
Custom Details Make a Better Deck
Smart framing eliminates the ledger and adds a shady seat.
Synopsis: A deck makes a great addition to a house, but that attractive curb-appeal enhancer can bring some problems, notably the trick of attaching it to the house. If done improperly or carelessly, a deck ledger can lead to rotten house framing. Montana builder Michael Ayers has figured out a way to avoid that hassle: He builds decks freestanding, eliminating the ledger and the risk to the house. Instead, Ayers takes care to regulate the deck’s spacing from the house while keeping the deck close enough to be able to be used directly from the house. In the project featured in this article, Ayers also builds in benches to provide cozy seating and a pergola above to help shade the sun.
Decks often are referred to as outdoor rooms, and this added living space can receive as much furnishing attention as any room in the house. These outdoor rooms are subject to outdoor weather, though, which affects durability and usability. Most homeowners accept the fact that they won’t be able to use an outdoor room in December, but they expect to be able to use the deck full time in August. Even in cold climates like Montana’s, the August sun gets hot. Shady seating can be provided with store-bought chairs, benches, and umbrellas, but a more elegant option is to build in the seating and the shading. A pergola is an attractive way to create shade, and as long as you’re building one, why not add some benches to sit on underneath?
Freestanding decks don’t cause rot
One of the most difficult aspects of decks is how to attach them to a house without allowing water to infiltrate house framing. When my crew and I dug in to the house featured here, we found considerable rot in the rim joist and sill plate where moisture had been wicking in through an old porch for years. Rather than devising a complicated strategy for attaching and flashing the new deck ledger through the stucco siding, my crew and I thought, “Why not make the deck freestanding?”
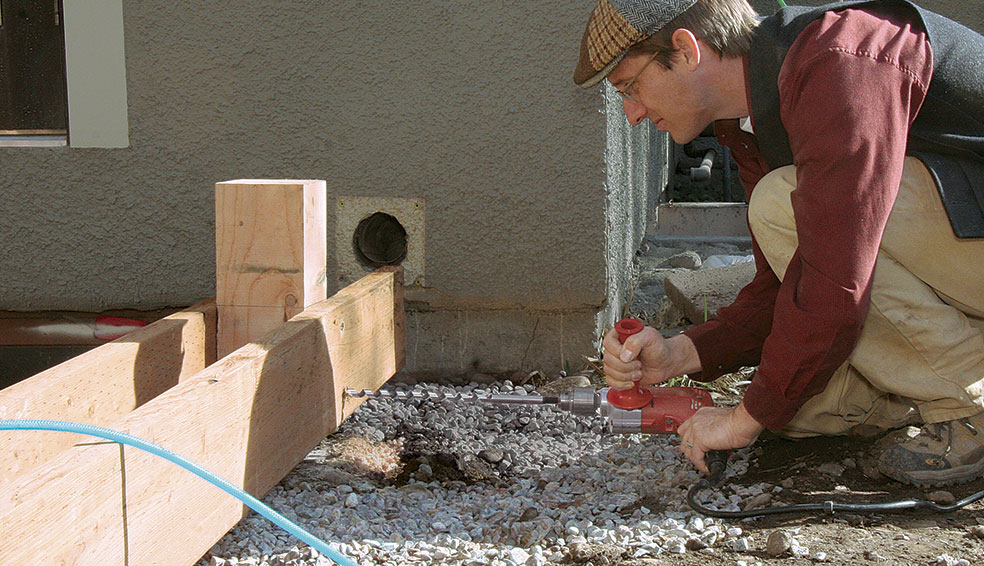
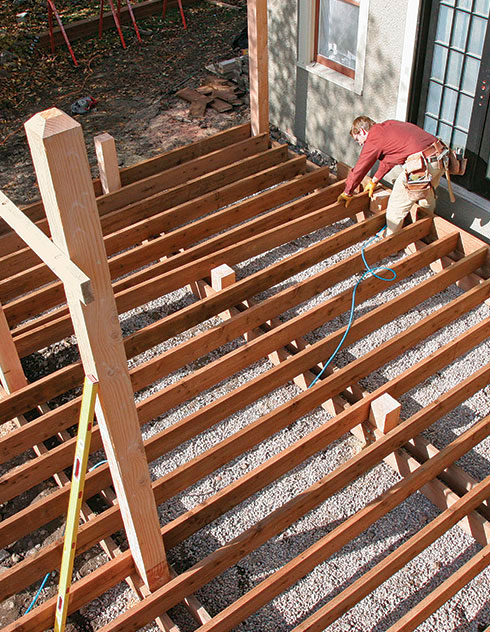
By simply adding a couple of beams and their associated posts and piers, we could eliminate the need for flashing a ledger altogether. This design had the added benefit of eliminating joist hangers because the deck joists sit atop site-built beams bolted through 6×6 posts. And because we had called in an excavator to dig the holes for the piers (the frost line in Montana is about 3-1/2 ft. below the surface), adding a few more holes didn’t add much cost
Posts must be aligned perfectly
Taking time to ensure a good layout is the key to making the job easier as you move from framing the deck to building the pergola and the benches. Some deck posts in this design run continuously through the deck and support the bench and the pergola above, one runs through the deck to support the bench framing, and the others support only floor framing.
Because of this design, the posts must be placed thoughtfully, and they must be aligned perfectly. Thoughtful post placement means that they won’t interfere with windows, doors, or travel paths. Equally important, they need to be spaced to adequately support the floor beams. Post placement starts with excavation, but you have opportunities to refine their position: when setting the concrete tubes in the holes and with adjustable post bases.
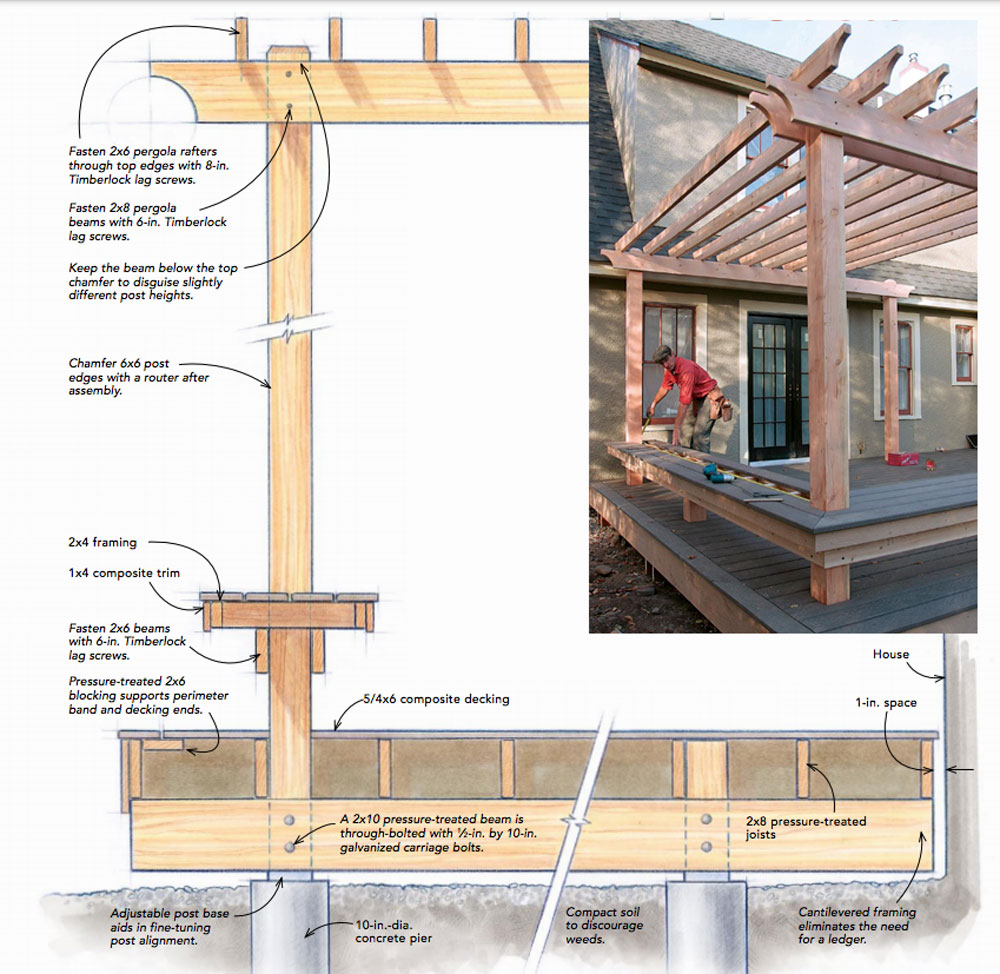
The design revolves around a postAnchored to concrete piers, the tallest posts extend through the deck, bench, and pergola; beams are bolted to the posts to support deck joists, bench framing, and pergola rafters. This freestanding design eliminates the need for a ledger. Because the posts are central to the design, alignment and plumb installation are critical.
|
Beams are built in place
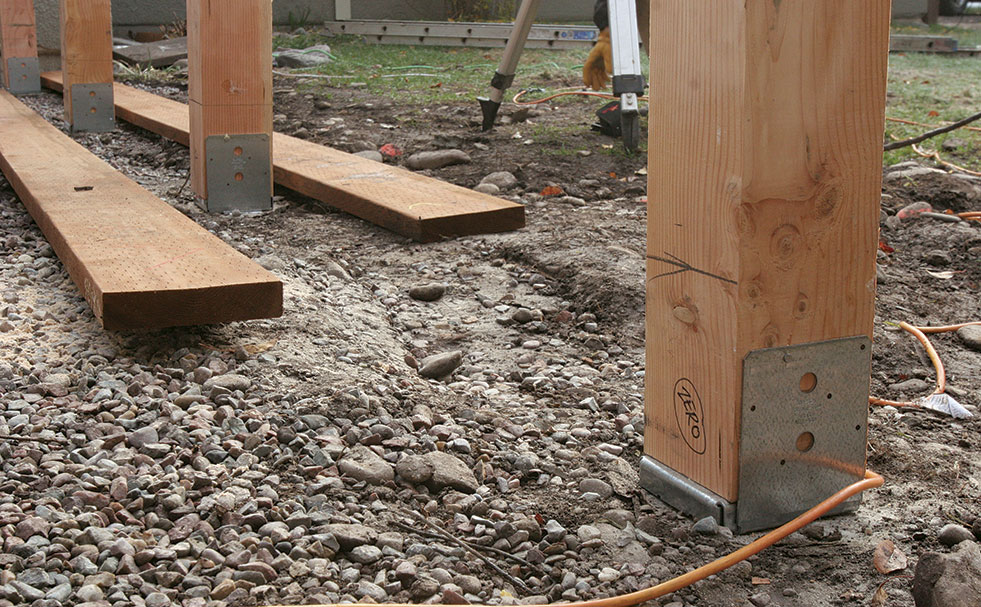
In Montana’s high mountain desert, using pressure-treated lumber for durable decks is unnecessary except in ground-contact situations. If the deck is close to the ground, we use pressure-treated lumber for the floor framing, but not for the visible wood. On this deck, the posts, the benches, and the pergola are fir. The framing is pressure-treated, and the decking is composite (www.trex.com). The post bases elevate the posts enough to keep moisture from wicking into them.
The more important aspect of shooting grade is beam placement. For a grade-level deck such as this one, the elevations can be tricky. The decking should be about 1 in. below the door threshold, and the beams should be above the ground. To squeeze a beam and floor joists into the space between threshold and ground, we used 2x10s for the beam and 2x8s for the floor joists. Along with 1-in. decking, this puts the beam 1 in. to 2 in. above the ground. Post placement and joist spacing need to be part of the equation when choosing lumber dimensions, so consult applicable span tables.
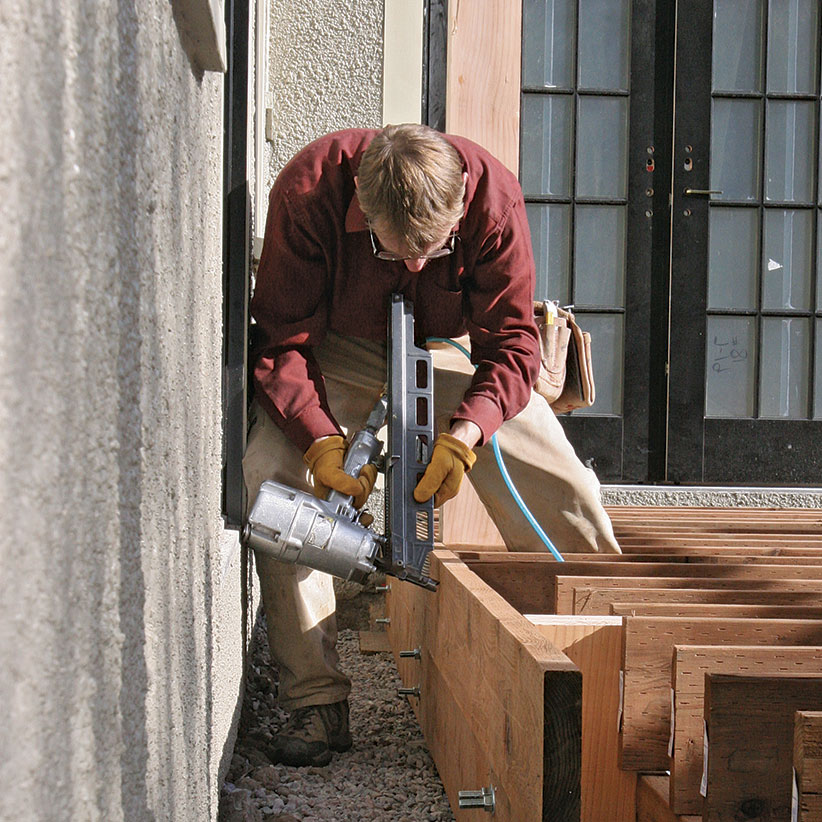
With a felt-tip pen, I mark the highest post zero; this is the benchmark. The other bases are marked with the fraction of an inch that they differ from the benchmark (+1⁄8, +1⁄4). When nailing the posts into the bases, it’s the last chance to align them accurately. It’s also a good idea to plumb them at this point; temporary braces can help to hold them in place.
To find the top of the beam, hook a tape measure to the bottom of the post, and add the fraction written on the post to the beam height (9-1⁄4 in. in this case). I tack the beams to the posts with a framing nail, making sure the two-piece beams are level to each other. Then I drill through each post and beam with a 5/8-in.-dia. auger bit. Carriage bolts tie everything together. It’s a good idea to double-check that the posts are plumb and spaced properly before you really tighten the carriage bolts and move on to floor framing.
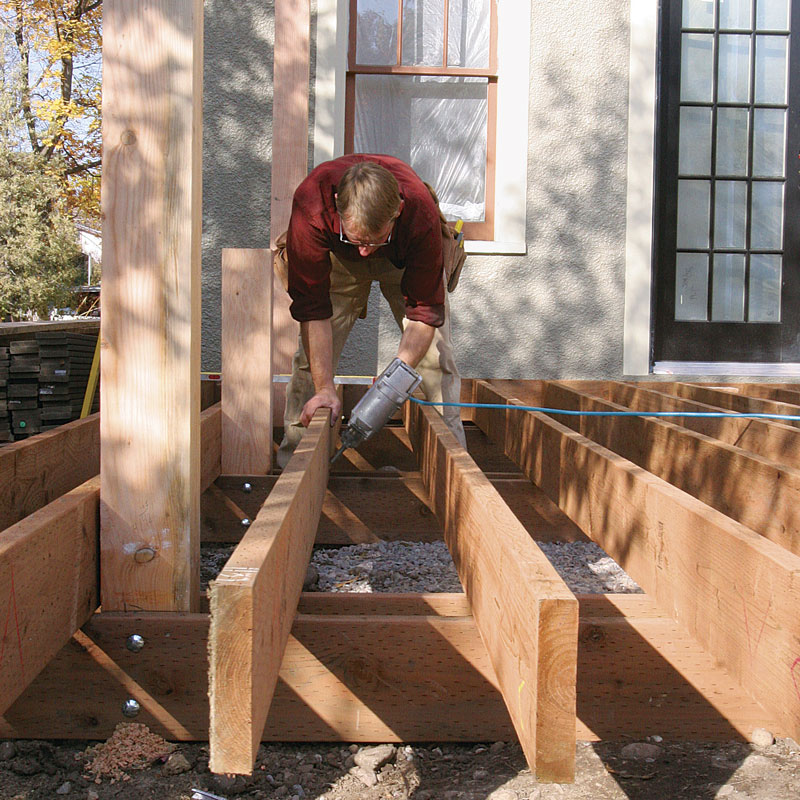
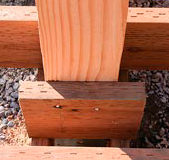
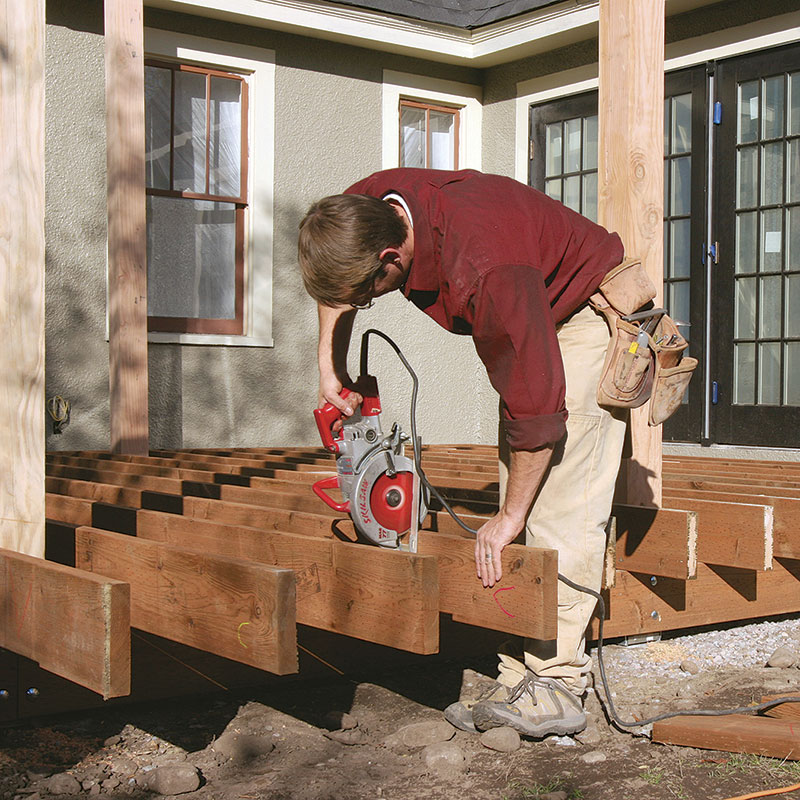
Spread the joists on layout atop the beams, and attach the rim closest to the house first. With that end of the floor framed, I slide the frame in place, leaving it about 1 in. from the house, and toenail the joists to the beams. Next, I cut the joists to length, but not just any length. Instead, I calculate the number of deck boards needed to cover the distance, including trim board, gaps, and overhang. This way, I won’t have to rip the last deck board where it meets the house. It takes about the same amount of time to calculate this number as it does to rip the final board, and it looks a lot better. After cutting the joists, I attach the opposing rim and any blocking needed to support the deck boards around the posts (photos in box below) and along their ends where they butt into the perimeter band.
Frame the floor and then slide it over to the houseEstimating the amount of concrete you will need for the footings is a simple calculation of volume: length times width times height. For circular form tubes, use this formula: 3.14 (pi) times diameter times height. If math is not your strong point or your form is irregular in shape, look for an online calculator at the manufacturer’s website, a home-store website, or via a general Internet search.
|
Space the decking consistently
With the deck framed, I square up the outside corner, apply a fascia board to the deck’s rim, and lay deck boards along the perimeter, mitering the corners. I overhang this “picture frame” past the trim by about 1 in. Because the joists’ lengths were calculated precisely to accommodate a particular number of deck boards, it’s important to gap the deck boards consistently as I work back toward the house. As with other composite decking materials, Trex requires specific spacing between boards and at butt joints because the material shrinks and swells with temperature variations. The gap size depends on the temperature during installation; the specs are printed on the end tags. I cut a few shims on a tablesaw to keep the gaps consistent.
To space the ends of the decking consistently away from the house, I use a scrap of 1⁄2-in. oriented strand board (OSB) as a spacer. I also check the decking as I proceed toward the house: Staying parallel to the house is important. After notching around the posts, I snap a chalkline as a guide, and when I get about halfway across the deck, I start measuring from the house to the deck boards. This also confirms that I can finish with a full-width deck board. If the numbers are a little off here, I can make a correction using a larger or smaller spacer at one end or the other. Then I can phase in the correction over many boards so that it won’t be as visible.
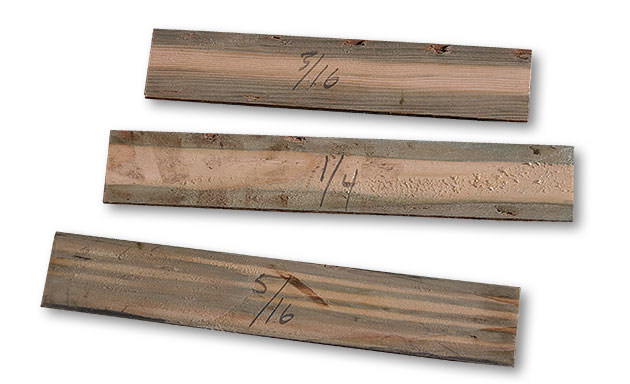
Use spacers to keep the expansion gaps consistent
Ends and edges need gaps. Composite decking shrinks and swells with temperature variation, so gapping butt joints is necessary. I also cut spacers a little wider and narrower than the specified gaps to keep the decking parallel to the house. |
Frame the benches and pergola
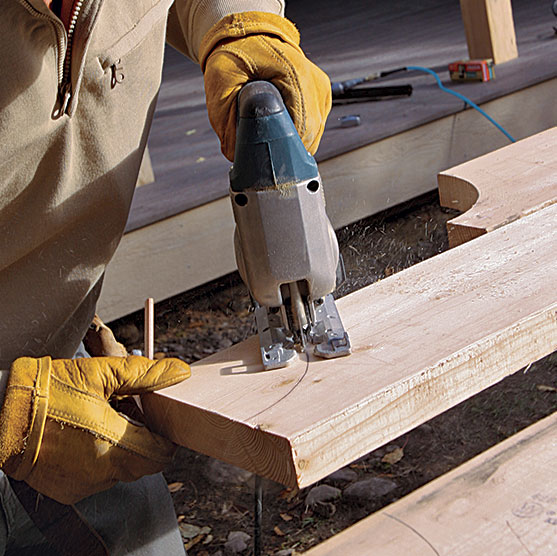
The beams carrying the pergola are 2x8s lagscrewed to the posts with Timberlock screws (www.mcfeelys.com); the pergola rafters are 2x6s. Both framing members have decorative cuts on their ends. Square or angular cuts can be made with a circular saw or a sliding compound-miter saw. Rounded or notched details can be cut with a jigsaw and a router. When cutting 2x stock with a jigsaw, the final cut probably won’t be square. I either need to clean it up with a belt sander or make a router template of 1⁄2-in. OSB. The template guides a pattern-cutting bit. At the end overhanging the house roof, I cut an angle to match the slope of the roof, leaving at least an inch of clearance off the roof shingles.
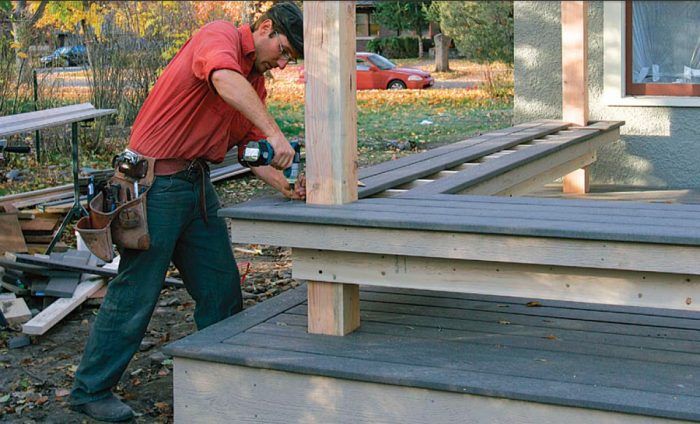
The benches are framed the same way as the deck, only on a smaller scale: a frame atop a beam bolted to posts. In this case, the beams are 2x6s attached to the posts with small lag screws. The 2×4 bench frame is built on top of the beam. The width of the frame again is set by the number of full-width deck boards that will be placed on top, which eliminates the need to rip any deck boards to fit. I wrap the bench frame with 1×4 finish trim, and then I run the decking on the benches. As with the deck boards, I picture-frame the benches, screwing the outer frame in place first, then decking the interior. This gives a finished look to the ends of the benches, capping the end cuts.
The pergola rafters are set north and south, which casts a wide afternoon shadow over the deck on hot summer days but allows sunlight into the house during cold winter months. If more shade is needed, a perpendicular layer of 1×2 material can be added to the top of the rafters.
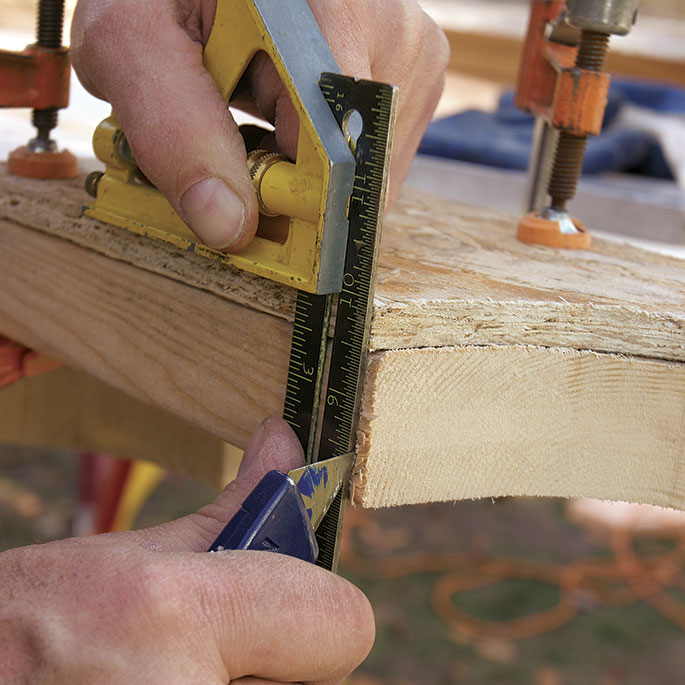
Detail the ends of the pergola beams and raftersMultiple cuts warrant a template. I detailed the ends of the beams and rafters with a simple radius cut. Because the beams are wider than the rafters, they need a slightly different radius to maintain the same proportions. Scraps of OSB make good templates.
|

With a couple of light fixtures mounted in the corners and a gas grill outside the kitchen door, the built-in pergola and the benches give a cozy feel to this inviting 300-sq.-ft.outdoor room.
For more photos, drawings, and details, click the View PDF button below:
Fine Homebuilding Recommended Products
Fine Homebuilding receives a commission for items purchased through links on this site, including Amazon Associates and other affiliate advertising programs.

Jigsaw
Stabila Extendable Plate to Plate Level

Bluetooth Earmuffs
