FHB Logo Facebook LinkedIn Email Pinterest Twitter X Instagram Tiktok YouTube Plus Icon Close Icon Navigation Search Icon Navigation Search Icon Arrow Down Icon Video Guide Icon Article Guide Icon Modal Close Icon Guide Search Icon Skip to content
Subscribe
Log In
  • How-To
  • Design
  • Tools & Materials
  • Restoration
  • Videos
  • Blogs
  • Forum
  • Magazine
  • Members
  • FHB House
  • Podcast
Log In

Fine Homebuilding Project Guides

Decks

Guide Home
  • Design & Planning
  • Tools & Materials
  • Footings & Foundations
  • Framing a Deck
  • Installing Decking
  • Installing Railings
  • Deck Stairs
  • Custom Details
  • Finishes, Repairs, and Maintenance
  • Complete Deck Builds
How-To

Installing a Grade Beam

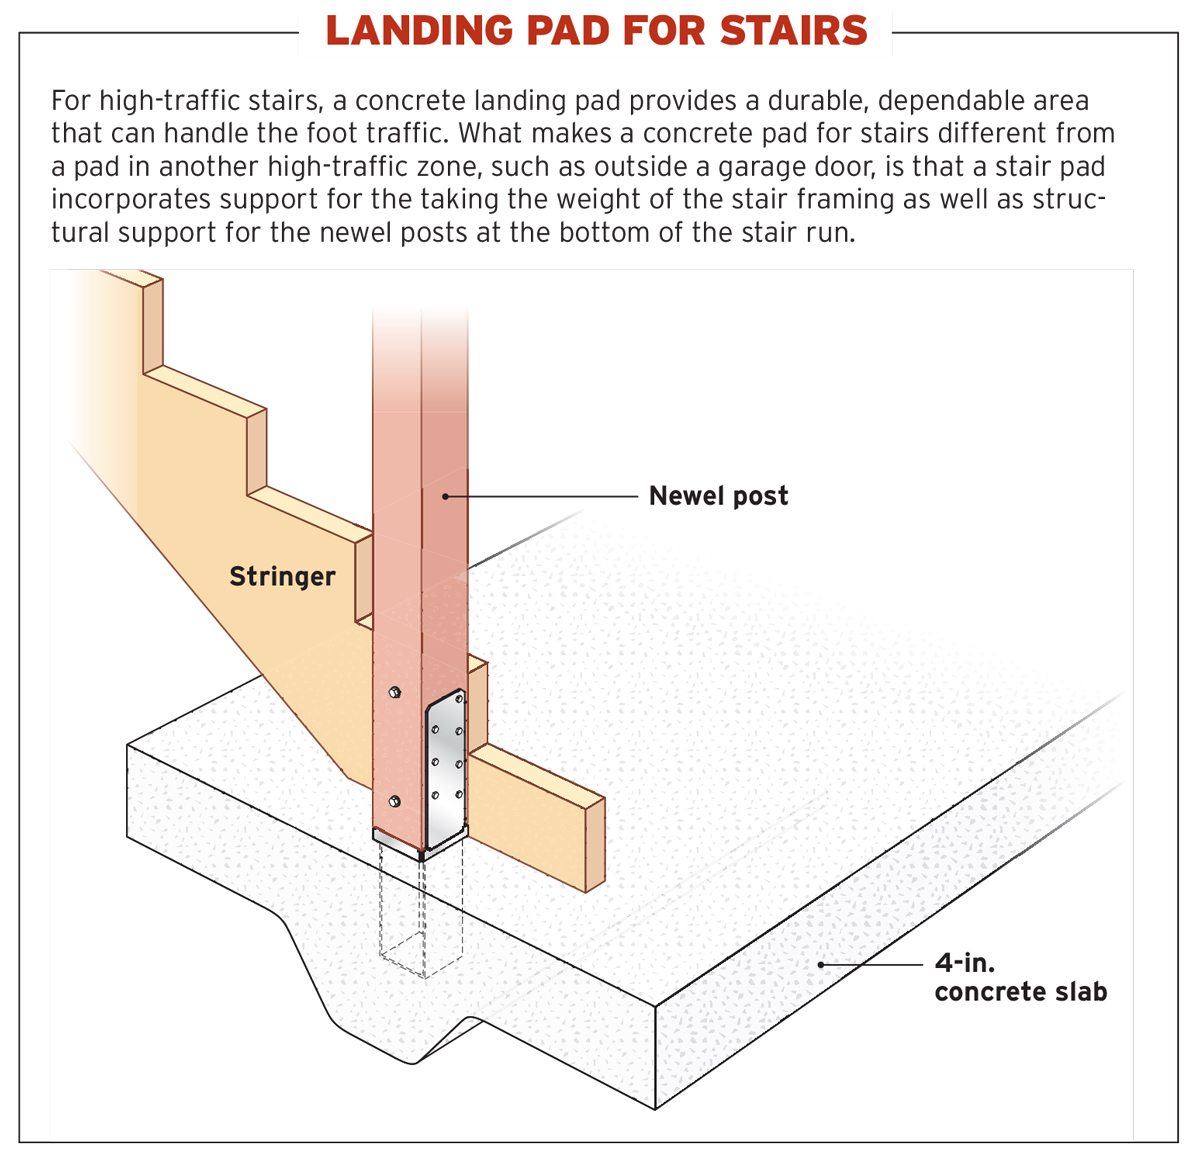
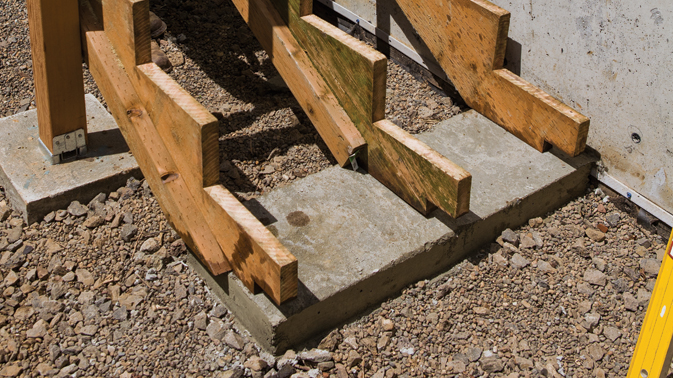
This concrete landing pad at the base of the stairs supports both the weight of the stairs and the posts at the bottom of the run.

By Scott Grice
  • X
  • facebook
  • linkedin
  • pinterest
  • email
  • add to favorites Log in or Sign up to save your favorite articles

There are many situations where a standard footing just won’t do the job. Grade beams and landing pads with integral footings are two ways to upgrade a footing’s appearance. There are also off-the-shelf footing forms, form additions, and concrete reinforcements that are readily available at home stores. For multistory decks, decks that support hot tubs, and decks on a severe slope, the footings may need to be drawn by a certified architect or engineer. And if you live in a cold climate and your deck is connected to the house, you will have to make sure the concrete extends down below the frost depth.

A good option for support at the base of a stairs is to install a grade beam, which is essentially a short foundation wall that supports both newel posts and the weight of the stairs. The main advantage of a grade beam is its low profile. It’s easily hidden under the bottom step, so, while the stairs are fully supported, you can incorporate the landscaping you want. For example, you could install grass or gravel flush to the bottom riser. Or at a later date you could install a landing pad independent of the stair support.

Building the form

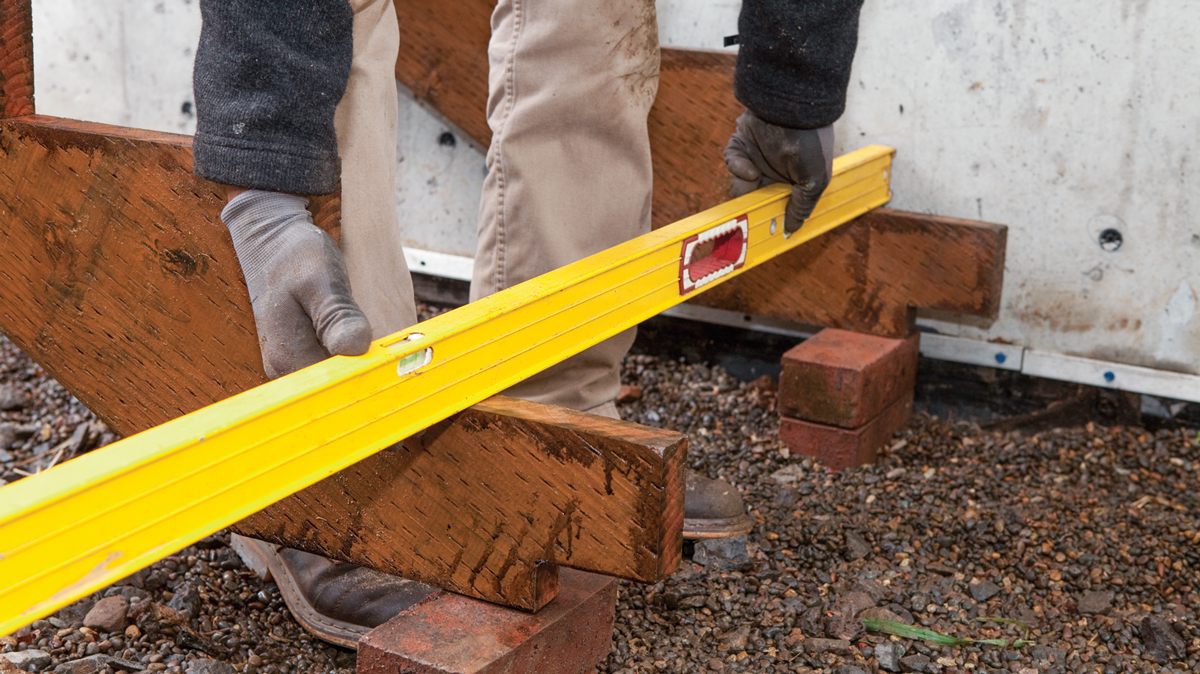
A method we have found works well is to align the form in its final position, and then use that to locate where to dig. To do this, cut the stringers with the appropriate rise and run and then temporarily secure them in their final location. With the method shown in the photos below, we let the soil constrain the concrete for the majority of the grade beam and form only the top few inches. Depending on the soil quality for your particular project, you may have to excavate a larger area and extend the form sides down the full height of the grade beam.

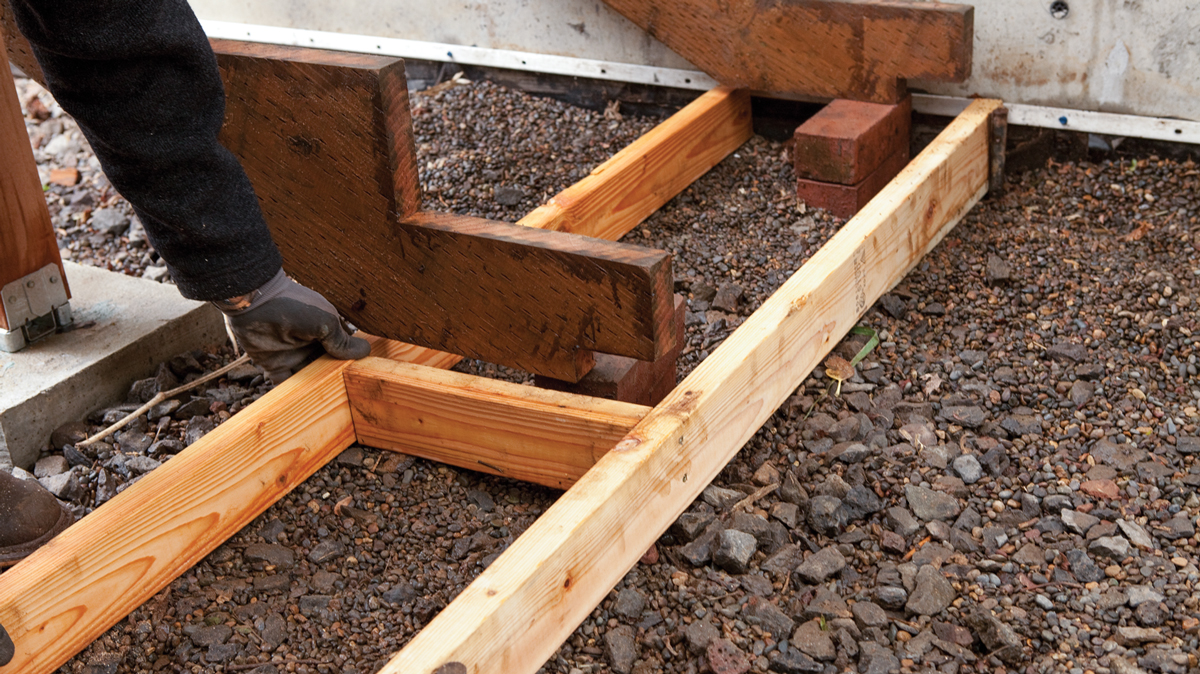
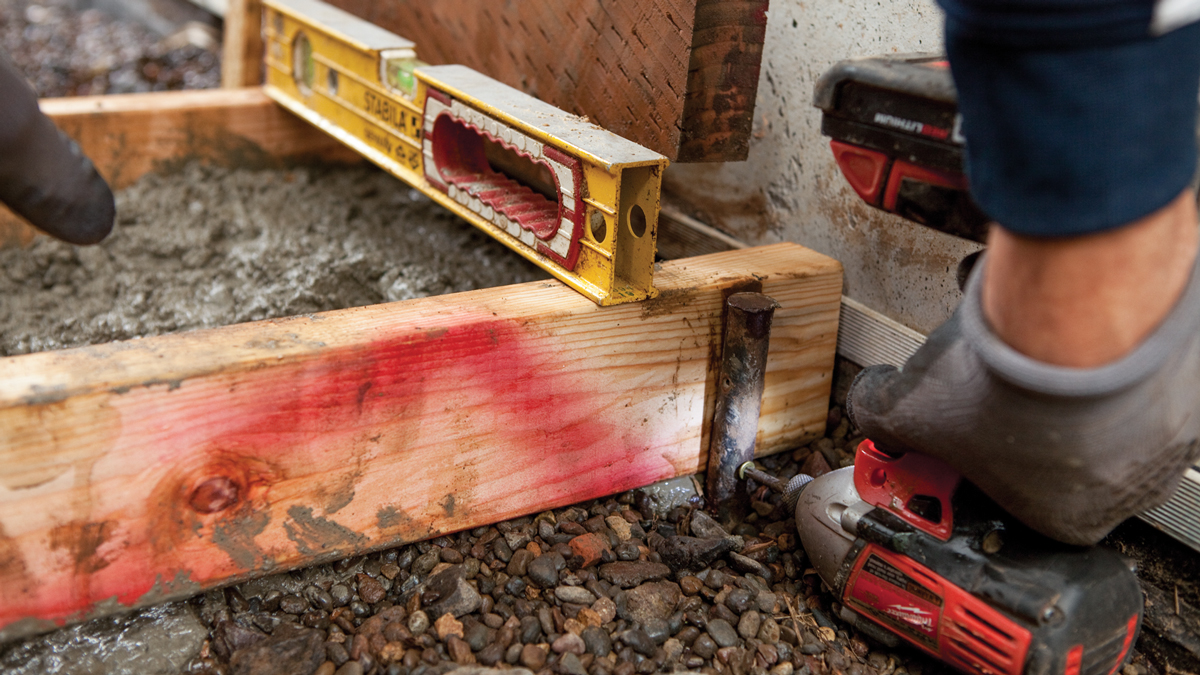
If you want the finished riser to conceal the concrete, use the front of the rough stringer to align the inside, front form board. Using steel stakes to secure the form is a big advantage over wooden stakes cut on the spot because they have a relatively small diameter, which will displace less soil, making them easier to drive. Also, the tip of the stake is in line with the shaft, unlike a roughly cut stake where the point may be off center. These two factors make it much easier to drive a steel stake straight down. Assemble the form using the stakes to hold the boards in position.

Trade secret

When positioning the forms and stakes, align the stakes and form tops flush to the top of the finished concrete height. When the form is positioned after excavation there will be an easy place to register to location and the tops of the stakes won’t get in the way when you’re finishing the concrete.

A small form like the one shown in the photos does not need to resist much pressure from the weight of the concrete. However, as the form size increases, the weight of the concrete will put a surprising amount of pressure on the form and can easily blow out poorly fastened joints or form boards. When securing the form sides, consider the direction the concrete will push. Because the grade beam is hidden in front and must stop before the first riser, add volume to the back and depth of the concrete to gain the adequate size to support the stairs. Once you’re satisfied with the form, mark the outside with marking spray, which leaves a reference line for excavating the footing. If you mark the inside, you would remove the reference line as you dig.

1. Place cut stringers in their final position by temporarily attaching the tops and resting them on blocks at the bottom.

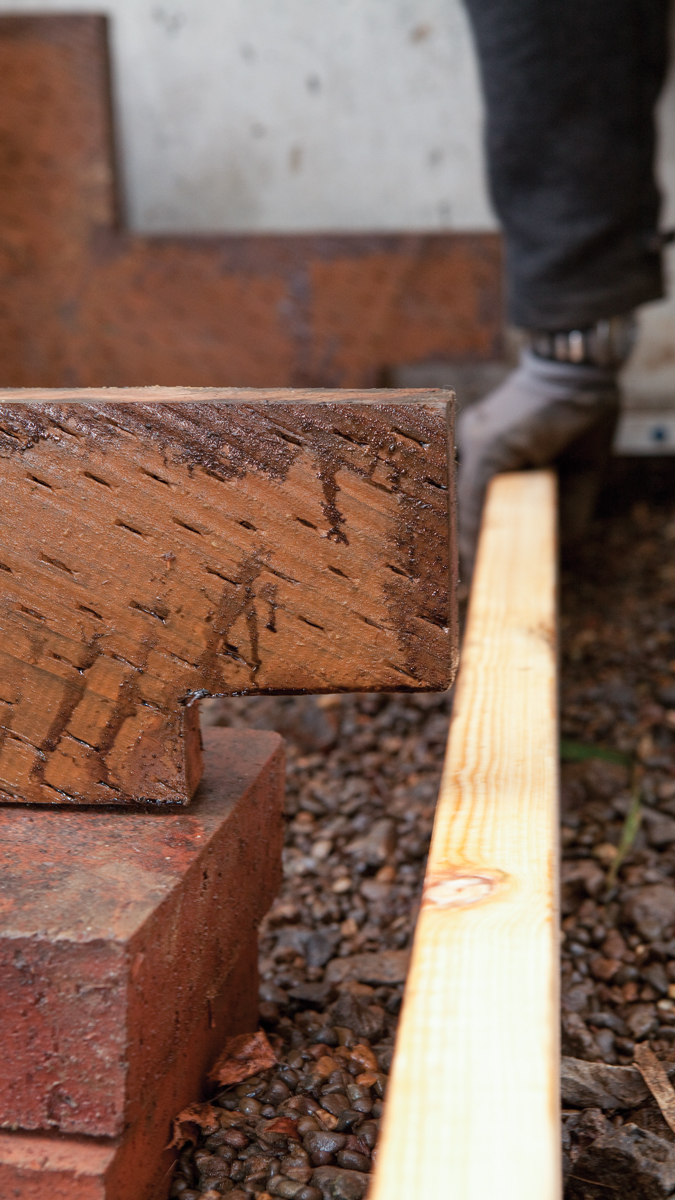
2. Align the front of the form with the leading edge of the stair stringer to ensure that the grade beam will be hidden.

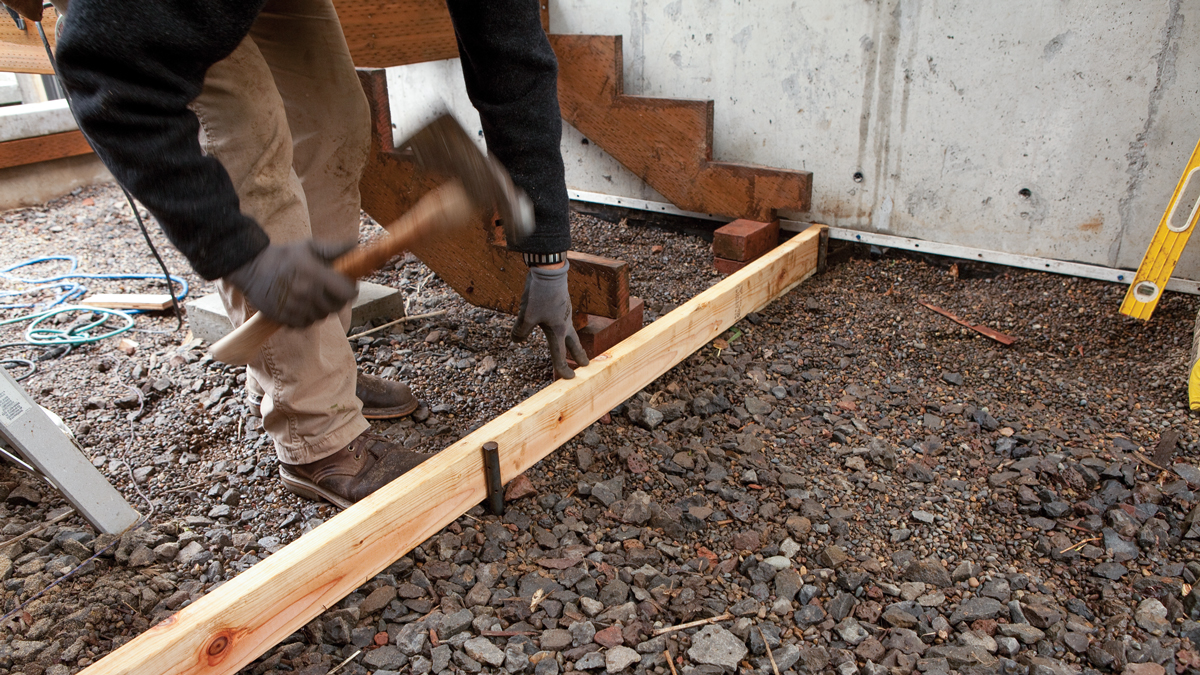
3. Install stakes on the outside of the form to hold the front form board in place.

4. Place all the form boards to complete the form perimeter. In this case, only three boards were needed.

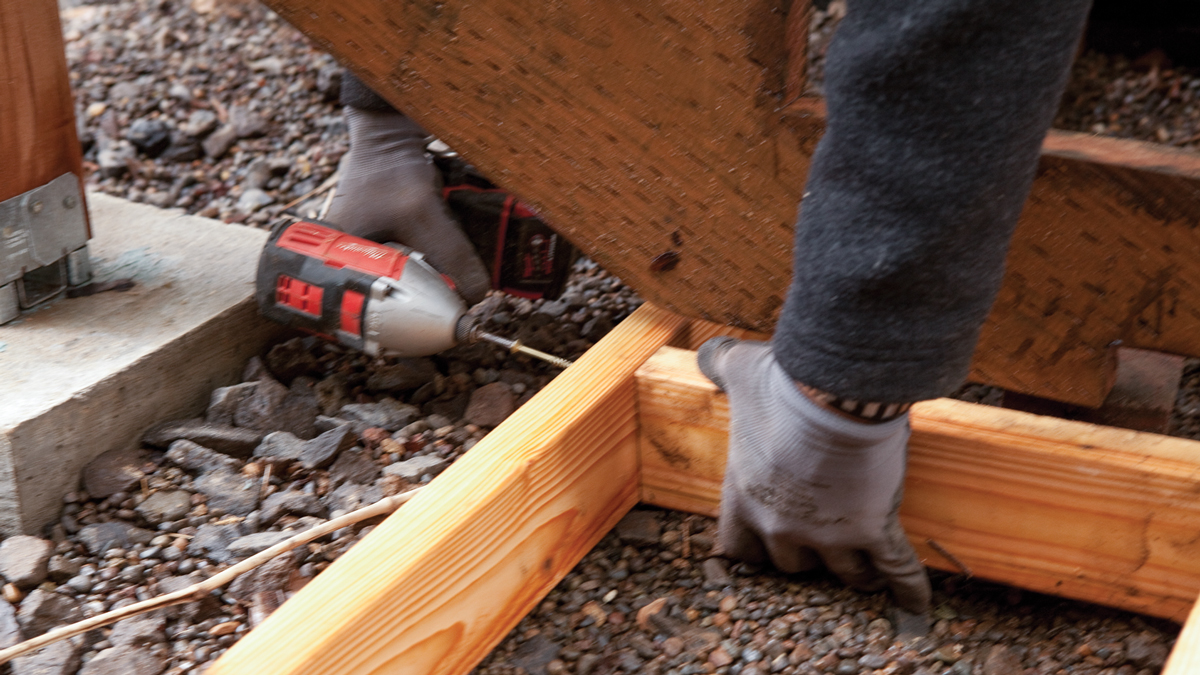
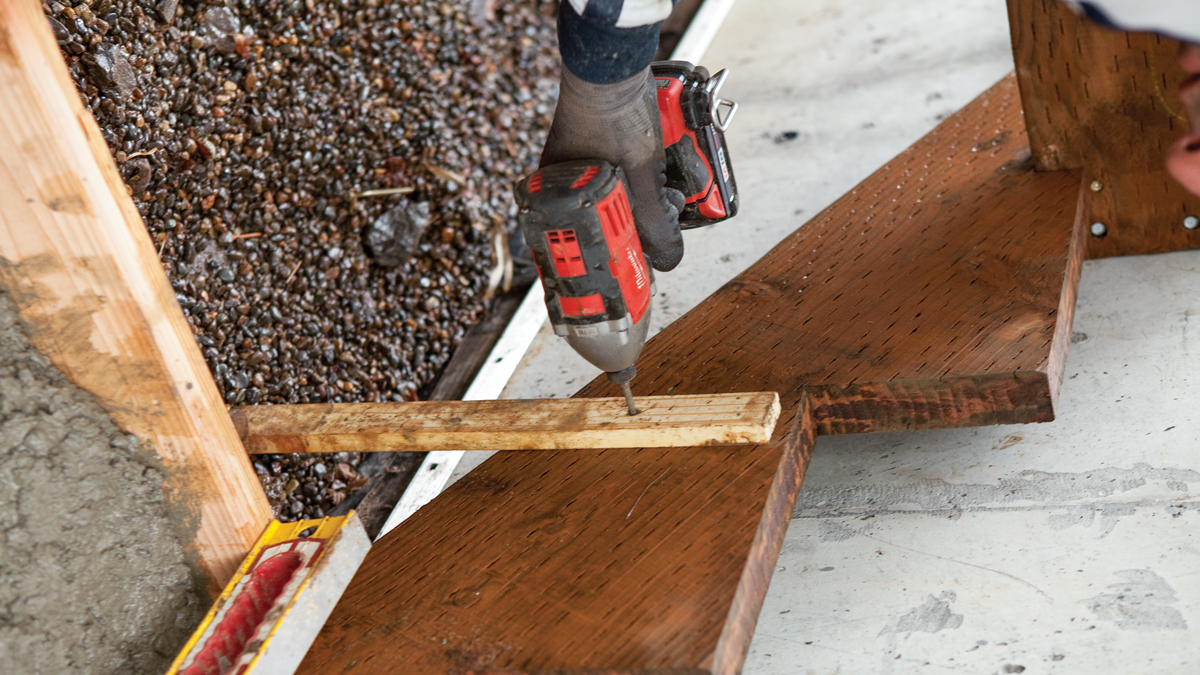
5. Secure the form parts with 3-in. screws.

6. Double-check to make sure that the form is aligned correctly when the form stakes are installed.

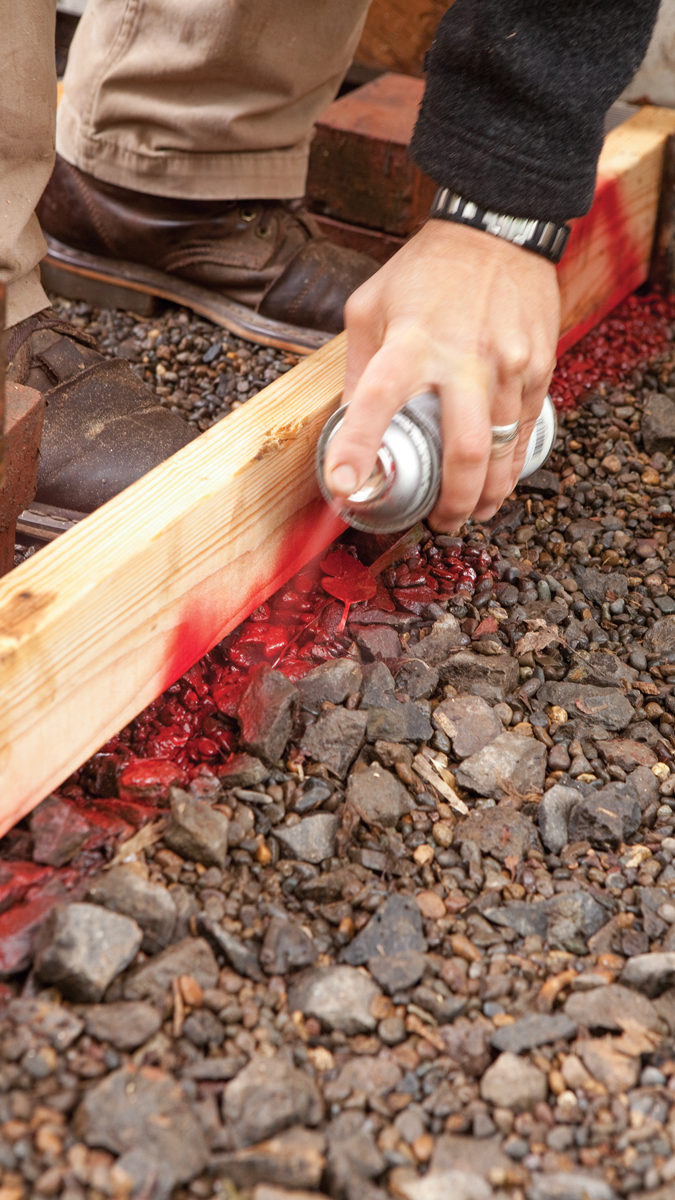
7. Spray the ground to indicate the outside perimeter of the form boards.

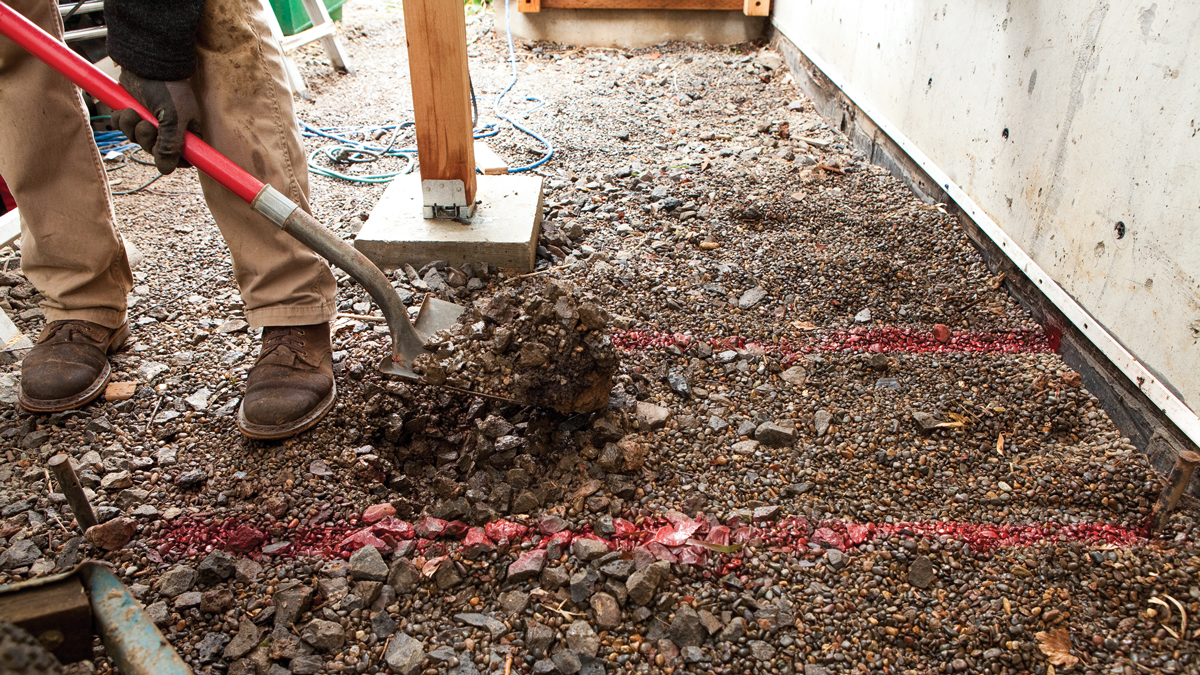
8. Excavate the dirt from the foundation footprint. Leave the marked line to use as a reference while digging.

Pouring the grade beam

As with a typical footing, the depth of a grade beam must extend below the frost depth plus a couple inches to allow room for drainage gravel at the bottom. On this project, we used a very coarse drainage gravel left over from another project, so using a soil tamper was a better choice than trying to stomp the gravel down (see step-by-step in photos below). A simple rebar frame will add considerable strength to the concrete. To estimate the length, place the rebar in the excavated trench and eyeball a cut 4 in. shorter than the trench. Use an angle grinder fitted with an abrasive blade to make the cut. Then cut vertical rebar sections a couple of inches shorter than the overall grade-beam depth and hold the frame together with rebar wire ties. For a single grade beam, you’ll want to prepare concrete bag mix in a wheelbarrow adjacent to the site. Add a few inches of mixed concrete to the trench and tap the rebar into position. Avoid sinking the vertical rebar legs into the soil as this may provide a pathway for rust, eventually weakening the overall structure. Mix and add more concrete, being sure to agitate the mix to eliminate any air pockets.

When the concrete is near grade, place the form in position by aligning the form’s top with the steel stakes. At this point, it’s a good idea to place a stringer in position to fine-tune the grade beam’s alignment. Also level the form’s top while securing the form to the stakes to ensure the form doesn’t shift out of position. With the form secure, fill concrete to the top, remembering to agitate the mix. Using the form to guide the float, smooth the top of the grade beam to a rough finish.

9. Dig down 2 in. below frost depth as determined by your local building department.

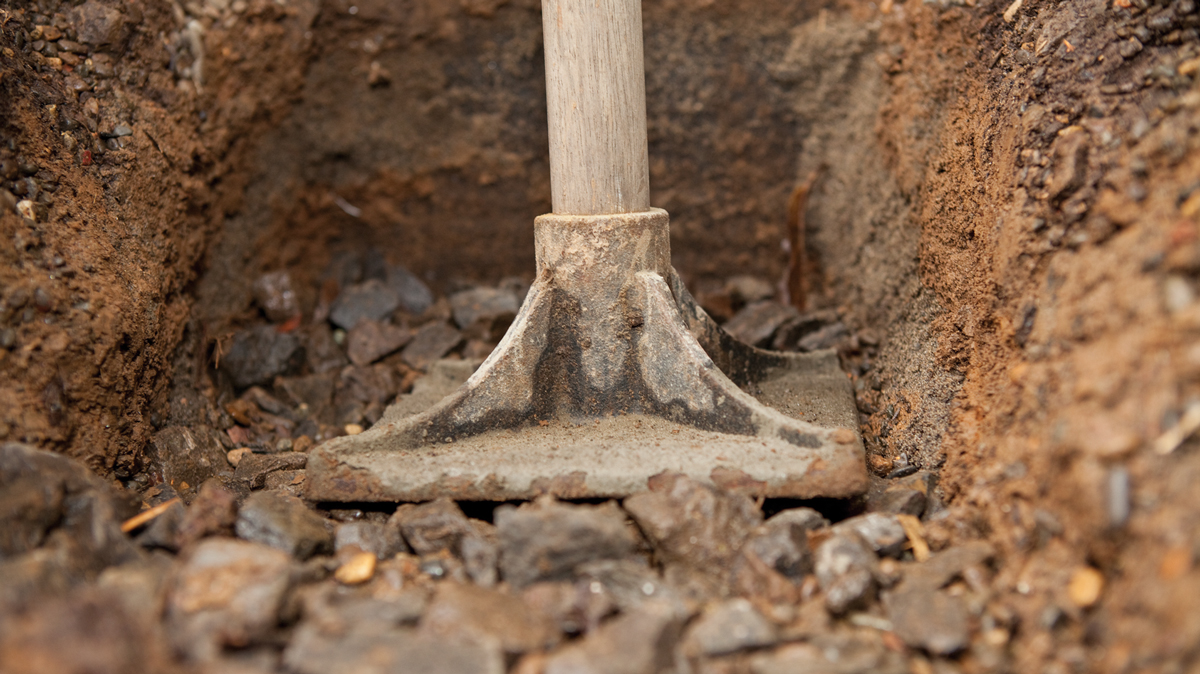
10. Add and compact 2 in. of drainage gravel at the bottom of the footing to help prevent frost heave.

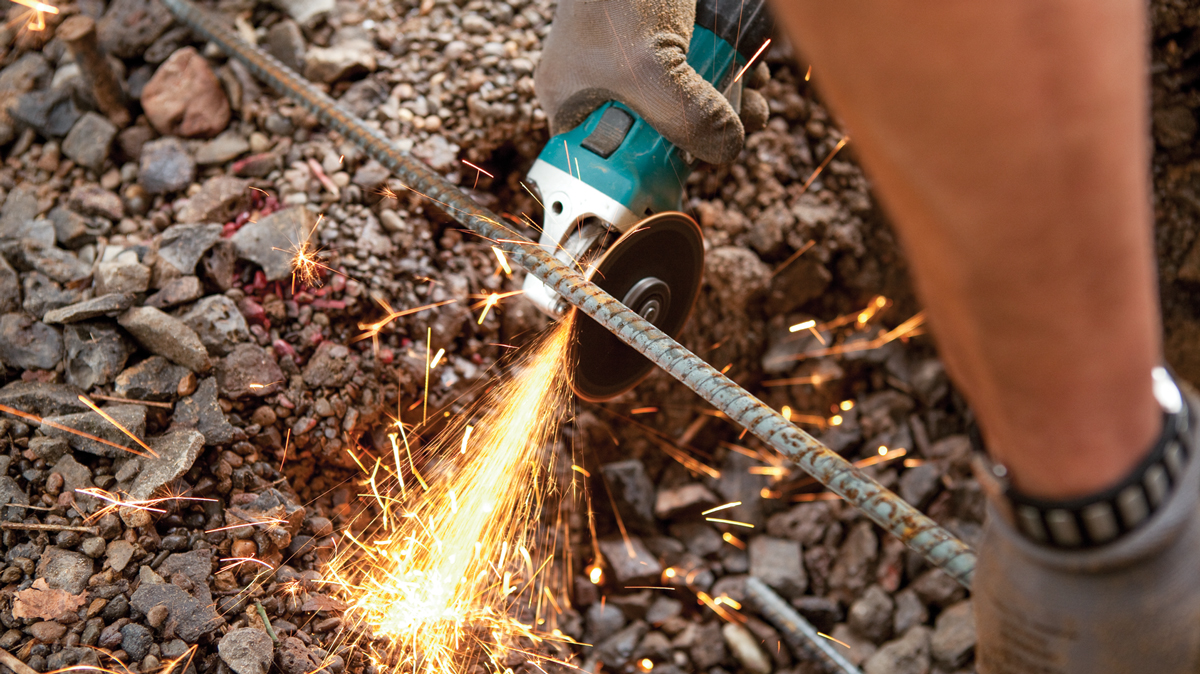
11. Cut lengths of rebar 4 in. shorter than the overall footing length and 2 in. shorter than the overall height.

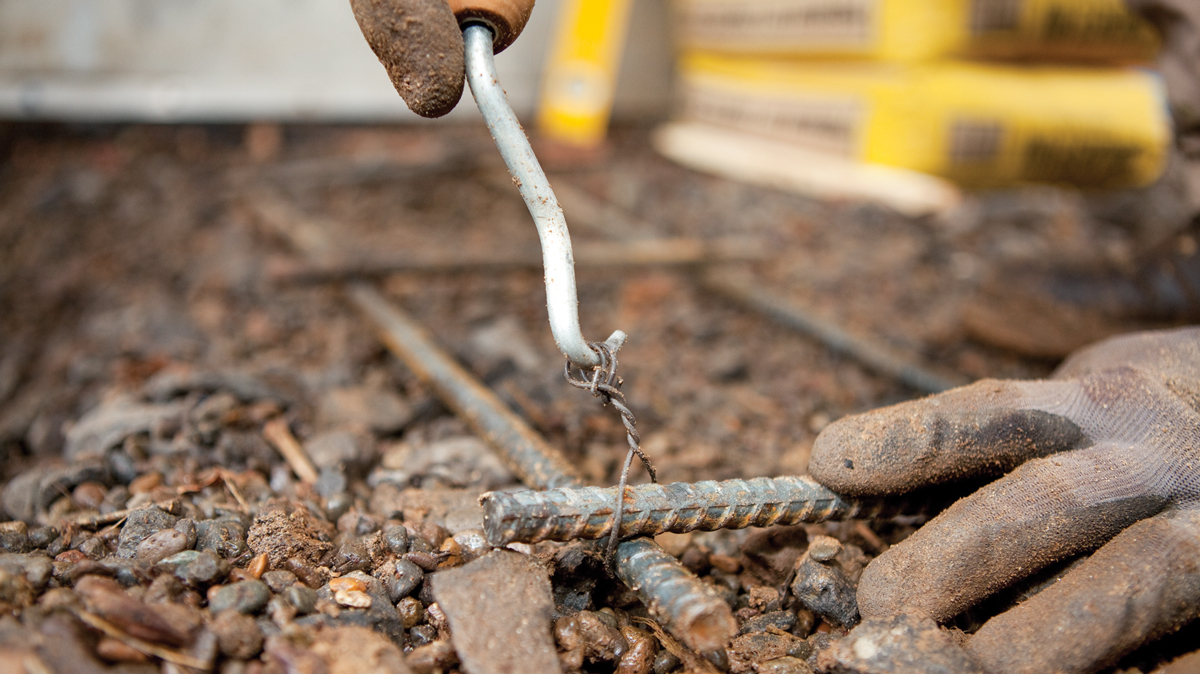
12. Use rebar ties to connect the rebar frame. For a small footing like this, the exact configuration is not critical.

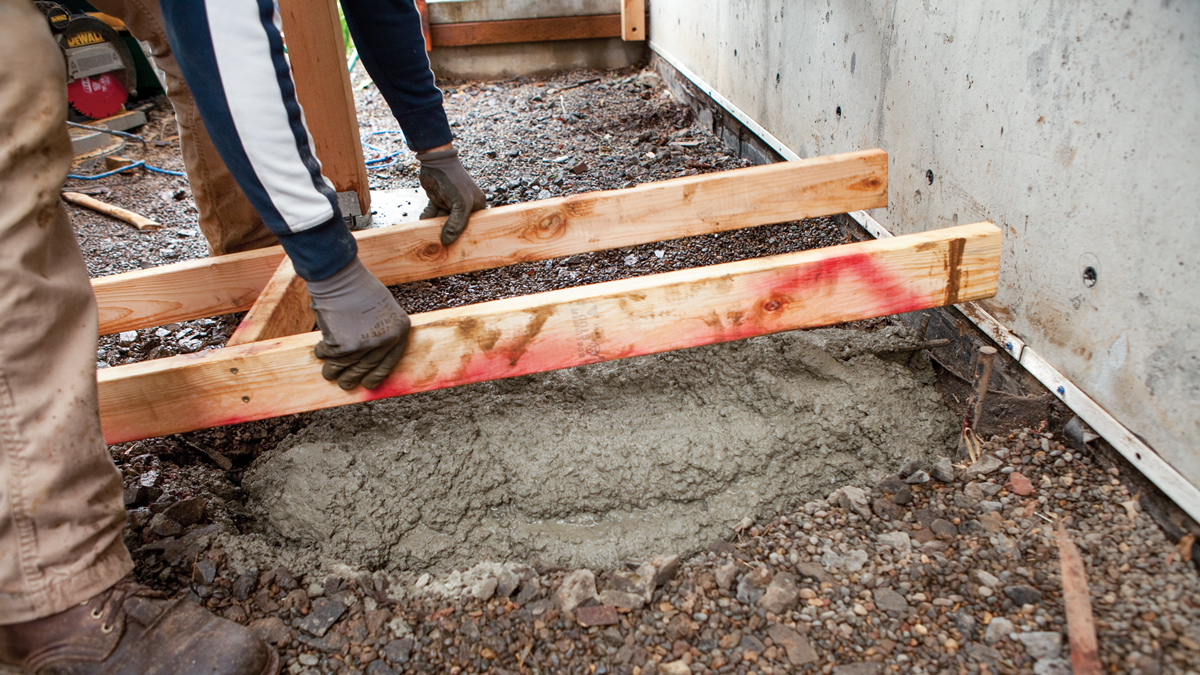
13. Hand mix the concrete until it has the consistency of thick cottage cheese.

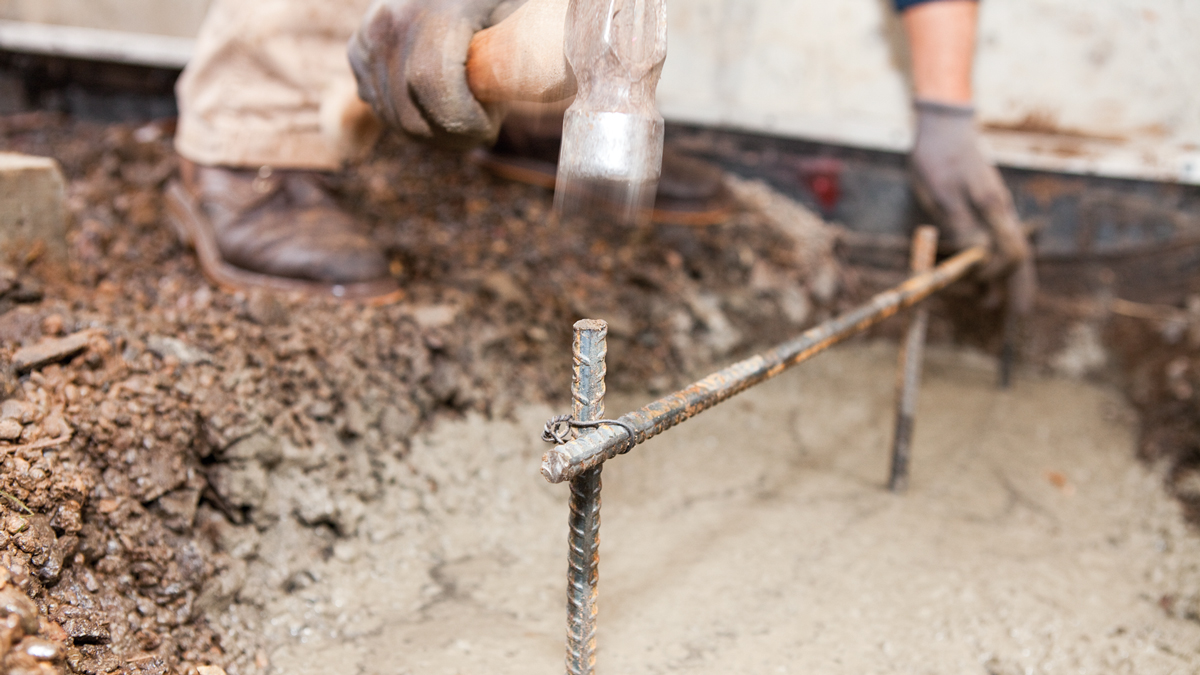
14. Tap the rebar frame into position once there are a few inches of concrete in the footing.

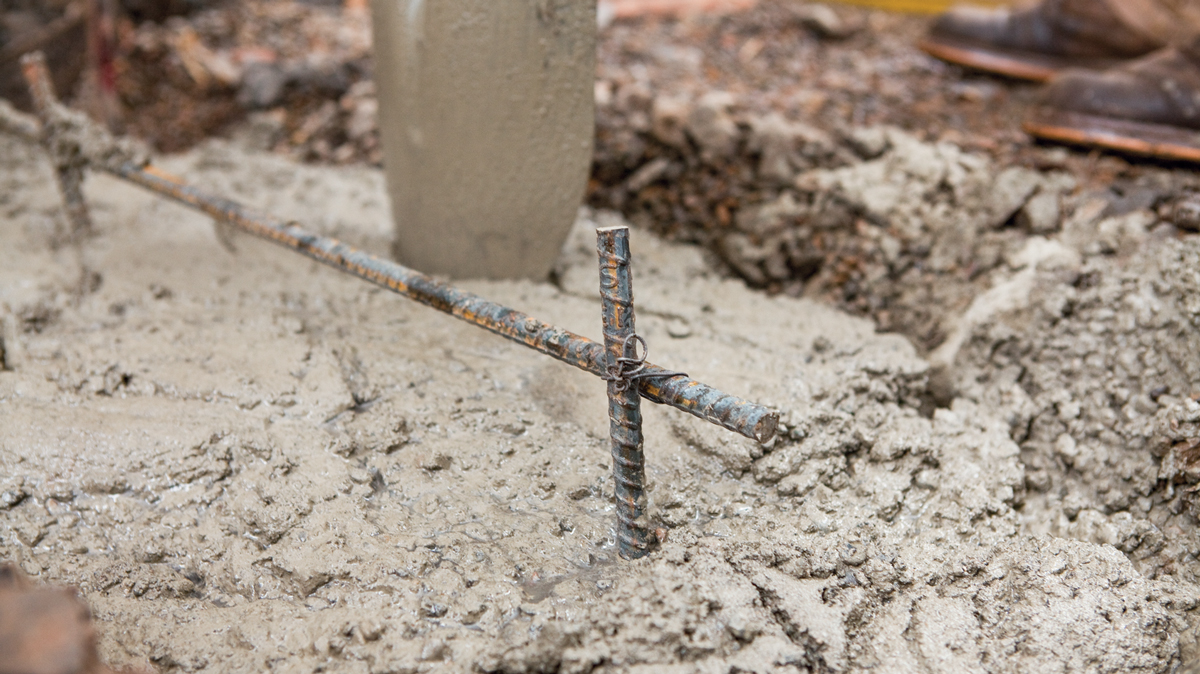
15. Agitate the concrete to eliminate air pockets that could weaken the footing.

16. Place the form in the position established by the steel stakes.

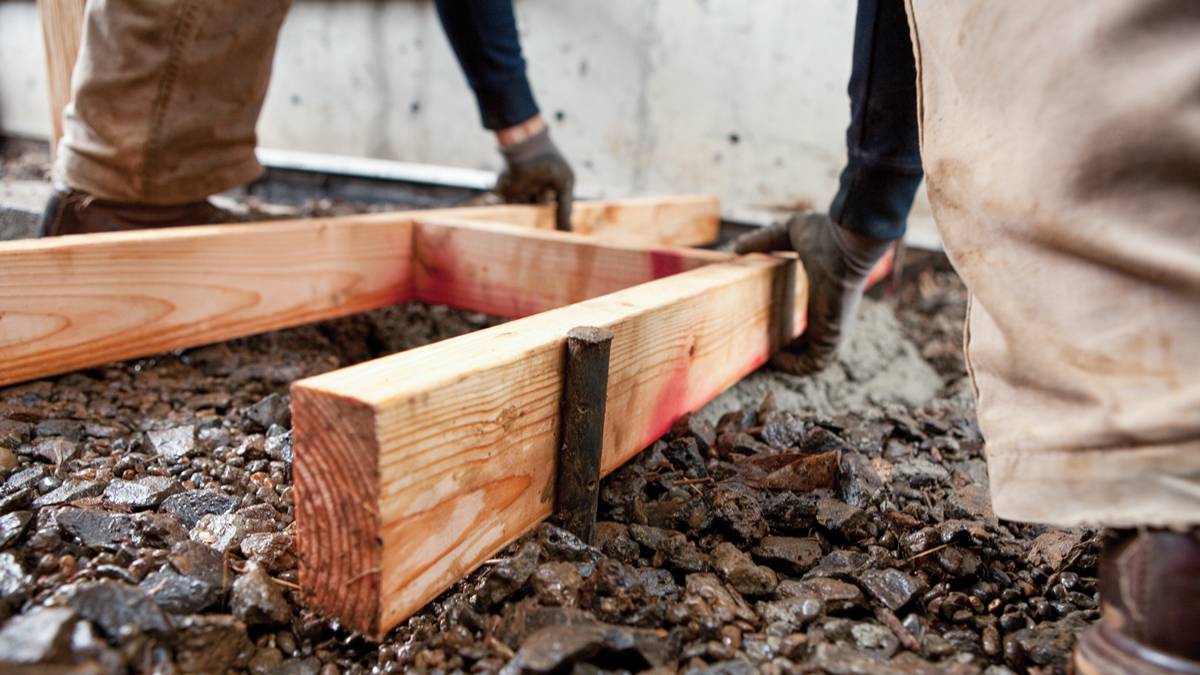
17. Align the top of the form with the top of the stakes. If necessary, use gravel or concrete to hold the form in place.

18. Reposition the stringer; and if necessary, attach supports.

19. Level the form and secure it in place by screwing it to the steel stakes.

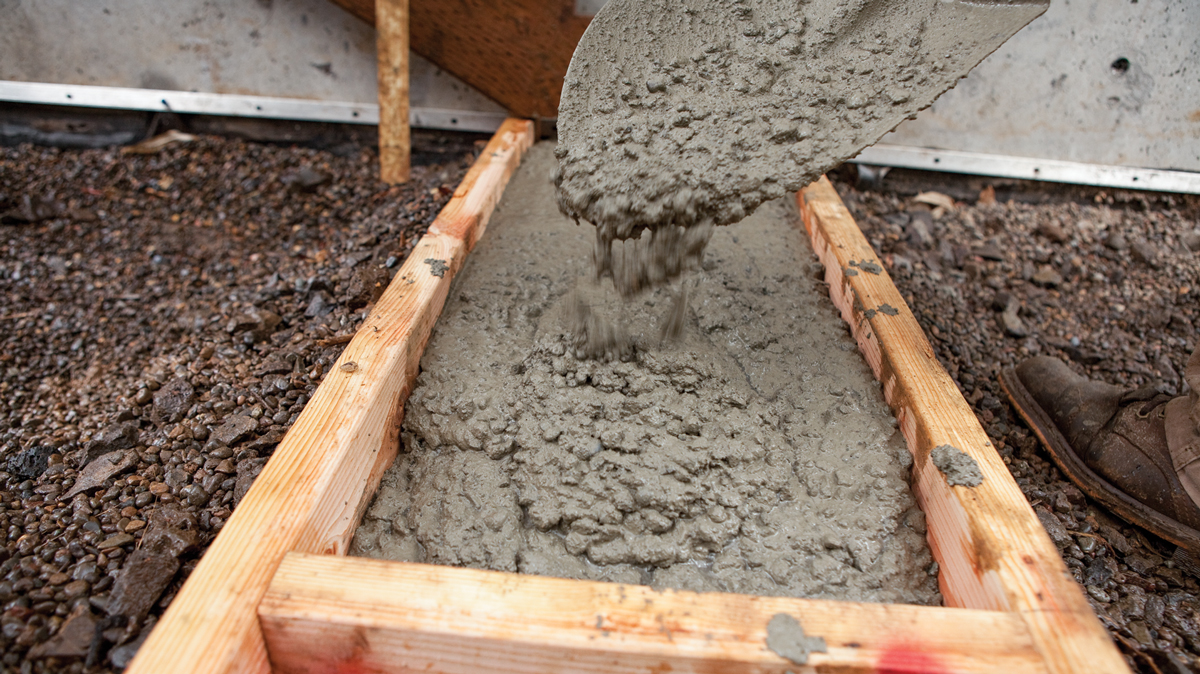
20. Fill the form to the top with concrete, agitating the concrete as you progress.

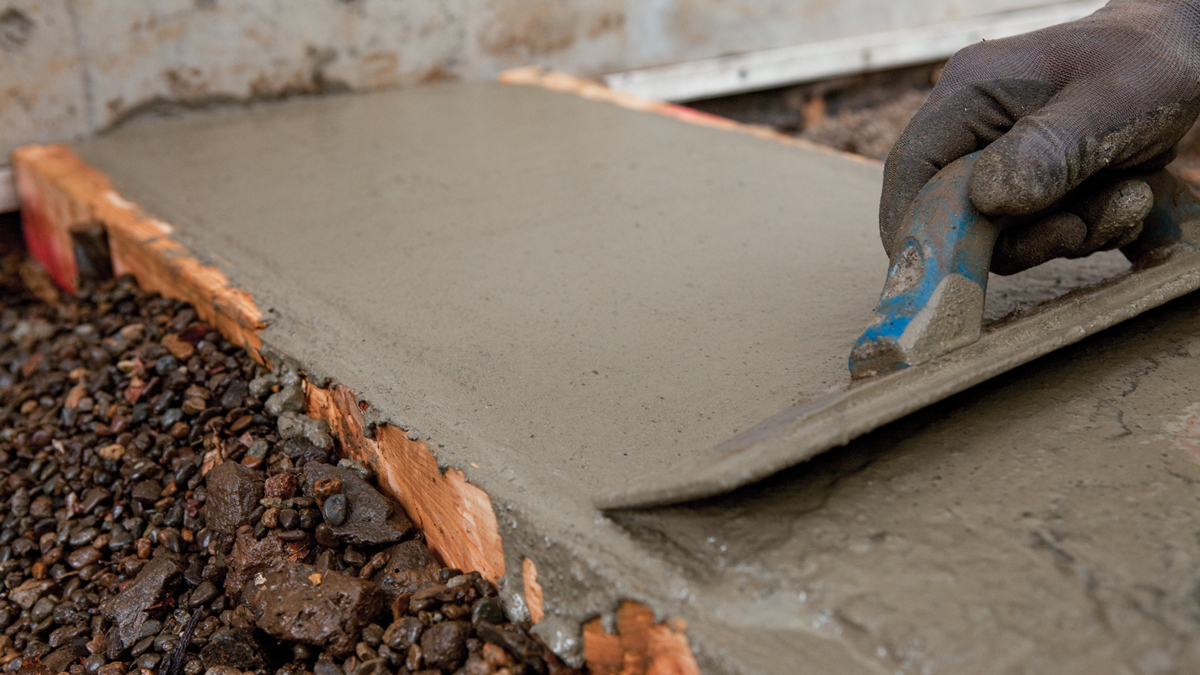
21. Finish the top to your satisfaction. The top needs to be flat, but not pretty.

Fine Homebuilding Recommended Products

Fine Homebuilding receives a commission for items purchased through links on this site, including Amazon Associates and other affiliate advertising programs.

FastenMaster Screw Bolt Fastening System

These solid, time-saving bolts don't require pre-drilling and come in very handy when it comes to guard rail posts.
Buy at Amazon

Standard Marking Chalk

We like white chalk because it’s non-permanent and wears off easily — this is especially helpful when marks are exposed and need to disappear.
Buy at Amazon

Drill Driver/Impact Driver

Whether you're pre-drilling holes or driving screws, this Milwaukee® compact cordless driver is the way to go when it comes to building decks.
Buy at Amazon
Previous: Ultimate Deck Build: Pouring and Finishing Concrete Slabs Next: Planning Ahead for a Deck with Skirtboards

Guide

Decks

Chapter

Footings & Foundations

Sign up for eletters today and get the latest how-to from Fine Homebuilding, plus special offers.

Signing you up...

This site is protected by reCAPTCHA and the Google Privacy Policy and Terms of Service apply.
See all newsletters
See all newsletters

Log in or create an account to post a comment.

Sign up Log in

Become a member and get full access to FineHomebuilding.com

Decks

Decks

Hundreds of articles and videos by top deck-building pros on how to design and build a beautiful, sturdy, and safe deck

View Project Guide

View All Project Guides »

Become a member and get unlimited site access, including the Decks Project Guide.

Start Free Trial

Design & Planning
  • Basic Design Options
  • Generating Plans
  • Calculating Deck Loads
  • Code Compliance
Tools & Materials
  • Deck Building Tools
  • Foundation and Framing Materials
  • Decking Materials
  • Fasteners and Hardware
Footings & Foundations
  • Choosing a Foundation
  • Sizing and Laying Out Footings
  • Excavation
  • Pouring the Foundation
Framing a Deck
  • Framing Overview
  • Installing the Ledger
  • Setting Posts and Beams
  • Installing Joists
Installing Decking
  • Decking Basics
  • Installation Process
  • Adding Fascia and Other Decorative Elements
Installing Railings
  • Installing Deck Railing Posts
  • Building Wood Rails and Balustrades
  • Non-Wood Railing Options
  • Installing Nonwood Balustrades
Deck Stairs
  • Deck Stairs Overview
  • Laying Out, Cutting, and Installing the Stringers
  • Installing Treads, Risers, and Stair Railings
Custom Details
  • Benches, Planters, and Privacy Features
  • Pergolas
  • Lighting
Finishes, Repairs, and Maintenance
  • Deck Finishes
  • Cleaning and Refinishing
  • Inspection and Repair
Complete Deck Builds
  • Grade-Level Decks
  • Raised Decks

Fine Home Building

Newsletter Sign-up

  • Fine Homebuilding

    Home building tips, offers, and expert advice in your inbox.

  • Green Building Advisor

    Building science and energy efficiency advice, plus special offers, in your inbox.

  • Old House Journal

    Repair, renovation, and restoration tips, plus special offers, in your inbox.

Signing you up...

This site is protected by reCAPTCHA and the Google Privacy Policy and Terms of Service apply.
See all newsletters

Follow

  • Fine Homebuilding

    Dig into cutting-edge approaches and decades of proven solutions with total access to our experts and tradespeople.

    Start Free Trial Now
    • Facebook
    • Instagram
    • X
    • LinkedIn
  • GBA Prime

    Get instant access to the latest developments in green building, research, and reports from the field.

    Start Free Trial Now
    • Facebook
    • YouTube
  • Old House Journal

    Learn how to restore, repair, update, and decorate your home.

    Subscribe Now
    • Facebook
    • Instagram
    • X

Membership & Magazine

  • Online Archive
  • Start Free Trial
  • Magazine Subscription
  • Magazine Renewal
  • Gift a Subscription
  • Customer Support
  • Privacy Preferences
  • About
  • Contact
  • Advertise
  • Careers
  • Terms of Use
  • Site Map
  • Do not sell or share my information
  • Privacy Policy
  • Accessibility
  • California Privacy Rights

© 2025 Active Interest Media. All rights reserved.

Fine Homebuilding receives a commission for items purchased through links on this site, including Amazon Associates and other affiliate advertising programs.

  • Home Group
  • Antique Trader
  • Arts & Crafts Homes
  • Bank Note Reporter
  • Cabin Life
  • Cuisine at Home
  • Fine Gardening
  • Fine Woodworking
  • Green Building Advisor
  • Garden Gate
  • Horticulture
  • Keep Craft Alive
  • Log Home Living
  • Military Trader/Vehicles
  • Numismatic News
  • Numismaster
  • Old Cars Weekly
  • Old House Journal
  • Period Homes
  • Popular Woodworking
  • Script
  • ShopNotes
  • Sports Collectors Digest
  • Threads
  • Timber Home Living
  • Traditional Building
  • Woodsmith
  • World Coin News
  • Writer's Digest
Active Interest Media logo
X
X
This is a dialog window which overlays the main content of the page. The modal window is a 'site map' of the most critical areas of the site. Pressing the Escape (ESC) button will close the modal and bring you back to where you were on the page.

Main Menu

  • How-To
  • Design
  • Tools & Materials
  • Video
  • Blogs
  • Forum
  • Project Guides
  • Reader Projects
  • Magazine
  • Members
  • FHB House

Podcasts

  • FHB Podcast
  • ProTalk

Webinars

  • Upcoming and On-Demand

Podcasts

  • FHB Podcast
  • ProTalk

Webinars

  • Upcoming and On-Demand

Popular Topics

  • Kitchens
  • Business
  • Bedrooms
  • Roofs
  • Architecture and Design
  • Green Building
  • Decks
  • Framing
  • Safety
  • Remodeling
  • Bathrooms
  • Windows
  • Tilework
  • Ceilings
  • HVAC

Magazine

  • Current Issue
  • Past Issues
  • Magazine Index
  • Subscribe
  • Online Archive
  • Author Guidelines

All Access

  • Member Home
  • Start Free Trial
  • Gift Membership

Online Learning

  • Courses
  • Project Guides
  • Reader Projects
  • Podcast

More

  • FHB Ambassadors
  • FHB House
  • Customer Support

Account

  • Log In
  • Join

Newsletter

Get home building tips, offers, and expert advice in your inbox

Signing you up...

This site is protected by reCAPTCHA and the Google Privacy Policy and Terms of Service apply.
See all newsletters
See all newsletters

Follow

  • X
  • YouTube
  • instagram
  • facebook
  • pinterest
  • Tiktok

Join All Access

Become a member and get instant access to thousands of videos, how-tos, tool reviews, and design features.

Start Your Free Trial

Subscribe

FHB Magazine

Start your subscription today and save up to 81%

Subscribe

We hope you’ve enjoyed your free articles. To keep reading, become a member today.

Get complete site access to expert advice, how-to videos, Code Check, and more, plus the print magazine.

Start your FREE trial

Already a member? Log in

Privacy Policy Update

We use cookies, pixels, script and other tracking technologies to analyze and improve our service, to improve and personalize content, and for advertising to you. We also share information about your use of our site with third-party social media, advertising and analytics partners. You can view our Privacy Policy here and our Terms of Use here.

Cookies

Analytics

These cookies help us track site metrics to improve our sites and provide a better user experience.

Advertising/Social Media

These cookies are used to serve advertisements aligned with your interests.

Essential

These cookies are required to provide basic functions like page navigation and access to secure areas of the website.

Delete My Data

Delete all cookies and associated data