FHB Logo Facebook LinkedIn Email Pinterest Twitter X Instagram Tiktok YouTube Plus Icon Close Icon Navigation Search Icon Navigation Search Icon Arrow Down Icon Video Guide Icon Article Guide Icon Modal Close Icon Guide Search Icon Skip to content
Subscribe
Log In
  • How-To
  • Design
  • Tools & Materials
  • Restoration
  • Videos
  • Blogs
  • Forum
  • Magazine
  • Members
  • FHB House
  • Podcast
Log In

Fine Homebuilding Project Guides

Decks

Guide Home
  • Design & Planning
  • Tools & Materials
  • Footings & Foundations
  • Framing a Deck
  • Installing Decking
  • Installing Railings
  • Deck Stairs
  • Custom Details
  • Finishes, Repairs, and Maintenance
  • Complete Deck Builds

Laying Out and Cutting the Stringers

Calculate the rise and run, mark the stair notches, and then cut with a circular saw.

By Scott Grice
  • X
  • facebook
  • linkedin
  • pinterest
  • email
  • add to favorites Log in or Sign up to save your favorite articles

Decks built for the vast majority of homes will need a few steps to connect the deck to the surrounding yard. For these projects, a basic set of stairs as shown here will work well.

Calculating rise and run

Once you’ve located where the stairs will attach to the deck framing according to the plans, you can measure for the rise and run. As seen in the photos below, first, measure for the rise by establishing a level line from the top of the decking at the attachment point. On this project, the stairs were adjacent to the foundation wall, which was a handy place to mark the stair geometry. For situations that don’t have this convenience, mark the measurements down on a drawing. Using the level, mark a horizontal line near where the stairs will land. Then measure down from the level line to the top of grade. While this sounds pretty simple, knowing exactly where to measure the grade requires knowing exactly how the stringers will be supported.

1. Level across from the finished deck height. If the decking is not installed (as here), place a scrap of decking on top of the framing to establish the correct height.

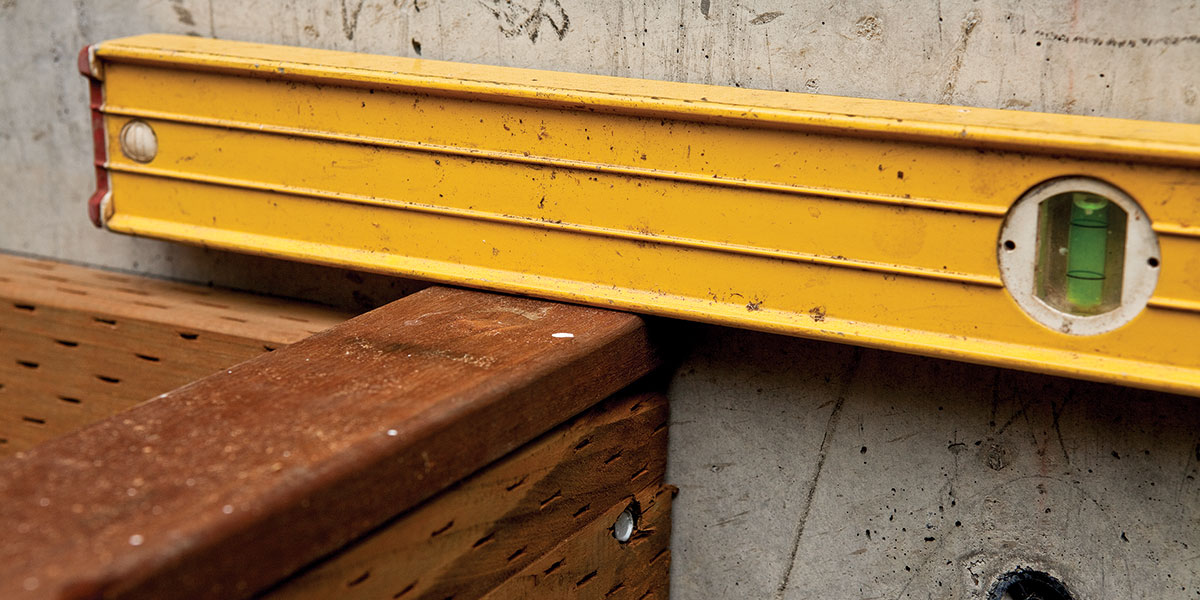
2. Mark the deck elevation over the stair landing location. If you don’t have a wall handy, find a helper to hold and read the level.

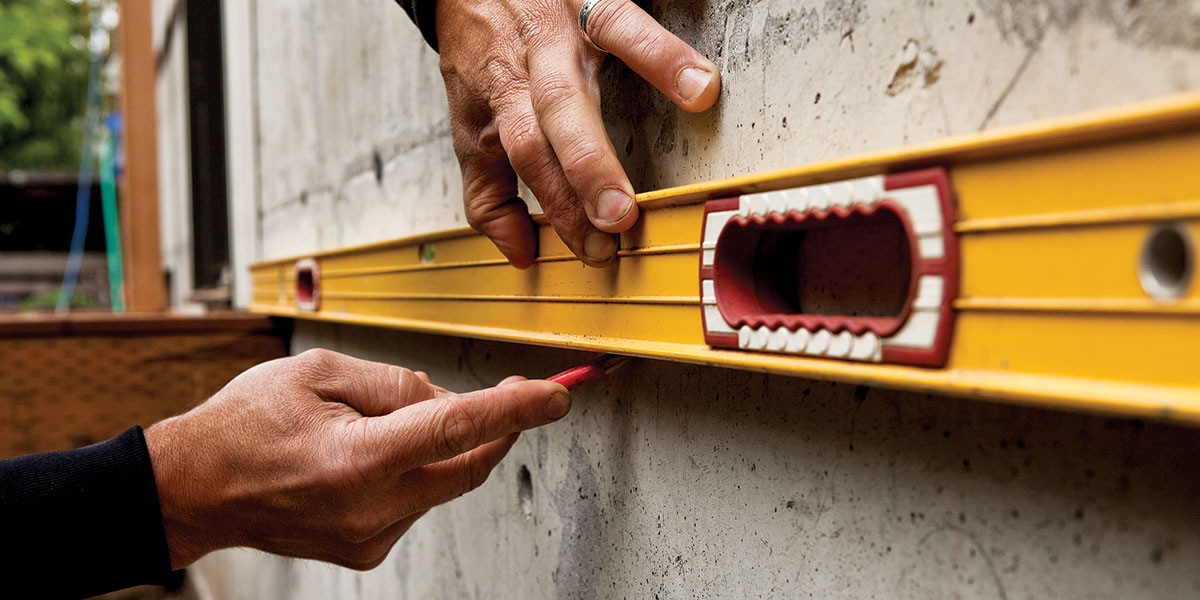
3. Measure down to the top of grade or stair landing to determine the overall rise.

If the landscaping is still rough, you can establish the stair-landing elevation by referencing the surrounding grade. You’ll want to raise the stair landing slightly to avoid water pooling at the bottom of the stairs.

Once you know the distance from the top of the decking to the stair landing, divide the distance by the estimated number of risers: Total rise x Number of stairs = Individual stair rise.

Trade Secret: Make an educated guess for rise and run. Before leveling out to measure the rise, measure down from the decking to the grade and divide the length by 7-1/2 in. If the grade drops only a little, this will give you the number of risers plus or minus one.

If you are lucky, the calculation for the individual stair rise will be around 7 in. If the calculation is less than 6 in. or more than 8 in., try adding or subtracting a step accordingly, then recalculate the step rise.

Making minor adjustments to rise and run will change the “mood” of the stairs. For relaxed stairs, lengthen the run and shorten the rise. For more aggressive stairs (that is, steeper stairs), shorten the run and raise the rise. While code will vary a little, generally you’ll want to keep the rise between 4 in. and 7-1/2 in. and keep the run over 10 in.

Laying out and cutting the stringers

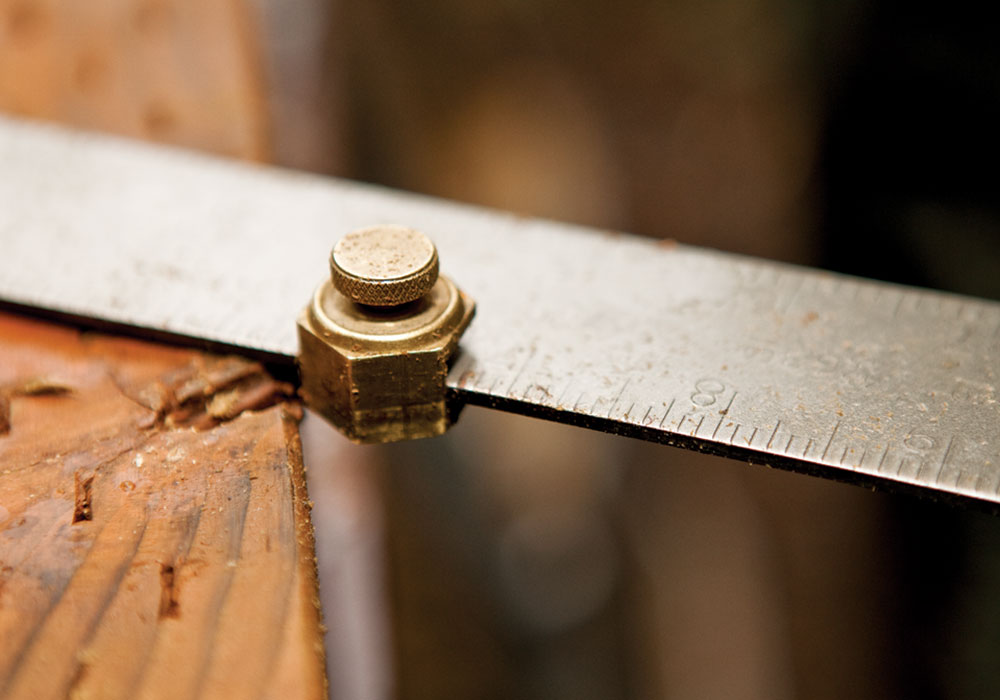
With the rise and run calculated, you can set up a framing square to mark out the stair notches on the stringer, as seen in the photos below. Clamp a straight length of scrap wood (leftover trim stock works well) to a framing square, with the wood’s edge registered to the rise and run measurements. I’ve seen some carpenters use spring clamps to hold the straightedge in place, but C-clamps hold the jig setup more securely and thus reduce the chance of a layout error. Place the jig 12 in. or so in from the end, avoiding any knots in the wood that might weaken the stringer.


What can go wrong

Using stair-gauge nuts on a framing square to mark out the stringer’s rise and run is common practice. But using them on notoriously inconsistent pressure-treated lumber can be a problem because it can cause your stairs to vary in height.


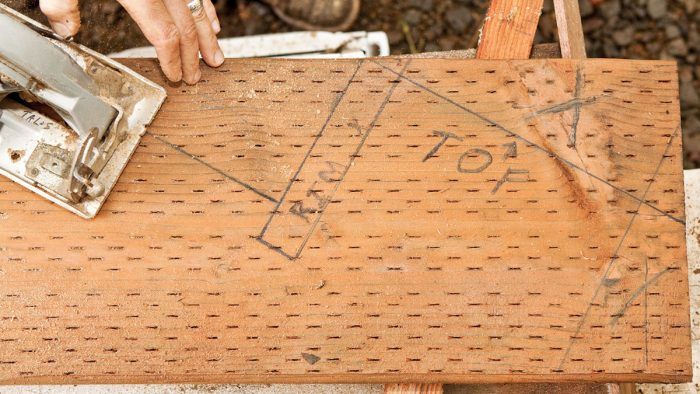
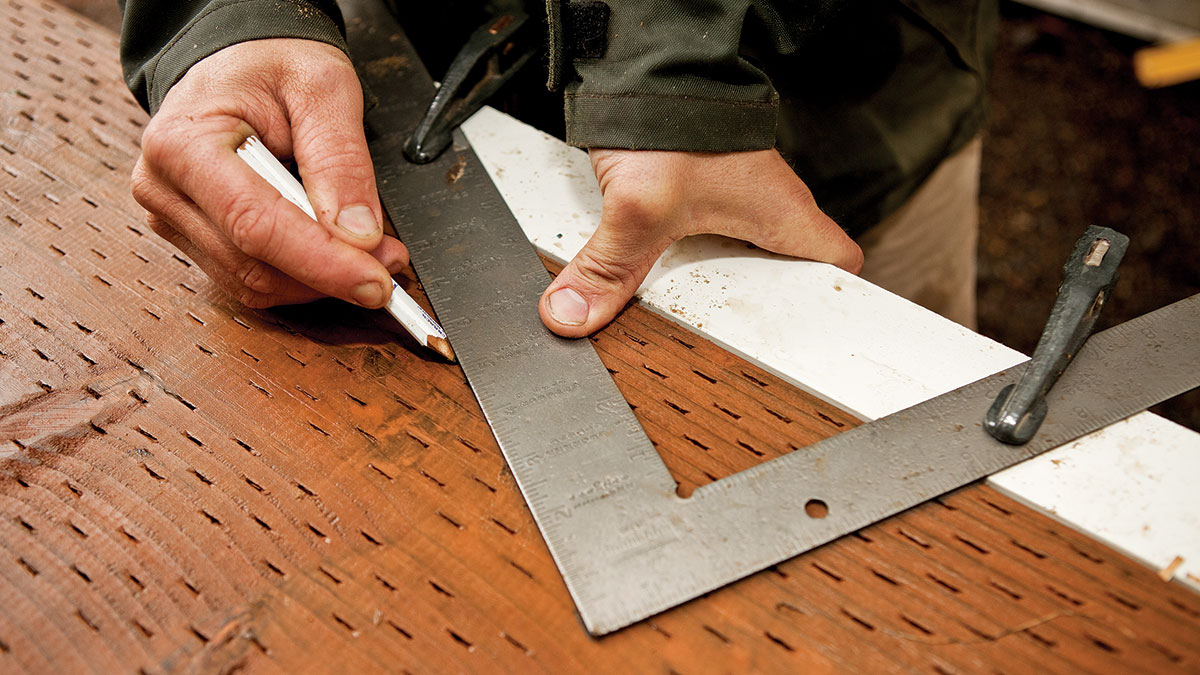
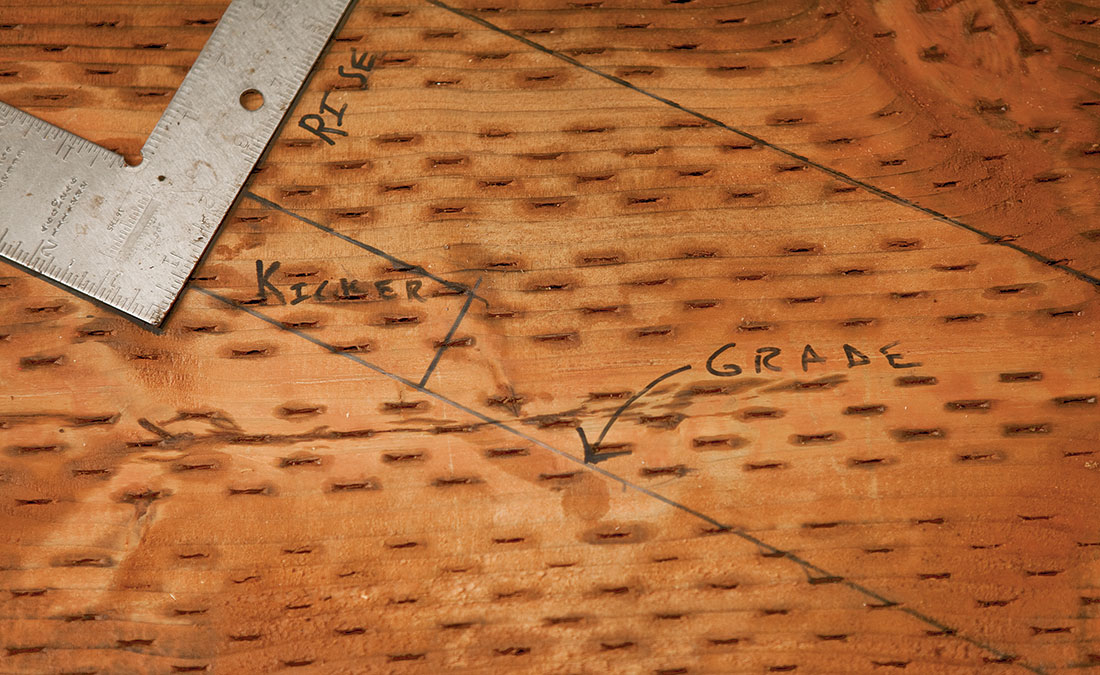
Draw the first stair notch using the framing square as a guide. Before drawing the rest of the stair notches, draw all of the framing elements where the stringer will attach to the deck framing. This allows you to verify that you’ve left enough wood at the stringer’s top to secure it to the framing and also allows you to verify your stair calculations.

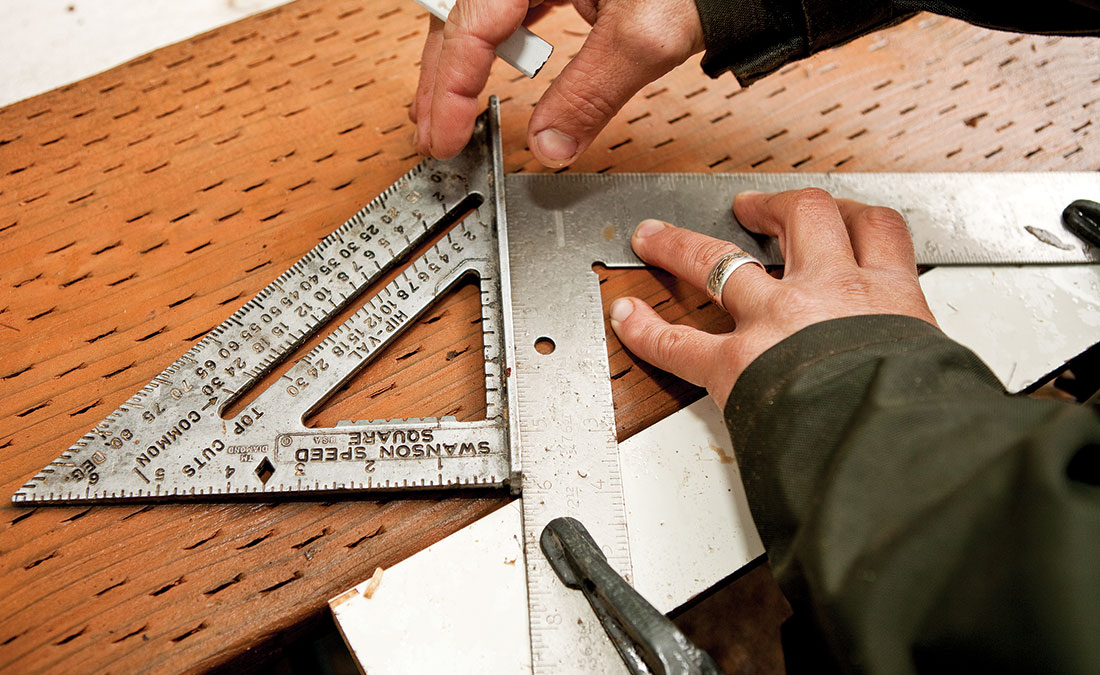
To mark out the rest of the notches, slide the framing square to the next step, referencing the previous notch. There is a chance that you might wander off layout using this method. On short runs this is not a problem, but on longer runs it can be more of a concern. Short of laying the whole stringer out with a construction calculator, you can increase accuracy by aligning a Speed Square to the adjacent triangle. At the bottom of the run, draw the grade and kicker onto the board as with the top. Cut the notches with a circular saw, being careful not to overcut the inside of the notch. The waste portion of the notch will easily break off at this point.

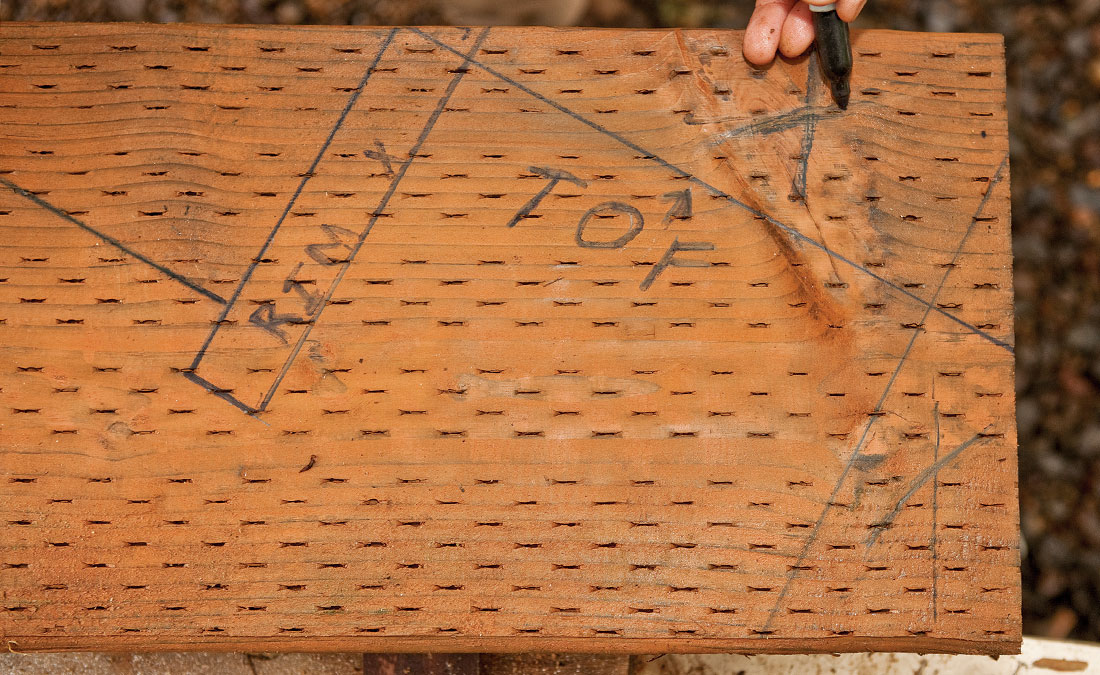
Trade Secret: Mark the waste sections with an X. While what is waste and what is not may seem obvious while marking the stringer, just a few minutes later when you’re focused on making accurate cuts, it easy to forget which side of the line to cut on.

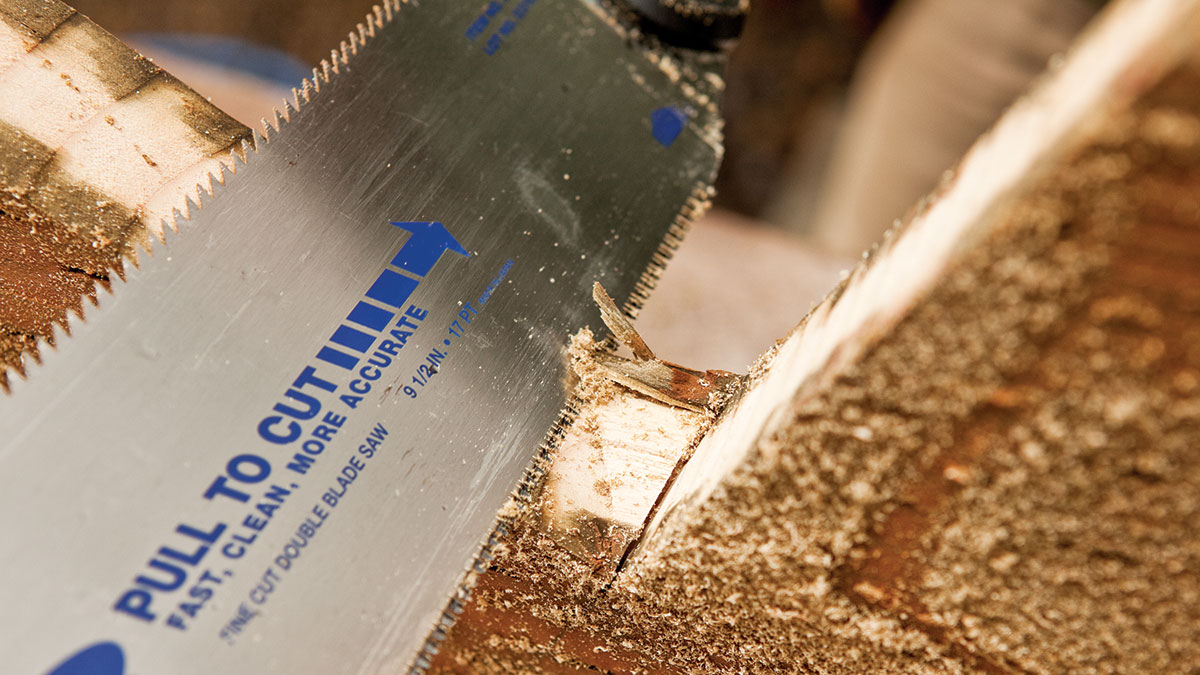
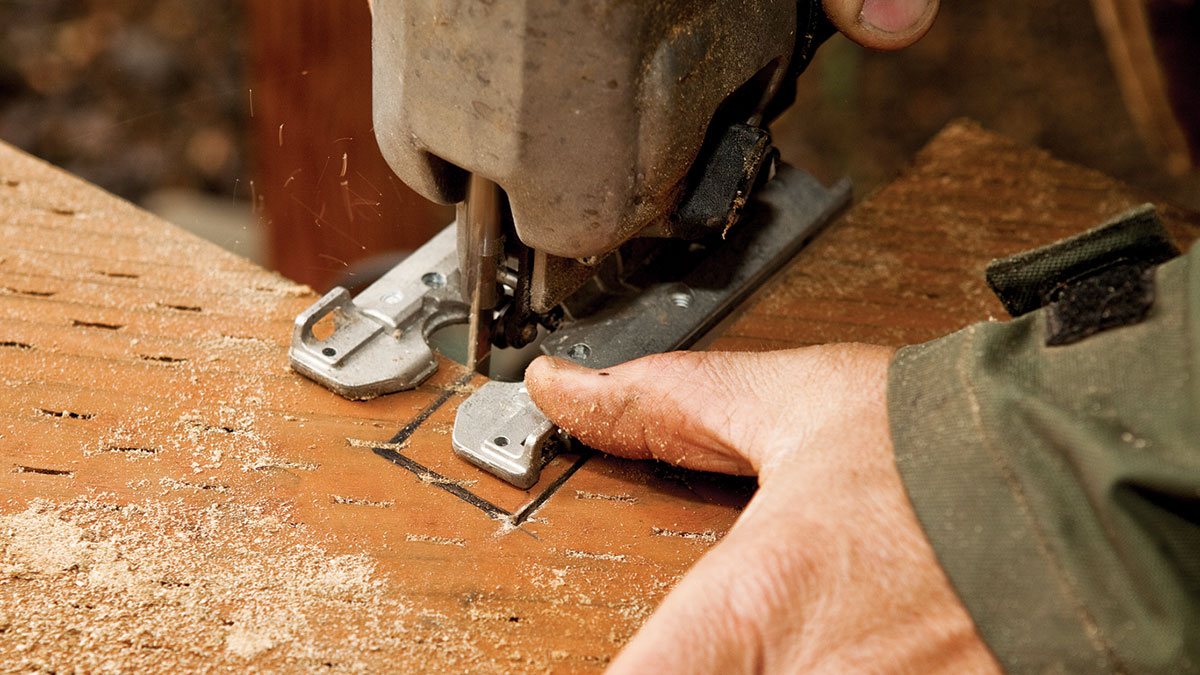
To clean up the stringer, finish the notch cuts with a handsaw or jigsaw. To avoid overcuts that might weaken the stringer, use a jigsaw where the layout calls for a tight inside corner. To protect the stringer and preserve all the hard work you’ve just invested, apply a coat of wood preservative to all freshly cut ends.

1. Set up a stair-marking jig by clamping a straight-edged board to a framing square. Register the straight edge to the stair’s rise and run.

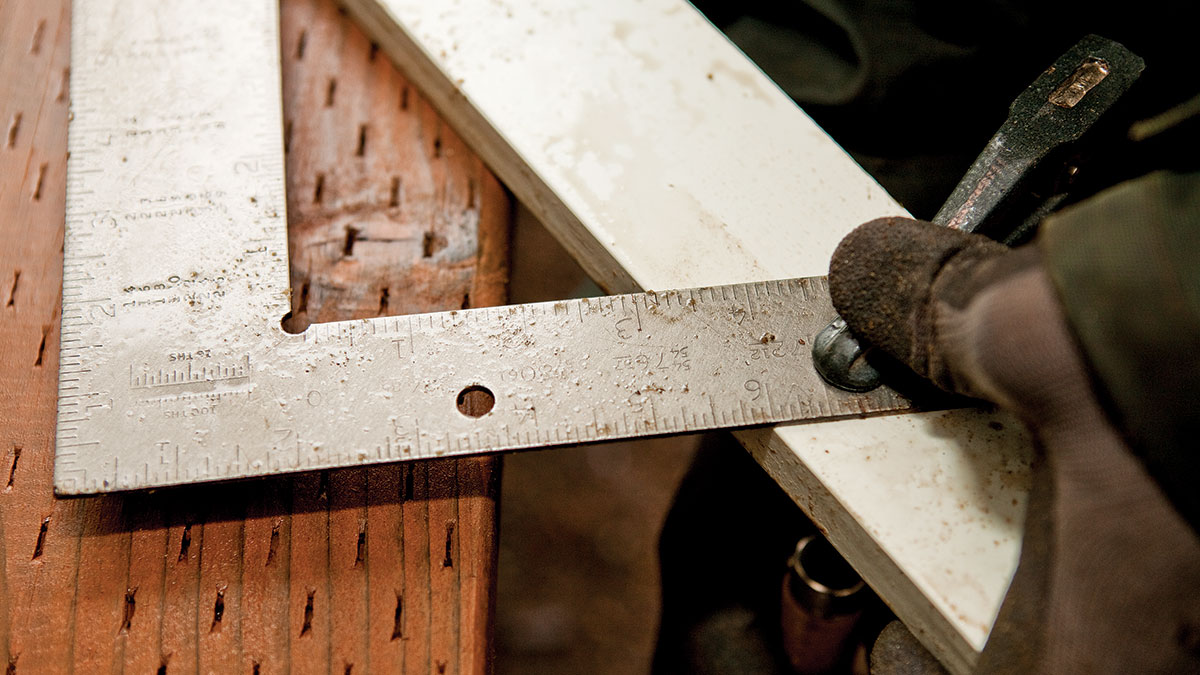
2. Mark the first stair notch in the stringer. Orient this notch at least 12 in. from the board’s end and clear of any knots.

3. Draw the deck-framing plan onto the stringer face. Clearly mark an X on any waste portions.

4. Align a Speed Square to the adjacent notch line to increase the accuracy of stringer layout.

5. Mark the landing plan on the bottom of the stringer. As with the top, mark the waste portions with an X.

6. Cut the notches with a circular saw, being careful not to overcut the line.

7. Finish the notch cut with a handsaw or jigsaw.

8. Cut inside corners carefully with a jigsaw.

9. Apply wood preservative to all fresh cuts.

Fine Homebuilding Recommended Products

Fine Homebuilding receives a commission for items purchased through links on this site, including Amazon Associates and other affiliate advertising programs.

Angel Guard Deck Demon

Demo has never been easier with the deck demon. The tool keeps the worker in an upright position and uses leverage to remove decking from framing, a must have tool for demo.
Buy at Amazon

Cepco BoWrench Decking Tool

This tool makes straightening deck boards a breeze during installation.
Buy at Amazon

Jigsaw

When it comes to fitting and installing decking, a cordless jigsaw is a must-have for custom cuts — especially around posts.
Buy at Amazon
Previous: Ultimate Deck Build: Cutting and Installing Stair Stringers Next: Stairs to a Pitched Landing

Guide

Decks

Chapter

Deck Stairs

Sign up for eletters today and get the latest how-to from Fine Homebuilding, plus special offers.

Signing you up...

This site is protected by reCAPTCHA and the Google Privacy Policy and Terms of Service apply.
See all newsletters
See all newsletters

Log in or create an account to post a comment.

Sign up Log in

Become a member and get full access to FineHomebuilding.com

Decks

Decks

Hundreds of articles and videos by top deck-building pros on how to design and build a beautiful, sturdy, and safe deck

View Project Guide

View All Project Guides »

Become a member and get unlimited site access, including the Decks Project Guide.

Start Free Trial

Design & Planning
  • Basic Design Options
  • Generating Plans
  • Calculating Deck Loads
  • Code Compliance
Tools & Materials
  • Deck Building Tools
  • Foundation and Framing Materials
  • Decking Materials
  • Fasteners and Hardware
Footings & Foundations
  • Choosing a Foundation
  • Sizing and Laying Out Footings
  • Excavation
  • Pouring the Foundation
Framing a Deck
  • Framing Overview
  • Installing the Ledger
  • Setting Posts and Beams
  • Installing Joists
Installing Decking
  • Decking Basics
  • Installation Process
  • Adding Fascia and Other Decorative Elements
Installing Railings
  • Installing Deck Railing Posts
  • Building Wood Rails and Balustrades
  • Non-Wood Railing Options
  • Installing Nonwood Balustrades
Deck Stairs
  • Deck Stairs Overview
  • Laying Out, Cutting, and Installing the Stringers
  • Installing Treads, Risers, and Stair Railings
Custom Details
  • Benches, Planters, and Privacy Features
  • Pergolas
  • Lighting
Finishes, Repairs, and Maintenance
  • Deck Finishes
  • Cleaning and Refinishing
  • Inspection and Repair
Complete Deck Builds
  • Grade-Level Decks
  • Raised Decks

Fine Home Building

Newsletter Sign-up

  • Fine Homebuilding

    Home building tips, offers, and expert advice in your inbox.

  • Green Building Advisor

    Building science and energy efficiency advice, plus special offers, in your inbox.

  • Old House Journal

    Repair, renovation, and restoration tips, plus special offers, in your inbox.

Signing you up...

This site is protected by reCAPTCHA and the Google Privacy Policy and Terms of Service apply.
See all newsletters

Follow

  • Fine Homebuilding

    Dig into cutting-edge approaches and decades of proven solutions with total access to our experts and tradespeople.

    Start Free Trial Now
    • Facebook
    • Instagram
    • X
    • LinkedIn
  • GBA Prime

    Get instant access to the latest developments in green building, research, and reports from the field.

    Start Free Trial Now
    • Facebook
    • YouTube
  • Old House Journal

    Learn how to restore, repair, update, and decorate your home.

    Subscribe Now
    • Facebook
    • Instagram
    • X

Membership & Magazine

  • Online Archive
  • Start Free Trial
  • Magazine Subscription
  • Magazine Renewal
  • Gift a Subscription
  • Customer Support
  • Privacy Preferences
  • About
  • Contact
  • Advertise
  • Careers
  • Terms of Use
  • Site Map
  • Do not sell or share my information
  • Privacy Policy
  • Accessibility
  • California Privacy Rights

© 2025 Active Interest Media. All rights reserved.

Fine Homebuilding receives a commission for items purchased through links on this site, including Amazon Associates and other affiliate advertising programs.

  • Home Group
  • Antique Trader
  • Arts & Crafts Homes
  • Bank Note Reporter
  • Cabin Life
  • Cuisine at Home
  • Fine Gardening
  • Fine Woodworking
  • Green Building Advisor
  • Garden Gate
  • Horticulture
  • Keep Craft Alive
  • Log Home Living
  • Military Trader/Vehicles
  • Numismatic News
  • Numismaster
  • Old Cars Weekly
  • Old House Journal
  • Period Homes
  • Popular Woodworking
  • Script
  • ShopNotes
  • Sports Collectors Digest
  • Threads
  • Timber Home Living
  • Traditional Building
  • Woodsmith
  • World Coin News
  • Writer's Digest
Active Interest Media logo
X
X
This is a dialog window which overlays the main content of the page. The modal window is a 'site map' of the most critical areas of the site. Pressing the Escape (ESC) button will close the modal and bring you back to where you were on the page.

Main Menu

  • How-To
  • Design
  • Tools & Materials
  • Video
  • Blogs
  • Forum
  • Project Guides
  • Reader Projects
  • Magazine
  • Members
  • FHB House

Podcasts

  • FHB Podcast
  • ProTalk

Webinars

  • Upcoming and On-Demand

Podcasts

  • FHB Podcast
  • ProTalk

Webinars

  • Upcoming and On-Demand

Popular Topics

  • Kitchens
  • Business
  • Bedrooms
  • Roofs
  • Architecture and Design
  • Green Building
  • Decks
  • Framing
  • Safety
  • Remodeling
  • Bathrooms
  • Windows
  • Tilework
  • Ceilings
  • HVAC

Magazine

  • Current Issue
  • Past Issues
  • Magazine Index
  • Subscribe
  • Online Archive
  • Author Guidelines

All Access

  • Member Home
  • Start Free Trial
  • Gift Membership

Online Learning

  • Courses
  • Project Guides
  • Reader Projects
  • Podcast

More

  • FHB Ambassadors
  • FHB House
  • Customer Support

Account

  • Log In
  • Join

Newsletter

Get home building tips, offers, and expert advice in your inbox

Signing you up...

This site is protected by reCAPTCHA and the Google Privacy Policy and Terms of Service apply.
See all newsletters
See all newsletters

Follow

  • X
  • YouTube
  • instagram
  • facebook
  • pinterest
  • Tiktok

Join All Access

Become a member and get instant access to thousands of videos, how-tos, tool reviews, and design features.

Start Your Free Trial

Subscribe

FHB Magazine

Start your subscription today and save up to 81%

Subscribe

We hope you’ve enjoyed your free articles. To keep reading, become a member today.

Get complete site access to expert advice, how-to videos, Code Check, and more, plus the print magazine.

Start your FREE trial

Already a member? Log in

Privacy Policy Update

We use cookies, pixels, script and other tracking technologies to analyze and improve our service, to improve and personalize content, and for advertising to you. We also share information about your use of our site with third-party social media, advertising and analytics partners. You can view our Privacy Policy here and our Terms of Use here.

Cookies

Analytics

These cookies help us track site metrics to improve our sites and provide a better user experience.

Advertising/Social Media

These cookies are used to serve advertisements aligned with your interests.

Essential

These cookies are required to provide basic functions like page navigation and access to secure areas of the website.

Delete My Data

Delete all cookies and associated data