FHB Logo Facebook LinkedIn Email Pinterest Twitter X Instagram Tiktok YouTube Plus Icon Close Icon Navigation Search Icon Navigation Search Icon Arrow Down Icon Video Guide Icon Article Guide Icon Modal Close Icon Guide Search Icon Skip to content
Subscribe
Log In
  • How-To
  • Design
  • Tools & Materials
  • Restoration
  • Videos
  • Blogs
  • Forum
  • Magazine
  • Members
  • FHB House
  • Podcast
Log In

Fine Homebuilding Project Guides

Decks

Guide Home
  • Design & Planning
  • Tools & Materials
  • Footings & Foundations
  • Framing a Deck
  • Installing Decking
  • Installing Railings
  • Deck Stairs
  • Custom Details
  • Finishes, Repairs, and Maintenance
  • Complete Deck Builds
How-To

Laying Out Deck Joists

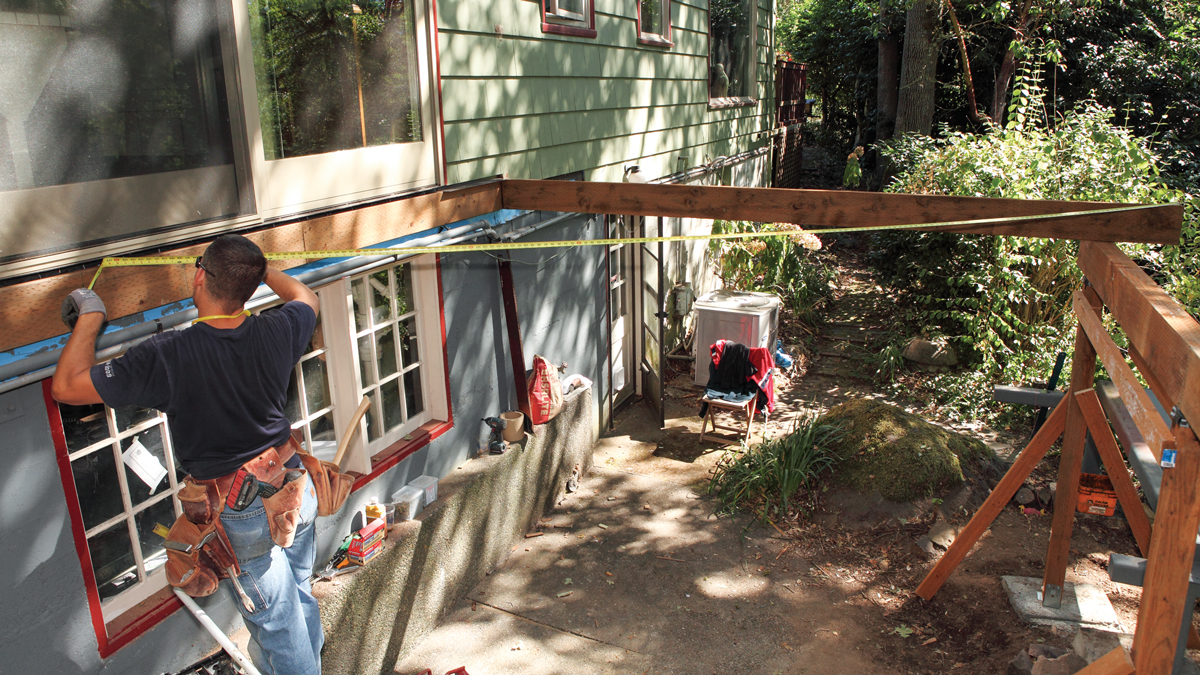
Deck builder Scott Grice shows how to pull and mark an initial layout and square the assembly–and then how to pull secondary layouts.

By Scott Grice
  • X
  • facebook
  • linkedin
  • pinterest
  • email
  • add to favorites Log in or Sign up to save your favorite articles

Once the beams are installed and either temporarily or permanently braced, it’s time to install the joists. Installing the joists involves pulling an initial layout of their locations and marking the house ledger, rolling the lumber into place, and installing rim joists. However, these tasks are not discrete. Often there will be a little back and forth among them. For example, it’s easier to register secondary layouts off of joists that have already been installed rather than doing the entire layout before installing any joists.

In this section, we’ll discuss how to pull an initial layout and square the assembly. Then you’ll learn different ways to pull secondary layouts, some of which involve joists that have already been installed. We’ll cover installing, or rolling, joists in the next section.

Most commonly, joist spacing is 16 in. o.c., but it can vary depending on the type of decking. Some synthetic decking requires joist spacing at 12 in.; and if the deck is going to carry a heavy load, such as a hot tub, the joist spacing will often be reduced even more. For the deck shown here, we used standard 16-in.-o.c. joist spacing.

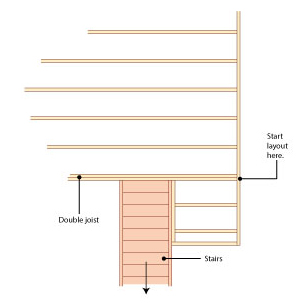
Where to Start Joist Layout

Start the layout from the logical spot, which is not necessarily the deck’s edge. Here, starting the layout at the double joist that acts as the header for the stair stringers makes much more sense than starting layout from the edge of the deck.

START THE LAYOUT FROM A LOGICAL POINT

Double joist
Double joist

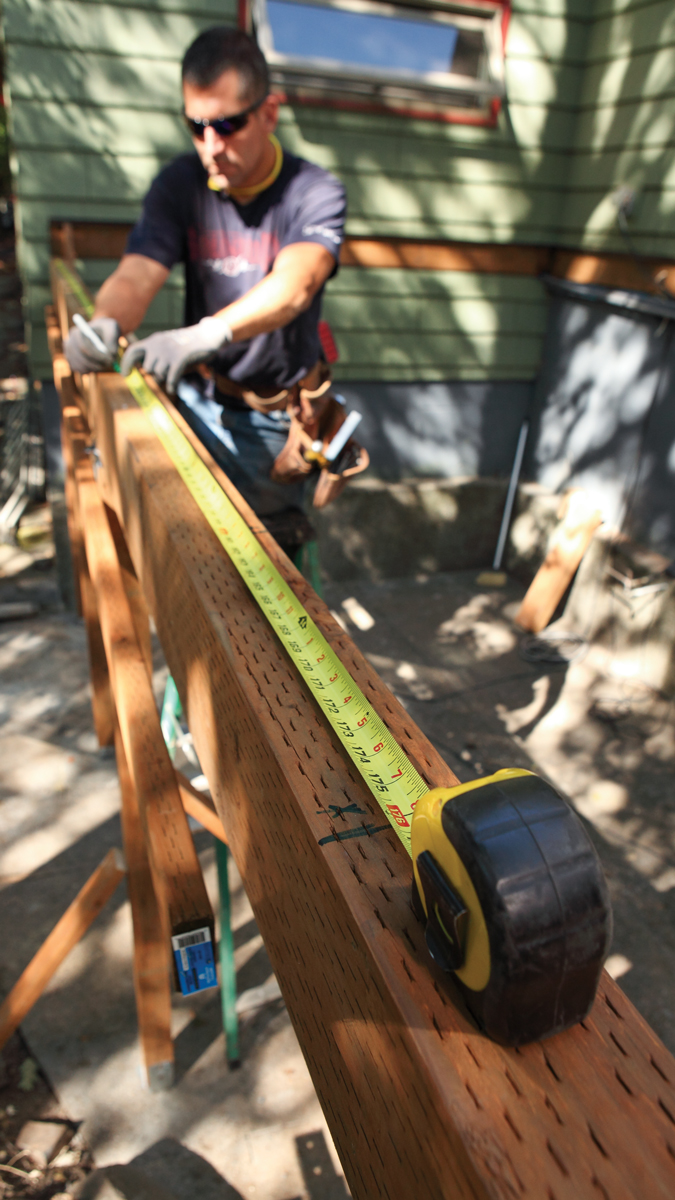
The easiest way to pull layout is simply to hook the tape on the end of the ledger board and mark a crow’s foot every 16 in. (see photos below). On this deck, we wanted the layout to begin from the outside of the rim joist that hadn’t been installed yet. We could have stopped what we were doing to install the rim joist before pulling layout, but instead we dropped (or burned) 1-1/2 in. from the layout so that every joist was 16-in. o.c. When marking the joist location, indicate with an X which side of the crow’s foot to locate the joist. It’s also a good idea to draw a vertical line to indicate the edge of the joist. This makes it easy to install the joist by aligning the joist face to the line.

Install the rim joist to the end of the ledger with through screws. There are a couple of things to note about installing the rim joist. First, as mentioned, you can install the rim joist before pulling layout and simply hook your tape to it instead of burning 1-1/2 in. to get all the joists 16 in. o.c. Second, installing the rim joist to the end of the ledger, as seen here, has the advantage that it can be secured with through screws instead of hardware. If the rim joist butts to a full-length ledger, then corner-attachment hardware is required. Once the rim joist is secured to the ledger, use the 3-4-5 method to align it at 90° to the house.

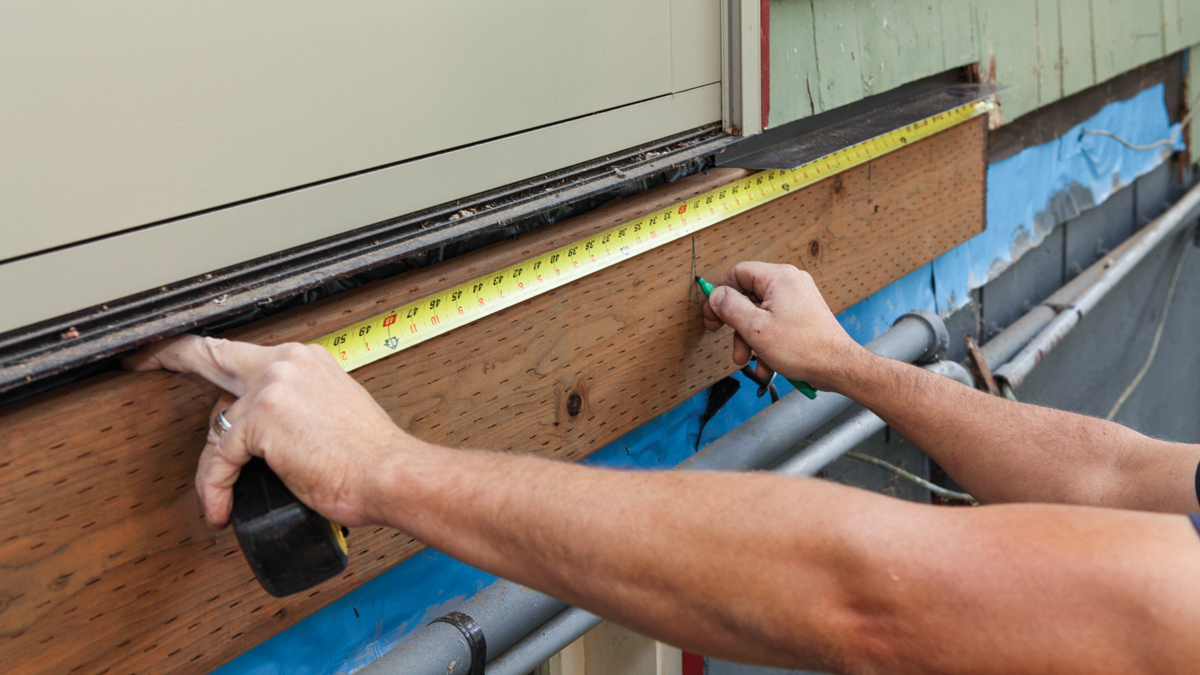
1. Hook the tape measure on the end of the ledger board and mark each joist on the layout.

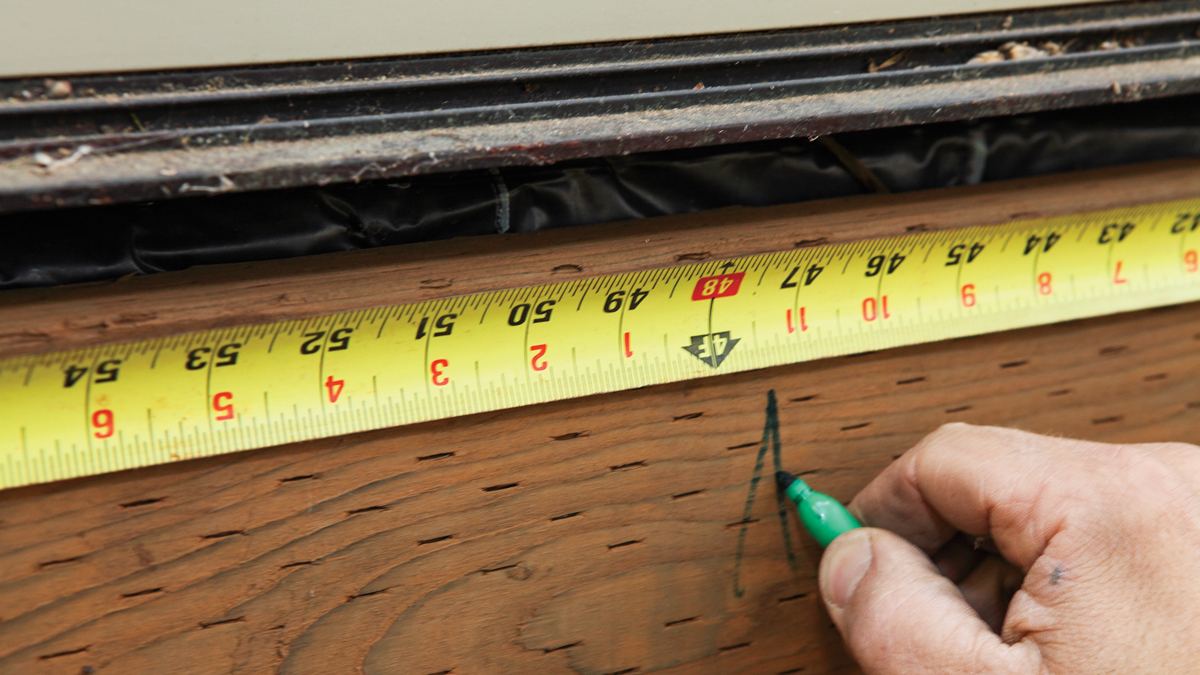
2. Adjust the layout so that all the joists are aligned on center in reference to the end joist.

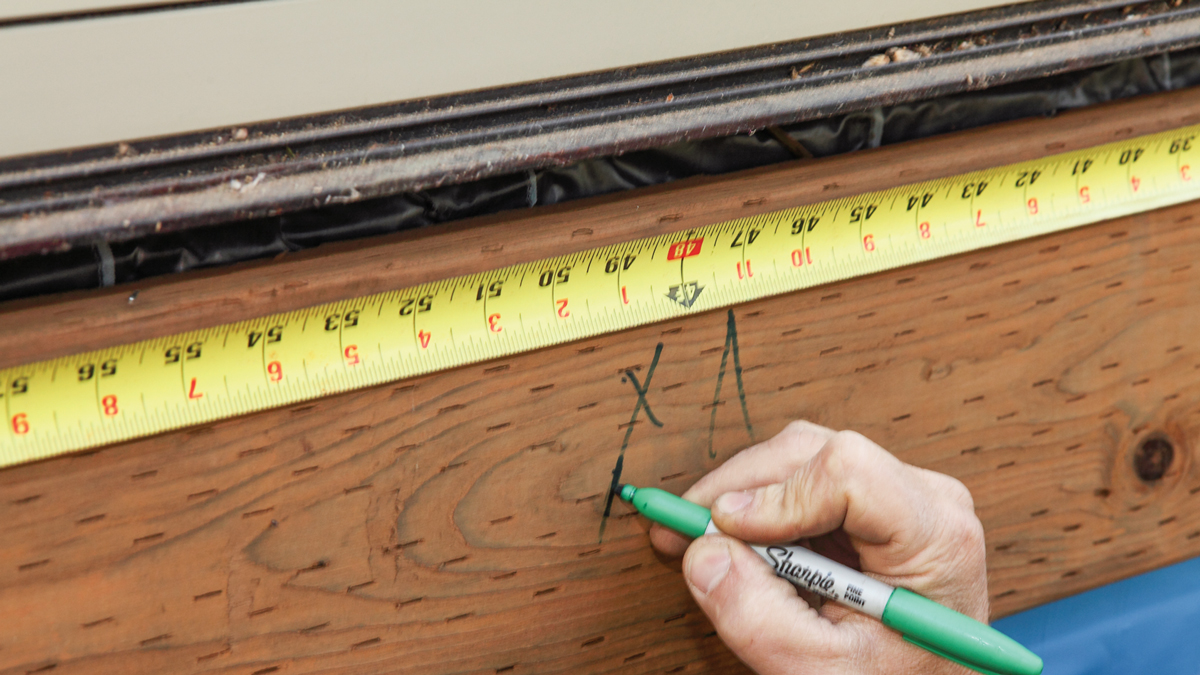
3. Mark the side of the crow’s foot that the joist will land on to avoid any confusion.

4. Mark a plumb line to align the joist to when installing the joists.

5. Install the rim joist to the end of the ledger using 3-in. through screws.

6. Adjust the rim joist square to the house by using the 3-4-5 method or the Pythagorean theorem.

Pulling secondary layouts

Secondary layouts are all the other layouts on beams or rim joists that reference the first layout. Use the rim joist that you squared to the ledger (that is, the house) as the reference for the secondary layouts. For the joist layout parallel to the rim joist, mark the adjacent joist and pull layout from that, rather than pulling directly from the rim joist. Extend the tape across the top of the beam, lock it so it won’t recoil, and register it on the first joist position. Then mark the layout on the beam, moving the ladder as necessary. Locking the tape frees up both hands for marking and avoids the excess hassle of having to work the tape every time you move the ladder. You could butt the tape to the rim joist instead of marking the adjacent joist, but then you’d have to move the ladder all the way down to the other end and work back to the rim. This may seem like a small difference, but many small efficiencies add up to a lot of saved work and time.

To extend the rim-joist reference, use a string line to transfer the layout to additional beams. Tack a 2x block to the rim joist at the house. Tack another 2x block to the rim joist over the first beam and then extend a string line that’s aligned with the blocks to transfer the layout. On this deck, the extended joists were sistered on the side with the blocks, meaning that the new joist layout was offset by 1-1/2 in. If we were going to sister the joist to the inside, we would have put the blocks to the inside. To continue the layout across the beams, align the tape to the string and mark the layout, again noting to which side of the mark the joist will land.

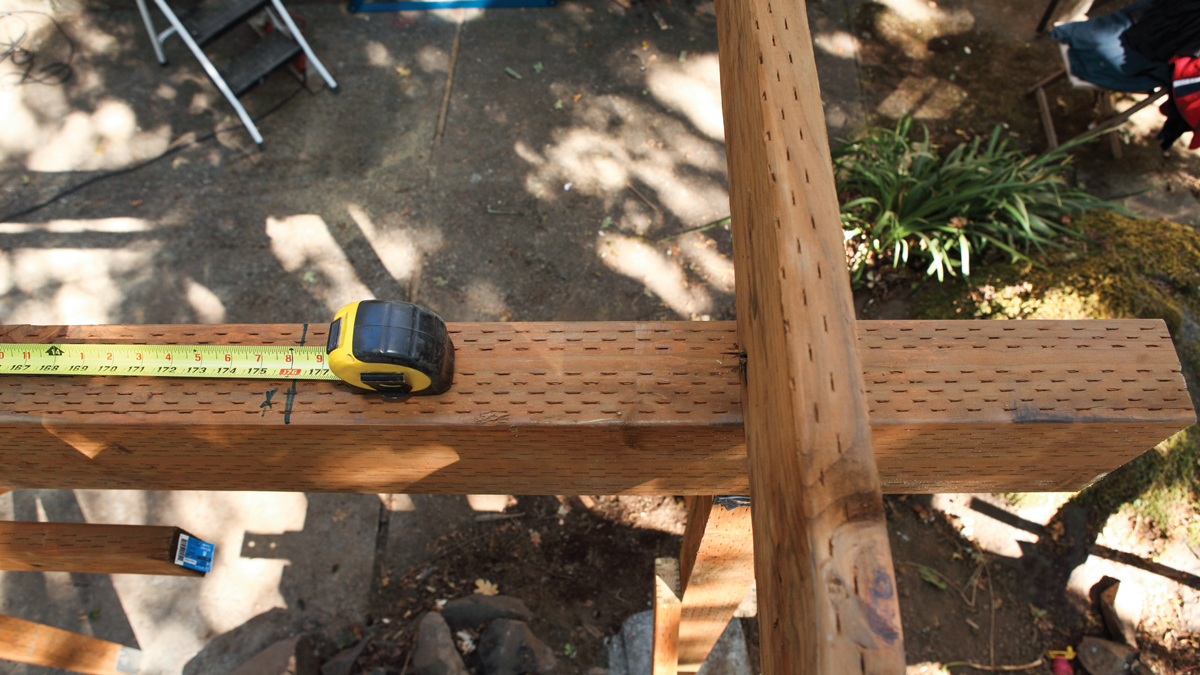
1. Register the tape on the joist layout adjacent to the rim joist and extend it the length of the beam.

2. Mark the joist layout on the top of the beam. Remember to indicate which side of the mark the joist will land on.

3. Place 2x blocks on the side of the rim joist. Place one block near the ledger and the other block over the beam.

4. Align the string when transferring the layout to additional beams.

5. Use the string as a reference to pull additional parallel layouts.


What can go wrong

It’s easy to lose track of which side of the board you’re pulling layout from. Once you’ve marked a joist, clearly indicate to which side the joist will land before marking anymore joist locations.


Pulling layout on an angle

Sometimes you need to pull layout on an angle. You can use a construction calculator to figure the distance between the joists based on the Pythagorean theorem (see “Pythagorean Theorem”), but it might be just as quick to pull a few measurements.
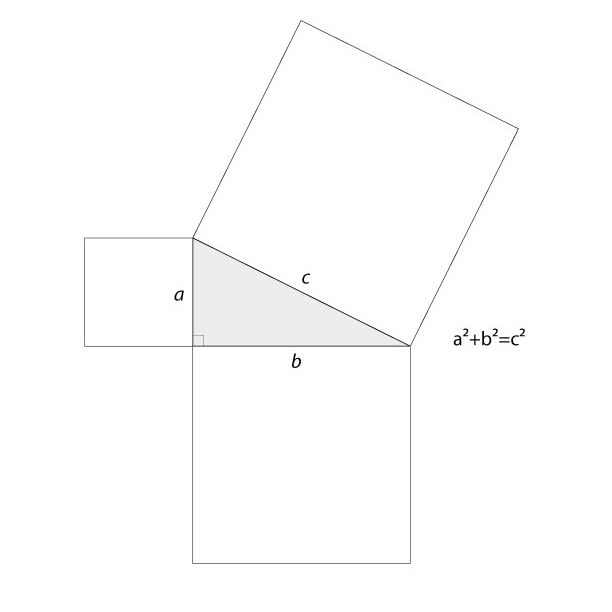
Pythagorean Theorem

A handy trick to have in your tool bag is the Pythagorean theorem, which states that for any right-angle triangle a2 + b2 = c2.

For example, if a = 6 and b = 8, then c = 20.

62 + 82 = 102

36 + 64 = 100

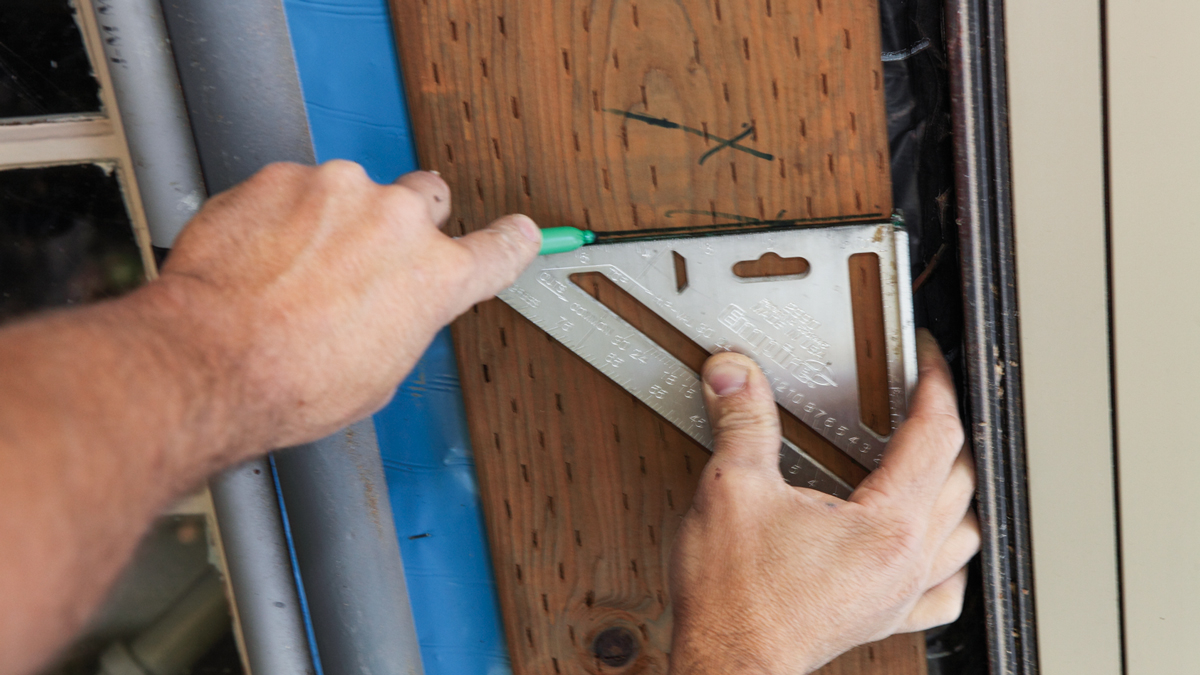
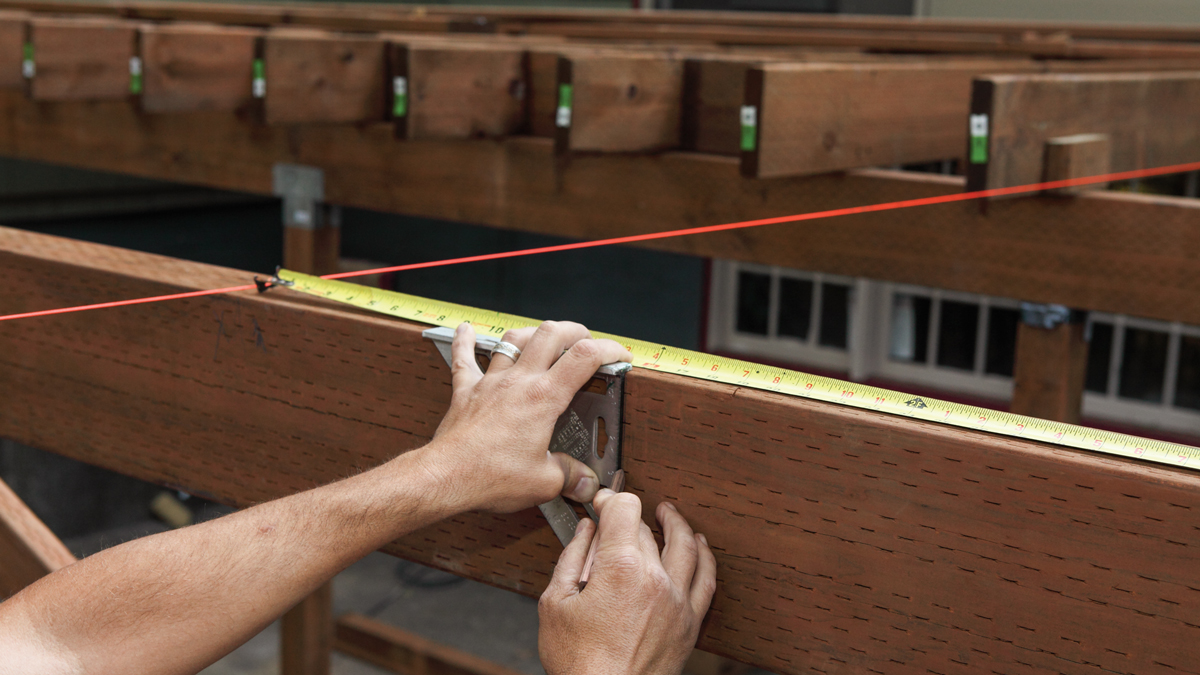
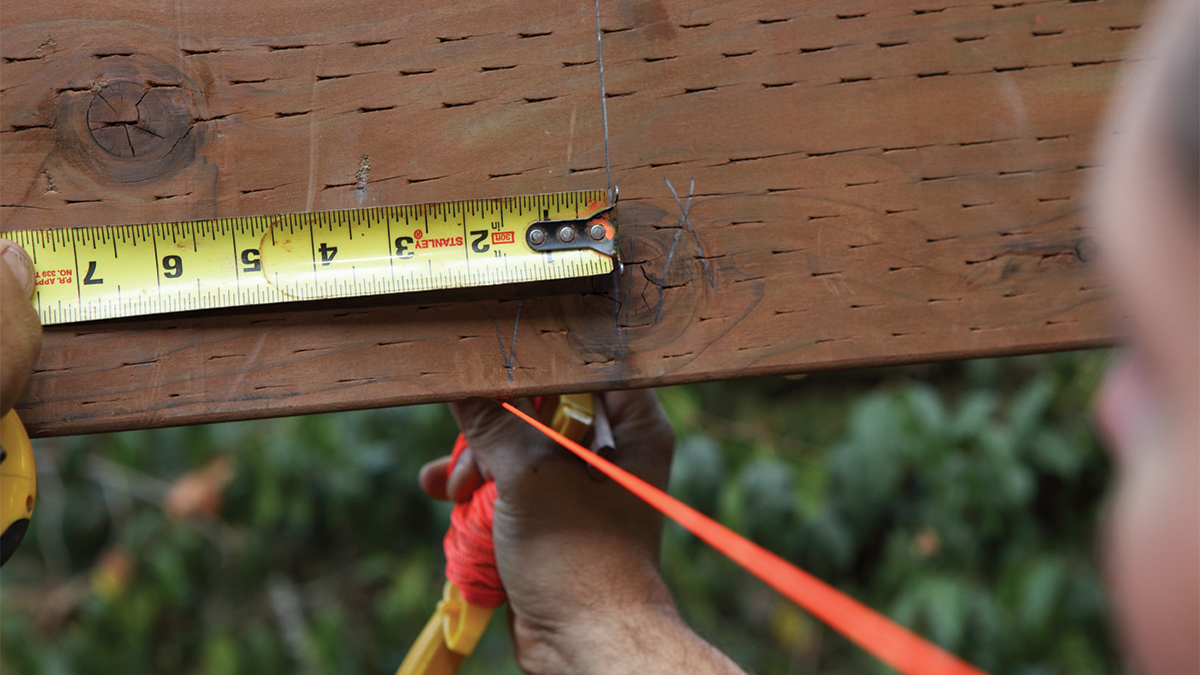
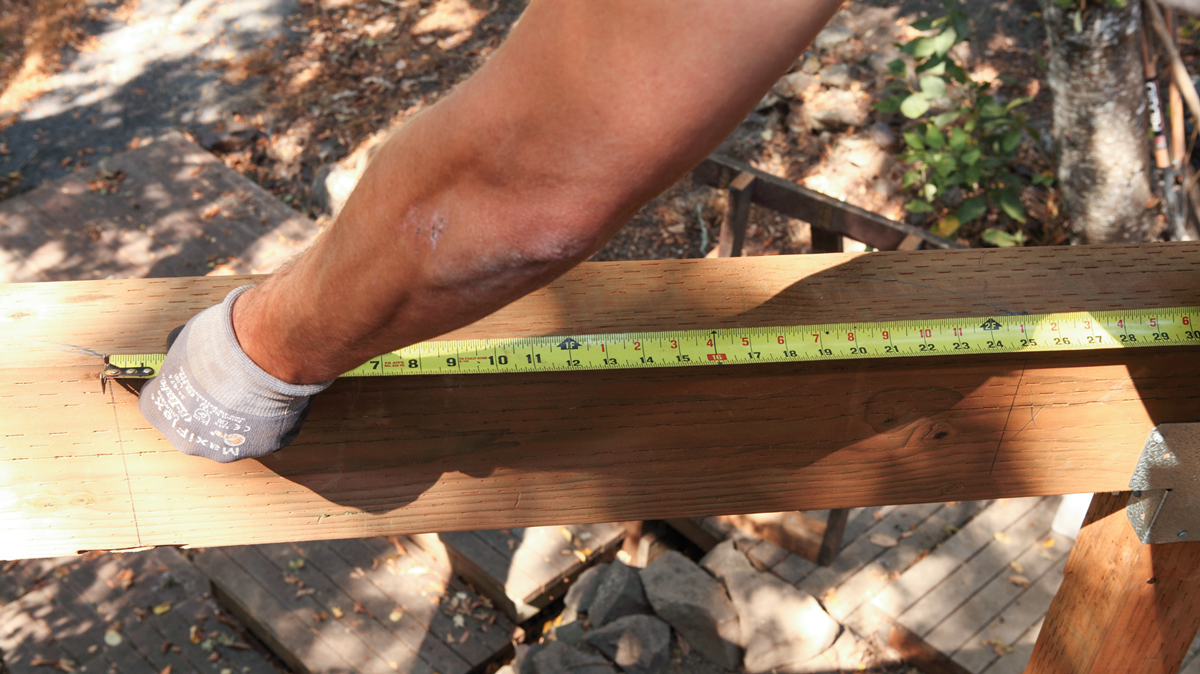
To figure the layout with a tape measure, hook the tape on the nearest joist and align the tape perpendicular to the joist with a Speed Square 1. Move the tape and square along the joist until the tape reads 16 in. to the framing on the angle, in this case a rim beam 2. Mark the joist location with a Speed Square 3. Slide the tape and square along the joist until the tape reads 32 in. and mark another joist location 4. Measure between the joist locations along the angle to find the on-center joist spacing 5. Now you can use this spacing to pull layout along the angle.

If you have a long run on the angle, it’s a good idea to establish joist locations at either end and pull layout to the center. If the layouts don’t line up, take half the discrepancy divided by the number of spaces and this is the distance the on-center number needs to be adjusted by. For example, say there is a 2-in. gap between the layouts pulled from either end. For ease of math, say there are 8 joist spaces on either side. With simple math you know the initial on-center joist space is 1/8 in. too short. Add 1/8 in. to that number, then pull layout again and you should be dead on.

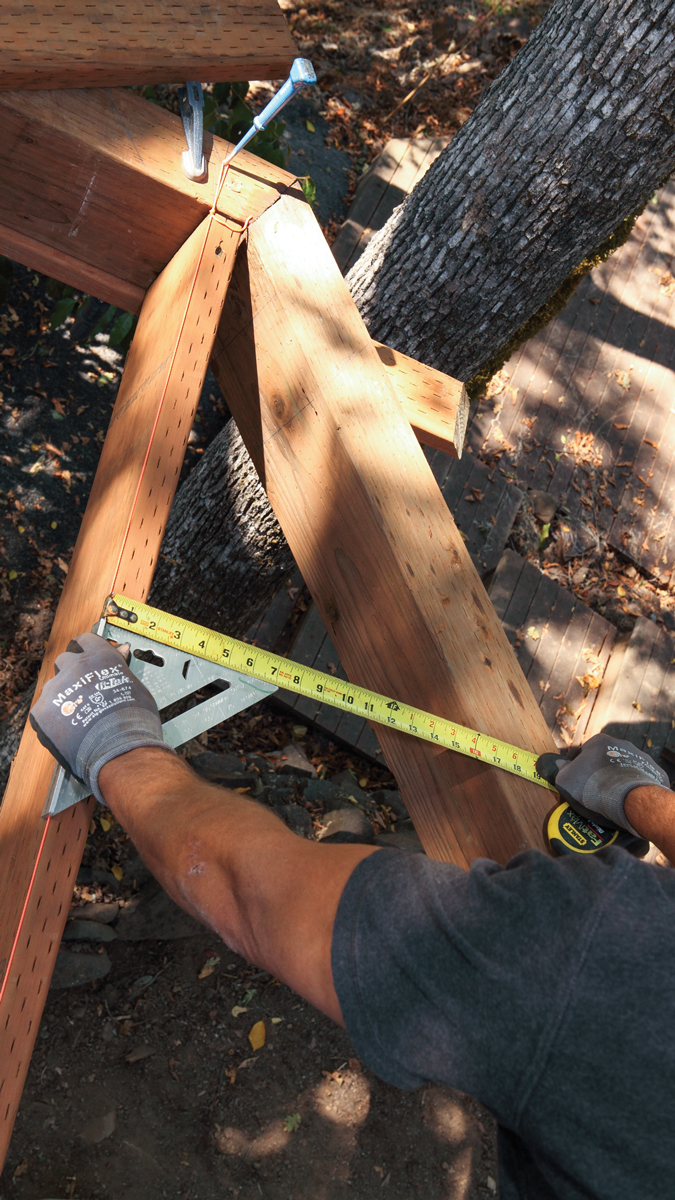
1. When pulling layout on an angle, use a Speed Square to align the tape at a 45° angle to the last joist.

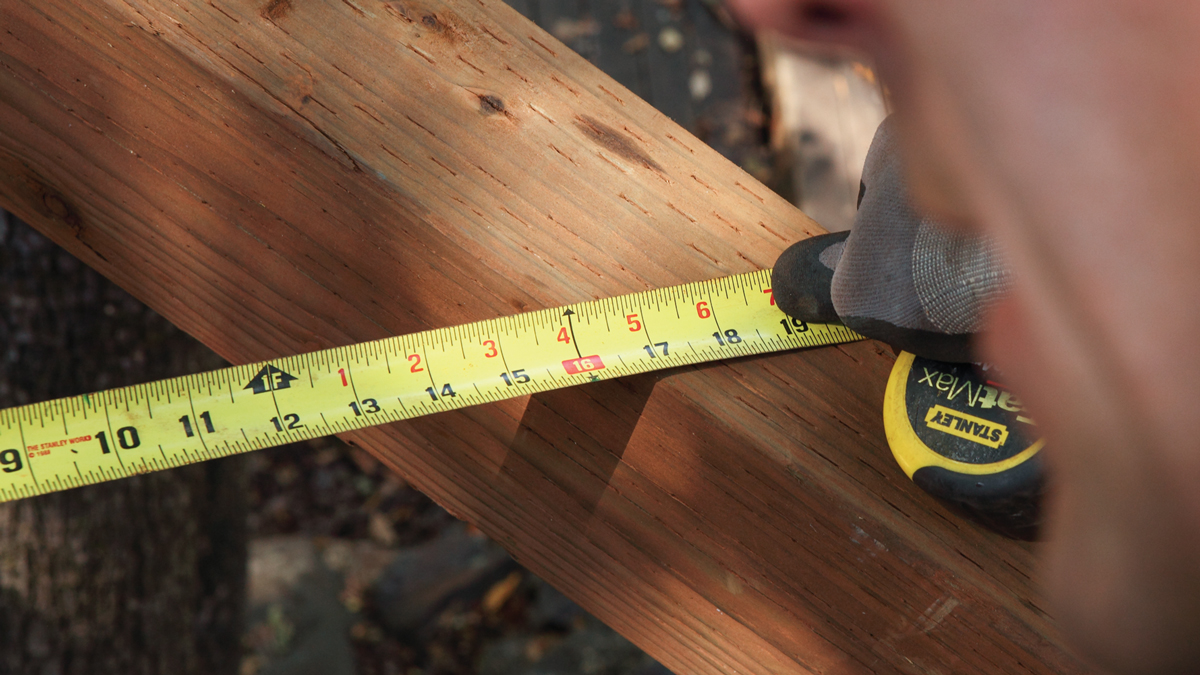
2. Measure 16 in. from the last joist, square to the rim joist, and mark the location.

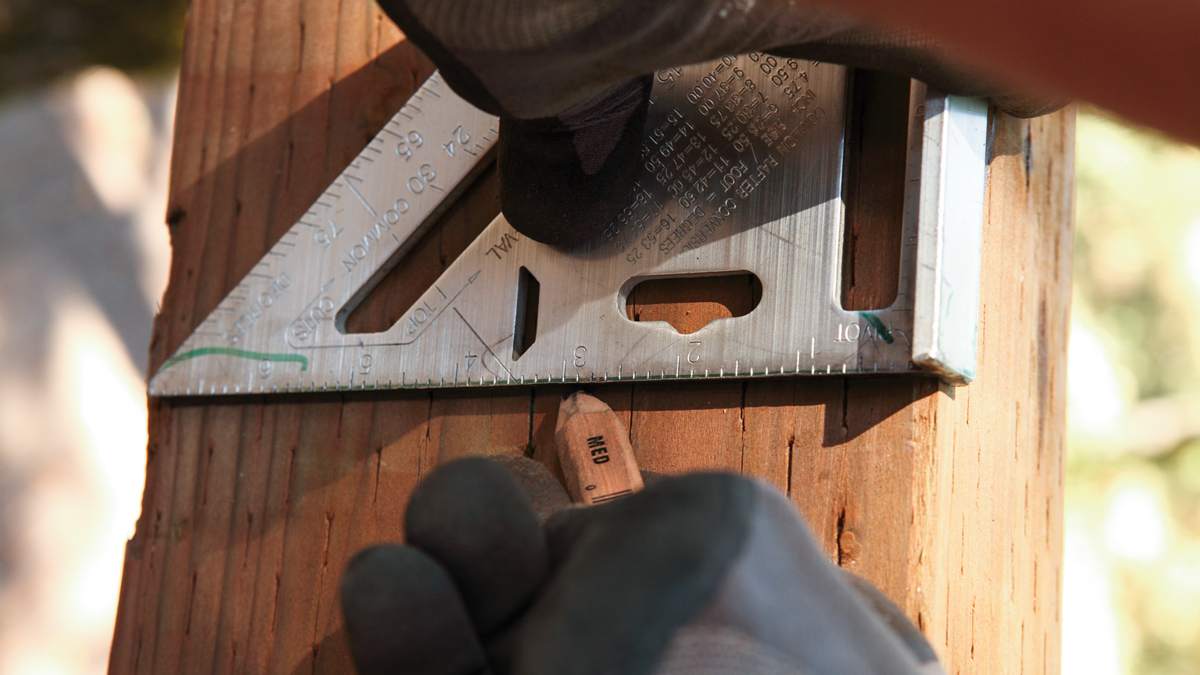
3. Mark a vertical line on the rim joist to give yourself a reference when installing the field joists.

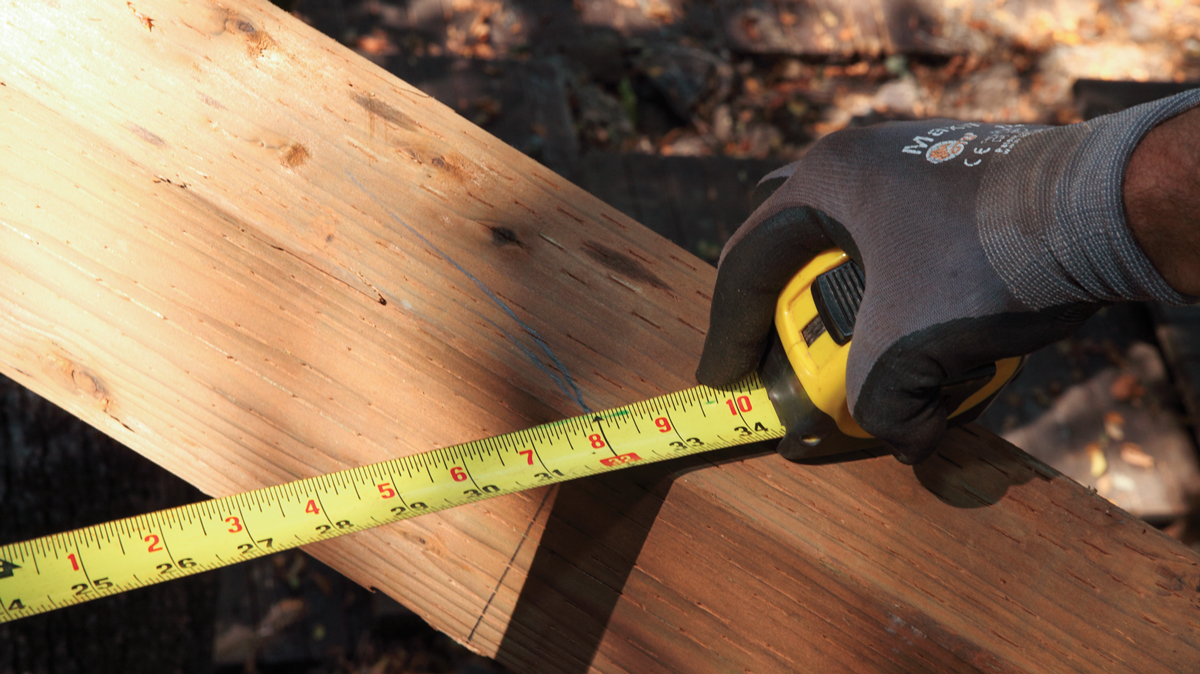
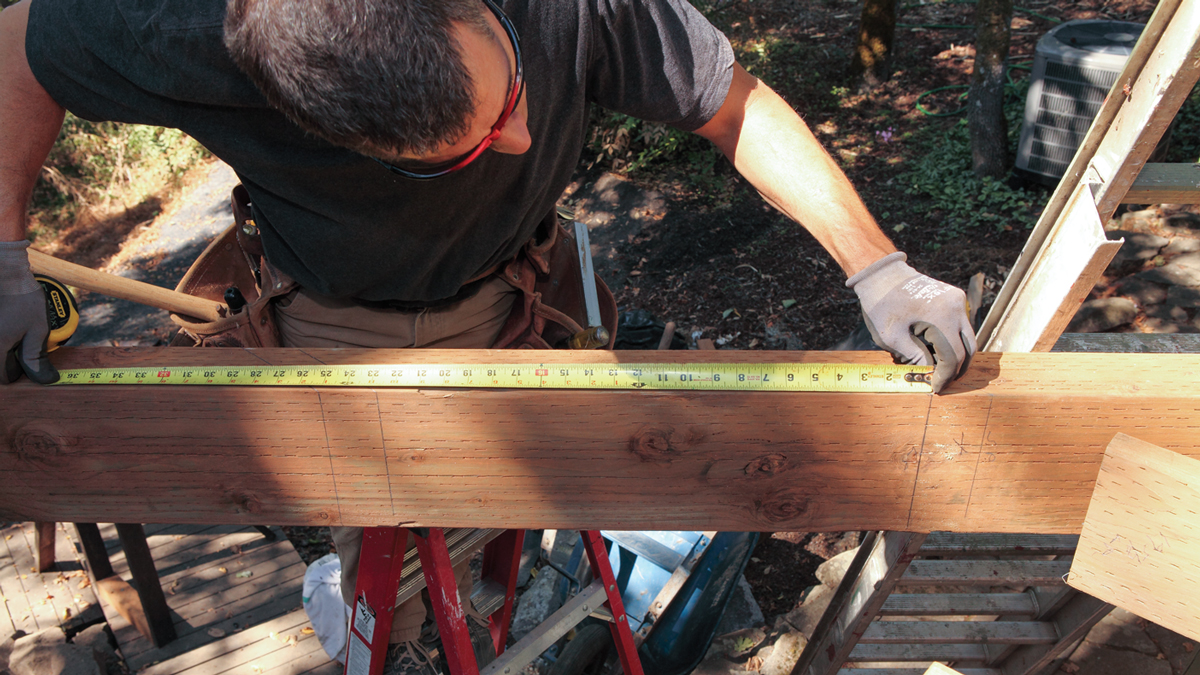
4. Slide the tape down and measure 32 in. from the last joist, square to the rim joist, and mark that location.

5. Measure the distance between the marks on the rim joist to discover the on-center joist distance along the rim joist.


Trade secret

The bed angle of most circular saws limits a bevel cut to 45° (or sometimes 51°). To cut a bevel at a greater angle, clamp a section of beam flush to the end of the joist. To calculate the saw angle, simply subtract the desired angle from 90°. Here, I am cutting a 58° angle so I set the saw at 32°
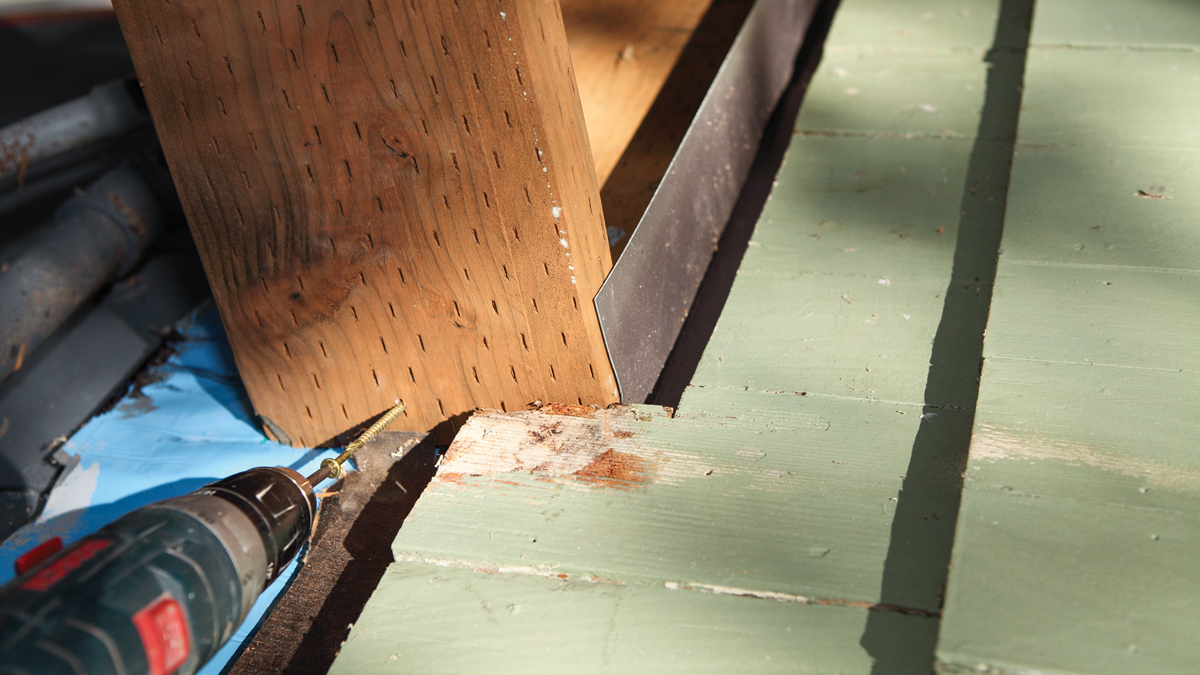
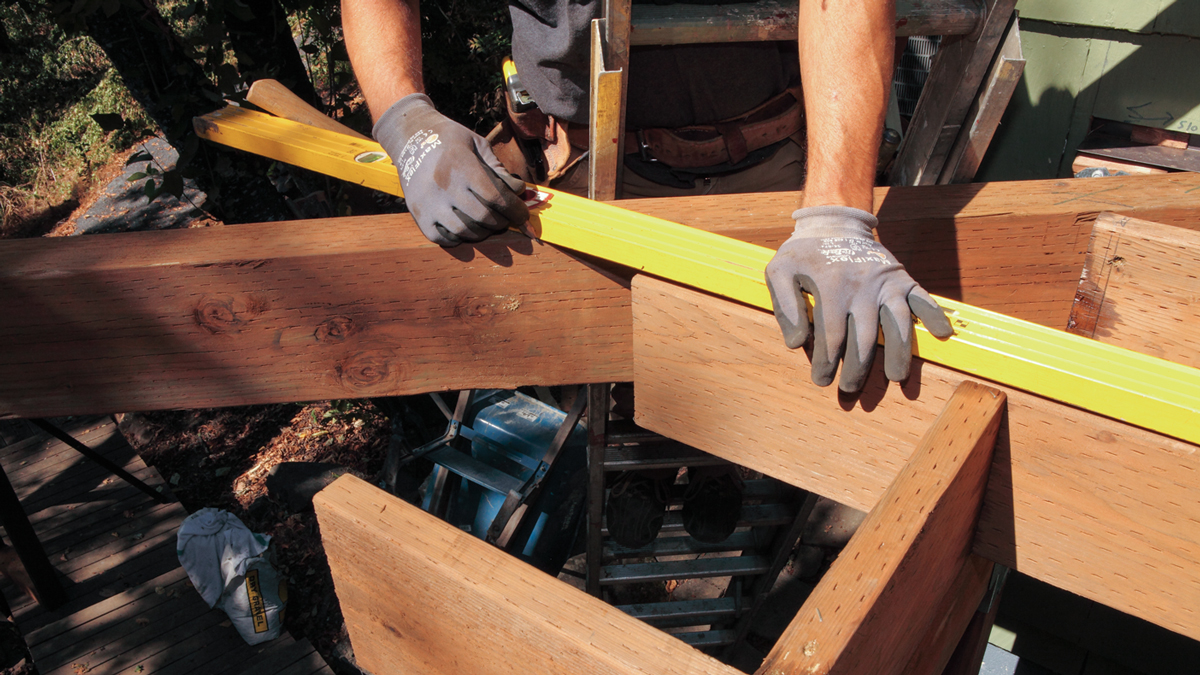
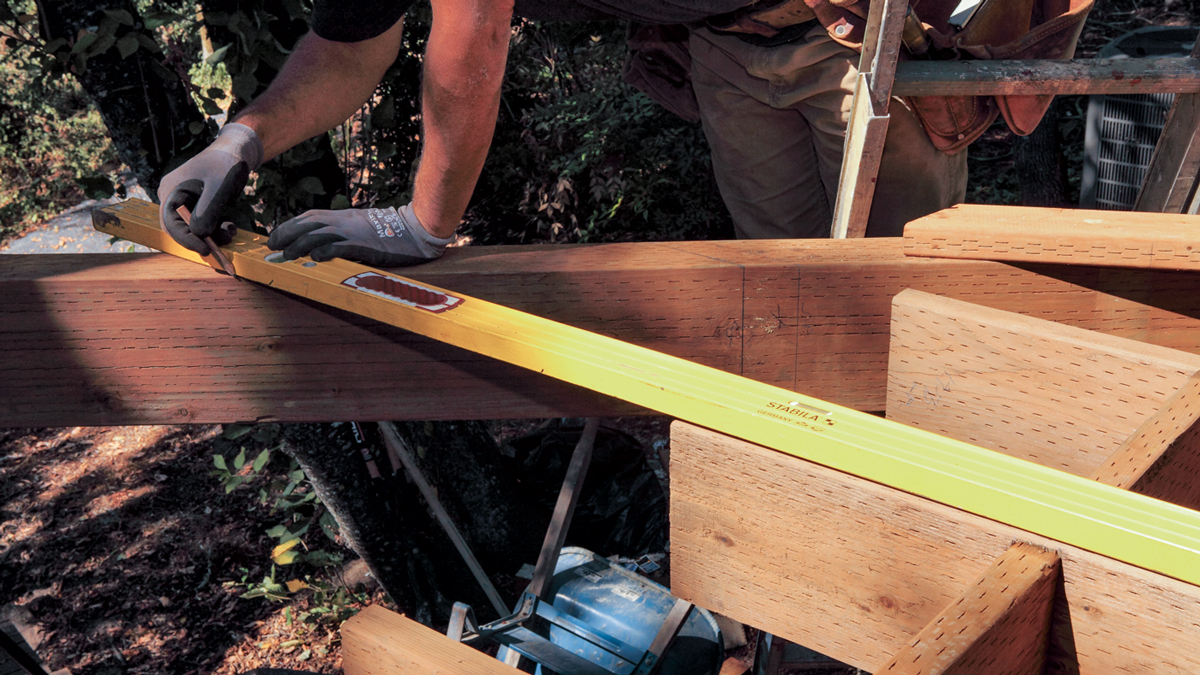


Another Way to Lay Out on an Angle

Another way to figure on-center joist spacing on an angle is to extend the line of joists already installed. This method requires a level or straightedge.

1.Align the level with the edge of the first joist and extend it over the rim joist or beam.

2. Repeat the process with the next joist over.

3. Then measure between the marks to get the on-center distance between the joist on the angle.


Fine Homebuilding Recommended Products

Fine Homebuilding receives a commission for items purchased through links on this site, including Amazon Associates and other affiliate advertising programs.

4-Gallon Piston Backpack Sprayer

This sprayer holds a large amount of solution and the backpack design keeps your hands free, making maintaining and cleaning a deck a breeze.
Buy at Amazon

Lithium-Ion Cordless Palm Nailer

This tool is nice to have for fitting in tight spaces when fastening hardware. While you may not use it often, you'll be glad you have it when you need it.
Buy at Amazon

Drill Driver/Impact Driver

Whether you're pre-drilling holes or driving screws, this Milwaukee® compact cordless driver is the way to go when it comes to building decks.
Buy at Amazon
Previous: Get Your Deck Joists Right Next: How to Install Deck Joists

Guide

Decks

Chapter

Framing a Deck

Sign up for eletters today and get the latest how-to from Fine Homebuilding, plus special offers.

Signing you up...

This site is protected by reCAPTCHA and the Google Privacy Policy and Terms of Service apply.
See all newsletters
See all newsletters

Log in or create an account to post a comment.

Sign up Log in

Become a member and get full access to FineHomebuilding.com

Decks

Decks

Hundreds of articles and videos by top deck-building pros on how to design and build a beautiful, sturdy, and safe deck

View Project Guide

View All Project Guides »

Become a member and get unlimited site access, including the Decks Project Guide.

Start Free Trial

Design & Planning
  • Basic Design Options
  • Generating Plans
  • Calculating Deck Loads
  • Code Compliance
Tools & Materials
  • Deck Building Tools
  • Foundation and Framing Materials
  • Decking Materials
  • Fasteners and Hardware
Footings & Foundations
  • Choosing a Foundation
  • Sizing and Laying Out Footings
  • Excavation
  • Pouring the Foundation
Framing a Deck
  • Framing Overview
  • Installing the Ledger
  • Setting Posts and Beams
  • Installing Joists
Installing Decking
  • Decking Basics
  • Installation Process
  • Adding Fascia and Other Decorative Elements
Installing Railings
  • Installing Deck Railing Posts
  • Building Wood Rails and Balustrades
  • Non-Wood Railing Options
  • Installing Nonwood Balustrades
Deck Stairs
  • Deck Stairs Overview
  • Laying Out, Cutting, and Installing the Stringers
  • Installing Treads, Risers, and Stair Railings
Custom Details
  • Benches, Planters, and Privacy Features
  • Pergolas
  • Lighting
Finishes, Repairs, and Maintenance
  • Deck Finishes
  • Cleaning and Refinishing
  • Inspection and Repair
Complete Deck Builds
  • Grade-Level Decks
  • Raised Decks

Fine Home Building

Newsletter Sign-up

  • Fine Homebuilding

    Home building tips, offers, and expert advice in your inbox.

  • Green Building Advisor

    Building science and energy efficiency advice, plus special offers, in your inbox.

  • Old House Journal

    Repair, renovation, and restoration tips, plus special offers, in your inbox.

Signing you up...

This site is protected by reCAPTCHA and the Google Privacy Policy and Terms of Service apply.
See all newsletters

Follow

  • Fine Homebuilding

    Dig into cutting-edge approaches and decades of proven solutions with total access to our experts and tradespeople.

    Start Free Trial Now
    • Facebook
    • Instagram
    • X
    • LinkedIn
  • GBA Prime

    Get instant access to the latest developments in green building, research, and reports from the field.

    Start Free Trial Now
    • Facebook
    • YouTube
  • Old House Journal

    Learn how to restore, repair, update, and decorate your home.

    Subscribe Now
    • Facebook
    • Instagram
    • X

Membership & Magazine

  • Online Archive
  • Start Free Trial
  • Magazine Subscription
  • Magazine Renewal
  • Gift a Subscription
  • Customer Support
  • Privacy Preferences
  • About
  • Contact
  • Advertise
  • Careers
  • Terms of Use
  • Site Map
  • Do not sell or share my information
  • Privacy Policy
  • Accessibility
  • California Privacy Rights

© 2025 Active Interest Media. All rights reserved.

Fine Homebuilding receives a commission for items purchased through links on this site, including Amazon Associates and other affiliate advertising programs.

  • Home Group
  • Antique Trader
  • Arts & Crafts Homes
  • Bank Note Reporter
  • Cabin Life
  • Cuisine at Home
  • Fine Gardening
  • Fine Woodworking
  • Green Building Advisor
  • Garden Gate
  • Horticulture
  • Keep Craft Alive
  • Log Home Living
  • Military Trader/Vehicles
  • Numismatic News
  • Numismaster
  • Old Cars Weekly
  • Old House Journal
  • Period Homes
  • Popular Woodworking
  • Script
  • ShopNotes
  • Sports Collectors Digest
  • Threads
  • Timber Home Living
  • Traditional Building
  • Woodsmith
  • World Coin News
  • Writer's Digest
Active Interest Media logo
X
X
This is a dialog window which overlays the main content of the page. The modal window is a 'site map' of the most critical areas of the site. Pressing the Escape (ESC) button will close the modal and bring you back to where you were on the page.

Main Menu

  • How-To
  • Design
  • Tools & Materials
  • Video
  • Blogs
  • Forum
  • Project Guides
  • Reader Projects
  • Magazine
  • Members
  • FHB House

Podcasts

  • FHB Podcast
  • ProTalk

Webinars

  • Upcoming and On-Demand

Podcasts

  • FHB Podcast
  • ProTalk

Webinars

  • Upcoming and On-Demand

Popular Topics

  • Kitchens
  • Business
  • Bedrooms
  • Roofs
  • Architecture and Design
  • Green Building
  • Decks
  • Framing
  • Safety
  • Remodeling
  • Bathrooms
  • Windows
  • Tilework
  • Ceilings
  • HVAC

Magazine

  • Current Issue
  • Past Issues
  • Magazine Index
  • Subscribe
  • Online Archive
  • Author Guidelines

All Access

  • Member Home
  • Start Free Trial
  • Gift Membership

Online Learning

  • Courses
  • Project Guides
  • Reader Projects
  • Podcast

More

  • FHB Ambassadors
  • FHB House
  • Customer Support

Account

  • Log In
  • Join

Newsletter

Get home building tips, offers, and expert advice in your inbox

Signing you up...

This site is protected by reCAPTCHA and the Google Privacy Policy and Terms of Service apply.
See all newsletters
See all newsletters

Follow

  • X
  • YouTube
  • instagram
  • facebook
  • pinterest
  • Tiktok

Join All Access

Become a member and get instant access to thousands of videos, how-tos, tool reviews, and design features.

Start Your Free Trial

Subscribe

FHB Magazine

Start your subscription today and save up to 81%

Subscribe

This is your last free article.

Don't miss another expert tip or technique from building pros. Start your free trial today.

Start your FREE trial

Already a member? Log in

We hope you’ve enjoyed your free articles. To keep reading, become a member today.

Get complete site access to expert advice, how-to videos, Code Check, and more, plus the print magazine.

Start your FREE trial

Already a member? Log in

Privacy Policy Update

We use cookies, pixels, script and other tracking technologies to analyze and improve our service, to improve and personalize content, and for advertising to you. We also share information about your use of our site with third-party social media, advertising and analytics partners. You can view our Privacy Policy here and our Terms of Use here.

Cookies

Analytics

These cookies help us track site metrics to improve our sites and provide a better user experience.

Advertising/Social Media

These cookies are used to serve advertisements aligned with your interests.

Essential

These cookies are required to provide basic functions like page navigation and access to secure areas of the website.

Delete My Data

Delete all cookies and associated data