FHB Logo Facebook LinkedIn Email Pinterest Twitter X Instagram Tiktok YouTube Plus Icon Close Icon Navigation Search Icon Navigation Search Icon Arrow Down Icon Video Guide Icon Article Guide Icon Modal Close Icon Guide Search Icon Skip to content
Subscribe
Log In
  • How-To
  • Design
  • Tools & Materials
  • Restoration
  • Videos
  • Blogs
  • Forum
  • Magazine
  • Members
  • FHB House
  • Podcast
Log In

Fine Homebuilding Project Guides

Decks

Guide Home
  • Design & Planning
  • Tools & Materials
  • Footings & Foundations
  • Framing a Deck
  • Installing Decking
  • Installing Railings
  • Deck Stairs
  • Custom Details
  • Finishes, Repairs, and Maintenance
  • Complete Deck Builds
How-To

Multi-Feature Curved Deck: Framing

Careful planning, copious blocking, and a slew of angled cuts are the keys to success when building a radiused deck.

By David Toht
  • X
  • facebook
  • linkedin
  • pinterest
  • email
  • add to favorites Log in or Sign up to save your favorite articles

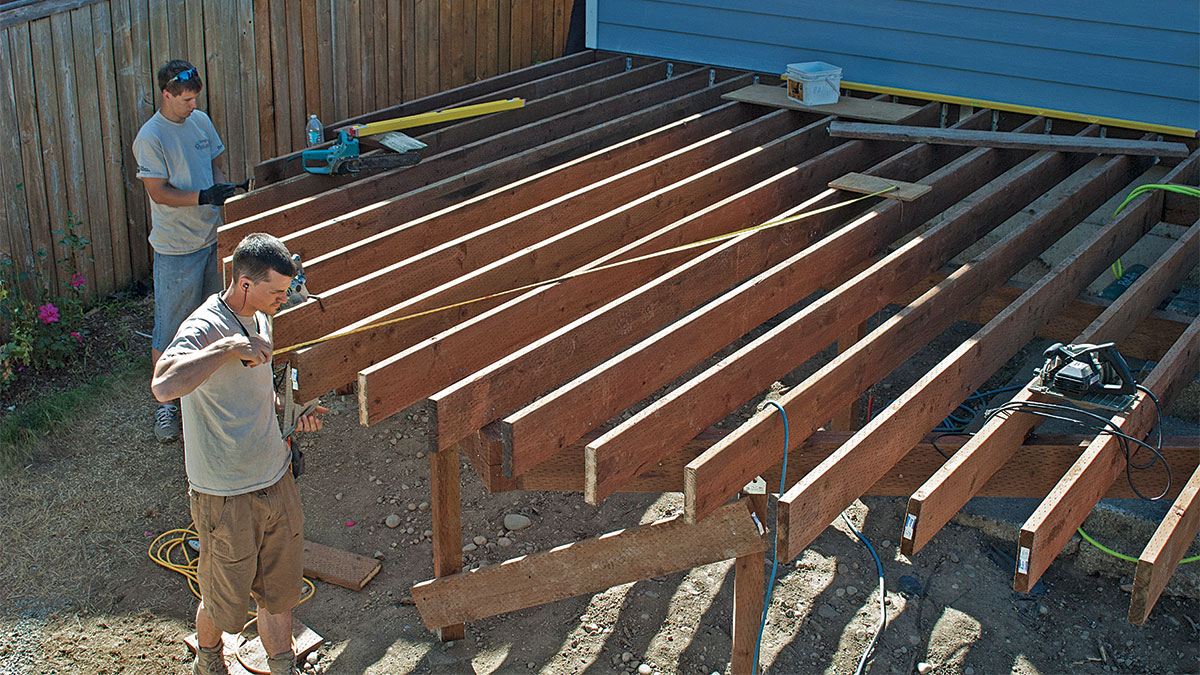
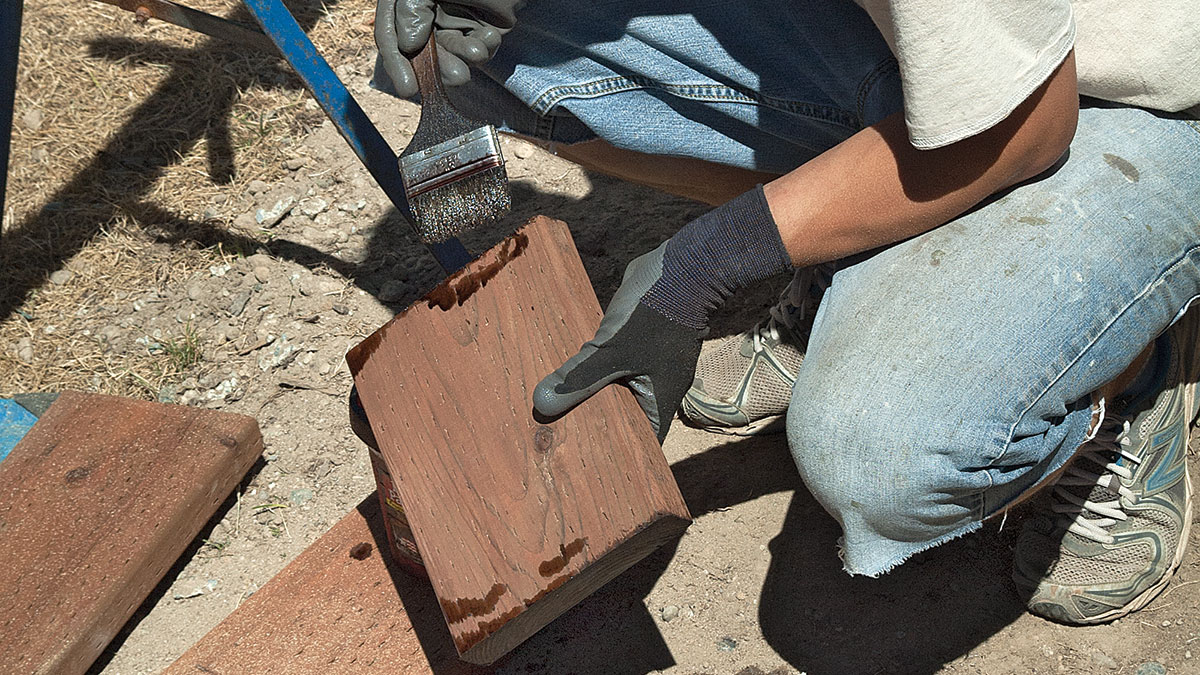
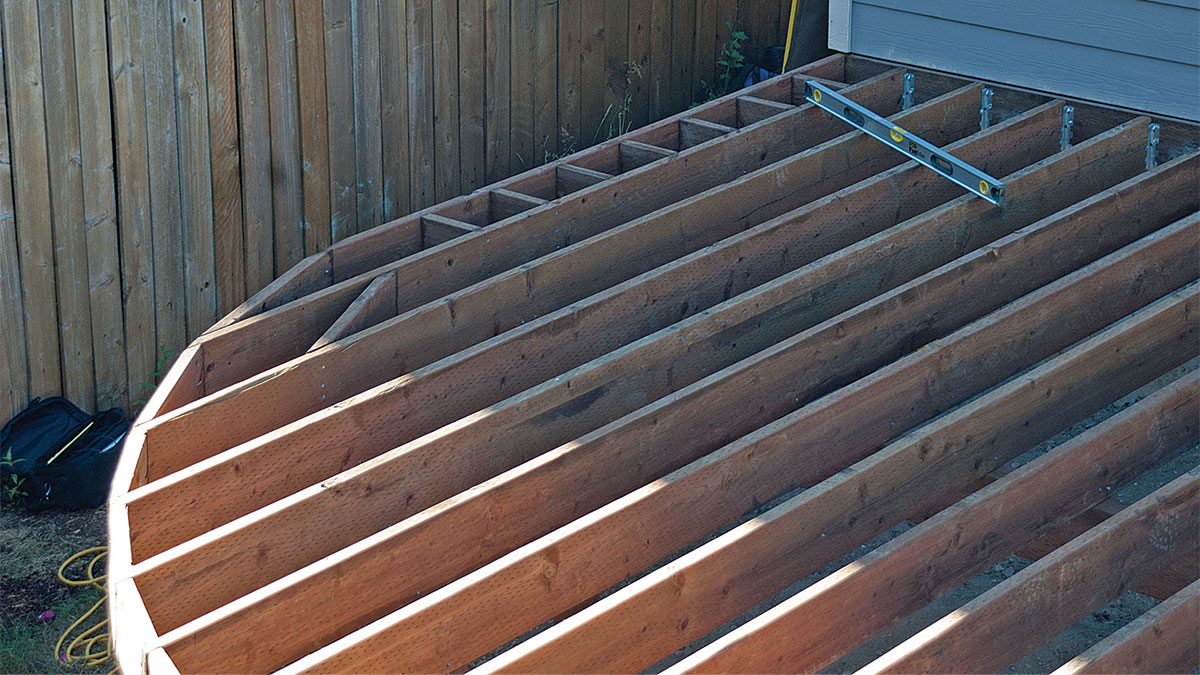
The trick to framing a cylindrical deck is providing a sound structural foundation while also making sure every cut end of the decking is fully supported. That takes planning and, inevitably, reworking things until you have it right. Screw fasteners help. If you have to revise your framing, it is easy to back out fasteners and start again.

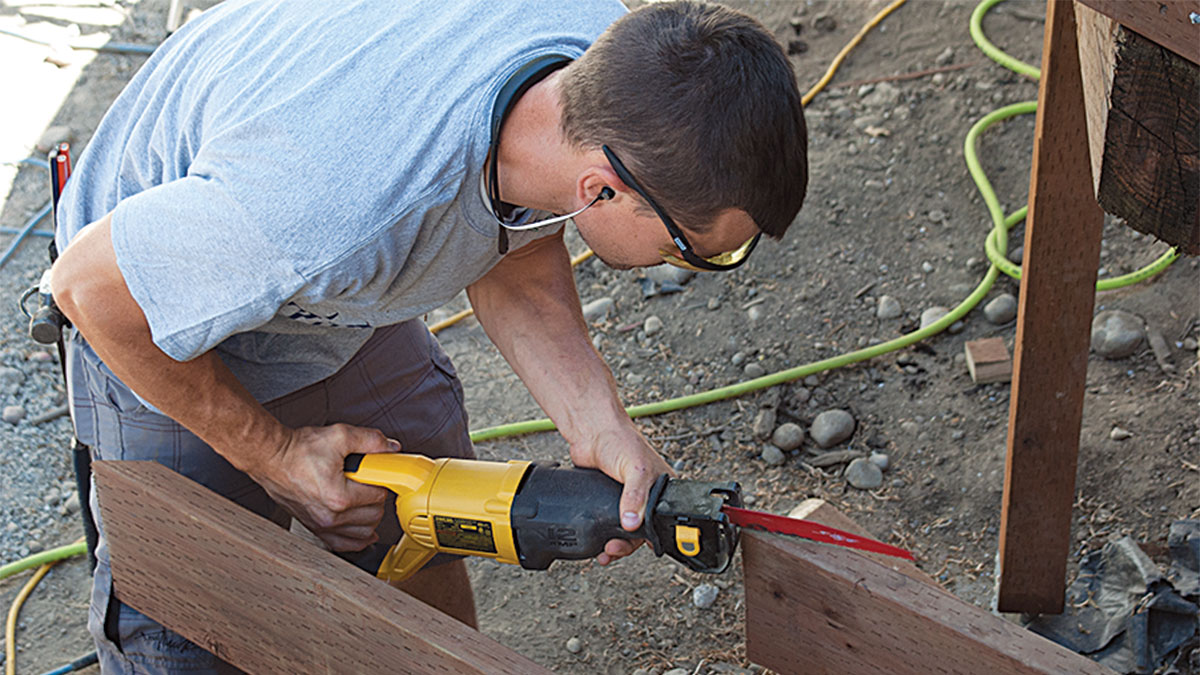
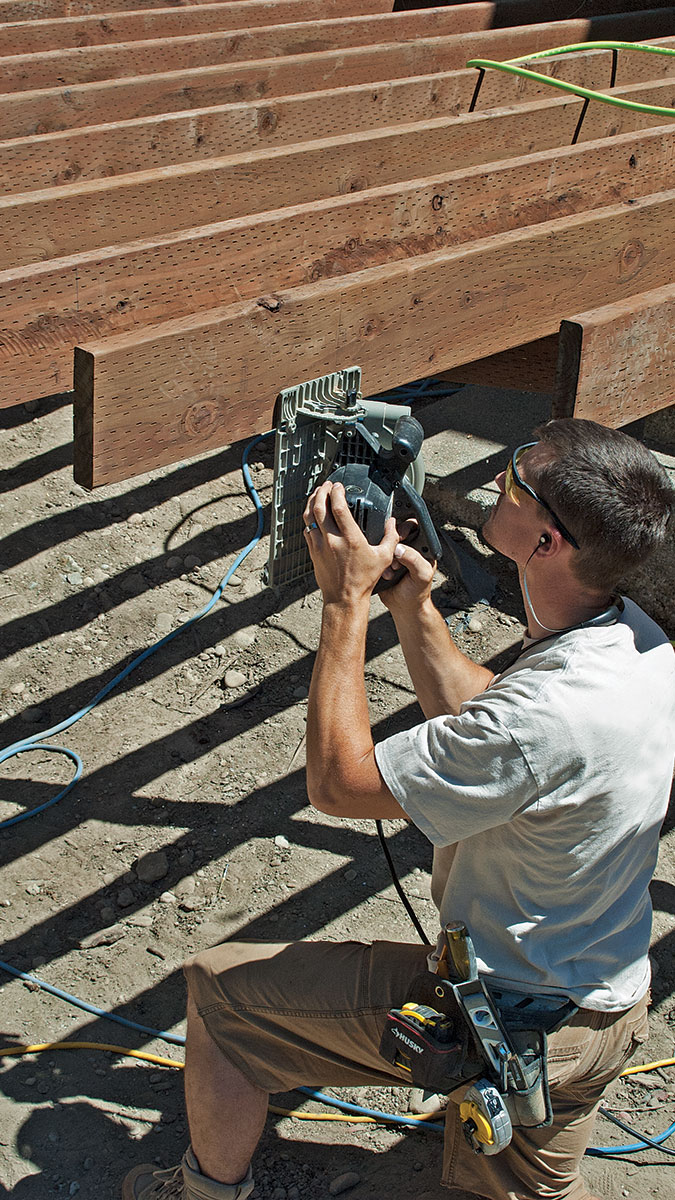
Cutting the joists to a radius means making a multitude of angled cuts. A conventional 90-degree cut is the shortest distance from one side of a board to the other. Vary from 90 degrees and you have a lot more wood to cut through—a sharp angle can be like cutting through an 8-in. beam. Such angles aren’t possible with the 7-1/4-in. blade on most circular saws. Instead, pros use an electric chainsaw (see step 3). Amateurs often find a reciprocating saw less intimidating, although slower.

TIP

A long, wood-cutting blade on a reciprocating saw will do the job of making an angled cut, though it cuts more slowly than a chainsaw. Mark the top, bottom, and both sides of the joist so you can make corrections if the blade wanders.

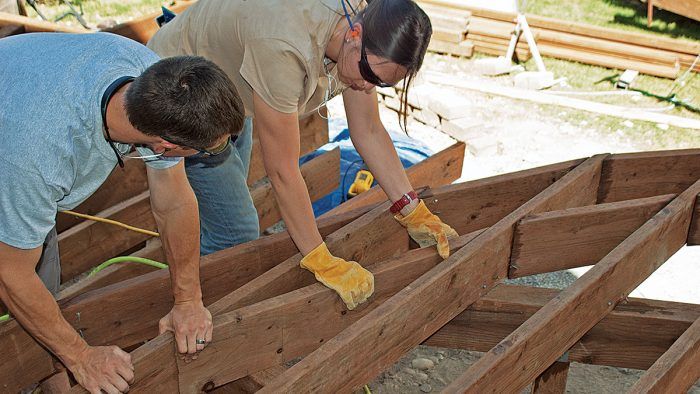
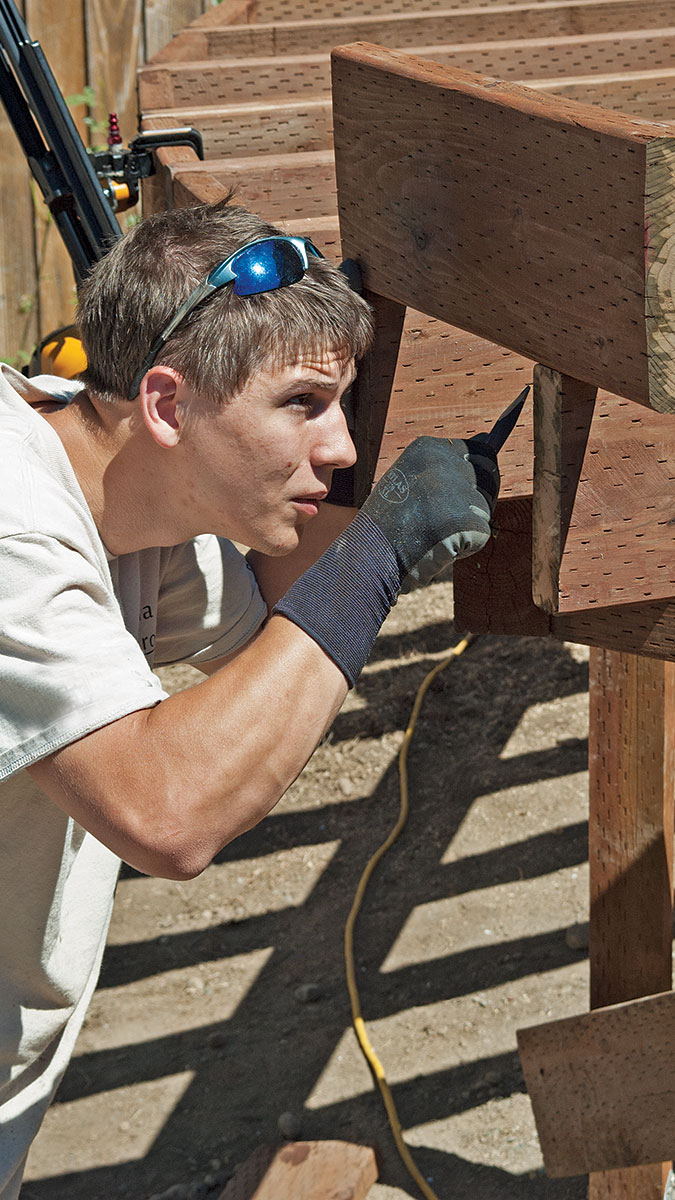
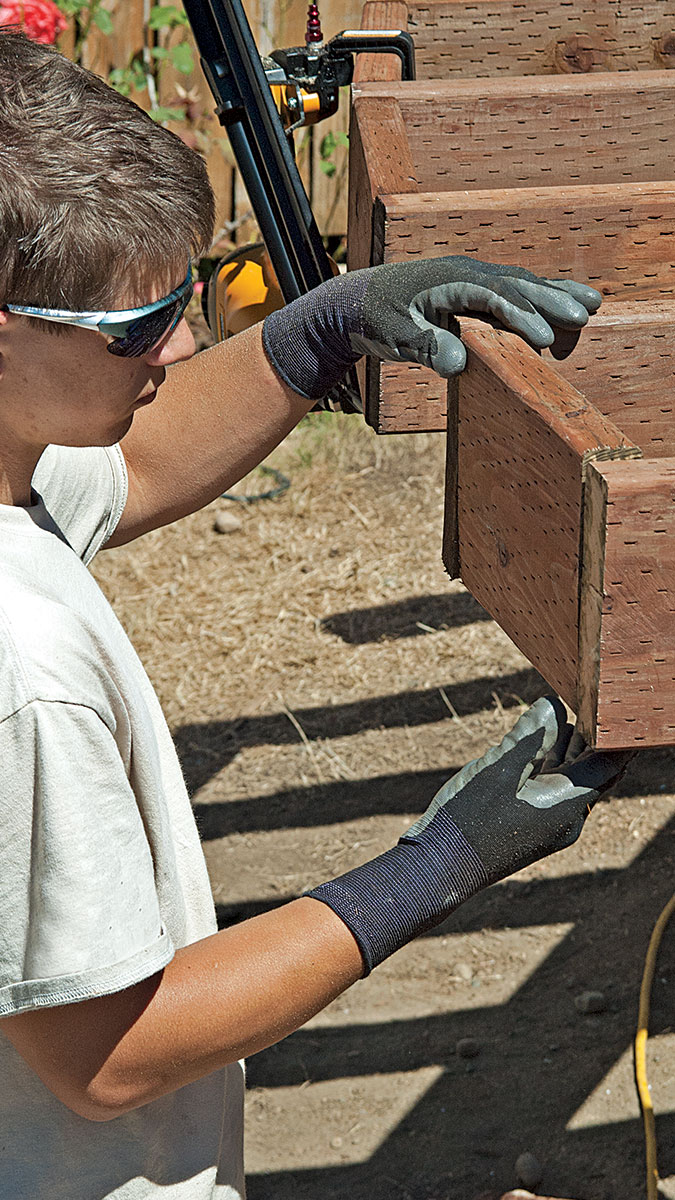
Blocking between the joists is a slow process of marking, cutting, checking, and recutting. It takes careful planning to locate the blocking so it provides support where needed but is covered by decking to avoid possible rot pockets.

Post, beam, and ledger installation is much like any deck. It is when the joists go on that the fun begins. Here’s how to install joists and blocking on a radius deck.
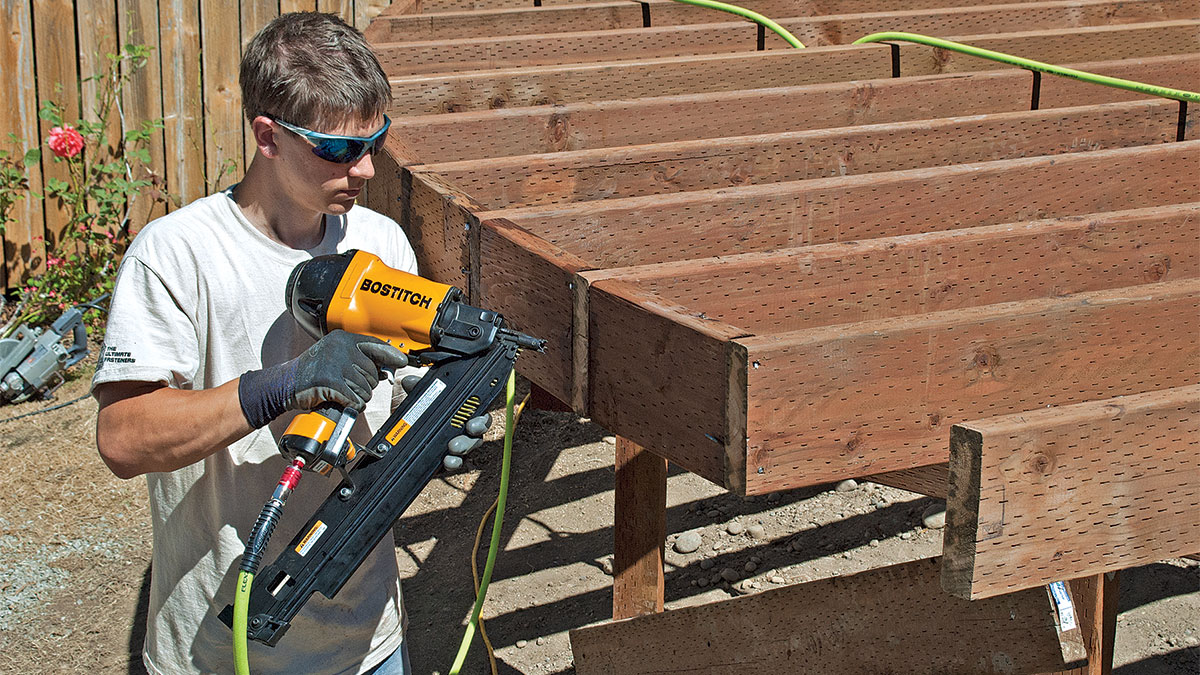
1. Mark the radius. With the footings, posts, beams, and ledgers in place, install the joists. Let each joist run wild. A scrap of plywood attached to the joists provides a stable base for marking the centerpoint. By hooking a tape measure onto a deck screw drilled into the centerpoint, each joist can be marked with the proper angle for cutting.

2. Trim the joists.
When the angle is not too severe, some cuts can be made with a circular saw.
3. Make angled cuts with a chain saw
. Sharp angles call for cuts beyond the ability of a circular saw. An electric chainsaw does the job quickly and, with practice, makes a surprisingly accurate cut.
4. Mark the blocking.
Perimeter blocking stabilizes the joists, provides a nailing surface for the picture-frame edging that wraps each level, and supports the skirting. Holding each piece in place and marking as shown is much more accurate than attempting to measure each piece.
5. Test-fit the blocking.
It can be tough to cut the blocking right the first time. Test-fit each piece so it is tight but not too tight.
6. Coat cut the edges.
Once you are satisfied with the fit, coat all cut edges with preservative.
7. Fasten the blocking.
Fasten the blocking by nailing through the joist and into the blocking where you have a clear shot and toenailing (as shown) where the previous block is in the way.

TIP

If you aren’t comfortable with a pneumatic nailer, deck screws hold even better but are more labor intensive. To avoid a split and to ease driving, you need to drill a pilot hole for each screw before fastening—an extra step.


8. Begin the second course of blocking.
The edge of this deck will be finished with two bent pieces of decking. To provide an adequate nailing surface, a second course of blocking is needed. Cut and fasten the blocking along the straight edge of the deck.
9. Continue the second course of blocking.
Measure, allowing for the two courses of bent decking, a 3/8-in. gap and a 3/4-in. overhang beyond the skirting. Position the blocking so it will be completely covered by the decking.

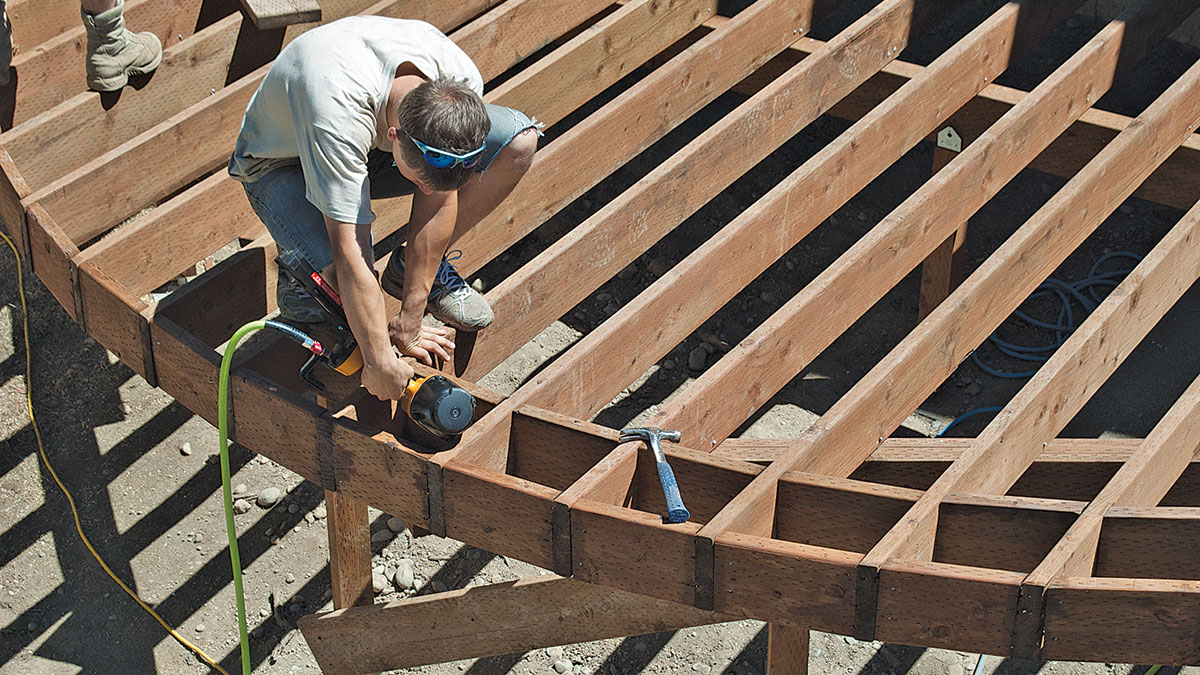
10. Prepare for mega-blocking. Some of the blocking will seem to be almost joist length and call for very acute angle cuts. These are the pieces that take some finesse to get right. Complete the blocking on both levels of the deck.

Fine Homebuilding Recommended Products

Fine Homebuilding receives a commission for items purchased through links on this site, including Amazon Associates and other affiliate advertising programs.

Jigsaw

When it comes to fitting and installing decking, a cordless jigsaw is a must-have for custom cuts — especially around posts.
Buy at Amazon

Standard Marking Chalk

We like white chalk because it’s non-permanent and wears off easily — this is especially helpful when marks are exposed and need to disappear.
Buy at Amazon

4-Gallon Piston Backpack Sprayer

This sprayer holds a large amount of solution and the backpack design keeps your hands free, making maintaining and cleaning a deck a breeze.
Buy at Amazon
Previous: Multi-Feature Curved Deck: Introduction Next: Multi-Feature Curved Deck: Decking

Guide

Decks

Chapter

Complete Deck Builds

Sign up for eletters today and get the latest how-to from Fine Homebuilding, plus special offers.

Signing you up...

This site is protected by reCAPTCHA and the Google Privacy Policy and Terms of Service apply.
See all newsletters
See all newsletters

Log in or create an account to post a comment.

Sign up Log in

Become a member and get full access to FineHomebuilding.com

Decks

Decks

Hundreds of articles and videos by top deck-building pros on how to design and build a beautiful, sturdy, and safe deck

View Project Guide

View All Project Guides »

Become a member and get unlimited site access, including the Decks Project Guide.

Start Free Trial

Design & Planning
  • Basic Design Options
  • Generating Plans
  • Calculating Deck Loads
  • Code Compliance
Tools & Materials
  • Deck Building Tools
  • Foundation and Framing Materials
  • Decking Materials
  • Fasteners and Hardware
Footings & Foundations
  • Choosing a Foundation
  • Sizing and Laying Out Footings
  • Excavation
  • Pouring the Foundation
Framing a Deck
  • Framing Overview
  • Installing the Ledger
  • Setting Posts and Beams
  • Installing Joists
Installing Decking
  • Decking Basics
  • Installation Process
  • Adding Fascia and Other Decorative Elements
Installing Railings
  • Installing Deck Railing Posts
  • Building Wood Rails and Balustrades
  • Non-Wood Railing Options
  • Installing Nonwood Balustrades
Deck Stairs
  • Deck Stairs Overview
  • Laying Out, Cutting, and Installing the Stringers
  • Installing Treads, Risers, and Stair Railings
Custom Details
  • Benches, Planters, and Privacy Features
  • Pergolas
  • Lighting
Finishes, Repairs, and Maintenance
  • Deck Finishes
  • Cleaning and Refinishing
  • Inspection and Repair
Complete Deck Builds
  • Grade-Level Decks
  • Raised Decks

Fine Home Building

Newsletter Sign-up

  • Fine Homebuilding

    Home building tips, offers, and expert advice in your inbox.

  • Green Building Advisor

    Building science and energy efficiency advice, plus special offers, in your inbox.

  • Old House Journal

    Repair, renovation, and restoration tips, plus special offers, in your inbox.

Signing you up...

This site is protected by reCAPTCHA and the Google Privacy Policy and Terms of Service apply.
See all newsletters

Follow

  • Fine Homebuilding

    Dig into cutting-edge approaches and decades of proven solutions with total access to our experts and tradespeople.

    Start Free Trial Now
    • Facebook
    • Instagram
    • X
    • LinkedIn
  • GBA Prime

    Get instant access to the latest developments in green building, research, and reports from the field.

    Start Free Trial Now
    • Facebook
    • YouTube
  • Old House Journal

    Learn how to restore, repair, update, and decorate your home.

    Subscribe Now
    • Facebook
    • Instagram
    • X

Membership & Magazine

  • Online Archive
  • Start Free Trial
  • Magazine Subscription
  • Magazine Renewal
  • Gift a Subscription
  • Customer Support
  • Privacy Preferences
  • About
  • Contact
  • Advertise
  • Careers
  • Terms of Use
  • Site Map
  • Do not sell or share my information
  • Privacy Policy
  • Accessibility
  • California Privacy Rights

© 2025 Active Interest Media. All rights reserved.

Fine Homebuilding receives a commission for items purchased through links on this site, including Amazon Associates and other affiliate advertising programs.

  • Home Group
  • Antique Trader
  • Arts & Crafts Homes
  • Bank Note Reporter
  • Cabin Life
  • Cuisine at Home
  • Fine Gardening
  • Fine Woodworking
  • Green Building Advisor
  • Garden Gate
  • Horticulture
  • Keep Craft Alive
  • Log Home Living
  • Military Trader/Vehicles
  • Numismatic News
  • Numismaster
  • Old Cars Weekly
  • Old House Journal
  • Period Homes
  • Popular Woodworking
  • Script
  • ShopNotes
  • Sports Collectors Digest
  • Threads
  • Timber Home Living
  • Traditional Building
  • Woodsmith
  • World Coin News
  • Writer's Digest
Active Interest Media logo
X
X
This is a dialog window which overlays the main content of the page. The modal window is a 'site map' of the most critical areas of the site. Pressing the Escape (ESC) button will close the modal and bring you back to where you were on the page.

Main Menu

  • How-To
  • Design
  • Tools & Materials
  • Video
  • Blogs
  • Forum
  • Project Guides
  • Reader Projects
  • Magazine
  • Members
  • FHB House

Podcasts

  • FHB Podcast
  • ProTalk

Webinars

  • Upcoming and On-Demand

Podcasts

  • FHB Podcast
  • ProTalk

Webinars

  • Upcoming and On-Demand

Popular Topics

  • Kitchens
  • Business
  • Bedrooms
  • Roofs
  • Architecture and Design
  • Green Building
  • Decks
  • Framing
  • Safety
  • Remodeling
  • Bathrooms
  • Windows
  • Tilework
  • Ceilings
  • HVAC

Magazine

  • Current Issue
  • Past Issues
  • Magazine Index
  • Subscribe
  • Online Archive
  • Author Guidelines

All Access

  • Member Home
  • Start Free Trial
  • Gift Membership

Online Learning

  • Courses
  • Project Guides
  • Reader Projects
  • Podcast

More

  • FHB Ambassadors
  • FHB House
  • Customer Support

Account

  • Log In
  • Join

Newsletter

Get home building tips, offers, and expert advice in your inbox

Signing you up...

This site is protected by reCAPTCHA and the Google Privacy Policy and Terms of Service apply.
See all newsletters
See all newsletters

Follow

  • X
  • YouTube
  • instagram
  • facebook
  • pinterest
  • Tiktok

Join All Access

Become a member and get instant access to thousands of videos, how-tos, tool reviews, and design features.

Start Your Free Trial

Subscribe

FHB Magazine

Start your subscription today and save up to 81%

Subscribe

We hope you’ve enjoyed your free articles. To keep reading, become a member today.

Get complete site access to expert advice, how-to videos, Code Check, and more, plus the print magazine.

Start your FREE trial

Already a member? Log in

Privacy Policy Update

We use cookies, pixels, script and other tracking technologies to analyze and improve our service, to improve and personalize content, and for advertising to you. We also share information about your use of our site with third-party social media, advertising and analytics partners. You can view our Privacy Policy here and our Terms of Use here.

Cookies

Analytics

These cookies help us track site metrics to improve our sites and provide a better user experience.

Advertising/Social Media

These cookies are used to serve advertisements aligned with your interests.

Essential

These cookies are required to provide basic functions like page navigation and access to secure areas of the website.

Delete My Data

Delete all cookies and associated data