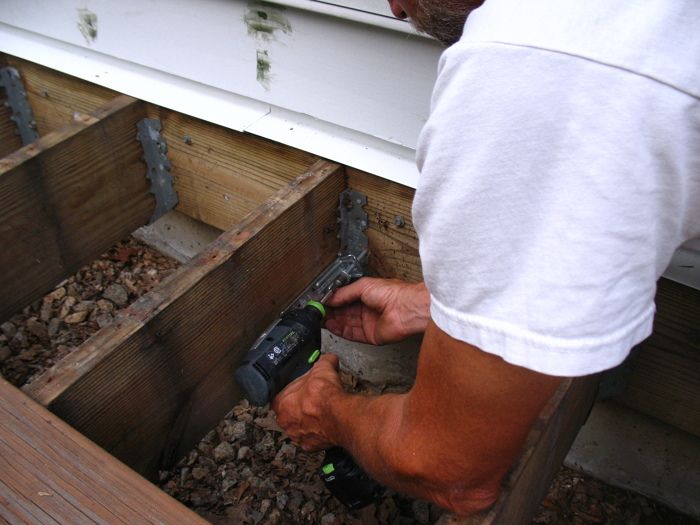
A hardware upgrade is standard practice whenever we replace the existing decking and railing with new. With the old deck boards removed we have access to the entire deck frame so adding and replacing connectors, and installing additional ledger fasteners is straight forward.
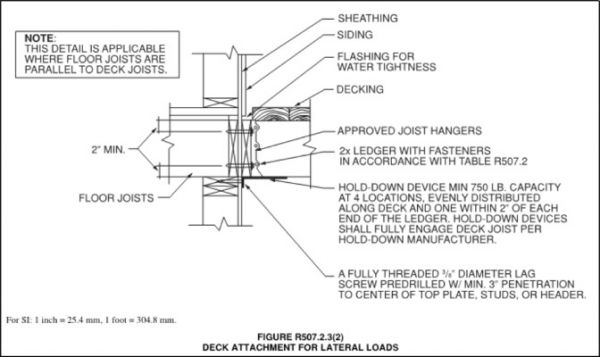
Even though our local building officials don’t require lateral load connections on existing decks, clients appreciate the improved safety measure. And the new 2015 lateral load option – four angle brackets screwed into the mudsill or wall plate and into deck joists – is much simpler to install than the previous option; a through-bolted connection linking two house joists to two deck joists.
 |
On a recent re-deck job I installed 8 of the new Simpson StrongTie DTT1 hardware using their SDWH TimberHex screws. The deck had two levels so there were essentially two separate decks to secure.
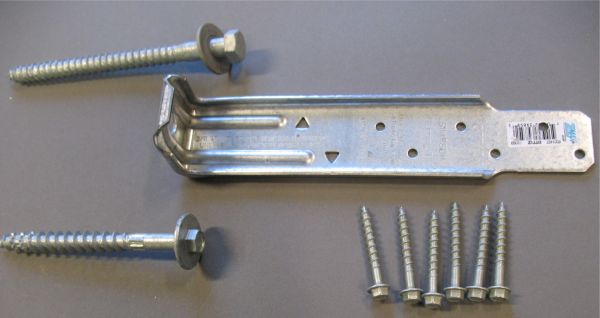 |
The code calls for 4 of the 750 lb. capacity connectors on a deck of any size. Two of the connectors must be installed within 2 feet of the ends of ledger and the other two spaced equally along the ledger per code.
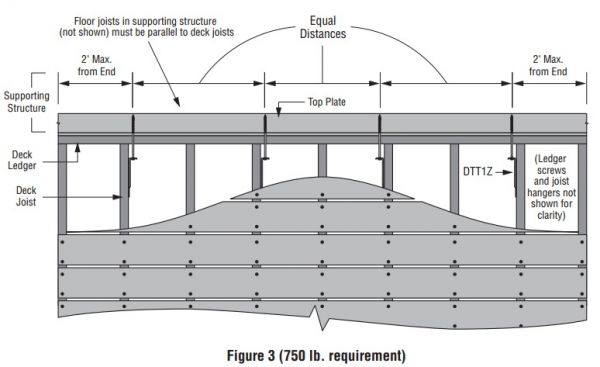
The hardware secures the 4 deck joists to the mudsill or wall top plate with a 3/8 in. lag screws or Simpson StrongTie SDWH screws. The key to a solid connection is driving the screws straight into the center of the sill or plate at least 3 in.
The IRC drawing depicts the hardware screwed to the bottom of a deck joist and the long screw driven into the center of the sill/plate. In the real-world it’s unlikely the alignment will match. Simpson StrongTie publishes a Technical Bulletin showing several options for mounting the DTT1 to the deck joist or blocking secured to a deck joist so sill/plate screw can be centered perfectly.
On this project, the mudsill was about 2 in. up from the bottom of the ledger so the DTT1 connectors could be mounted to the side of the joists. The flanges on the original joist hangers would ordinarily interfere with sill/plate screw but in this case the side cutouts on the hangers aligned with the mudsill so I didn’t have to pad the joists with blocks to avoid the flanges.
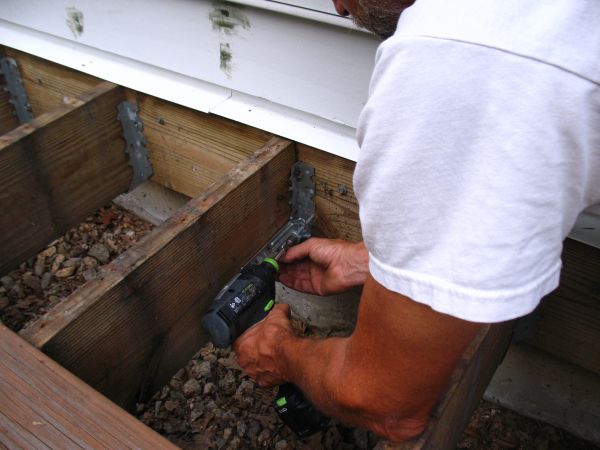
The DTT1 can be mounted to the deck joist first and then the screw can be driven into the sill/plate OR you can drive the screw in first and then mount the DTT1 to the deck joist or blocking. After trying to install the hardware both ways I found it much easier to drive the screw into the mudsill first and then screw the DTT1 to the side of the joist.
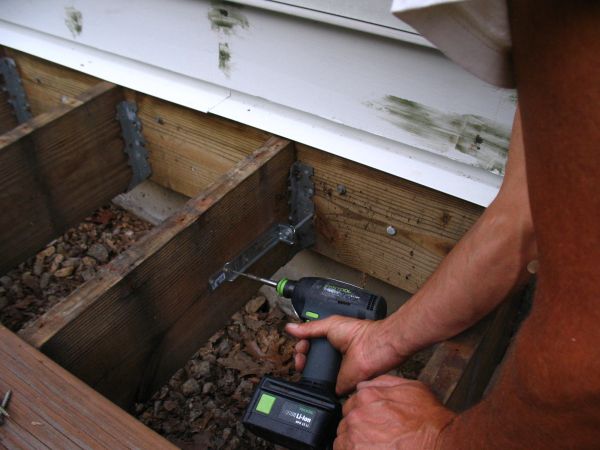
When using 3/8 in. lag screws to mount the hardware you have to drill a pilot hole through the ledger and sill/plate. The Simpson StrongTie SDWS TimberHex screws don’t require a pilot hole but I snapped off several during the installation. It’s likely that the screws hit knots in the 20 year old SYP mudsill or perhaps hit anchor bolts. After the forth screw broke off, I began piloting 3/16 in. holes and had no trouble driving the SDWS screws. Another advantage of boring a pilot hole even when they aren’t required is the screws track the hole and don’t veer off center following wood grain or knot edges.
The only shortcoming of the new lateral load connection is that the code only permits it to be used when the house joists run perpendicular to the house rim joist. Hopefully someone will conduct some testing to show that the connection still works when the house joists are parallel to the rim joist.
Fine Homebuilding Recommended Products
Fine Homebuilding receives a commission for items purchased through links on this site, including Amazon Associates and other affiliate advertising programs.

8067 All-Weather Flashing Tape

Handy Heat Gun

Reliable Crimp Connectors


