
The Care and Feeding of Wooden Decks
Frequent cleaning and periodic refinishing are the best ways to ensure a long and happy life for these vulnerable creatures.

Synopsis: A painting contractor explains how he cleans and refinishes exterior decks to protect the structure and keep it from becoming an eyesore. Pointers include how to detail structure to avoid problems in the first place.
The Eskimos have five dozen words for snow. Here in the waterlogged Pacific Northwest, weather forecasters have an equally diverse vocabulary whether they’re calling for light rain, showers, isolated storms, sprinkles, drizzle, mist, driving rain or mizzle. If you live here, you can expect to get wet nearly every day from September through June. I can’t imagine a less hospitable place to build a wooden deck. But to the average Seattle homeowner, a house with less than half the yard covered by cascading decks is unfinished.
I’d be happier if everyone built stone patios. But homeowners depend on me to make sure their decks aren’t reduced to a heap of compost. Fortunately, I can assure them that with modern technology and periodic maintenance, a deck can enjoy a long, productive life.
Penetrating finishes are better than paints
Materials for wooden decks vary from region to region, but none of them is maintenance-free. I use the same procedures for all wooden decks. When homeowners ask me beforehand how to finish a new deck, I caution against paint or solid stain. Any horizontal surface, especially one subjected to foot traffic, is extremely difficult to keep paint on. Even solid alkyd stains, which for years have been recommended for decks, are too brittle and merely sit on top of the wood (like paint), awaiting the opportunity to peel off.
I prefer penetrating finishes. Properly applied penetrating finishes such as semi transparent alkyd stains and clear wood preservatives are absorbed into the wood fibers to protect better against mold, mildew, rot and UV-degradation. Penetrating finishes are also easier to recoat because over time, they fade rather than flake.
The best penetrating finish I’ve found is Clear Wood Finish UV, which enhances the wood’s natural beauty but can also be tinted like a stain. CWF is an emulsified oil, so it cleans up like a latex but offers the protection of a petroleum product. I have found it far superior to the more popular paraffin based coatings (such as Thompson’s Water Seal) that require biannual re-treatment to be effective. Even with the best finishes, however, the surface of the deck needs to be recoated every three years to provide maximum protection for the wood.
Cleaning and pressure-washing come first
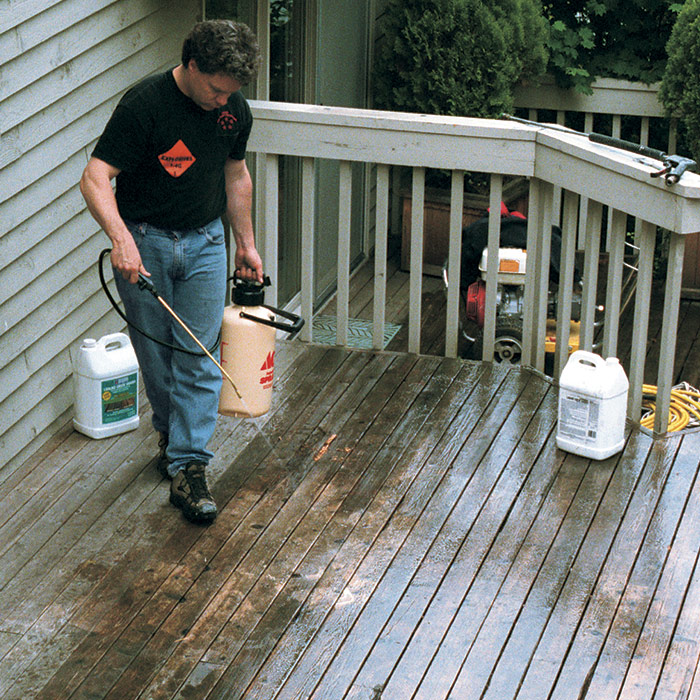
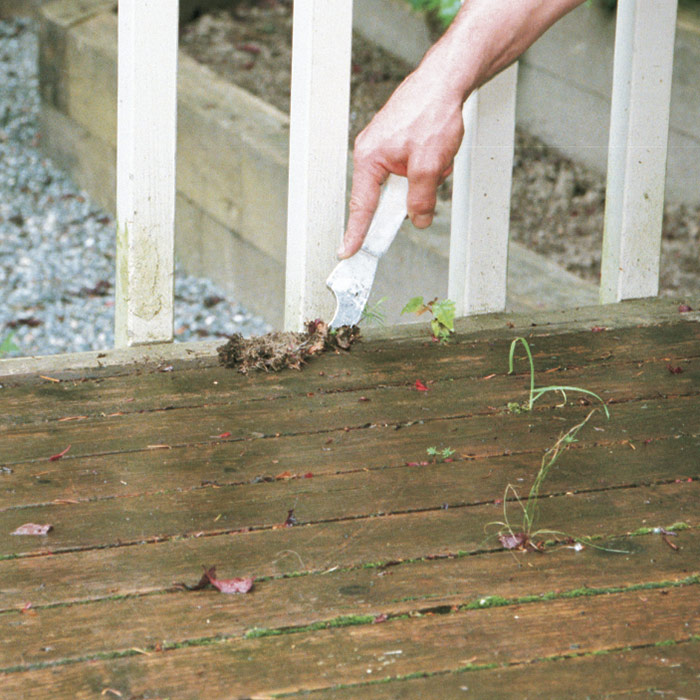
Unless they’ve been painted, I treat older decks basically the same as new ones. Every deck gets a thorough broom cleaning; while I’m sweeping an older deck, I check for damaged spots and mark any boards that need to be replaced. After all the leaves and dog hair have been swept away, I spray on a specially formulated deck cleaner, such as Revive. Applied full strength with a garden sprayer, the deck cleaner kills mold and mildew and cuts through dirt and oxidation. It also removes mill glazing from new decks, which means you don’t have to let new lumber “silver” for a year before applying a finish. The deck cleaner works almost immediately, so as soon as I’m finished spraying it on, I return to the starting point and begin a light pressure-washing.
A lot of people are afraid of using a pressure washer on a deck, and with good reason. Used improperly, a pressure washer can do more harm than good. In the right hands, however, a pressure washer prepares a deck for refinishing quickly and effectively. For cleaning decks, I use a 9-hp, 2500-psi machine with a 15° spray tip (15° is the angle formed by the fan of water as it shoots from the tip).
 |
 |
 |
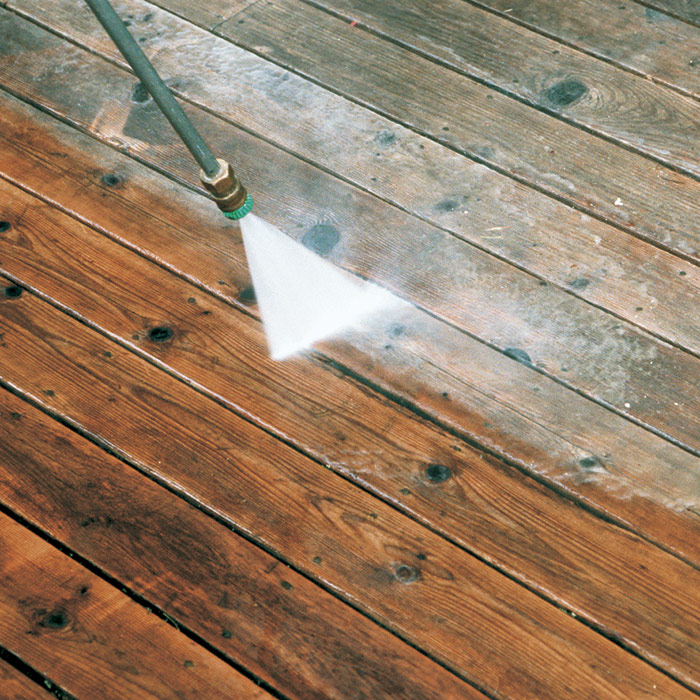
To avoid wasted motion, I spray a 6-ft. wide swath, then overlap the next swath by 12 in. to 18 in. to make sure that the edges blend together. For maximum cleaning power with minimal abrasion, I hold the spray tip 6 in. to 9 in. above the surface of the deck and sweep the wand over the boards in a flattened pendulum motion, lifting the wand away from the deck at the end of one pass and lowering it gradually back at the beginning of the next.
When I’m able to wiggle underneath the deck, I give the underside a quick pressure wash as well. I usually don’t find much mold or mildew, which would require an intensive wash; mostly I’m just concerned with cleaning out spider webs, splashed mud and other debris. It’s a dirty job, but somebody really ought to do it. After I wash the underside, the top gets another quick rinse.
Preparing the railings
While I’m spraying the deck, I also pressure-wash both sides of the railings. For most effective cleaning, I keep the fan of water as perpendicular to the vertical surfaces as I can. At the same time, I also direct the spray deep into the crevices to drive out all the bugs and gunk that have take up residence.
After washing the deck, I give the railing assembly the once-over, checking for signs of rot. I pay attention to the top of the handrail, especially if it has exposed fasteners, and to the end grain at the top of uncapped support posts. If I find any rotten spots, I use liquid borates (Wood Care Systems; ewoodcare.com) to kill the rot organism; then, after it has been allowed to dry, I use epoxy to repair the damage.
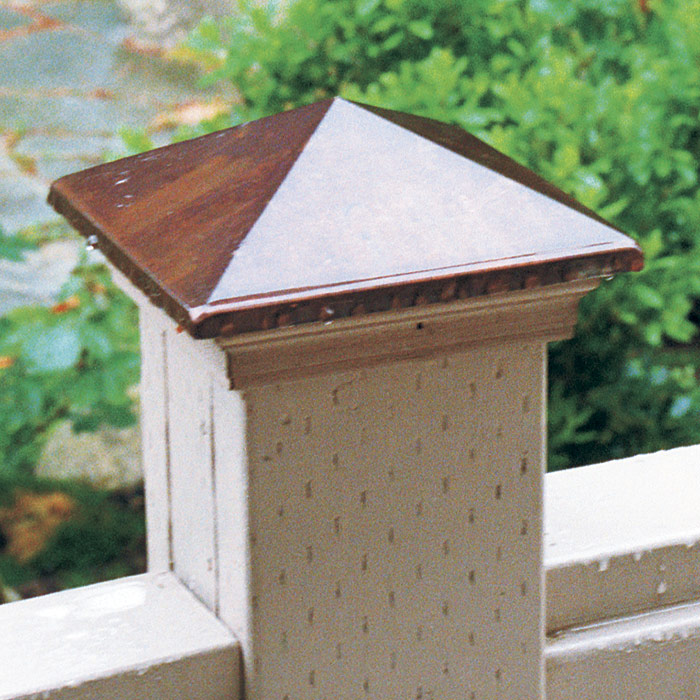
With so much end grain exposed to the elements, uncapped support posts are always a problem. If the design permits, I simply cut back the posts to solid wood, then install inexpensive but good-looking copper caps, which are available at any hardware store.
Brightening follows cleaning
Preparing a deck for finish actually involves two chemical treatments. A side effect of the cleaning stage is that it leaves even brand new decks looking tired and gray. But that’s just temporary. As soon as I finish pressure-washing, I fill up the garden sprayer with Deckmaster Wood Brightener and spray a liberal coating over all the bare wood. This oxalic-acid based product quickly restores wood darkened by age or chemicals to a like-new appearance. I usually let the brightener soak into the wood for 20 minutes or so, then rinse the deck lightly with the pressure washer.
Penetrating finish won’t soak in unless wood is dry, so after I’m done swabbing the decks, I allow them to dry for a minimum of three warm, rain-free days before I apply the finish. During the interim, I usually move on to another job, but before I leave, I replace the boards that I previously determined were too rotten to save. To make the new boards blend in, I pick a semitransparent stain from my collection that closely matches the color of the weathered deck boards. By the time the stain wears away, the new board will be almost unnoticeable.
 |
 |
 |
Sprayed finish gets all the nooks and crannies
There’s no reason you can’t finish a deck using brushes and rollers, but it’s much faster to use spray equipment. You can also get better coverage using a sprayer because it enables you to force the coating into tight spots that would be difficult or impossible to reach with a brush. Spray equipment is expensive to buy, but compared with the cost of labor, it’s cheap to rent. Sprayers and pressure washers are offered for rent at many paint-supply houses as well as at most rental centers.
With a brush, I’d start outside the deck on the tops of the railings and work my way down to the deck, then in toward the house. Spraying is tougher because I have to use masking to control overspray.
Which comes first, the deck or the railings?
When all the surfaces are getting the same finish, I generally spray both sides of the railings and leave the deck boards for last. If the railings are getting a different finish than the deck surface (as was the case on this job), I have to spray the deck first.
On this job, the railings were originally painted to match the trim of the house. Stripping all the paint would have cost a fortune, so I’d previously scraped and sanded the loose spots. When the deck finish was dry, the railings would get a fresh coat of stain.
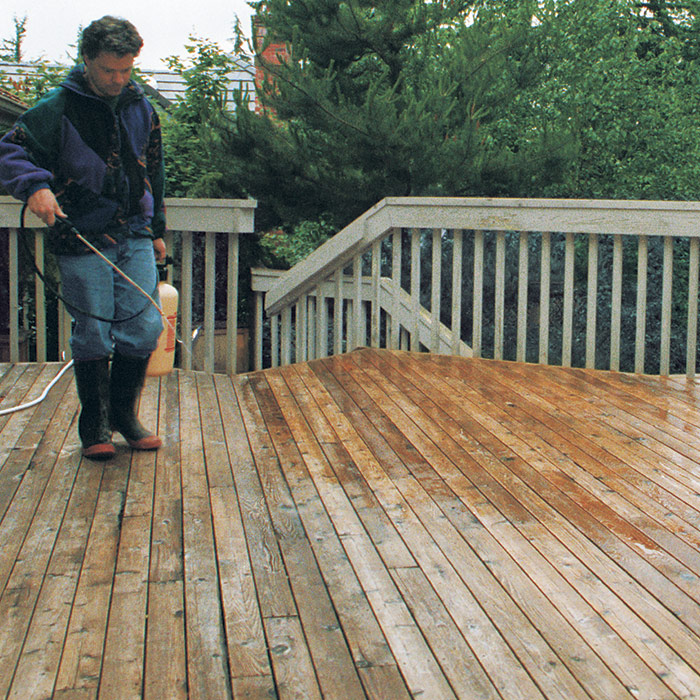
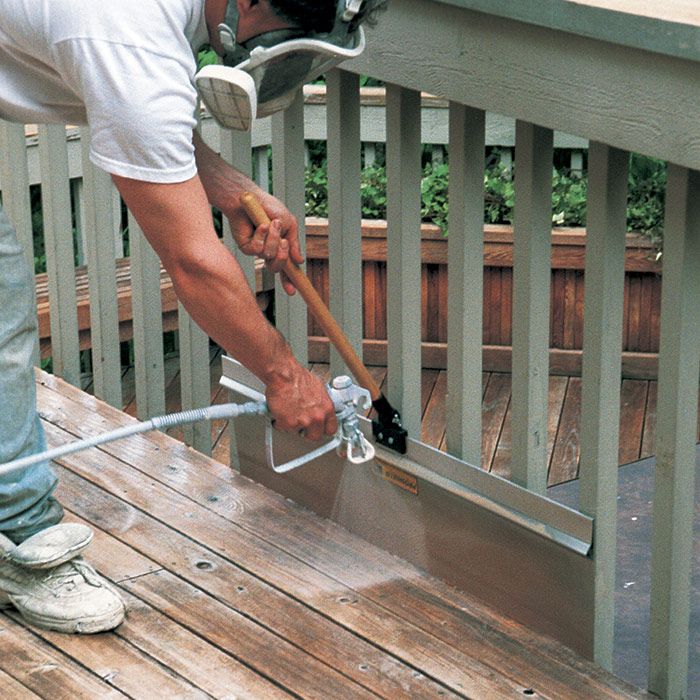
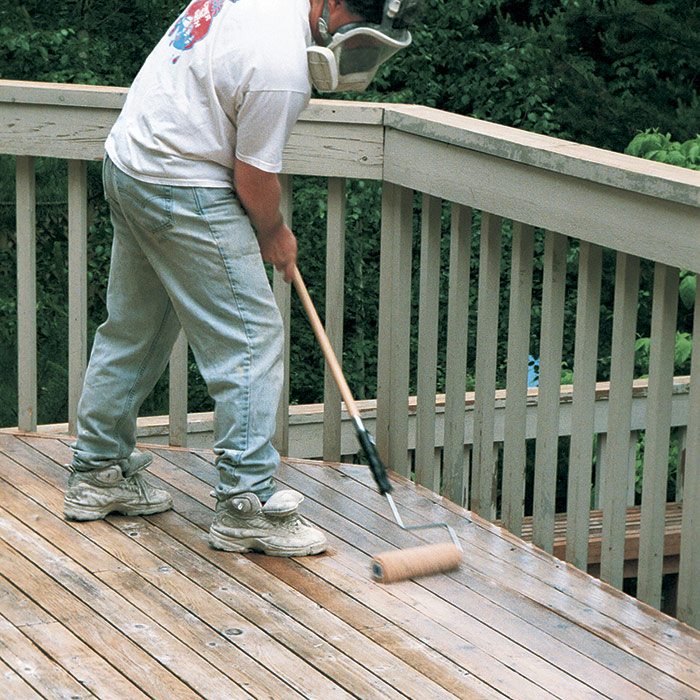
Using an airless paint sprayer with a #617 spray tip, I applied the CWF coating, moving lengthwise along the deck boards from one end of the deck to the other. I held the spray gun 12 in. to 18 in. from the surface and moved just fast enough to put down an even, wet coat. After every couple of passes, I put down the spray gun and rolled the finish using a 1/2-in. nap, 9-in. wide paint roller. After rolling, the deck boards should have an even, glossy sheen. If the penetrating finish soaks in completely, as it often does on thirsty, weathered boards, I spray another light coat before moving on to the next section. When I’m spraying alongside the house or the railings, I use a 4-ft. wide painting shield to control the overspray.
After the top of the deck has been coated, I crawl underneath, if it’s accessible, and soak the bottom of the boards, the joists, the beams, whatever I can get. In my experience, treating the underside of a deck even once can double its life span.
Mask carefully before spraying the railings
The downside to spraying the deck first is that I have to let it dry for 24 hours to 72 hours (depending on humidity) before I can finish the railings. When this deck was dry enough to walk on without leaving footprints, I started masking off the surfaces I didn’t want painted. To protect the house from overspray, I wrapped the first floor with a 9-ft. wide strip of plastic sheeting. I spread clean painter’s tarps and masking paper over the deck surface and then ran a strip of 3-ft. wide kraft paper around the outside of the balusters.
These railings were painted, so after removing the loose paint, I applied a coat of Sherwin-Williams solid latex stain. To spray the railings, I switched to a narrower (#213) spray tip, which puts out a more compact, directional spray fan than the tip I used for the deck boards. I started on one of the inside corners and worked counterclockwise, spraying the handrail in long, horizontal strokes,and the balusters in vertical strokes. Keeping the spray tip about 12 in. away from the railing, I covered the balusters on three sides and also tried to coat as much of the underside of the railing as possible. At the end of each pass with the spray gun, I brushed the finish using a disposable painting pad (if I’d been applying a penetrating finish, I would have used a lamb’s wool mitt).
Once the railing’s interior surface had dried to the touch (on a warm day, usually an hour or less), I removed the kraft paper and sprayed the outer surfaces of the balusters, as well as any other spots I wasn’t able to reach from the inside. I didn’t need to rehang the paper on the inside because all the vulnerable surfaces were already covered. As soon as I finished this application, the rest of the masking was pulled, a few small touch-ups were made with the disposable pad, and I was done. Unless homeowners really like having me around, I urge them to sweep the deck frequently and to wash it lightly once a year.
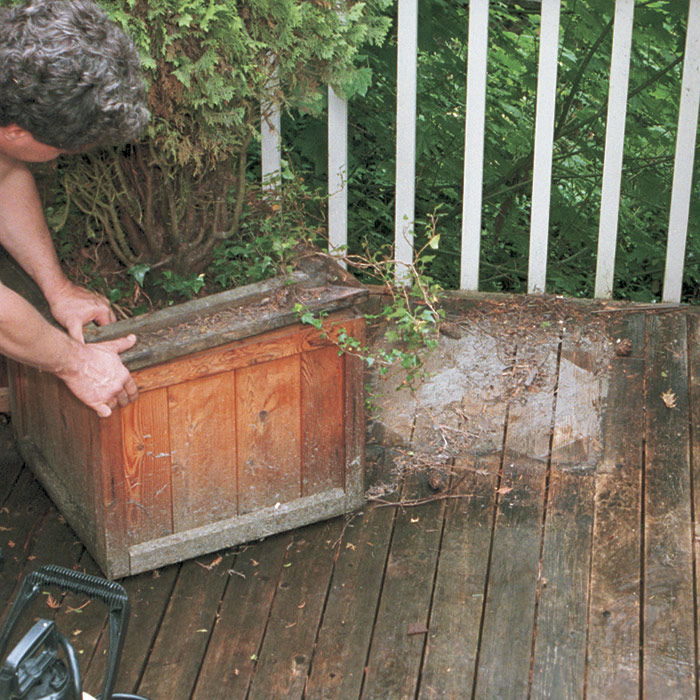
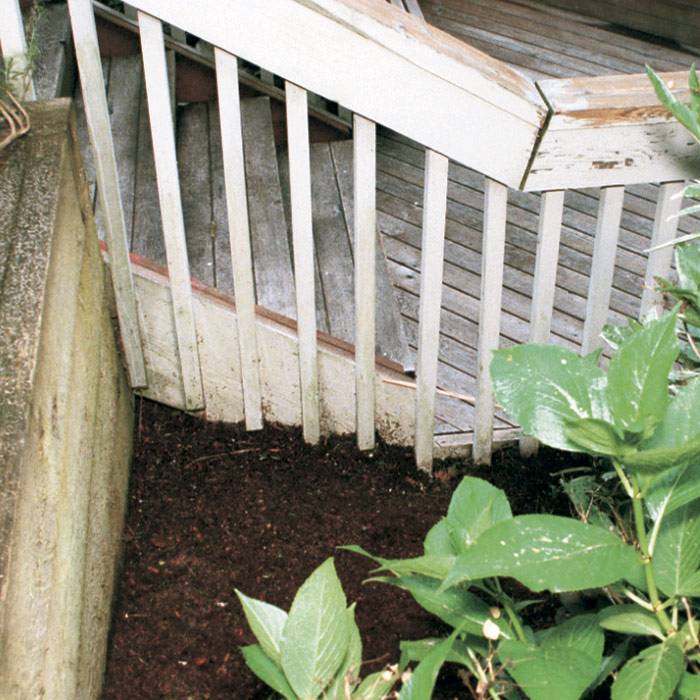
Avoiding Deck ProblemsUnfortunately, cleaning and refinishing a deck are not cure-alls. A lot of the problems I see with decks stem from the original construction and landscaping. By far the worst problem is improper flashing where the deck’s rim joist is attached to the house. This critical detail must be carefully designed, or the house as well as the deck will suffer. Another common problem is placing the deck too close to the ground. The proximity of the moist earth encourages rot to thrive as evaporation pulls moisture directly into the bottom of the deck. I like to see at least 1 ft. of airspace between the bottom of the joists and the ground. If a deck must be built closer to the ground, I recommend providing special drainage beneath the deck and then dipping all of the lumber in preservative before installation. Plants and decks don’t mix: Deck boards need air circulation to keep them healthy.
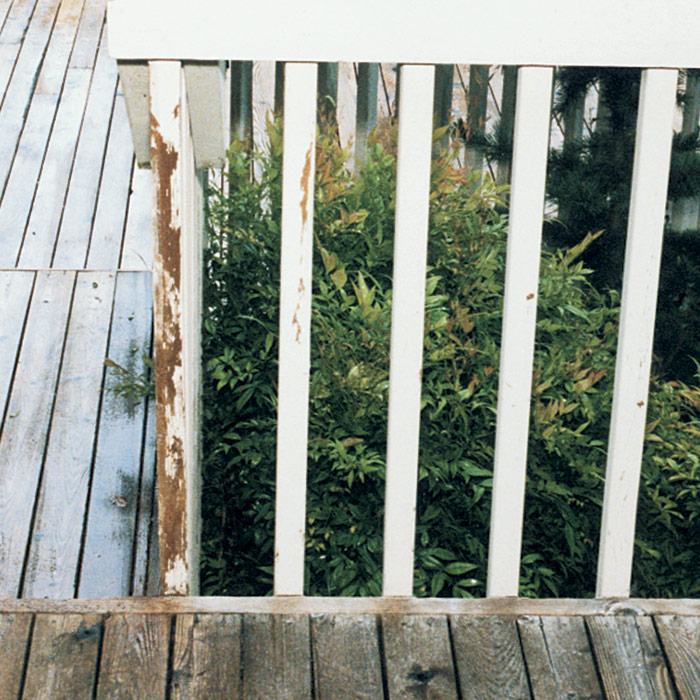
Fasteners can also be a problem. Deeply countersunk screws or air nails create hundreds of tiny petri dishes for rot to thrive in. Builders should try to set their fasteners flush with the deck surface (or you can try one of the concealed-fastening systems that are now available). In my experience, however, even deep pockets aren’t a problem as long as the deck is regularly cleaned and recoated. Railings are always a problem, especially when the handrails are made of wide, flat boards. Wide, flat surfaces are great places to set potted plants or to rest drinks, but they’re also great places for water to collect, which eventually causes cupping, checking and rot. To reduce cupping, the handrail needs to be relatively thick for its width; a 2×6 is far preferable to a 1×6. If the homeowners will stand for it, the top of the handrail should be beveled to shed water. To prevent cupping further, the handrail should be installed so that the annular rings curve down. —J. T. |
—Photos by Tom O’Brien.
For more photos and details on taking care of wooden decks, click the View PDF button below.
Fine Homebuilding Recommended Products
Fine Homebuilding receives a commission for items purchased through links on this site, including Amazon Associates and other affiliate advertising programs.
FastenMaster Screw Bolt Fastening System
Cepco BoWrench Decking Tool

Drill Driver/Impact Driver

