Episode 1: Drywall Tools for the First Coat
Learn about mechanical and automatic tools such as the taper, the compound tube, and the banjo to make your drywall job better and easier.
Sponsored by USG Sheetrock® Brand
There are a few different ways to finish drywall, but when you’re trying to be efficient, mechanical and automatic drywall tools make a big difference. I’ve developed a systematic approach to finishing drywall incorporating a variety of finishing tools, with specific tools I prefer to use in different situations.
The automatic taper
The first tool to get familiar with is the automatic taper. Compound fills the barrel, and tape is threaded through to the top. When pressed and run along the drywall, it applies compound and tape to walls, seams, and inside corners all in one step. To cut the tape at the end of a seam or an inside corner, you simply pull back on the handle, drawing a knife across the tape inside the head and cutting a nice straight line.
Embedding the tape in the proper compound is important. I use USG Sheetrock® Brand All Purpose joint compound. The only thing that is added to the Joint Compound is water; I don’t use any other additives (like dish soap, for example). It’s also important to mix the compound to get the right consistency, even if you buy it premixed from the supplier.
Filling the automatic taper with compound also requires a pump, which transfers compound from the bucket and into the taper. I keep my fingers tucked into the end so I can feel when it’s full. At this point, the tube probably weighs 30 lb. or more.
Once I’m ready to place the automatic taper against the wall and start putting compound on the seams, I begin with butted seams on the walls and ceilings. I put the tape on those seams first, embed it, and then go through and do the overlapping seams. I begin at the bottom of the seam, rolling the taper up. Once I get a few inches from the top, I pull back and forward on the handle to cut the tape.
I use an 8-in. taping knife with aluminum edges to embed the tape. When embedding, I put it really tight to the drywall because on a butted seam I want to make sure it’s as flat as can be. Occasionally, you might come across a little dry spot. If that happens, just fill it by hand as you go.
When it’s filled, the automatic taper uses about 75 ft. of tape per fill. So if I fill it three times, I’ll use a full 250-ft. roll of tape.
Corner rolling and flushing tools
Next, I start working on inside corners, and because of the extra reach from the taper, I can stay on the ground; I don’t have to get on my stilts. Using this tool creases and places the compound and tape, but once it’s in place I need to embed the tape and smooth the compound out. This is called embedding and flushing, and I use corner roller tools to get these areas smooth. These tools are attached to a pole, and they roll the compound nice and tight into the corner. Before rolling the corner, I like to put a little compound on the roller by dipping it into the bucket of mud so I’m not starting out with a perfectly dry roller. Then I start right in the middle of the corner, rolling gently at first to avoid making wrinkles. Once it’s started, more pressure can be applied.
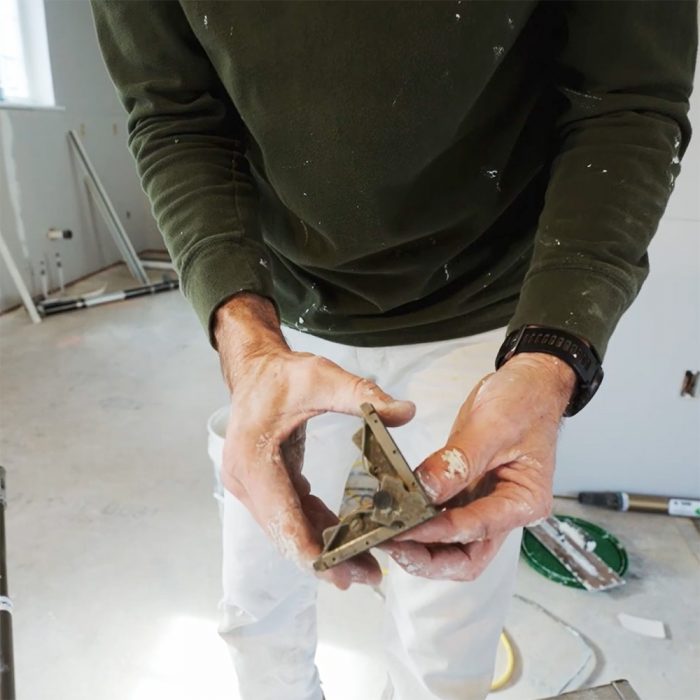
Once it’s rolled and embedded, the compound needs to be smoothed out with a corner flusher and a corner finisher. The corner finisher is a bit more complicated. It has springs in it that adjust to the degree of the corner, because corners are not always perfectly 90°. The edges of the tool smooth the compound out.
The corner flusher is a simpler version of the corner finisher. It doesn’t have all those moving parts, but it still does flex enough to adjust to different widths or different angled corners. The corner flusher is used to smooth the compound out, but once again, I like to dip it in the joint compound to get it acclimated before it goes on the wall.
Start by moving from the bottom, and push up so you don’t pull joint compound down and into a puddle on the floor. You can apply quite a bit of pressure, and I usually go over it twice. The poles that the corner flusher attaches to are telescopic, so I can make the handle a bit longer or shorter.
Typically I would do this process for the whole room or even the whole downstairs before I started pointing it up and cleaning it off. But if you have excess that drips down while you’re working, remove that as you go.
Compound tube and mud shoes
Although the automatic taper is very efficient, it’s a pretty complicated tool and quite expensive. If you’re looking for something more straightforward and cost-effective, an alternative is a compound tube, or a mud tube.
The mud tube is similar to the automatic taper in the sense that the whole tube fills with compound, but you don’t need the expensive pump to load it. It’s filled by pulling back on the tool’s handle like a big syringe. This tool is slower than the automatic taper, but still a lot faster than hand taping.
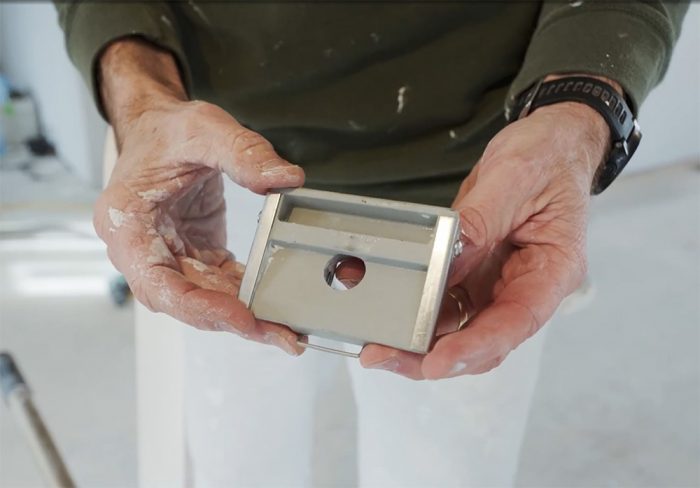
To get the compound onto the drywall seams, use a mud shoe, which attaches to the end of the mud tube. Apply compound to the wall by pushing on the handle of the mud tube while pressing and moving along the seam. If you find that you’re working hard to force the compound out of the tube, then it’s too thick. A different shoe goes on for inside corners. It’s a 90° corner mud shoe that puts a ribbon of joint compound on each edge of the inside corner.
Unlike the automatic taper that puts the compound and the tape on all at once, using the tube and mud shoes just puts the compound on; taping has to be done by hand. Once the tape is applied, I use the corner roller and corner flusher to get the compound smooth.
Drywall banjo
The last tool in this overview is called a banjo. It has a cavity for mud, and tape threads through it. This tool is used similarly to the automatic taper because it puts the mud and the tape on at the same time.
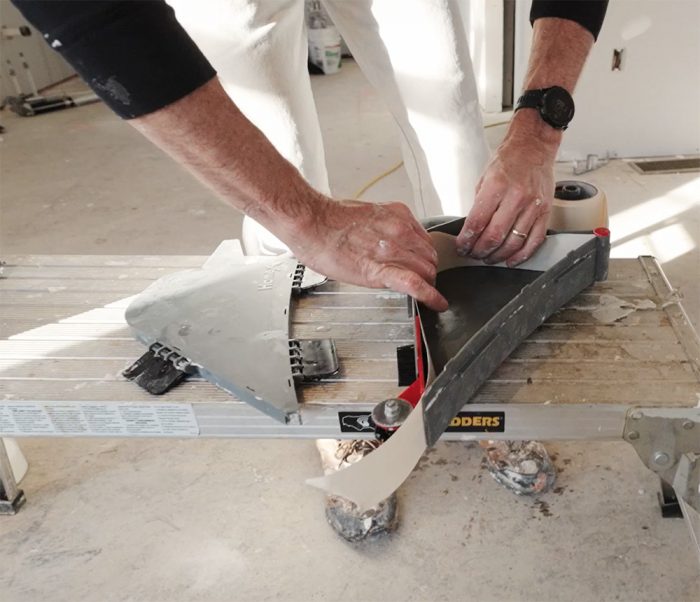
As the tape is being pulled out, compound is applied to the back side of the tape until the tool is empty. The compound does have to be relatively thin for this tool to work; otherwise, it pulls really hard.
After that, the tape gets embedded just as it does with the automatic taper. Once tape and compound are applied to the wall, just take the 8-in. knife and embed tight. The banjo is a commonly used tool that I believe works very well.
I’ve demonstrated several tools, techniques, and tips to help you decide what will work best for you. If you’re doing smaller jobs, maybe you’ll choose the banjo or the compound tube. For larger jobs, you may opt for the automatic taper. Whichever you choose, I hope you are now equipped to do better drywall work.
RELATED STORIES





View Comments
Watching Myron work is a real revelation in process and efficiency. Not sure if I'll get the dispensing tools, but I've already identified areas where I can improve my own hobbyist process.
Myron, you are still the master. I think it was 25 or 30 years ago that I saw your taping skills and it inspired me to roll up my sleeves and get taping. You do make it look easy. I've gotten better, my skills are no where close to yours on your worst day, but your tips and techniques have helped over the years. Thank you for this latest info and for helping us learn how to sling mud.