Fastening Drywall
Whether you're using screws or nails, adhesive or the "floating corners" technique, here's all you need to know to secure the panels.
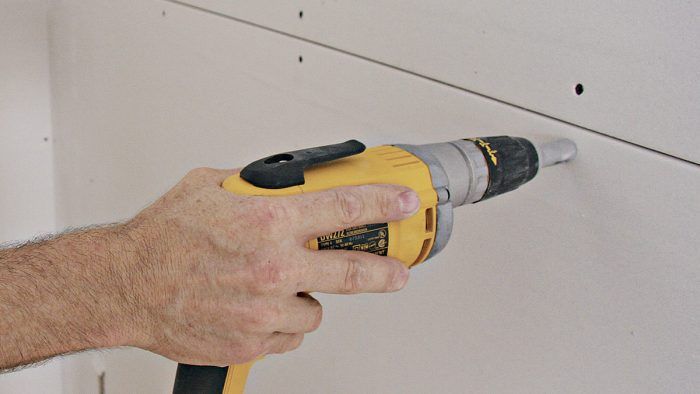
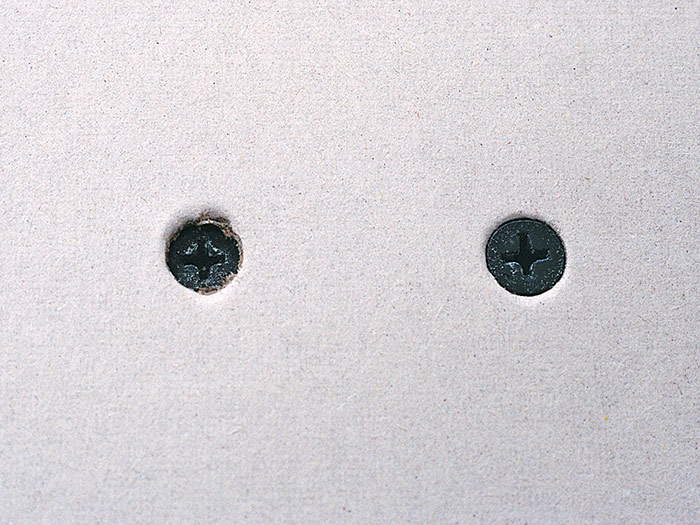
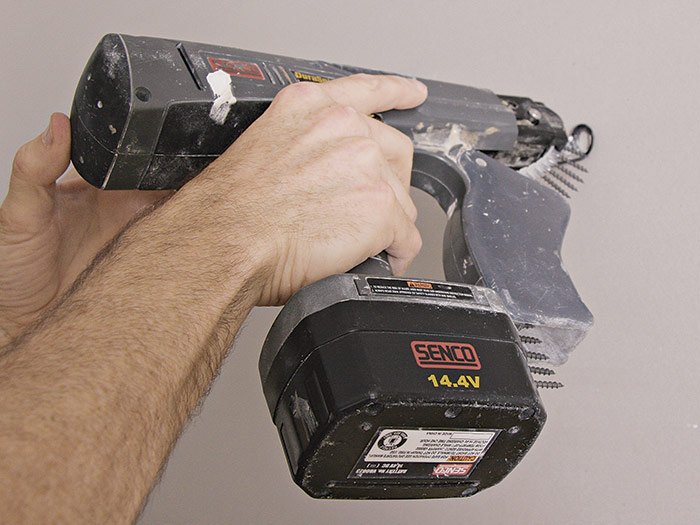
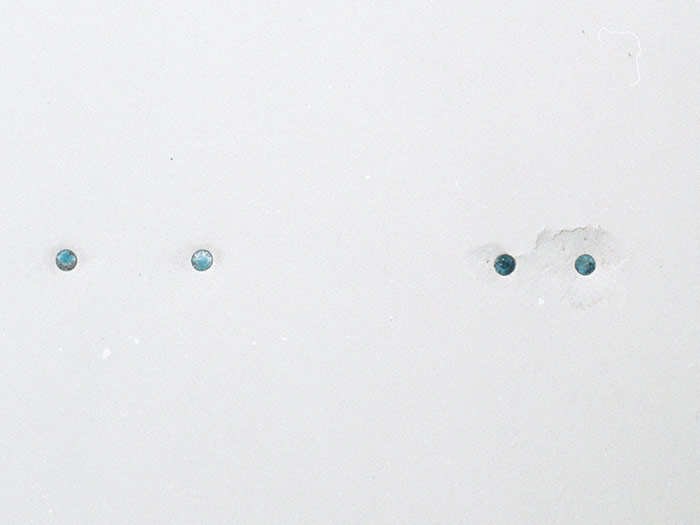
The preferred method for attaching drywall to wood or metal framing is to use drywall screws. Screws are inserted with a drywall screw gun so that the screw head sits just below the surface of the panel without breaking the face paper. With the screw gun set to the correct depth, the screw pulls the panel tight against the framing; when the screw stops turning, the clutch disengages. The screw head spins the paper as it sinks in, leaving a slight dimple and a clean smooth edge around it.
Fastening for Fire CodeFor single-layer applications of fire-resistant drywall to meet fire-code specifications, the panels must be correctly attached to the framing. Fasteners should be spaced no more than 8 in. apart along each framing member. Under normal conditions, the panels will stay in place with fasteners spaced 12 in. or 16 in. apart, but under the extreme conditions of a fire, the panels may come loose prematurely, thereby greatly reducing the fire rating of the application. |
| WORK SMART: For a tight fit across the framing, fasten panels at one edge and then work your way across to the other edge. |
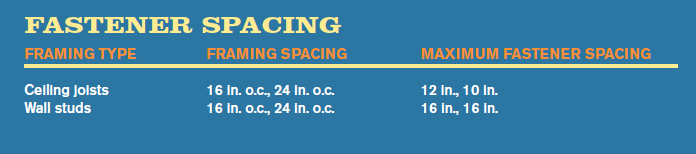
Make sure you hold the screw gun firmly and insert the screw straight (a screw that’s even slightly tilted will not set deep enough on one side and may tear the face paper on the other). Space the screws evenly on each framing member according to the specifications in the chart above. Place screws at least 3/8 in. in from the perimeter of the panel to avoid damaging the edge.
If you use nails instead of drywall screws, make sure you use ring-shank nails specified for attaching drywall to wood framing. As with screws, set the nails at least 3/8 in. in from the edges and follow the same spacing schedule across the face. When the ends of the panels butt against each other, fasten nails every 8 in. along both sides of the joint.
When using nails instead of screws, all nails “in the field” (across the face of the panel) should be double-nailed. Begin nailing at one edge and work toward the opposite edge. To help keep the drywall tight against the framing, apply hand pressure on the panel next to the nail as you drive it in. Set one nail lightly and then set another nail 1-1/2 in. to 2 in. away. Gently hit each nail until the last blow of the drywall hammer firmly sets each one in shallow, uniform dimples. Do not break the paper and keep damage to the gypsum core in the dimpled area to a minimum.
If you use nails, I recommend that you do so only along the edges of the panel, and then fill in the rest with drywall screws in the field. I used to use nails to tack the panels in place, but I find now that screws do a better job. The object is to get the panel tacked up as quickly as possible to lessen the physical strain—and the new screw guns are faster than ever. Once the panel is tacked in place, I cut out all the openings and then screw the centers and any spots that I missed along the edges. I prefer to use screws rather than nails along butted seams for a more stable joint.
Fastener length is important. The problems with using fasteners that are too short are obvious, but using fasteners that are too long can also present difficulties. Overlong screws are likely to tip or go in crooked, damaging the drywall. Also, the longer the screw or nail, the more likely it is to pop as the framing shrinks.
| WORK SMART: When nailing or screwing along the bottom of a panel or along the edge of a doorway or window, place fasteners as close as possible to the panel edge (but no closer than 3/8 in.). The trim will cover these fasteners, which means a few less screws or nails to tape. |
Whether you use screws or nails, it takes a lot of fasteners to attach all the panels to a ceiling or wall. One way to cut down on the number of fasteners needed (and to help eliminate the problem of fastener pops and loose panels) is to use the “floating corners” technique, as explained in the sidebar. Another fastener-saving method is to secure the drywall with adhesive.
| WORK SMART: When nailing or screwing along the bottom of a panel or along the edge of a doorway or window, place fasteners as close as possible to the panel edge (but no closer than 3/8 in.). The trim will cover these fasteners, which means a few less screws or nails to tape. |
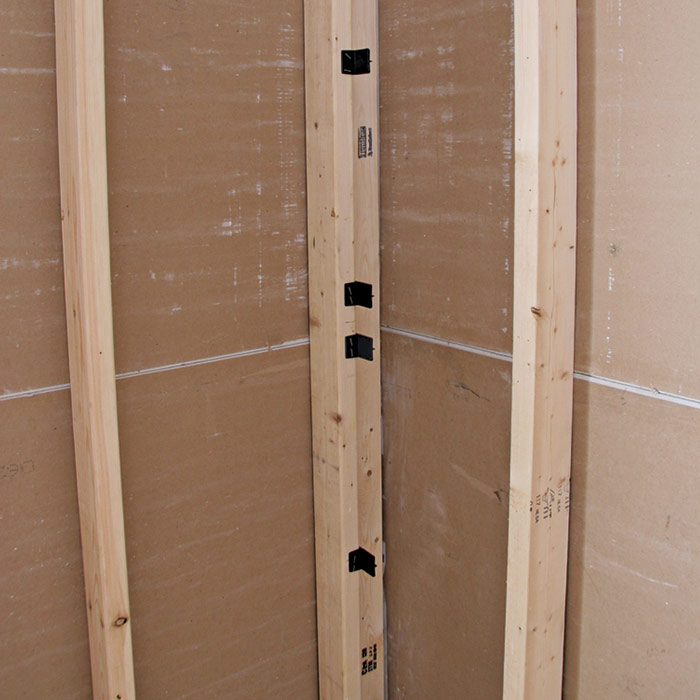
Floating Corners TechniqueThe inside corners where wall meets wall or ceiling meets wall are prone to cracking and fastener pops caused by stress at the intersection. One way to reduce fastener problems is to eliminate fasteners at one or both edges in the corners. I call this the “floating corners” technique.
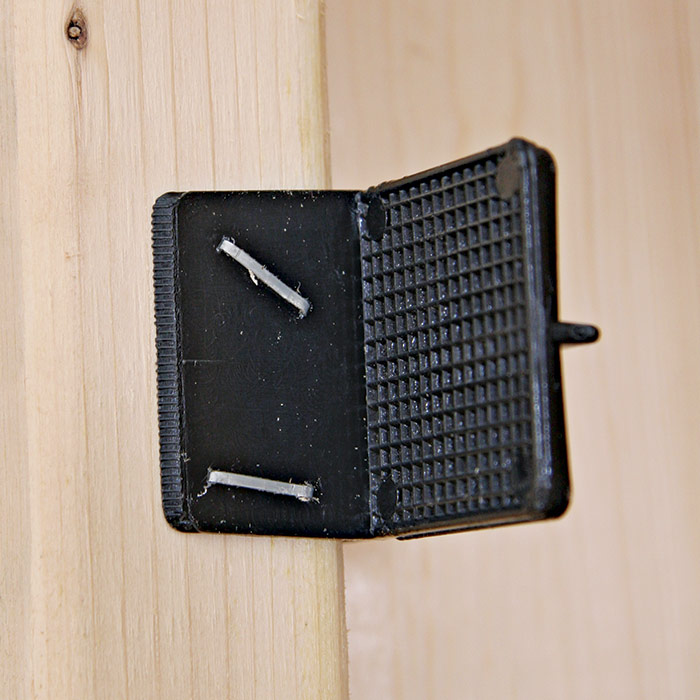
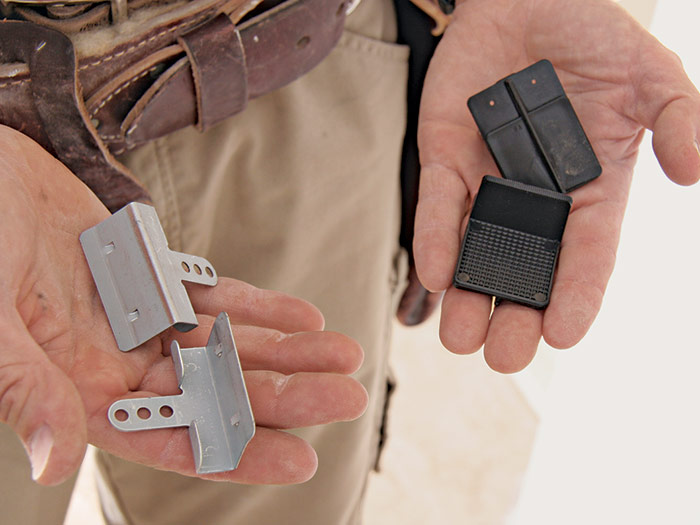
For the vertical corners on the wall panels, omit fasteners on the first panel installed in the corner (see the drawing at right). When you fasten the abutting panel, it helps support the first one. Follow this method for the entire height of the wall corner. Screw or nail the remaining ceiling and wall areas using standard fastening procedures. By eliminating the fasteners in the corners, the drywall is still held firmly in place, but if the corner framing flexes or settles a little, the corners will most likely be unaffected. (Corners that are not fastened still need to have standard wood framing behind them.) Another version of the floating corner technique uses drywall clips to hold the panels in place. Once attached to the edge of a panel, drywall clips have a nailing foot that is perpendicular to the face of the panel. This allows you to attach both sides of an inside corner to the same stud, eliminating the need for a third stud on an inside corner and backup framing along ceiling edges. When using a drywall clip on a ceiling, keep the first screw back 7 in. to 12 in. from the edge.
|
Adhesive Cuts Down on FastenersUsing adhesive has any number of advantages to using mechanical fasteners alone:
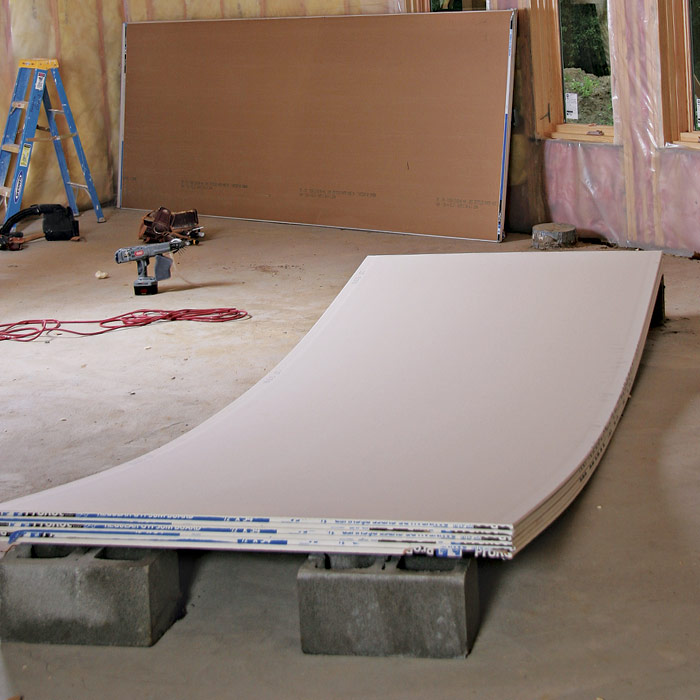
Use an adhesive that is approved for wood-to-drywall applications. Apply a 3/8-in.-wide bead along the entire length of each framing member. Wherever the panels butt together, apply a bead of adhesive to each edge of the framing member. Install fasteners along the perimeter of each panel immediately after it is hung. On panels attached horizontally to walls, no face nailing or screwing is necessary, except on butted seams—and then only enough to pull the panels flush (every 10 in. to 12 in.). If panels are attached vertically, the face should be screwed into each stud on 24-in. centers. For ceilings, install one screw every 24 in. To cut down on the number of screws, you can remove the face screws after 24 hours. When using adhesive, it’s helpful to pre-bow the panels before you hang them. Stack the panels face side up, with the ends supported on 2x4s (see the drawing below), and leave them overnight. When a pre-bowed panel is fastened around the perimeter, the center is forced tight against the adhesive on the framing, thereby eliminating the need for temporary fasteners. Allow the adhesive to dry for at least 48 hours before starting the taping process. (Note that the adhesive method does not work over a plastic vapor barrier or insulation where the kraft paper overlaps the framing.)
Pre-bowing drywall panels prior to adhesive application ensures a tight bond. |