FHB Logo Facebook LinkedIn Email Pinterest Twitter X Instagram Tiktok YouTube Plus Icon Close Icon Navigation Search Icon Navigation Search Icon Arrow Down Icon Video Guide Icon Article Guide Icon Modal Close Icon Guide Search Icon Skip to content
Subscribe
Log In
  • How-To
  • Design
  • Tools & Materials
  • Restoration
  • Videos
  • Blogs
  • Forum
  • Magazine
  • Members
  • FHB House
  • Podcast
Log In

Fine Homebuilding Project Guides

Drywall

Guide Home
  • Drywall Basics
  • Tools and Materials
  • Hanging Drywall
  • Taping and Sanding
  • Special Installations
  • Drywall Repairs
  • Plaster
How-To

Planning a Drywall Job

Get these layout tips down and you will end up with a better job in less time.

By Myron R. Ferguson
  • X
  • facebook
  • linkedin
  • pinterest
  • email
  • add to favorites Log in or Sign up to save your favorite articles
Smart layout: When possible, attach drywall panels perpendicular to the ceiling joists and cover the span with one length of drywall.

Planning a drywall job involves more than just selecting the right type of drywall. You’ll also need to estimate materials, make sure the materials (especially the longer-length panels) are available when needed, plan access for the drywall, and make sure you have enough help on the job site to maneuver the cumbersome panels. But before you start figuring out a material list for the job, there are some basic layout principles that you should keep in mind.

General layout guidelines

No two drywall projects are exactly alike, and each presents a unique set of challenges. But I’ve found that keeping the following items in mind helps just about any job go smoothly.

Always think of ways to eliminate unnecessary joints when planning the layout of a room. Use the longest panels possible; remember that most types of drywall are available in lengths of up to 14 ft. or 16 ft. You may be tempted to use all 8-ft. lengths because they are lighter and easier to handle (and often cheaper), but don’t. Using all 8-ft. panels creates too many seams that are difficult to hide. Keep in mind that fewer seams means less taping.

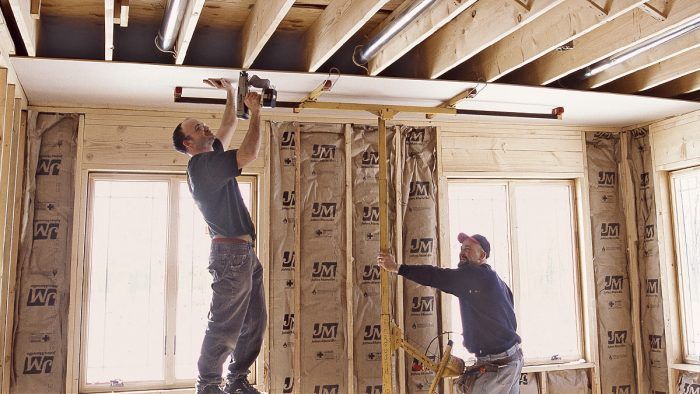
Ceiling panels can be attached either perpendicular to the ceiling joists (my preference) or parallel to the joists. Make sure that the type of drywall you intend to use is approved for the stud or joist spacing; drywall is stronger in the long direction. In addition, the framing spacing may affect the direction in which the drywall is hung.


From Frame to Finish

Keep it flush
Keep it flush: The framing was not aligned flush to this opening. When the drywall was attached it cracked, leading to an unnecessary repair.

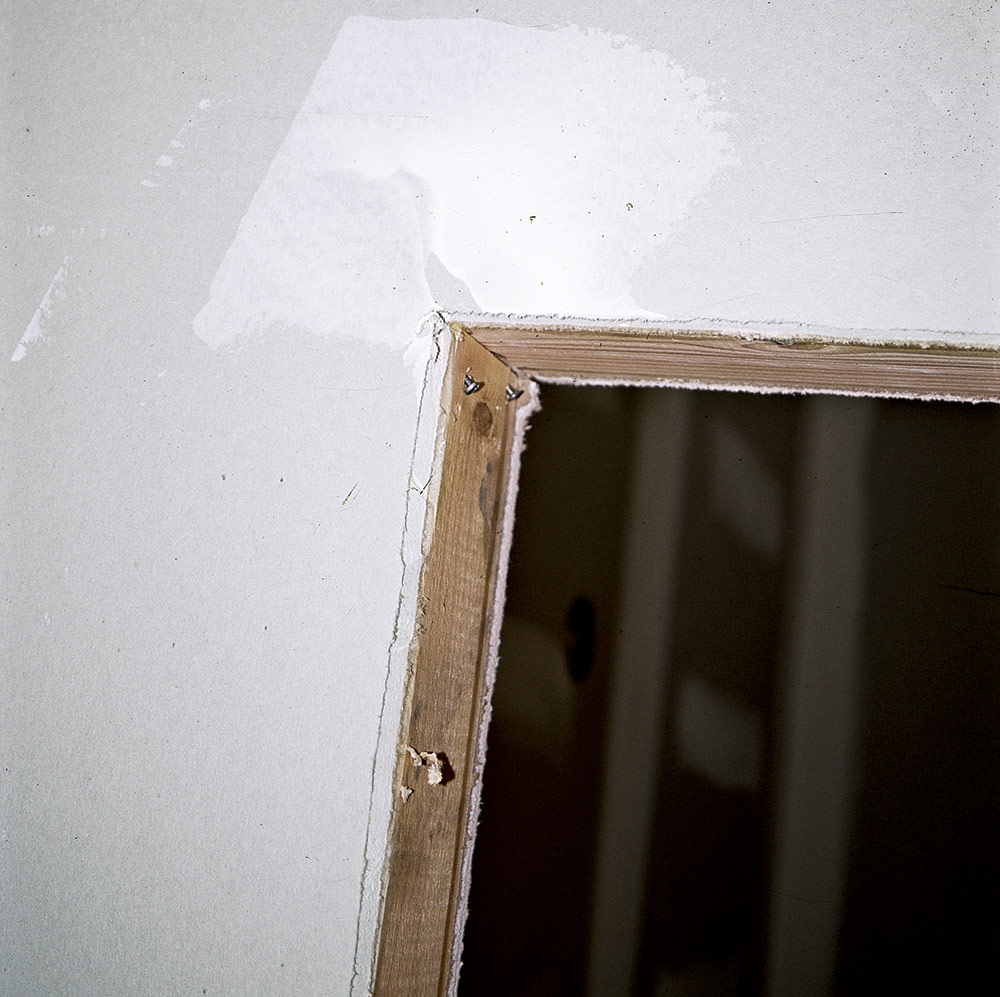
Everything that happens from the time the framing starts until the finish work is complete affects the quality of the finished product. And it may even go back further than that. For example, if I get a complaint about drywall work, I may be able to blame the excavator: Maybe he overdug the footings and when he backfilled he didn’t tamp down the dirt enough. So, the floor settles and then the ceiling joist is low and I cover it with drywall. Now there is a bump along the edge and of course the crown molding does not fit the ceiling properly. See how one thing leads to another? To prevent such problems, it’s a good idea to do a walkthrough with a contractor prior to the delivery of drywall to make sure that everything is ready to be covered with drywall. I also like the general contractor to have a carpenter at the jobsite when we hang the drywall. This way, any questionable framing issues discovered during hanging can be addressed. The end result is a better job overall.

Check the framing
Check the framing: These firestops are located where a horizontal seam will fall. It seems like a good location, but blocks and nails often stick out past the framing and create a ridged seam.


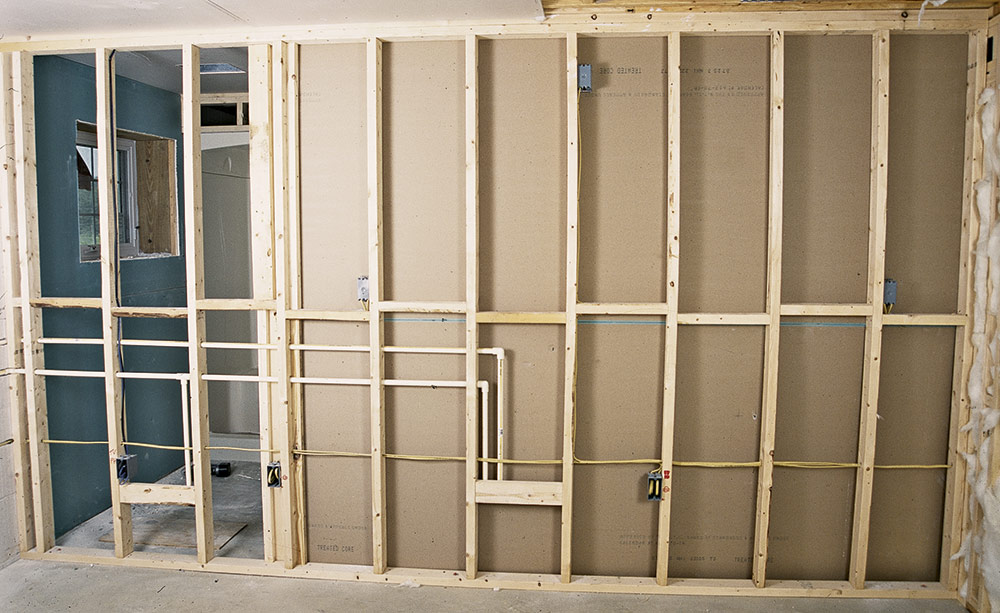
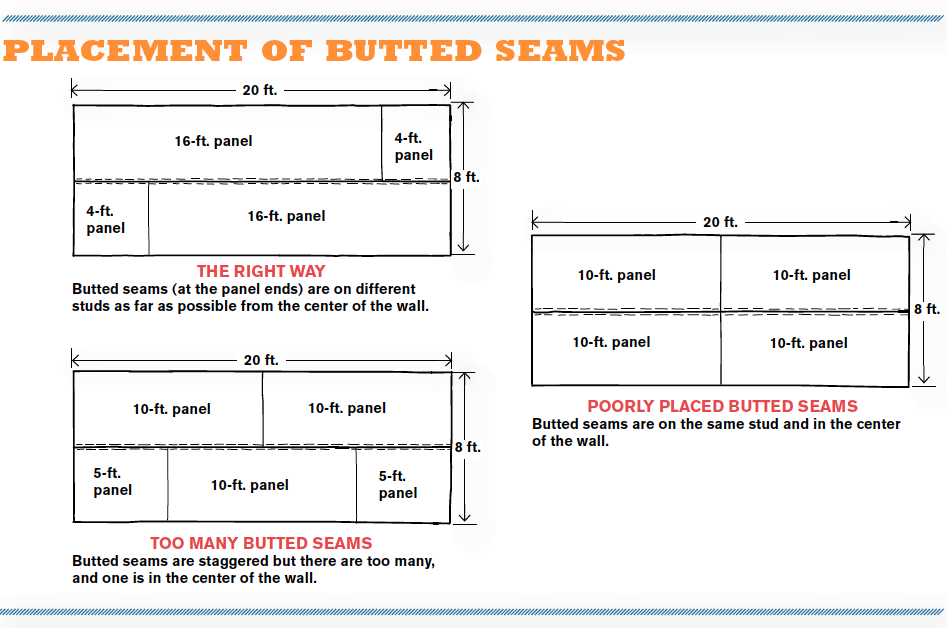
Always try to avoid butted seams A butted seam is a joint created when two untapered panel ends are joined together on the same framing member. If you have to use butted seams, stagger them as far as possible from the center of the wall. For example, if a wall is 8 ft. high by 20 ft. long, it is not a good idea to use four 10-ft. panels (see the drawing “Placement of Butted Seams”). You’ll end up with more than two butted seams on one wall or with seams on the same stud in the center of the wall. Instead, order two 16-ft. panels and one 8-ft. panel, and arrange them as shown in the drawing. This way, there are only two butted seams on the wall and they’re away from the center, where they are easier to hide when taping and finishing.

Placement of Butted Seams

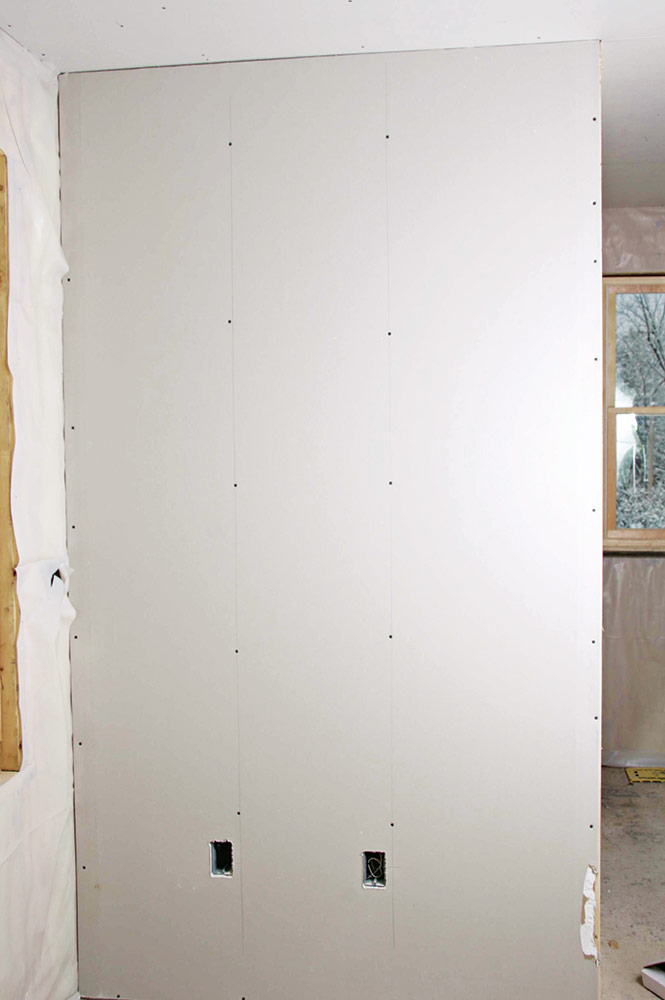
On walls that are more than 4 ft. wide and no higher than 8 ft., hang the drywall horizontally (perpendicular to the studs). This technique reduces the linear footage of joints and also places the horizontal joints at a good height for taping (see the drawing “Horizontal vs. Vertical Layout”).

Horizontal vs. Vertical Layout


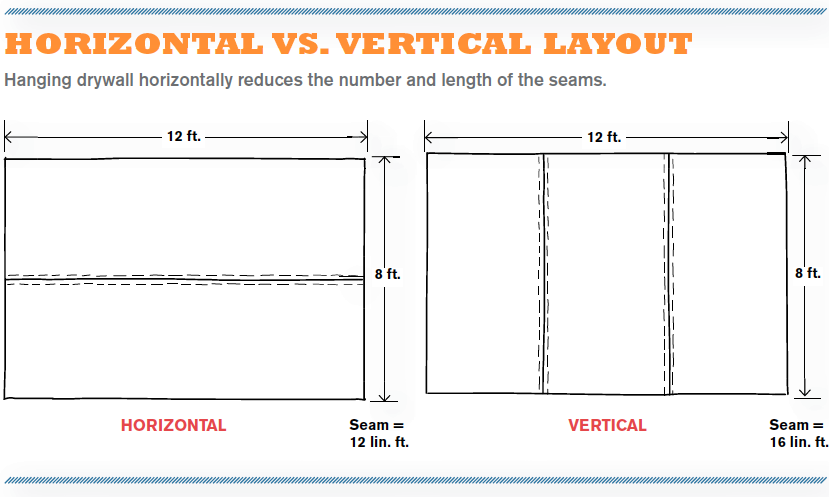
For walls that are more than 8 ft. high, consider using 54-in.-wide drywall panels, which can greatly reduce the linear footage of seams. Fifty-four-in.-wide drywall is only available in lengths of up to 12 ft. That could be a problem in larger rooms or areas where the walls are over 9 ft. high. In those cases, it may be better to install the drywall vertically. The goal is to use whichever method produces the fewest seams (measured in linear feet) to tape.


positioning drywall screws
Positioning screws: The screws tying the end of this panel to the framing are too close to the edge of the panel. The result is a damaged core and weak attachment.

Why Avoid Butted Seams?

Below are some of the reasons butted seams create trouble spots for the drywaller:

  • Framing members are often too narrow. If the edge of one panel isn’t exactly centered on the framing, the next panel won’t fit correctly. The result is a poor attachment to the framing.
  • Screws have to be installed close to the edge of the drywall, damaging the core of the panel and resulting in a weak attachment.
  • Structural movement or lumber shrinking or expanding will cause butted seams to ridge or crack because they are the weakest points in the wall or ceiling.
  • Unlike the sides of drywall panels, the ends of panels are not tapered to create a recess. At the finishing stage, this means you’re concealing a bump rather than filling a recess.


Avoid drywall seams when possible
Avoid seams when possible: On walls 4 ft. wide or less, hang the panels vertically. Not only does this cut down on finishing, but it also often avoids having to blend the seam into the outside corner bead.


Previous: Pre-Drywall Inspections Prevent Hiccups Next: Install and Finish Drywall: 7 Tips for an Accurate Takeoff

Guide

Drywall

Chapter

Drywall Basics

Sign up for eletters today and get the latest how-to from Fine Homebuilding, plus special offers.

Signing you up...

This site is protected by reCAPTCHA and the Google Privacy Policy and Terms of Service apply.
See all newsletters
See all newsletters

Log in or create an account to post a comment.

Sign up Log in

Become a member and get full access to FineHomebuilding.com

Drywall

Drywall

Trusted, comprehensive guidance for choosing, hanging, taping, sanding, and repairing drywall—the right way

View Project Guide

View All Project Guides »

Become a member and get unlimited site access, including the Drywall Project Guide.

Start Free Trial

Drywall Basics
  • Types and Uses of Drywall
  • Planning the Job
Tools and Materials
  • Hanging Tools
  • Taping Tools and Materials
  • Sanding and Finishing Tools and Materials
Hanging Drywall
  • Prep for Hanging
  • Measuring and Cutting Drywall
  • Guidelines for Hanging and Fastening Drywall
  • Hanging Ceilings
  • Hanging Walls
  • Hanging Airtight Drywall
  • Trim Accessories/Corner Beads
Taping and Sanding
  • Taping Basics
  • Taping Seams
  • Taping Inside and Outside Corners
  • Sanding
Special Installations
  • Tricky Transitions
  • Curved Surfaces
  • Other Special Installations
  • Decorating with Drywall
Drywall Repairs
  • Patching Holes, Cracks, and More
Plaster
  • Working with Lime Plaster
  • Plaster Repair
  • Classic Plaster Techniques

Fine Home Building

Newsletter Sign-up

  • Fine Homebuilding

    Home building tips, offers, and expert advice in your inbox.

  • Green Building Advisor

    Building science and energy efficiency advice, plus special offers, in your inbox.

  • Old House Journal

    Repair, renovation, and restoration tips, plus special offers, in your inbox.

Signing you up...

This site is protected by reCAPTCHA and the Google Privacy Policy and Terms of Service apply.
See all newsletters

Follow

  • Fine Homebuilding

    Dig into cutting-edge approaches and decades of proven solutions with total access to our experts and tradespeople.

    Start Free Trial Now
    • Facebook
    • Instagram
    • X
    • LinkedIn
  • GBA Prime

    Get instant access to the latest developments in green building, research, and reports from the field.

    Start Free Trial Now
    • Facebook
    • YouTube
  • Old House Journal

    Learn how to restore, repair, update, and decorate your home.

    Subscribe Now
    • Facebook
    • Instagram
    • X

Membership & Magazine

  • Online Archive
  • Start Free Trial
  • Magazine Subscription
  • Magazine Renewal
  • Gift a Subscription
  • Customer Support
  • Privacy Preferences
  • About
  • Contact
  • Advertise
  • Careers
  • Terms of Use
  • Site Map
  • Do not sell or share my information
  • Privacy Policy
  • Accessibility
  • California Privacy Rights

© 2025 Active Interest Media. All rights reserved.

Fine Homebuilding receives a commission for items purchased through links on this site, including Amazon Associates and other affiliate advertising programs.

  • Home Group
  • Antique Trader
  • Arts & Crafts Homes
  • Bank Note Reporter
  • Cabin Life
  • Cuisine at Home
  • Fine Gardening
  • Fine Woodworking
  • Green Building Advisor
  • Garden Gate
  • Horticulture
  • Keep Craft Alive
  • Log Home Living
  • Military Trader/Vehicles
  • Numismatic News
  • Numismaster
  • Old Cars Weekly
  • Old House Journal
  • Period Homes
  • Popular Woodworking
  • Script
  • ShopNotes
  • Sports Collectors Digest
  • Threads
  • Timber Home Living
  • Traditional Building
  • Woodsmith
  • World Coin News
  • Writer's Digest
Active Interest Media logo
X
X
This is a dialog window which overlays the main content of the page. The modal window is a 'site map' of the most critical areas of the site. Pressing the Escape (ESC) button will close the modal and bring you back to where you were on the page.

Main Menu

  • How-To
  • Design
  • Tools & Materials
  • Video
  • Blogs
  • Forum
  • Project Guides
  • Reader Projects
  • Magazine
  • Members
  • FHB House

Podcasts

  • FHB Podcast
  • ProTalk

Webinars

  • Upcoming and On-Demand

Podcasts

  • FHB Podcast
  • ProTalk

Webinars

  • Upcoming and On-Demand

Popular Topics

  • Kitchens
  • Business
  • Bedrooms
  • Roofs
  • Architecture and Design
  • Green Building
  • Decks
  • Framing
  • Safety
  • Remodeling
  • Bathrooms
  • Windows
  • Tilework
  • Ceilings
  • HVAC

Magazine

  • Current Issue
  • Past Issues
  • Magazine Index
  • Subscribe
  • Online Archive
  • Author Guidelines

All Access

  • Member Home
  • Start Free Trial
  • Gift Membership

Online Learning

  • Courses
  • Project Guides
  • Reader Projects
  • Podcast

More

  • FHB Ambassadors
  • FHB House
  • Customer Support

Account

  • Log In
  • Join

Newsletter

Get home building tips, offers, and expert advice in your inbox

Signing you up...

This site is protected by reCAPTCHA and the Google Privacy Policy and Terms of Service apply.
See all newsletters
See all newsletters

Follow

  • X
  • YouTube
  • instagram
  • facebook
  • pinterest
  • Tiktok

Join All Access

Become a member and get instant access to thousands of videos, how-tos, tool reviews, and design features.

Start Your Free Trial

Subscribe

FHB Magazine

Start your subscription today and save up to 81%

Subscribe

You have 1 free article remaining.

Get complete site access, including thousands of videos, how-to tips, tool reviews, and design features.

Start your FREE trial

Already a member? Log in

We hope you’ve enjoyed your free articles. To keep reading, become a member today.

Get complete site access to expert advice, how-to videos, Code Check, and more, plus the print magazine.

Start your FREE trial

Already a member? Log in

Privacy Policy Update

We use cookies, pixels, script and other tracking technologies to analyze and improve our service, to improve and personalize content, and for advertising to you. We also share information about your use of our site with third-party social media, advertising and analytics partners. You can view our Privacy Policy here and our Terms of Use here.

Cookies

Analytics

These cookies help us track site metrics to improve our sites and provide a better user experience.

Advertising/Social Media

These cookies are used to serve advertisements aligned with your interests.

Essential

These cookies are required to provide basic functions like page navigation and access to secure areas of the website.

Delete My Data

Delete all cookies and associated data