FHB Logo Facebook LinkedIn Email Pinterest Twitter X Instagram Tiktok YouTube Plus Icon Close Icon Navigation Search Icon Navigation Search Icon Arrow Down Icon Video Guide Icon Article Guide Icon Modal Close Icon Guide Search Icon Skip to content
Subscribe
Log In
  • How-To
  • Design
  • Tools & Materials
  • Restoration
  • Videos
  • Blogs
  • Forum
  • Magazine
  • Members
  • FHB House
  • Podcast
Log In

Fine Homebuilding Project Guides

Drywall

Guide Home
  • Drywall Basics
  • Tools and Materials
  • Hanging Drywall
  • Taping and Sanding
  • Special Installations
  • Drywall Repairs
  • Plaster
How-To

Taping Off-Angle Corners

Using a custom tape or bead is the best way to tackle these tricky inside corners.

By Myron R. Ferguson
  • X
  • facebook
  • linkedin
  • pinterest
  • email
  • add to favorites Log in or Sign up to save your favorite articles

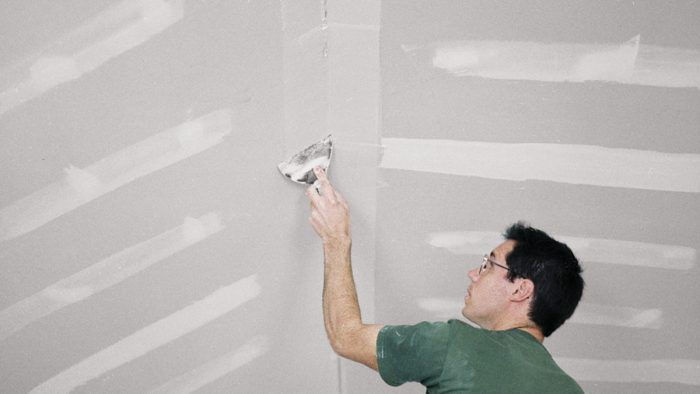
When a sloped ceiling meets a flat ceiling or a wall, the inside corner formed, which is usually much greater than 90 degrees, is known as an off-angle corner. It is important that these corners look straight. Giving these corners a beautiful straight center line shouldn’t be difficult or time-consuming to achieve. In addition to these types of corners being visible, they are also subject to cracking due to structural movement or settling.

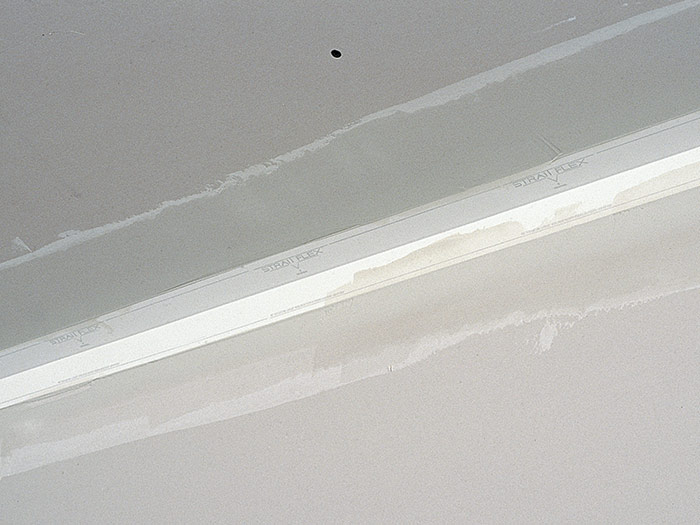
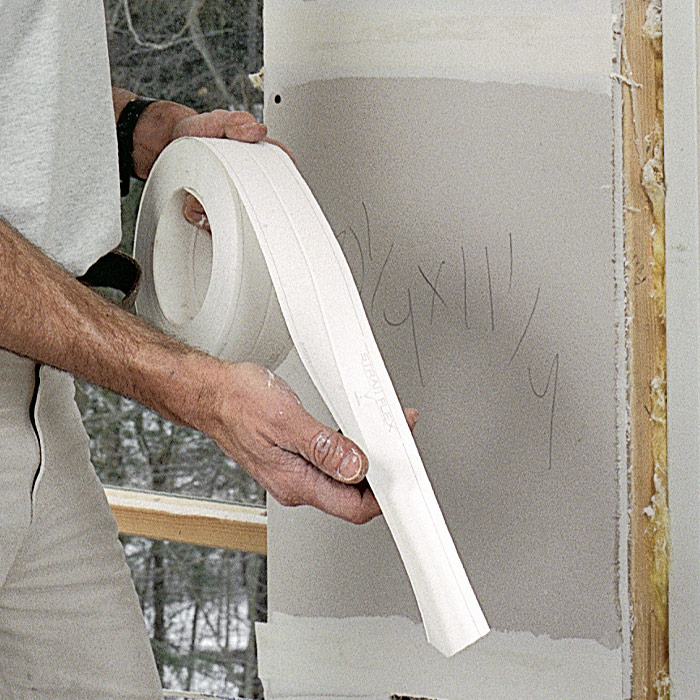
Fortunately, there are a number of tapes and beads tailor-made for these situations. One of my favorite beads is a vinyl product that adjusts to different angles and has a flexible center to accommodate normal structural movement or settling. It takes a little extra work to install and finish, but the end result makes it well worth the work.

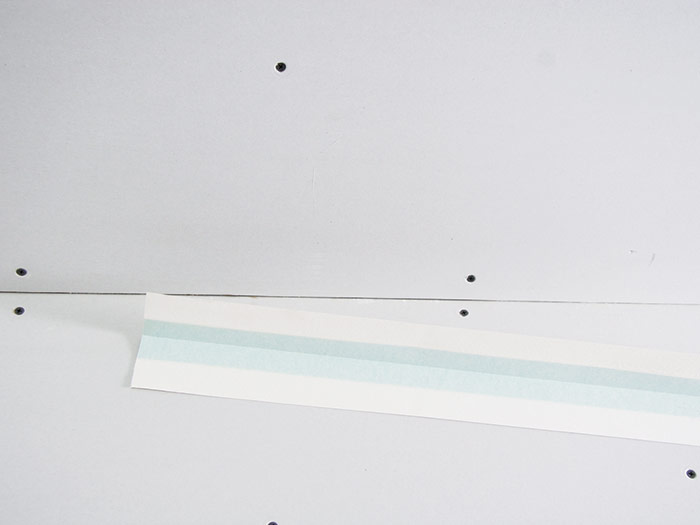
The center (creased area) of this bead should not receive a coat of joint compound. In fact, the very center should be completely clean after installation. Because there is no filling to make corrections later it is important to install the tapes as straight as possible. Begin by floating out any dips in the drywall with joint compound. After the compound dries, use a scrap piece of the bead to mark along the tape’s legs at both ends of the run and snap a chalkline between the sets of marks. Apply an approved spray adhesive to the drywall (I spray on two quick coats). Press the tape into position immediately, using the chalkline as a guide.


WORK SMART: All joint compound must be removed from the center of flexible beads. Get in the habit of checking the beads during each step of the taping process.


This type of bead can also be embedded in joint compound. Apply the compound to the drywall and roll the bead into place, centering it as you go. Sight along the inside edge and make adjustments, if necessary. Then press down on the legs with a taping knife. The legs will be concealed with joint compound and blended into the drywall, but the flexible center must remain free of compound.
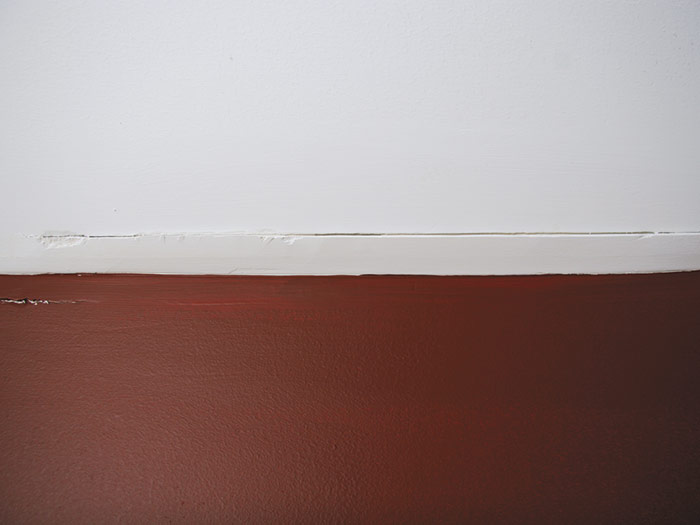
 

Off-Angle Inside Corners

Vinyl corner bead can be glued to off-angle corners and then covered in compound. When finished correctly, the result is a nice, straight crease that provides excellent expansion control.

Built to move
Built to move: This inside corner bead has a rubber center that flexes to fit odd angles and stretches to accommodate settling.

Glue it in place
Glue it in place: The bead can be attached with spray-on contact cement and staples.

Or embed the tape
Or embed the tape: Corner bead can also be embedded in joint compound using a taping knife. Once the bead is set in place, sight down its length and adjust as needed.

Keep creases clean
Keep creases clean: When properly taped and sanded, the sides of the joint are feathered into the drywall surface, but the center crease is free of compound.


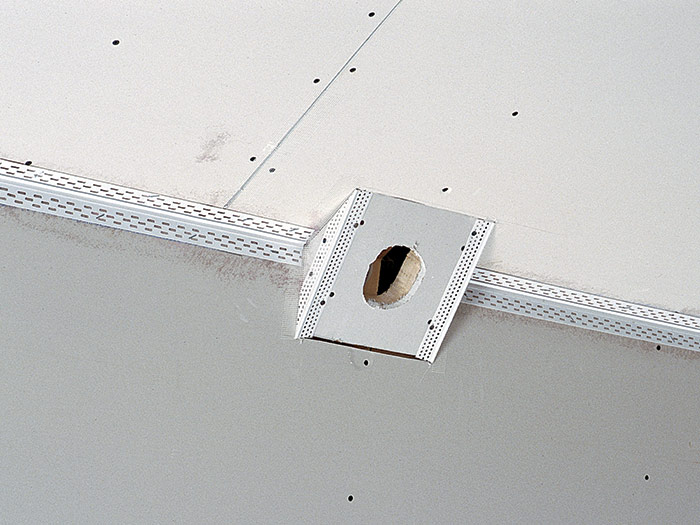
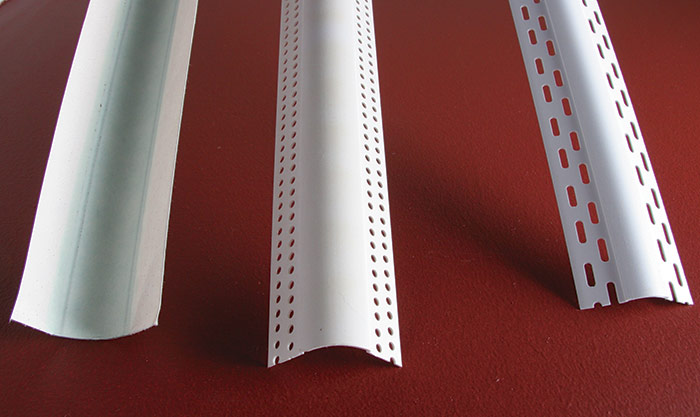
There are similar products that are adjustable to different angles but don’t have a flexible center that stretches (they’re simply hinged). If they are vinyl, apply them using the methods just mentioned. If they are not vinyl, embed them in compound. Use these beads only on angles that are less likely to crack due to structural movement.

Tapes are versatile
Tapes are versatile: Buying a roll of tape for off-angle inside and outside corners makes finishing easier. The tape has a slight beaded edge for outside corners and a crease for inside corners.

Some of these tapes can be used on both inside and outside off-angle corners. For inside corners, install them by applying joint compound to the drywall and pressing the bead into place with a taping knife. When applying finish coats of compound, there is no need to apply compound to the center of the tape—just feather the edges. When used as an outside corner the tape is folded to become a corner bead with a slightly beaded edge. These beads should be finished like any other outside corner. These products come in rolls, can be cut to length, and adjust to accommodate a wide range of angles.

Bullnose beads are also available for off-angle inside and outside corners. They come in standard lengths in metal, vinyl, or paper-covered metal or plastic. Bullnose beads are attached and finished in the same way as 90-degree corners. Keep the rounded edges as clean as possible during taping and sand any remaining compound off when dry.

Options for corner bead
Options for corner bead: On the left is a bullnose inside corner bead. At center is a 90-degree bullnose bead and on the right is a 3/4-in. bullnose off-angle outside corner bead.


Why Do Angles Crack?

Common reasons for cracking

    • Structural movement
    • Snow load
    • Materials dry out after construction
    • Building spreads

Ways to Prevent Problems

    • Use a flexible inside tape or a wider stronger tape
    • Control heat and humidity
    • Use a stronger compound
    • Use specially designed framing materials like X-crack

Movement is inevitable
Movement is inevitable: Off-angle inside corners are subject to movement. It doesn’t take much structural movement for most corner tapes to crack and come loose.

Use wide tape
Use wide tape: Wide, off-angle inside corner tapes, like this 4-in.-wide tape-on bead, prevent cracking because they’re more forgiving as buildings settle and move.

Straighten uneven framing
Straighten uneven framing: X-crack is an adjustable hinged product that is attached to the corners of framing before drywall is set in place. It helps straighten uneven framing and reduces cracking.

Provide consistent heat
Provide consistent heat: The drywall environment needs consistent heat throughout. This heater actually causes more cracks than it prevents because it leaves some areas hot and others cold.


Rounded corners technique

Before all of these new tapes and beads became available the options were pretty limited. To avoid crooked corners, I used regular paper tape embedded in compound. This method is not terribly strong, and it is difficult to create straight finished lines…but it can work.

I have had a lot of success rounding these off-angle, inside corners. It is a good technique that I still use occasionally on unusually crooked corners where the new beads just won’t work. I also use this technique if I am working in an older home and trying to match existing corners. For more on this process, see the drawing below and the sidebar “Rounding Corners Technique.”


Rounding an Inside Corner


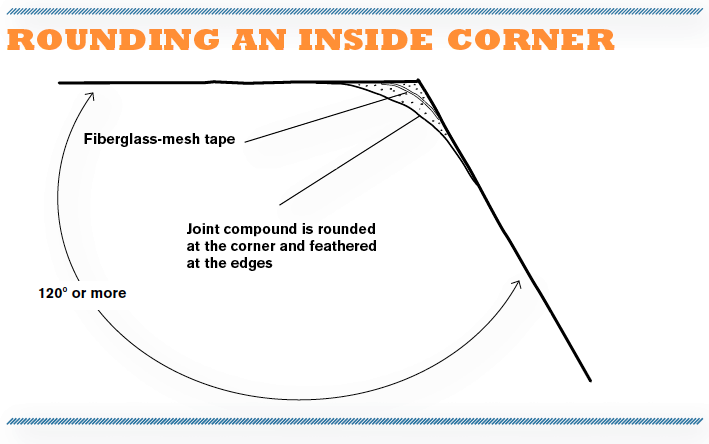
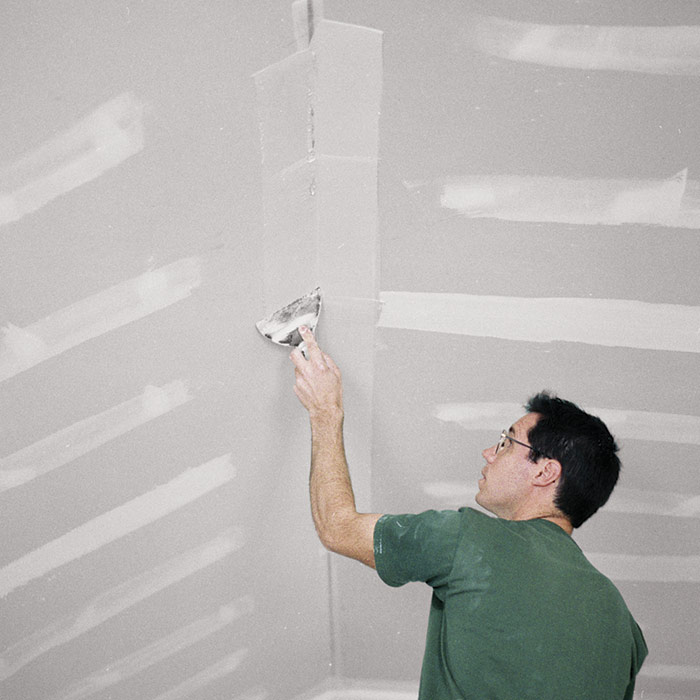
Rounding makes the corner appear straight, even though it is slightly off, because there is no obvious interior angle. As with regular inside corners, rounded corners can be finished with three coats of joint compound. I recommend using fiberglass-mesh tape combined with a setting-type joint compound for the first coat. First, cover the corner with the mesh tape. If there are large gaps between panels or damaged sections, apply an additional piece of mesh tape to cover those areas. Next, use a 6-in. taping knife to apply a thin coat of joint compound to each side of the corner. At this stage, it’s not necessary to cover the tape completely; a layer about 1/8 in. thick and 4 in. or 5 in. wide is sufficient.


Rounding Corners Technique

Rather than using beads to manage off-angle corners, tape can also be used. This technique comes in handy when you’re trying to match existing joints in older homes, or if the corner is very crooked.

Tape the joint
Tape the joint: When rounding an off-angle corner, begin by covering the angle with mesh tape.

Choose a setting-type compound
Choose a setting-type compound: Use a 6-in. taping knife to apply a thin layer of setting-type joint compound about 4 in. or 5 in. wide on each side of the joint.

Begin rounding the corner
Begin rounding the corner: Pull the knife lightly across the corner in one direction for the length of the joint, and then pull the knife back across the corner in the opposite direction. The center of the joint should be filled and slightly rounded and the edges should be feathered.

Apply the second coat
Apply the second coat: Use a 12-in. knife to round the corners after applying the second coat in a manner similar to the first coat. This is still a relatively thick coat, so I advise using a setting compound.

Lay on the third coat
Lay on the third coat: After sanding lightly, a paint roller works well to apply the third coat of joint compound. A regular drying-type compound can be used.

Finish the joint
Finish the joint: Smooth the compound with a 12-in. knife, removing the bulk of the compound as you work.


Once you’ve applied the compound, pull the taping knife across the corner at a 90-degree angle. After you’ve gone across the corner in one direction, there will still be gaps and rough edges in the compound; to correct those areas, pull the knife across the corner in the opposite direction. Take your time, and don’t apply too much pressure (very little joint compound should be removed if you’re doing it right). As you pull the knife gently across the corner, feather the edges of the compound and slightly round the center. By now the tape should be completely covered and there should not be any large gaps or high ridges left by the knife.

For the second coat on a rounded corner, use a setting-type compound, an all-purpose compound, or a ready-mixed taping compound. I prefer to use a setting-type compound for this coat, because a pretty heavy layer of compound is left in the rounded area of the corner, which can result in excessive shrinkage if you use a drying type. Shrinkage can cause deep cracks that require taped reinforcement to correct.

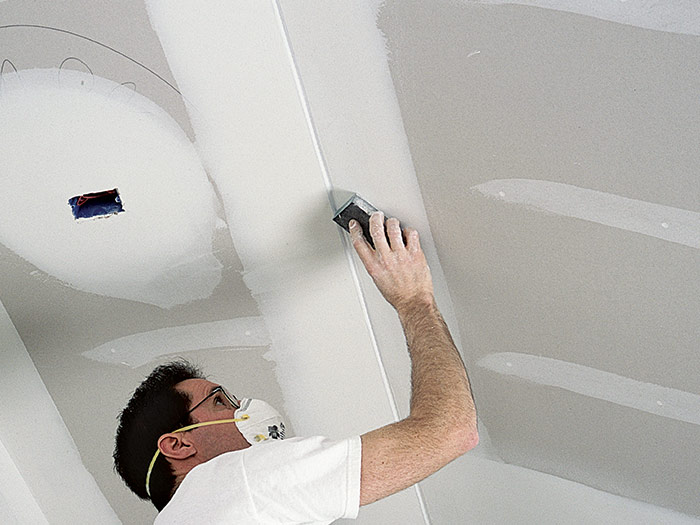
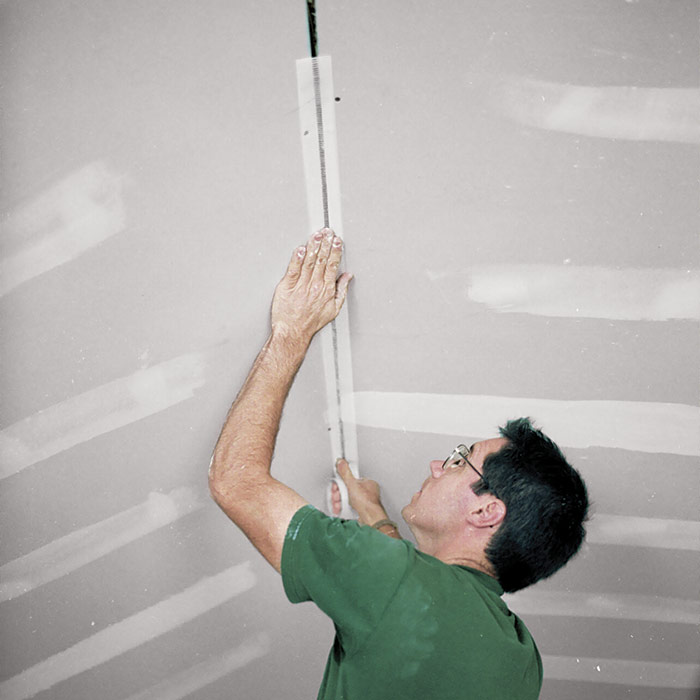
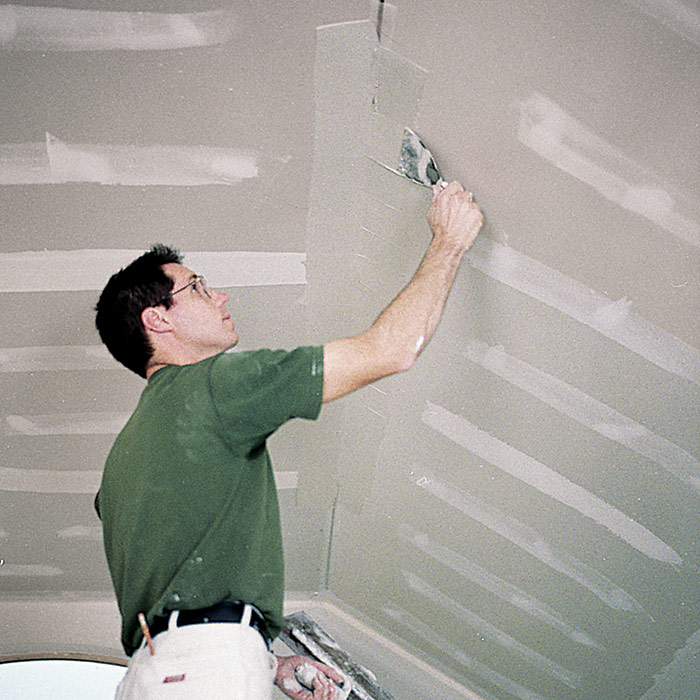
Using a 6-in. knife, apply about the same amount of compound to each side of the corner as you did during the first coat. On this coat, use a 12-in. straight-handled knife to round the compound (see the bottom left photo on the facing page). Pull the trowel across the corner in one direction and then in the opposite direction, just as you did for the first coat. Once again, very little compound should be removed as the corner is rounded and the edges are feathered.


WORK SMART: There is a heavy buildup of compound on a rounded corner. To resist cracking, be sure to use a setting-type compound for the first two coats.


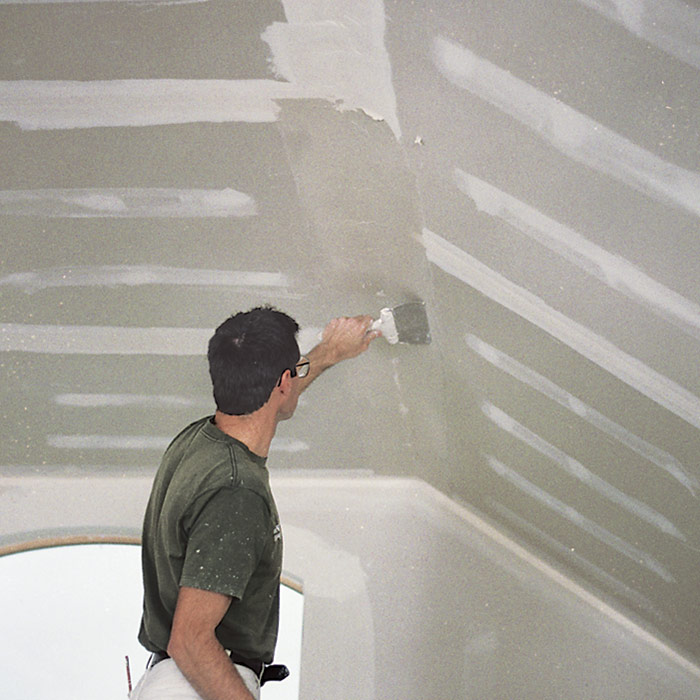
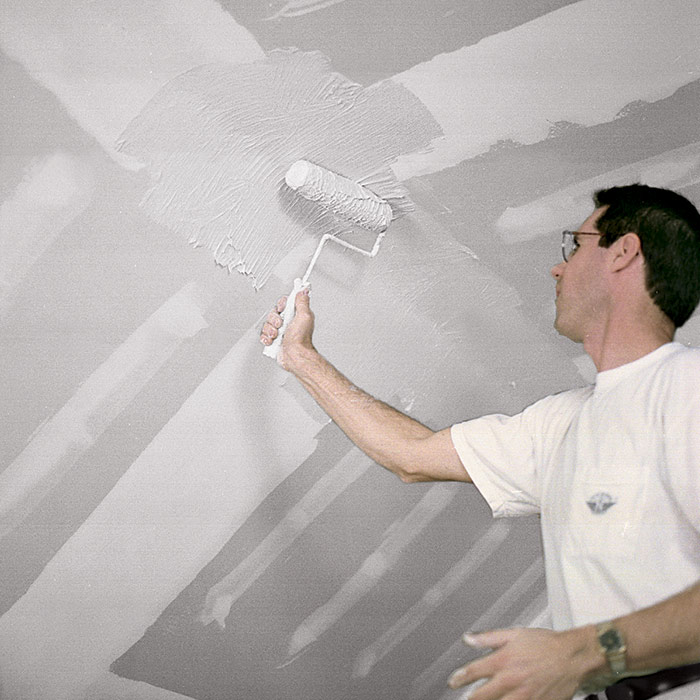
Before applying the third coat, lightly sand any high trowel marks and feather the edges with a pole sander and 120-grit sandpaper or sanding screen (be careful not to oversand or dig up the center areas). For the third coat, use a topping or an all-purpose ready-mixed compound. You can apply joint compound with a 6-in. or 12-in. knife, but I find that a roller works best, because it easily follows the curve of the rounded corner (see the bottom center photo on the facing page). Cover the entire taped area with a thin layer of joint compound, widening each edge. Then use a 12-in. trowel to remove the compound, in much the same way that the third coat on a regular seam is finished. All trowel marks and indentations should be filled, and only a thin film of compound should remain on the rest of the corner.

Previous: Taping Tricky Transitions Next: Butting Drywall to a Different Surface

Guide

Drywall

Chapter

Special Installations

Sign up for eletters today and get the latest how-to from Fine Homebuilding, plus special offers.

Signing you up...

This site is protected by reCAPTCHA and the Google Privacy Policy and Terms of Service apply.
See all newsletters
See all newsletters

Log in or create an account to post a comment.

Sign up Log in

Become a member and get full access to FineHomebuilding.com

Drywall

Drywall

Trusted, comprehensive guidance for choosing, hanging, taping, sanding, and repairing drywall—the right way

View Project Guide

View All Project Guides »

Become a member and get unlimited site access, including the Drywall Project Guide.

Start Free Trial

Drywall Basics
  • Types and Uses of Drywall
  • Planning the Job
Tools and Materials
  • Hanging Tools
  • Taping Tools and Materials
  • Sanding and Finishing Tools and Materials
Hanging Drywall
  • Prep for Hanging
  • Measuring and Cutting Drywall
  • Guidelines for Hanging and Fastening Drywall
  • Hanging Ceilings
  • Hanging Walls
  • Hanging Airtight Drywall
  • Trim Accessories/Corner Beads
Taping and Sanding
  • Taping Basics
  • Taping Seams
  • Taping Inside and Outside Corners
  • Sanding
Special Installations
  • Tricky Transitions
  • Curved Surfaces
  • Other Special Installations
  • Decorating with Drywall
Drywall Repairs
  • Patching Holes, Cracks, and More
Plaster
  • Working with Lime Plaster
  • Plaster Repair
  • Classic Plaster Techniques

Fine Home Building

Newsletter Sign-up

  • Fine Homebuilding

    Home building tips, offers, and expert advice in your inbox.

  • Green Building Advisor

    Building science and energy efficiency advice, plus special offers, in your inbox.

  • Old House Journal

    Repair, renovation, and restoration tips, plus special offers, in your inbox.

Signing you up...

This site is protected by reCAPTCHA and the Google Privacy Policy and Terms of Service apply.
See all newsletters

Follow

  • Fine Homebuilding

    Dig into cutting-edge approaches and decades of proven solutions with total access to our experts and tradespeople.

    Start Free Trial Now
    • Facebook
    • Instagram
    • X
    • LinkedIn
  • GBA Prime

    Get instant access to the latest developments in green building, research, and reports from the field.

    Start Free Trial Now
    • Facebook
    • YouTube
  • Old House Journal

    Learn how to restore, repair, update, and decorate your home.

    Subscribe Now
    • Facebook
    • Instagram
    • X

Membership & Magazine

  • Online Archive
  • Start Free Trial
  • Magazine Subscription
  • Magazine Renewal
  • Gift a Subscription
  • Customer Support
  • Privacy Preferences
  • About
  • Contact
  • Advertise
  • Careers
  • Terms of Use
  • Site Map
  • Do not sell or share my information
  • Privacy Policy
  • Accessibility
  • California Privacy Rights

© 2025 Active Interest Media. All rights reserved.

Fine Homebuilding receives a commission for items purchased through links on this site, including Amazon Associates and other affiliate advertising programs.

  • Home Group
  • Antique Trader
  • Arts & Crafts Homes
  • Bank Note Reporter
  • Cabin Life
  • Cuisine at Home
  • Fine Gardening
  • Fine Woodworking
  • Green Building Advisor
  • Garden Gate
  • Horticulture
  • Keep Craft Alive
  • Log Home Living
  • Military Trader/Vehicles
  • Numismatic News
  • Numismaster
  • Old Cars Weekly
  • Old House Journal
  • Period Homes
  • Popular Woodworking
  • Script
  • ShopNotes
  • Sports Collectors Digest
  • Threads
  • Timber Home Living
  • Traditional Building
  • Woodsmith
  • World Coin News
  • Writer's Digest
Active Interest Media logo
X
X
This is a dialog window which overlays the main content of the page. The modal window is a 'site map' of the most critical areas of the site. Pressing the Escape (ESC) button will close the modal and bring you back to where you were on the page.

Main Menu

  • How-To
  • Design
  • Tools & Materials
  • Video
  • Blogs
  • Forum
  • Project Guides
  • Reader Projects
  • Magazine
  • Members
  • FHB House

Podcasts

  • FHB Podcast
  • ProTalk

Webinars

  • Upcoming and On-Demand

Podcasts

  • FHB Podcast
  • ProTalk

Webinars

  • Upcoming and On-Demand

Popular Topics

  • Kitchens
  • Business
  • Bedrooms
  • Roofs
  • Architecture and Design
  • Green Building
  • Decks
  • Framing
  • Safety
  • Remodeling
  • Bathrooms
  • Windows
  • Tilework
  • Ceilings
  • HVAC

Magazine

  • Current Issue
  • Past Issues
  • Magazine Index
  • Subscribe
  • Online Archive
  • Author Guidelines

All Access

  • Member Home
  • Start Free Trial
  • Gift Membership

Online Learning

  • Courses
  • Project Guides
  • Reader Projects
  • Podcast

More

  • FHB Ambassadors
  • FHB House
  • Customer Support

Account

  • Log In
  • Join

Newsletter

Get home building tips, offers, and expert advice in your inbox

Signing you up...

This site is protected by reCAPTCHA and the Google Privacy Policy and Terms of Service apply.
See all newsletters
See all newsletters

Follow

  • X
  • YouTube
  • instagram
  • facebook
  • pinterest
  • Tiktok

Join All Access

Become a member and get instant access to thousands of videos, how-tos, tool reviews, and design features.

Start Your Free Trial

Subscribe

FHB Magazine

Start your subscription today and save up to 70%

Subscribe

You have 1 free article remaining.

Get complete site access, including thousands of videos, how-to tips, tool reviews, and design features.

Start your FREE trial

Already a member? Log in

We hope you’ve enjoyed your free articles. To keep reading, become a member today.

Get complete site access to expert advice, how-to videos, Code Check, and more, plus the print magazine.

Start your FREE trial

Already a member? Log in

Privacy Policy Update

We use cookies, pixels, script and other tracking technologies to analyze and improve our service, to improve and personalize content, and for advertising to you. We also share information about your use of our site with third-party social media, advertising and analytics partners. You can view our Privacy Policy here and our Terms of Use here.

Cookies

Analytics

These cookies help us track site metrics to improve our sites and provide a better user experience.

Advertising/Social Media

These cookies are used to serve advertisements aligned with your interests.

Essential

These cookies are required to provide basic functions like page navigation and access to secure areas of the website.

Delete My Data

Delete all cookies and associated data