FHB Logo Facebook LinkedIn Email Pinterest Twitter X Instagram Tiktok YouTube Plus Icon Close Icon Navigation Search Icon Navigation Search Icon Arrow Down Icon Video Guide Icon Article Guide Icon Modal Close Icon Guide Search Icon Skip to content
Subscribe
Log In
  • How-To
  • Design
  • Tools & Materials
  • Restoration
  • Videos
  • Blogs
  • Forum
  • Magazine
  • Members
  • FHB House
  • Podcast
Log In

Fine Homebuilding Project Guides

Drywall

Guide Home
  • Drywall Basics
  • Tools and Materials
  • Hanging Drywall
  • Taping and Sanding
  • Special Installations
  • Drywall Repairs
  • Plaster
How-To

Taping Outside Corners

They require corner bead and three coats of compound, but these corners are straightforward to tape.

By Myron R. Ferguson
  • X
  • facebook
  • linkedin
  • pinterest
  • email
  • add to favorites Log in or Sign up to save your favorite articles

For me, outside corners are a lot easier to tape than inside corners. There is no need to put any tape on the corner bead (though you can tape the edge of metal corner bead to reduce corner cracking). In addition, there are usually no seams or gaps along the corner bead edge (if there are gaps, use joint tape). This advice also applies to the newer tape-on or glue-on beads, which I prefer over nail-on metal beads.

First coat

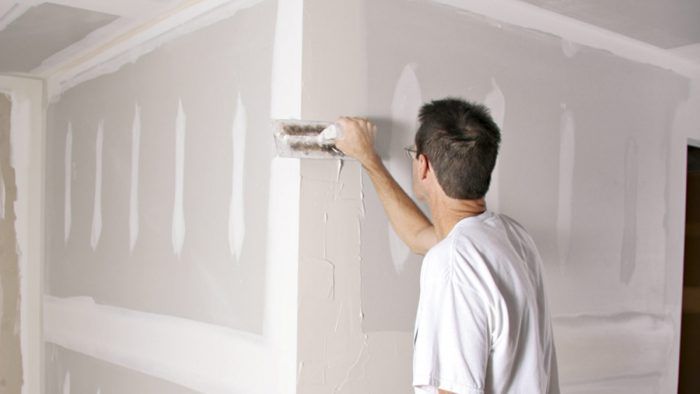
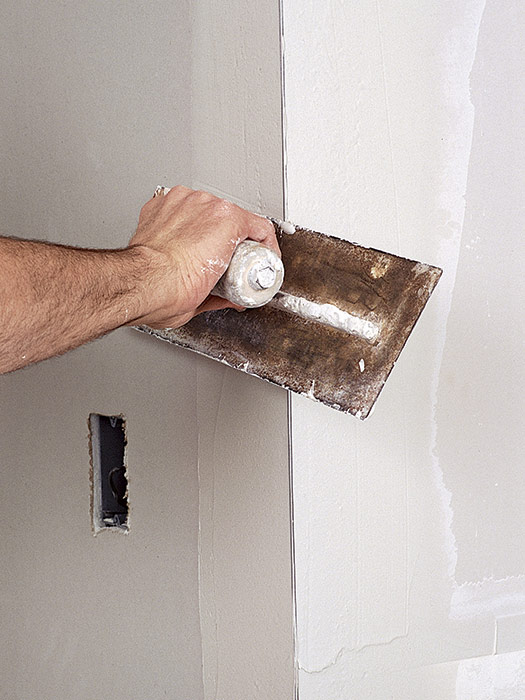
Apply the first coat of joint compound to the corner bead as you go through taping seams and inside corners throughout the room. Just blend in the areas where seams or corners intersect the corner bead. Using a 5-in. or 6-in. taping knife, cover the bead with joint compound and then press the compound into place with the edge of a beveled trowel or taping knife. Using the raised outside edge of the corner bead as a screed, pull the trowel along the corner, smoothing out the compound and feathering the edge along the drywall surface. Some of the newer beads—particularly the tape-on beads—are tight-fitting and require only one fill coat and a third (finish) coat. In this case, apply a wider first (fill) coat and pay more attention to getting it smooth.

WORK SMART: For a doorway wrapped with corner bead, use fiberglass-mesh tape at the corners to reinforce the area where the two beads meet.


Second coat

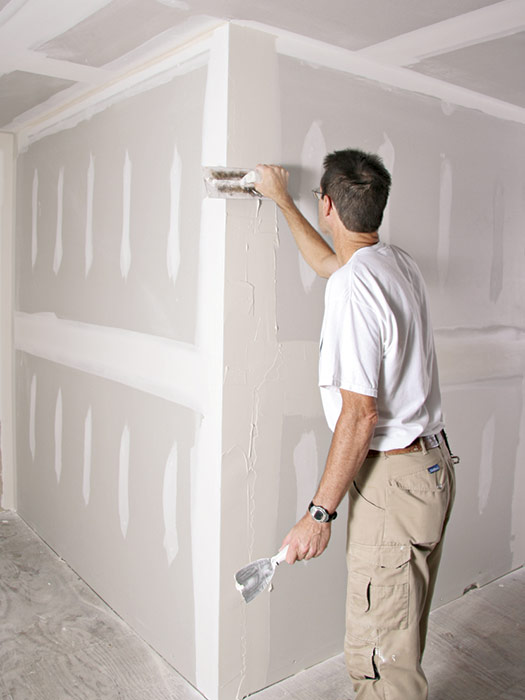
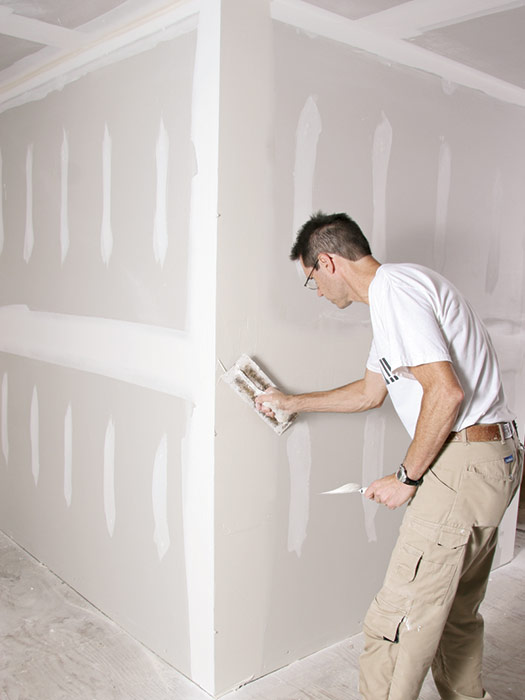
Outside corners are easy to second coat, because the raised outer edge of the corner bead acts as a screed for smoothing the compound. Apply the joint compound about 10 in. wide. Using a wide taping knife or a beveled trowel, apply pressure on the outside edge of the joint compound and on the edge of the corner bead, holding the trowel almost flat against the compound. When you’ve finished the second coat, the outer raised edge should still be visible, the center should be smooth, and the edges should be feathered into the surface of the panel.

If a seam or an inside corner intersects an outside corner, both areas can be taped at the same time. Blend the areas together, filling and smoothing as necessary with a 6-in. or 12-in. taping knife. You need a very light touch at the intersection—just skim the surface with the edge of the knife to avoid marking up the other seam. Blending the two seams together when they are both wet can be tricky, so an alternative is to apply the second coat on the corner and allow it to dry before second coating the intersecting seam.
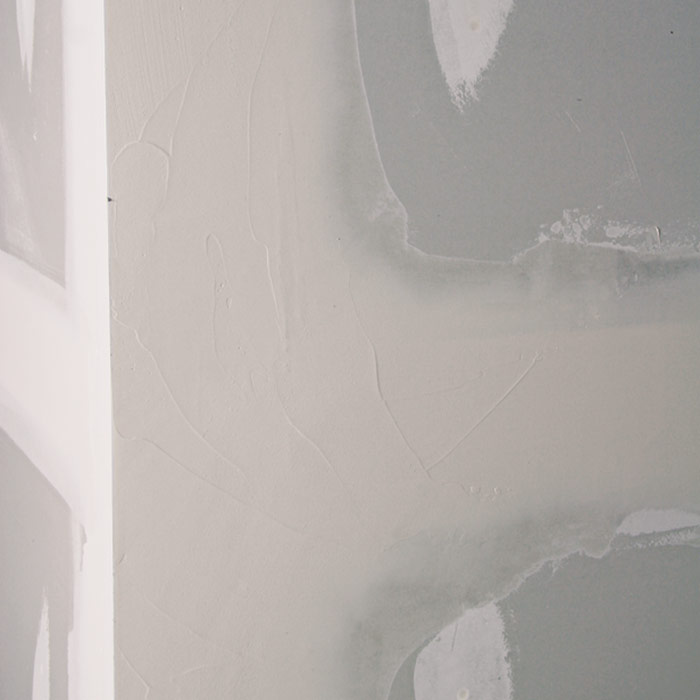
 

Taping Outside Corners

After the corner bead has been installed, the first coat of compound conceals it from sight. The first coat doesn’t have to be perfect, just be sure the beaded edge is clean. Applying the second coat allows you to smooth out any rough spots and blend it into intersecting joints.

Apply the first coat
Apply the first coat: When applying the first coat to corner bead on an outside corner, spread the compound about 6 in. wide, keeping the raised bead clean and using it as a screed for a curved trowel or taping knife.

Work out the rough spots
Work out the rough spots: When applying a wider fill coat over corner bead use the raised outer edge of the bead as a screed while you smooth the sides and feather the edges. This coat is typically 8 in. to 10 in. wide.

Blend intersecting seams
Blend intersecting seams: Taped areas must be blended together where they intersect. Here, a trowel and knife are used to blend a horizontal seam and an outside corner.

outside corner


Third coat

Apply the final coat of joint compound to the outside corners in the same way you final-coated the seams—with a 12-in. taping knife or a roller. For the final coat, use either an all-purpose compound or a topping compound (my preference).

THINK AHEAD: As you apply the third coat, note any areas that require additional feathering or filling. You must take care of them before you sand.


Apply a thin layer over the entire taped area, going 1 in. or so wider than the last coat. Feather the joint compound with a 12-in. taping knife. Remove most of the compound, leaving only enough to smooth the bead and feather the edge into the drywall surface.

A final check 

After you’ve applied the final coat and before you start sanding, walk through each room to check that the taping job is satisfactory. Look over the seams and corners, checking for indentations, scratches, and areas where the tape shows through. Touch up any imperfections with a thin application of joint compound before going on to the finish-sanding process. If anything requires special attention, such as a crack, a crowned seam, or an overcut outlet box, correct them before you begin sanding.


Previous: Finishing Drywall Seams Next: Drywall: Finishing an Outside Corner

Guide

Drywall

Chapter

Taping and Sanding

Sign up for eletters today and get the latest how-to from Fine Homebuilding, plus special offers.

Signing you up...

This site is protected by reCAPTCHA and the Google Privacy Policy and Terms of Service apply.
See all newsletters
See all newsletters

Log in or create an account to post a comment.

Sign up Log in

Become a member and get full access to FineHomebuilding.com

Drywall

Drywall

Trusted, comprehensive guidance for choosing, hanging, taping, sanding, and repairing drywall—the right way

View Project Guide

View All Project Guides »

Become a member and get unlimited site access, including the Drywall Project Guide.

Start Free Trial

Drywall Basics
  • Types and Uses of Drywall
  • Planning the Job
Tools and Materials
  • Hanging Tools
  • Taping Tools and Materials
  • Sanding and Finishing Tools and Materials
Hanging Drywall
  • Prep for Hanging
  • Measuring and Cutting Drywall
  • Guidelines for Hanging and Fastening Drywall
  • Hanging Ceilings
  • Hanging Walls
  • Hanging Airtight Drywall
  • Trim Accessories/Corner Beads
Taping and Sanding
  • Taping Basics
  • Taping Seams
  • Taping Inside and Outside Corners
  • Sanding
Special Installations
  • Tricky Transitions
  • Curved Surfaces
  • Other Special Installations
  • Decorating with Drywall
Drywall Repairs
  • Patching Holes, Cracks, and More
Plaster
  • Working with Lime Plaster
  • Plaster Repair
  • Classic Plaster Techniques

Fine Home Building

Newsletter Sign-up

  • Fine Homebuilding

    Home building tips, offers, and expert advice in your inbox.

  • Green Building Advisor

    Building science and energy efficiency advice, plus special offers, in your inbox.

  • Old House Journal

    Repair, renovation, and restoration tips, plus special offers, in your inbox.

Signing you up...

This site is protected by reCAPTCHA and the Google Privacy Policy and Terms of Service apply.
See all newsletters

Follow

  • Fine Homebuilding

    Dig into cutting-edge approaches and decades of proven solutions with total access to our experts and tradespeople.

    Start Free Trial Now
    • Facebook
    • Instagram
    • X
    • LinkedIn
  • GBA Prime

    Get instant access to the latest developments in green building, research, and reports from the field.

    Start Free Trial Now
    • Facebook
    • YouTube
  • Old House Journal

    Learn how to restore, repair, update, and decorate your home.

    Subscribe Now
    • Facebook
    • Instagram
    • X

Membership & Magazine

  • Online Archive
  • Start Free Trial
  • Magazine Subscription
  • Magazine Renewal
  • Gift a Subscription
  • Customer Support
  • Privacy Preferences
  • About
  • Contact
  • Advertise
  • Careers
  • Terms of Use
  • Site Map
  • Do not sell or share my information
  • Privacy Policy
  • Accessibility
  • California Privacy Rights

© 2025 Active Interest Media. All rights reserved.

Fine Homebuilding receives a commission for items purchased through links on this site, including Amazon Associates and other affiliate advertising programs.

  • Home Group
  • Antique Trader
  • Arts & Crafts Homes
  • Bank Note Reporter
  • Cabin Life
  • Cuisine at Home
  • Fine Gardening
  • Fine Woodworking
  • Green Building Advisor
  • Garden Gate
  • Horticulture
  • Keep Craft Alive
  • Log Home Living
  • Military Trader/Vehicles
  • Numismatic News
  • Numismaster
  • Old Cars Weekly
  • Old House Journal
  • Period Homes
  • Popular Woodworking
  • Script
  • ShopNotes
  • Sports Collectors Digest
  • Threads
  • Timber Home Living
  • Traditional Building
  • Woodsmith
  • World Coin News
  • Writer's Digest
Active Interest Media logo
X
X
This is a dialog window which overlays the main content of the page. The modal window is a 'site map' of the most critical areas of the site. Pressing the Escape (ESC) button will close the modal and bring you back to where you were on the page.

Main Menu

  • How-To
  • Design
  • Tools & Materials
  • Video
  • Blogs
  • Forum
  • Project Guides
  • Reader Projects
  • Magazine
  • Members
  • FHB House

Podcasts

  • FHB Podcast
  • ProTalk

Webinars

  • Upcoming and On-Demand

Podcasts

  • FHB Podcast
  • ProTalk

Webinars

  • Upcoming and On-Demand

Popular Topics

  • Kitchens
  • Business
  • Bedrooms
  • Roofs
  • Architecture and Design
  • Green Building
  • Decks
  • Framing
  • Safety
  • Remodeling
  • Bathrooms
  • Windows
  • Tilework
  • Ceilings
  • HVAC

Magazine

  • Current Issue
  • Past Issues
  • Magazine Index
  • Subscribe
  • Online Archive
  • Author Guidelines

All Access

  • Member Home
  • Start Free Trial
  • Gift Membership

Online Learning

  • Courses
  • Project Guides
  • Reader Projects
  • Podcast

More

  • FHB Ambassadors
  • FHB House
  • Customer Support

Account

  • Log In
  • Join

Newsletter

Get home building tips, offers, and expert advice in your inbox

Signing you up...

This site is protected by reCAPTCHA and the Google Privacy Policy and Terms of Service apply.
See all newsletters
See all newsletters

Follow

  • X
  • YouTube
  • instagram
  • facebook
  • pinterest
  • Tiktok

Join All Access

Become a member and get instant access to thousands of videos, how-tos, tool reviews, and design features.

Start Your Free Trial

Subscribe

FHB Magazine

Start your subscription today and save up to 81%

Subscribe

We hope you’ve enjoyed your free articles. To keep reading, become a member today.

Get complete site access to expert advice, how-to videos, Code Check, and more, plus the print magazine.

Start your FREE trial

Already a member? Log in

Privacy Policy Update

We use cookies, pixels, script and other tracking technologies to analyze and improve our service, to improve and personalize content, and for advertising to you. We also share information about your use of our site with third-party social media, advertising and analytics partners. You can view our Privacy Policy here and our Terms of Use here.

Cookies

Analytics

These cookies help us track site metrics to improve our sites and provide a better user experience.

Advertising/Social Media

These cookies are used to serve advertisements aligned with your interests.

Essential

These cookies are required to provide basic functions like page navigation and access to secure areas of the website.

Delete My Data

Delete all cookies and associated data