Wet Sanding
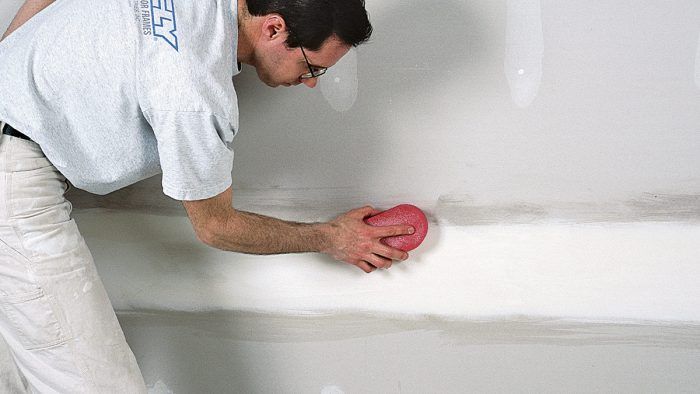
A drywall sponge is a handy tool for dust-free sanding, as long as you've done an excellent job of taping.

Occasionally, you may be working on a drywall finishing job where no dust at all is acceptable—for example, in an office building that contains sensitive computer equipment or in a home where a family member is allergic to dust particles. Even with careful covering and sealing of the work area, the fine dust that sanding creates is still going to get into unwanted areas.
Consider wet sanding, or sponging, for such cases. Because drying-type joint compound is water-soluble, you can blend the edges of taped areas and small defects with a wet sponge. When only a small touchup is required, an all-purpose household sponge or a smooth, soft cloth works effectively. For a larger wet sanding job, use a high-density polyurethane sponge made specifically for this purpose. The drywall sponge has small cells that retain water without excessive dripping.
| WORK SMART:Wait until the finish coat of joint compound is dry before you start wet sanding. If you don’t, the sponge may pull out joint compound in the wetter areas, and these defects will show after the joint compound is dry. |
To wet sand, dip the sponge in clean, cool water that is free of soap or additives. Wring out just enough water to eliminate dripping. Clean the sponge frequently as you work. As you would when dry sanding, rub the sponge in the direction of the seam or corner. Avoid rubbing across a seam or into a corner too much, because this may cause rippling in the finish. Use as few strokes as possible and be careful not to soak the joint compound. If the sponge is too wet, water may run down the walls, leaving visible streaks when dry. In addition, avoid excessively wetting the drywall paper, because it can rip easily when wet.

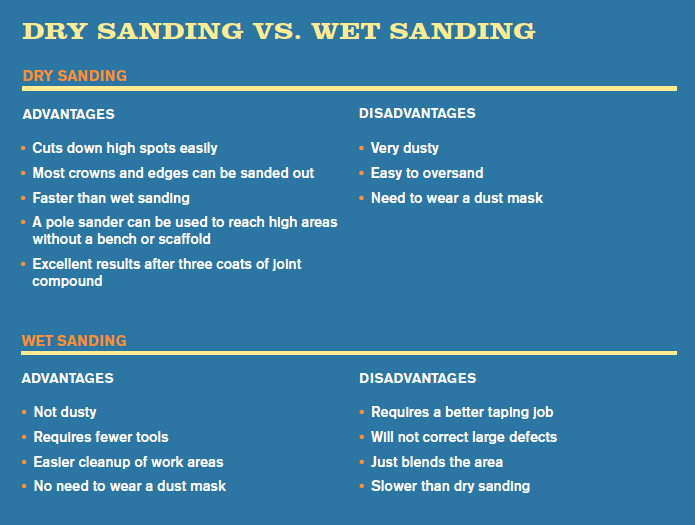
Although wet sanding is effective for blending the edges of taped seams and small defects, it doesn’t work so well on ridges and larger chunks. Unlike sandpaper, which cuts down excess compound, a sponge only blends or rounds over an area. If you plan to wet sand, make sure you do an excellent taping job. After the third coat of joint compound is dry, examine the surface carefully, using a bright light to help highlight any problem areas. Apply a thin coat of joint compound to defective areas and allow it to dry before wet sanding.


