Plumbing Upgrade for Faster Hot Water
Building science consultant Allison Bailes shows how to add a new water-distribution manifold and smaller pipes to decrease the time it takes for hot water to reach faucets.
David Wasserman and I worked together at the Southface Energy Institute back in 2007-08 and have been friends since then. Before Southface, he was an engineer at Oak Ridge National Lab. We also call on him for occasional help with some of our HVAC design work at Energy Vanguard. He knows his building science, especially the mechanical side. So when he posted a comment in another article about the hot water system retrofit he’s done on his own house, I wanted to see it.
The article where he posted that comment is the one I wrote about why it takes so long to get hot water in your house. The basic problem is that a lot of hot water pipes are both too long and too big in diameter. In the article I wrote about my own house, where it currently takes two and a half minutes to get hot water at the kitchen sink. I can reduce the length of the pipe to the kitchen, but it’s the diameter that’s killing me. I’ll fix mine before long, but Wasserman has already done something about his slow hot water.
Wasserman’s hot water retrofit
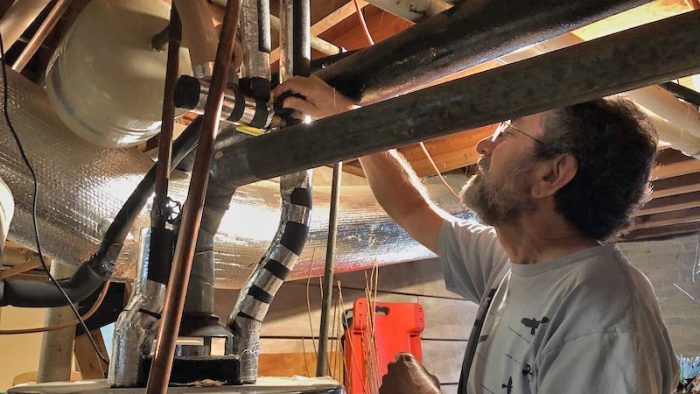
I went over to his place one day last fall, and he showed me what he’s done. That’s him in the top photo pointing out the addition to his hot water pipes, with a closeup below. It’s really simple. His existing hot water lines are all 3/4-in. and 1/2-in. copper pipe. With the low-flow fixtures used in homes now, those pipes are too big. He didn’t remove them, though. He simply added a second, smaller pipe for three of his hot water runs.
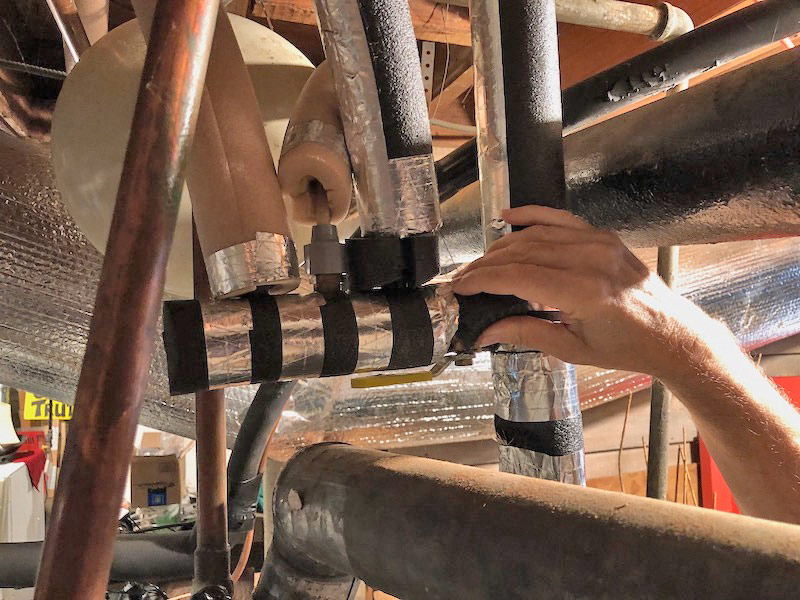
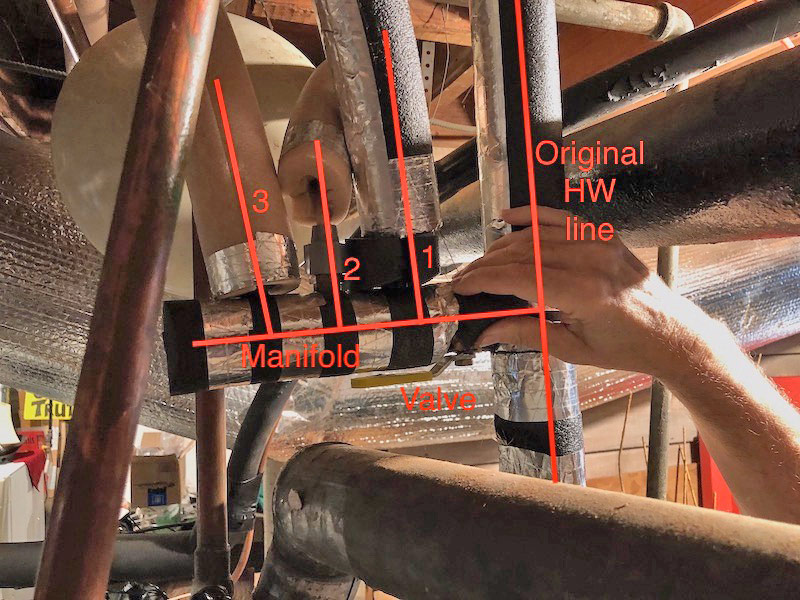
In the photo above, his hand is in front of the original hot water line coming off the top of the water heater. To the left of his hand is a short manifold he made out of copper pipe and copper tees (details below). Near his thumb is a cutoff valve for the three new hot water runs. Since it’s parallel to the manifold, you can tell the valve is open and the hot water goes that way. The three new runs go up from that manifold. They’re made of 1/4-in. PEX tubing, which you can’t see except for one little gap because they’re insulated.In case you can’t see all that in the photo above—and it IS hard to see with the pipes all covered in thick insulation—the annotated version of the photo below should help. The numbered lines are the new 1/4-in. PEX lines he installed between the manifold and the three hot water taps. (You’ll have to look closely to see the word “valve.” I couldn’t find a color that stood out any better there.)
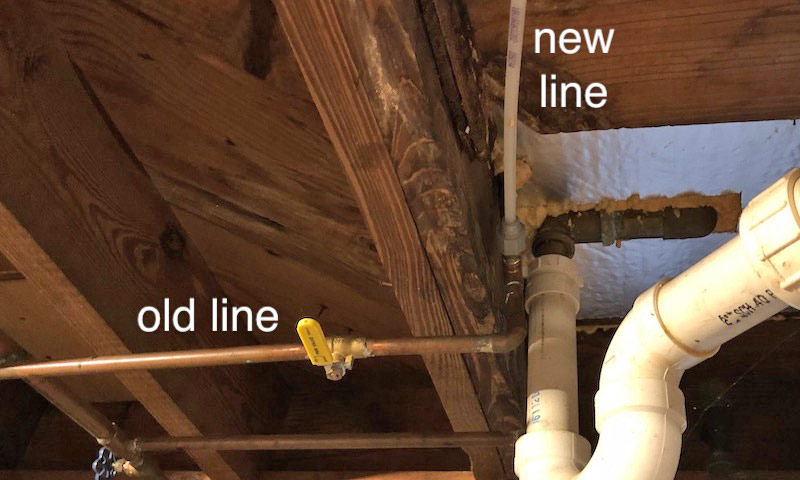
Those three PEX pipes go to three different parts of the house. The photo below shows one going into a bathroom. Since he doesn’t want hot water going through both pipes, he installed valves for the old runs near where the new run connects to it. Perpendicular to the pipe indicates that that one is off, and all hot water is coming through the 1/4-in. PEX pipe. The other two runs are set up the same way. Simple, right?
And how well does it work? He said it used to take over a minute to get hot water to his kitchen faucet. With the hot water system retrofit, it takes about 8 seconds. I verified that when I visited. They hadn’t used hot water in the kitchen yet that morning, so I turned on the tap and counted out, one-one thousand, two-one thousand . . . when I got to 7 seconds, the hot water was there.
Retrofit details
If you’re interested in the parts he used and other details, here’s what he wrote in his comment on the other article:
- Attach a 3/4-in. to 3/4-in. copper Tee as close as you can to the water heater outlet.
- Create a manifold consisting of 3/4-in. to 1/2-in. copper Tees connected by 3/4-in. stubs. Put as many Tees on it as you need. End the manifold with a cap, not a 90° bend.
- Attach 1/2-in. copper male adapters to each branch of the manifold.
- Thread on a Sharkbite reducing adapters.
- The PEX tubing then slips into the adapter.
- At the other end, find a 1/2-in. pipe [or whatever size yours is] as close to the fixture as possible and install a ball valve. Then install a 1/2-in. to 1/2-in. Tee downstream and repeat steps 3 and 4 above.
- This insulation works well with this tubing.
Caution: Prescriptive plumbing codes don’t allow pipes as small as 1/4-in., so you may need an engineer to help if you want to go that small. You need to know the flow rate required at the end of the line. To use 1/4-in. PEX tubing, it should be about 1.8 gal. per minute or less. Also, if you need to run the PEX more than 25 ft., you’ll need to go to a larger size, too. To get a better handle on what you need, use this plastic pipe design calculator.
There you have it. David Wasserman’s method to retrofit the hot water distribution system works well in his old house. If you’re worried about this retrofit not meeting the code, which requires 3/8-in. minimum pipe, Wasserman said: “Code requires you to put in over-sized piping but it does not require you to use them!”
Originally published on GreenBuildingAdvisor.com titled “Retrofitting a Hot Water System”. Allison Bailes of Atlanta, Georgia, is a speaker, writer, building science consultant, and the founder of Energy Vanguard. He has a PhD in physics and writes the Energy Vanguard Blog. He is also writing a book on building science. You can follow him on Twitter at @EnergyVanguard.
