FHB Logo Facebook LinkedIn Email Pinterest Twitter X Instagram Tiktok YouTube Plus Icon Close Icon Navigation Search Icon Navigation Search Icon Arrow Down Icon Video Guide Icon Article Guide Icon Modal Close Icon Guide Search Icon Skip to content
Subscribe
Log In
  • How-To
  • Design
  • Tools & Materials
  • Restoration
  • Videos
  • Blogs
  • Forum
  • Magazine
  • Members
  • FHB House
  • Podcast
Log In

Fine Homebuilding Project Guides

Finish & Trim Carpentry

Guide Home
  • Trim Design
  • Tools and Materials
  • Interior Trim Basics
  • Window and Door Casings
  • Baseboard and Crown Molding
  • Wainscot and Paneling
  • Mantels and Fireplace Surrounds
  • Coffered Ceilings
How-To

Easy, Elegant Mantel

Build a fireplace surround from one sheet of MDF and some stock moldings.

By Justin Fink Issue 273 - Feb/Mar 2018
  • X
  • facebook
  • linkedin
  • pinterest
  • email
  • add to favorites Log in or Sign up to save your favorite articles

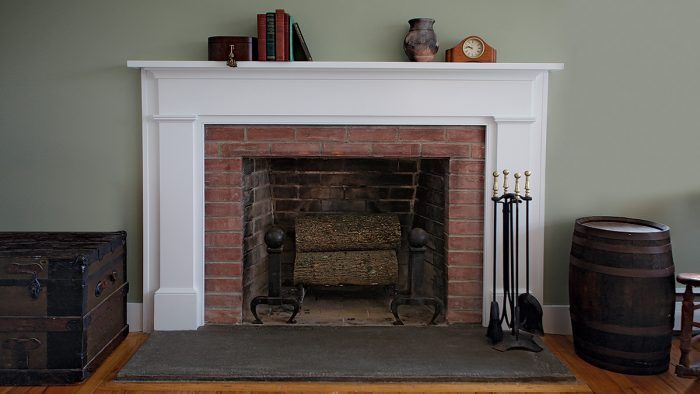
Fireplace surrounds—better known by the more commonly used term mantels—are a finish carpenter’s playground. They’re a relatively small, cleanly contained opportunity to create a centerpiece that shows off our craftsmanship, lets us exercise our eye for proportions and design, and, for better or worse, gives us a chance to pile on the moldings. But not every mantel job has a big budget, and that often leads to unimaginative design and execution, or worse, a cookie-cutter, factory-produced, prefab option. But with a bit of creativity, even a modest-budget living room can be finished with an elegant fireplace surround. All you need to build the mantel shown here is about $125, enough for a sheet of 3/4-in. MDF, some 1x poplar, and a couple sticks of stock molding.

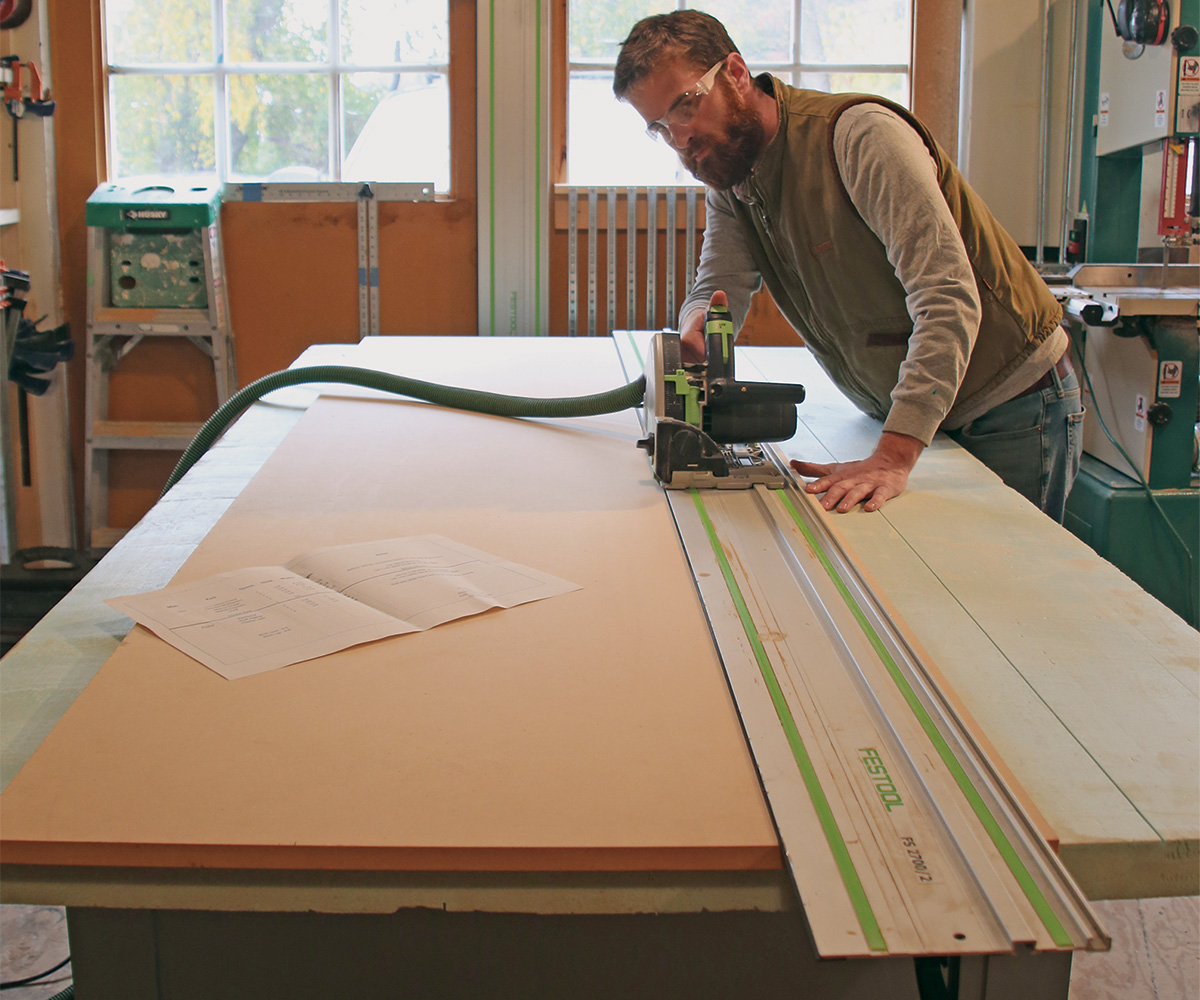
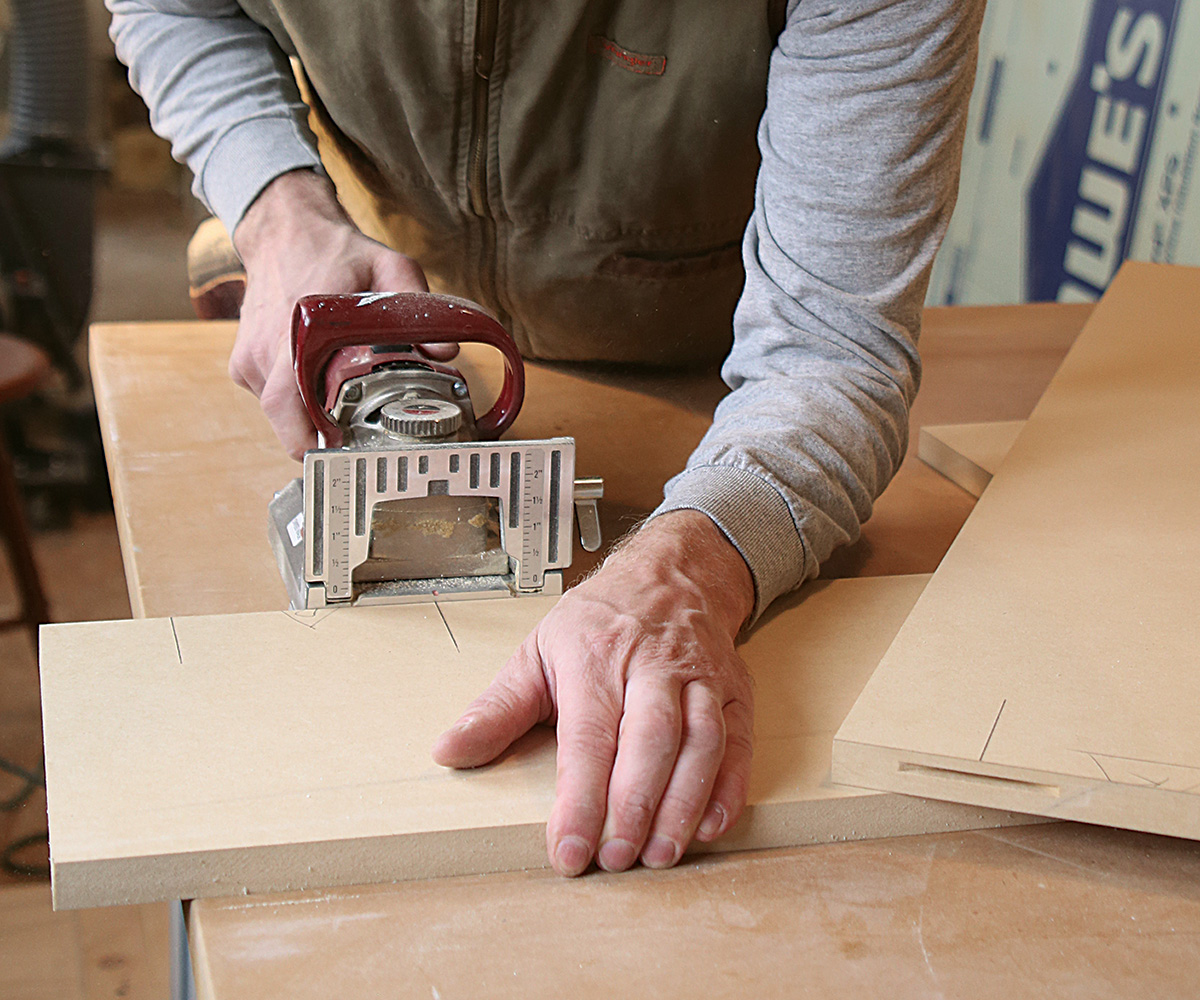
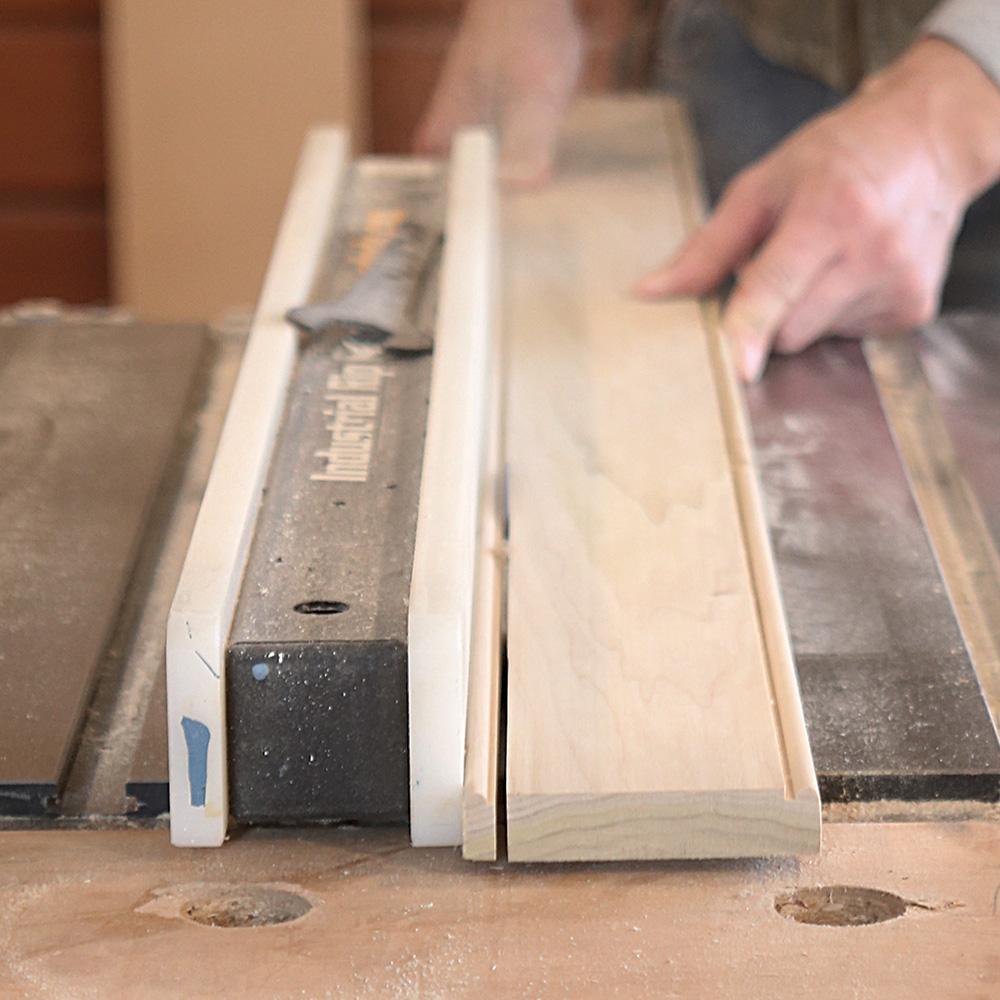
As far as trim-carpentry projects go, this one is fairly straight­forward. The work can be done in a shop, as it was for this project, or right on site. The tools aren’t specialized, and in most cases can be chosen based on what is already in your arsenal. For instance, I’d be just as comfortable joining boards with floating tenons as I was using biscuits, and even though I used a tracksaw to cut the MDF parts, a well-tuned tablesaw would also work.

The dimensions of the assembly shown here are based on a simple Federal design by woodworker Mario Rodriguez, which appears in his excellent book, Building Fireplace Mantels. I scaled the parts and customized the assembly to fit the room where the mantel was installed, but before you go too far down the path of designing, it’s important to consider the restrictions of the building code.

parts of a fireplace mantel
A mantel in layers. This simple Federal-style mantel is built from the wall out. First comes the foundation boards, then the frieze and pilasters, and finally all the preassembled trim that covers the gaps and seams while adding character.

The code is not difficult to satisfy, but fireplaces in old houses don’t always mesh with modern code standards. The problem is that the masonry around the firebox often isn’t wide enough to accommodate a mantel that’s set far enough away from the firebox to meet code—at least not without cartoonish proportions.

fireplace mantel trim code

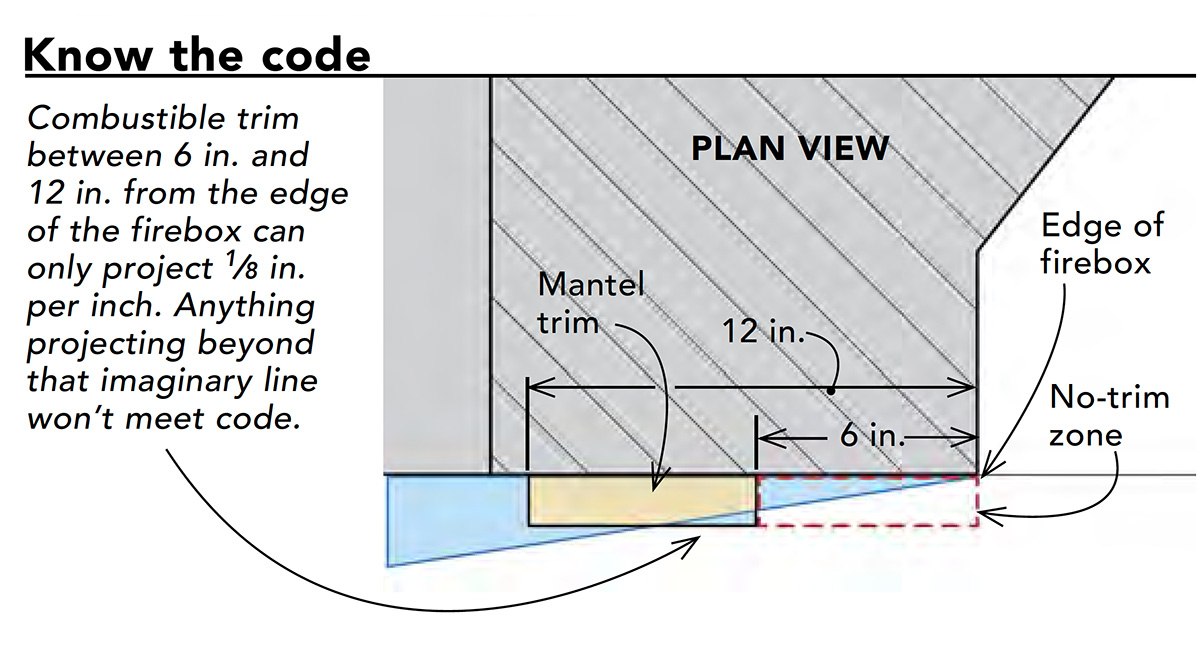
Luckily, the fireplace in this house is nonfunctional, and the homeowners simply wanted a decorative surround as a focal point. But if the fireplace had been operational, I would have scaled up the entire surround to maintain the mantel proportions, and then covered the brickwork with slabs of stone or tile that extend onto the surrounding drywall as far as necessary to cover the gap between the firebox and the mantel foundation boards. Finally, keep in mind that clearance rules for manufactured fireplace inserts and stoves supersede the building codes, and may be stricter.

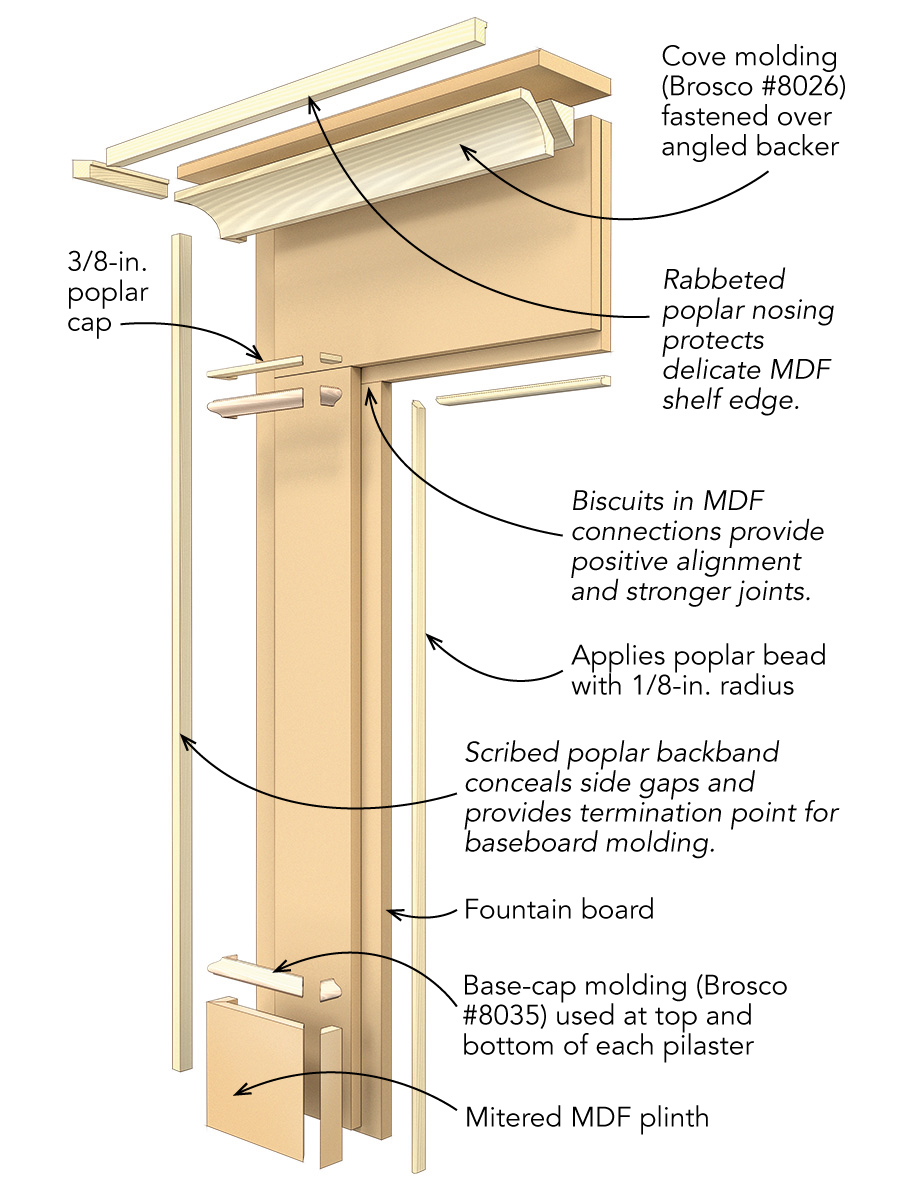
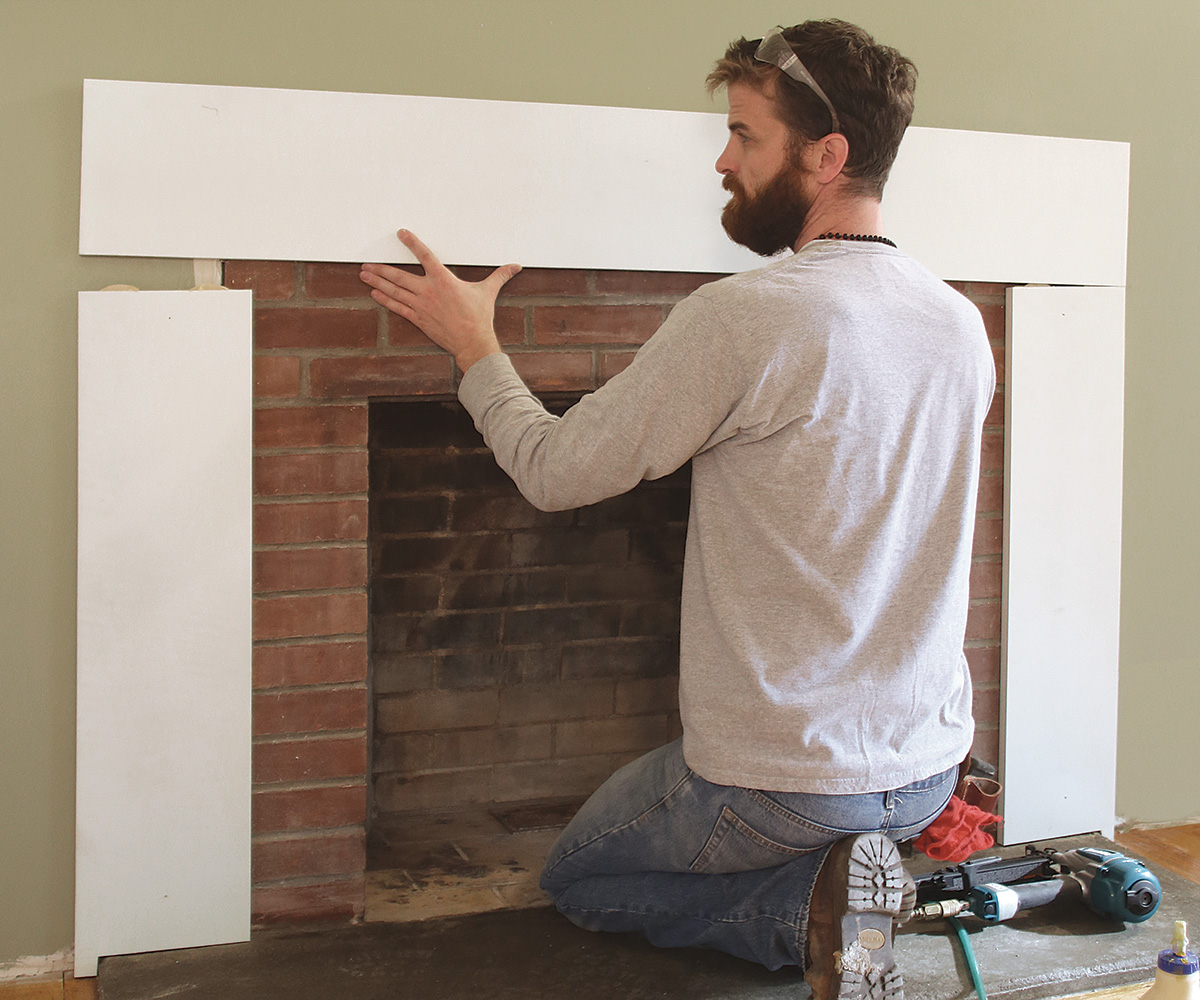
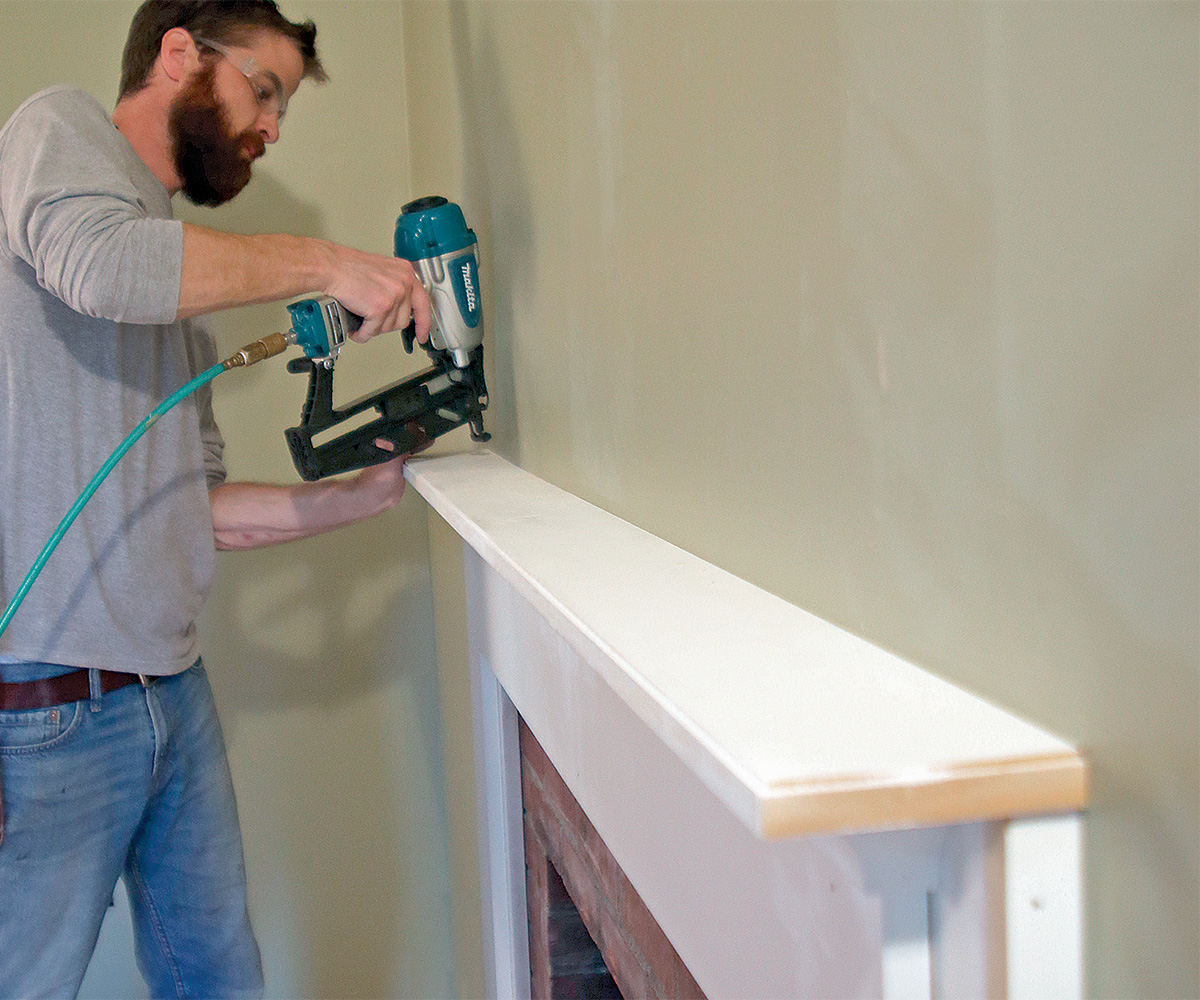
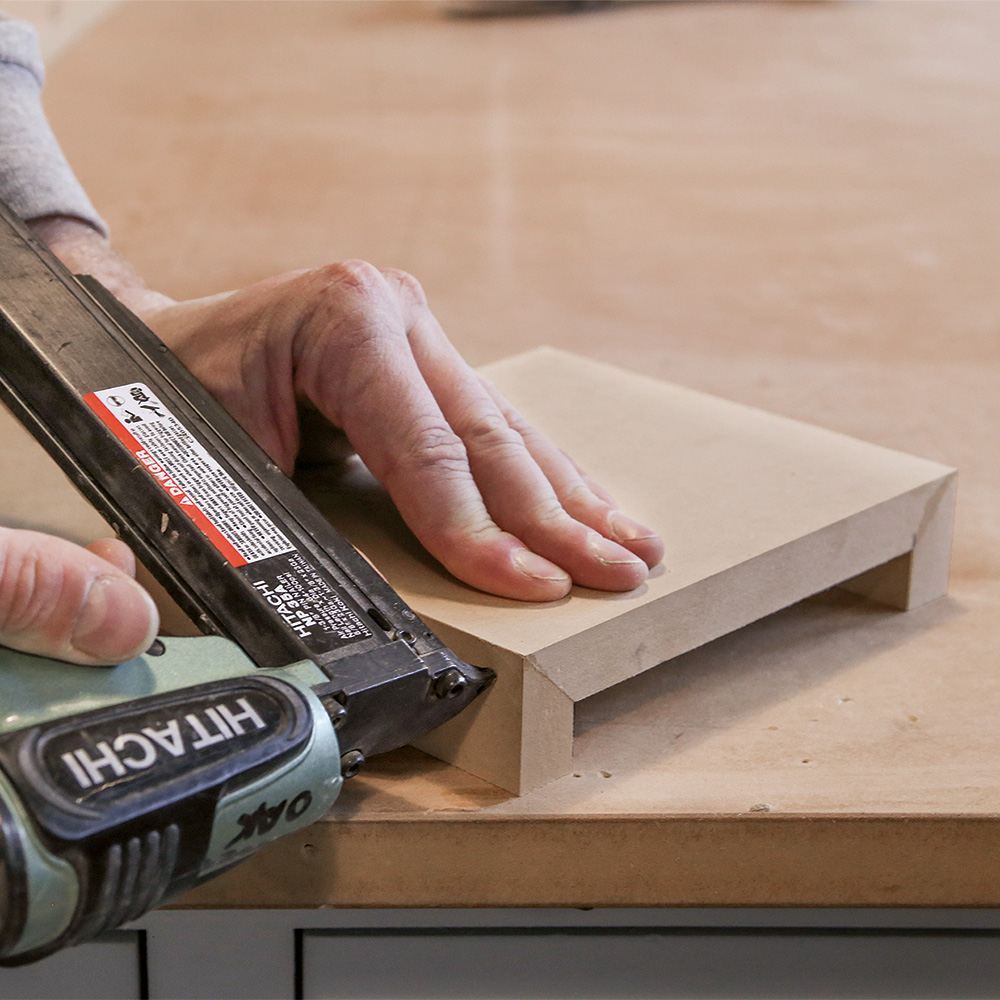
Start with a solid foundation

The foundation boards of this mantel have two roles. First, they create a visual backdrop for the entire fireplace surround, helping to ground the design. Second, they act as a flat, plumb surface in an assembly that is rarely so. This allows the rest of the parts of the mantel to attach regardless of the condition of the wall.

cutting your fireplace mantel pieces from a sheet of MDF
All from a single sheet. All of the MDF parts for this project come from a single 4×8 sheet. They are first broken down by width using a tracksaw, then taken to the miter saw to be cut to length.

cutting slots for biscuits in MDF
Biscuits for alignment. The three pieces that make up the foundation assembly are joined together in place rather than installed as one piece. To ensure flush joints that stay tight, the parts are slotted for biscuits and glue-sized before installation.

marking dead-level and plumb lines
1. Plumb and level. After measuring the setback from the edge of the firebox to where the inside edge of the foundation boards will land, use a pencil to strike dead-level and plumb lines across the masonry.

scribe to align the inside edge or each foundation board
2. Get set to scribe. After aligning the inside edge of each vertical foundation board to its plumb line, set your scribes to equal the distance from the top of the board—which is left longer than necessary—to the level pencil line on the masonry.

marking the bottom cut
3. Mark the bottom. Still holding the extra-long foundation board in position, trace the contours of the hearth onto the bottom face of the board. Once cut away, the board will fit at the bottom and be in alignment at the top.

cutting the scribe line using a jigsaw
4. Beveled for a tight fit. Cut along the scribed line using a jigsaw set to a slight undercutting bevel, taking the back edge of the board out of the equation to ensure the front sits tight to the hearth.

assembling the fireplace mantel foundation


Glass-smooth edges in MDF

One of the downsides to working with MDF is that, if left untreated, the porous fibers exposed by sawcuts are difficult to finish smoothly. I used to rely on spackle to smooth these problematic edges, but more recently switched to glue-sizing the edges instead. Glue-size is essentially watered-down yellow glue that’s brushed or rolled onto the edges of the board, where it soaks into the wood fibers and hardens. I find that a couple of passes with this watery glue solution (allowing for dry time between coats) followed by light sanding, then shellac-based primer, will result in a surface that’s smooth to the touch.

Glue-size vs untreated MDF cut edges


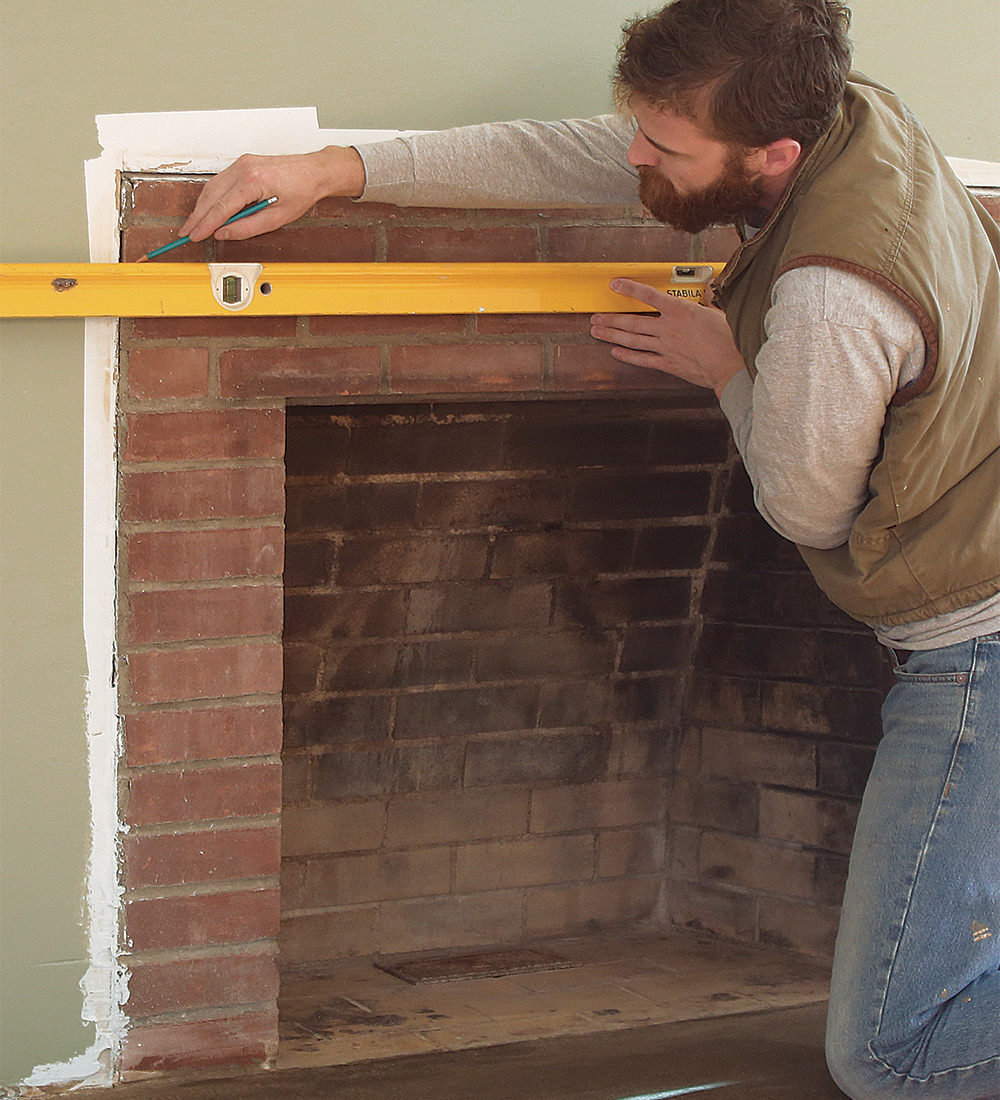
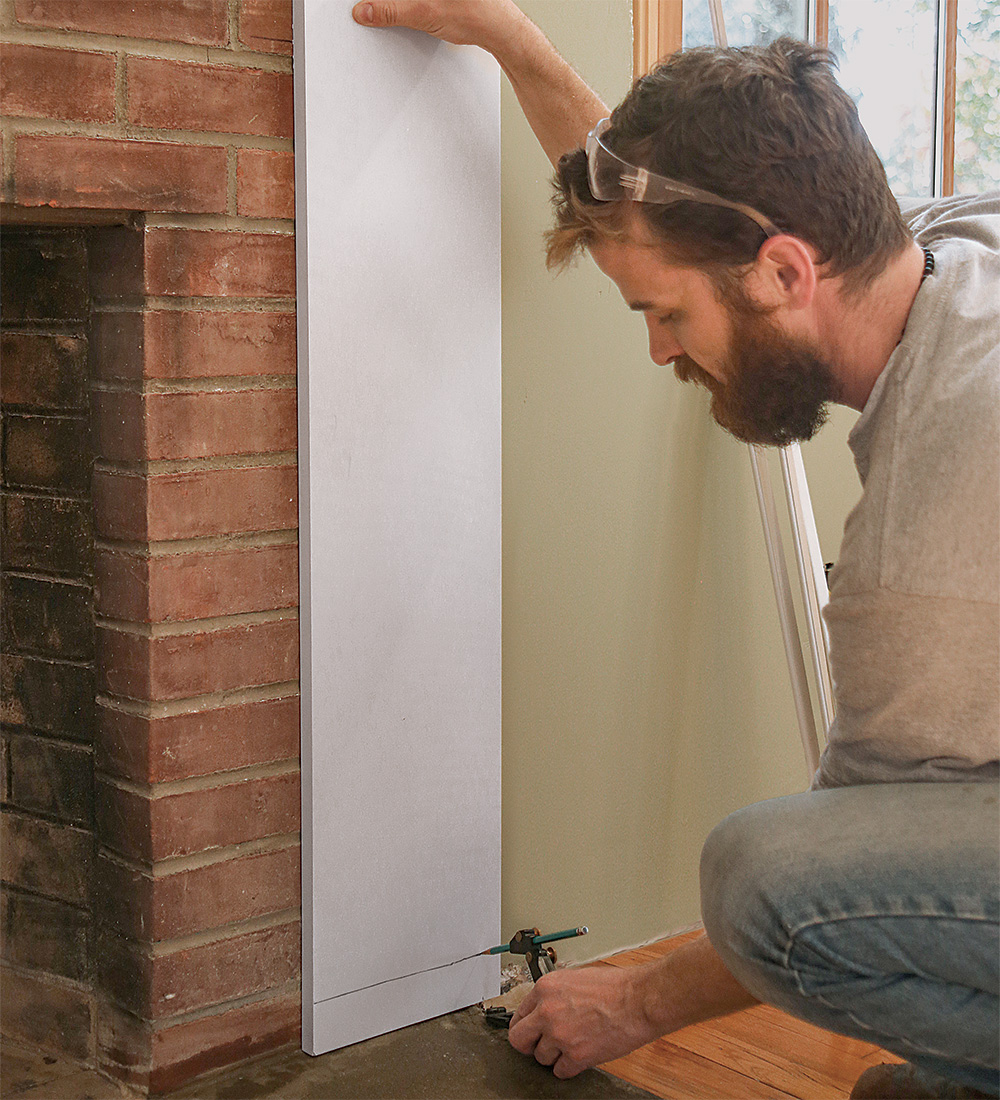
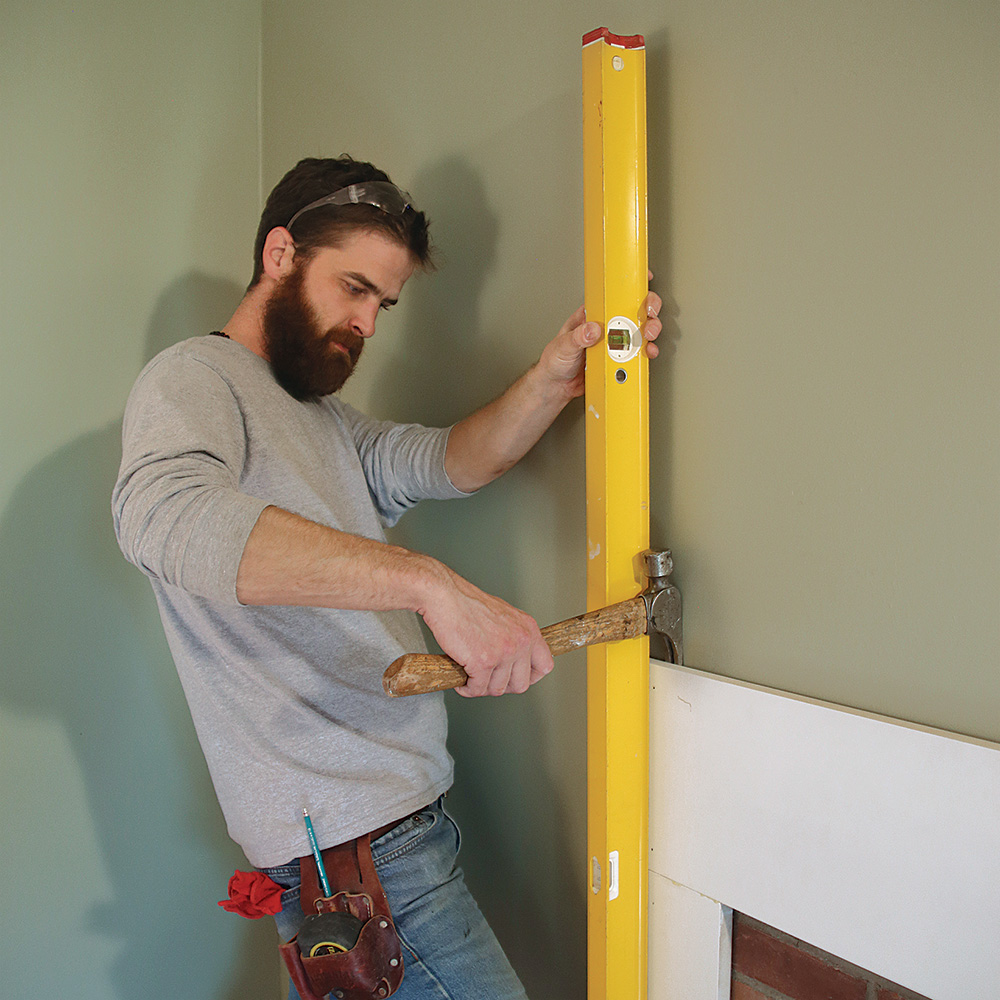
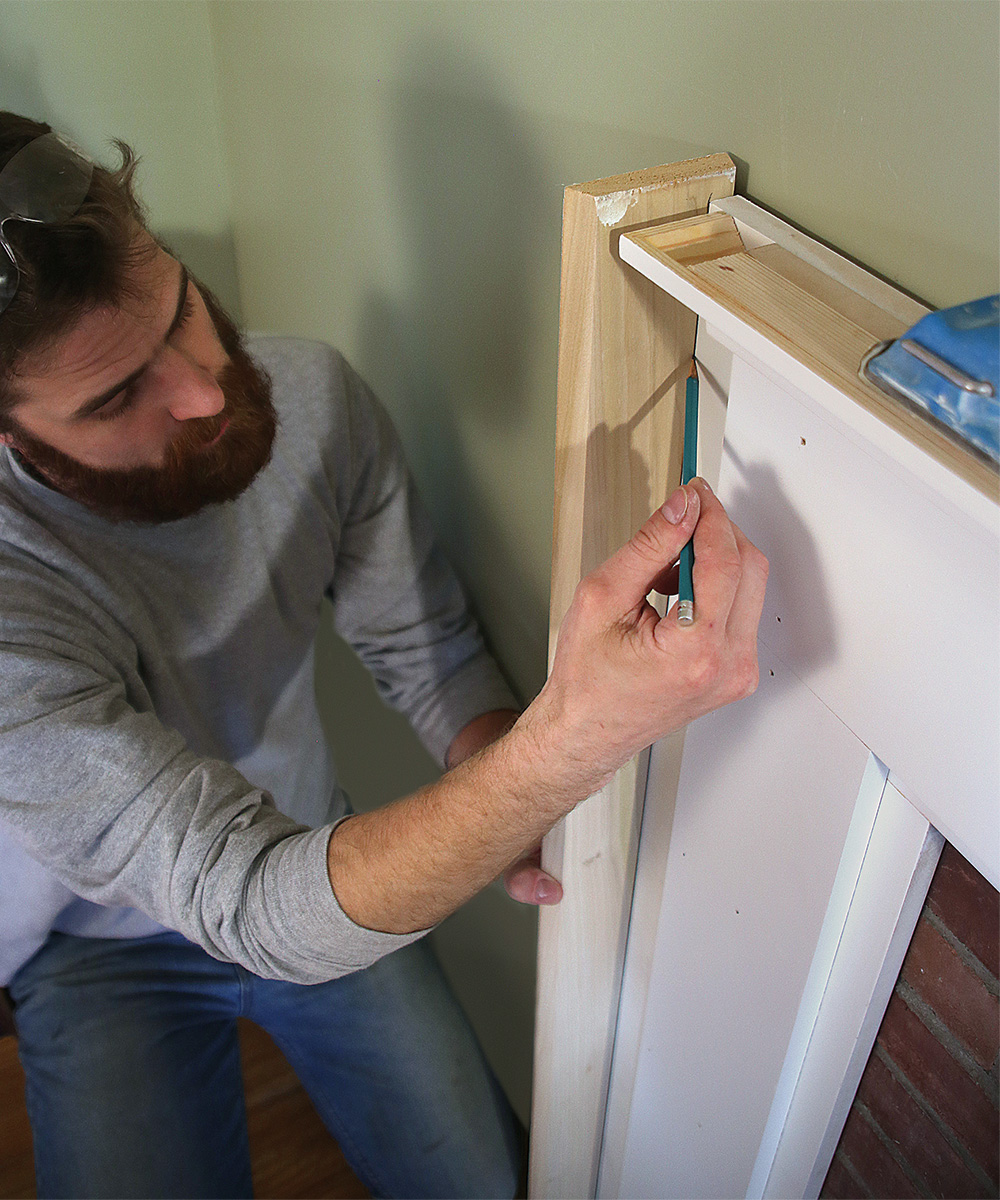
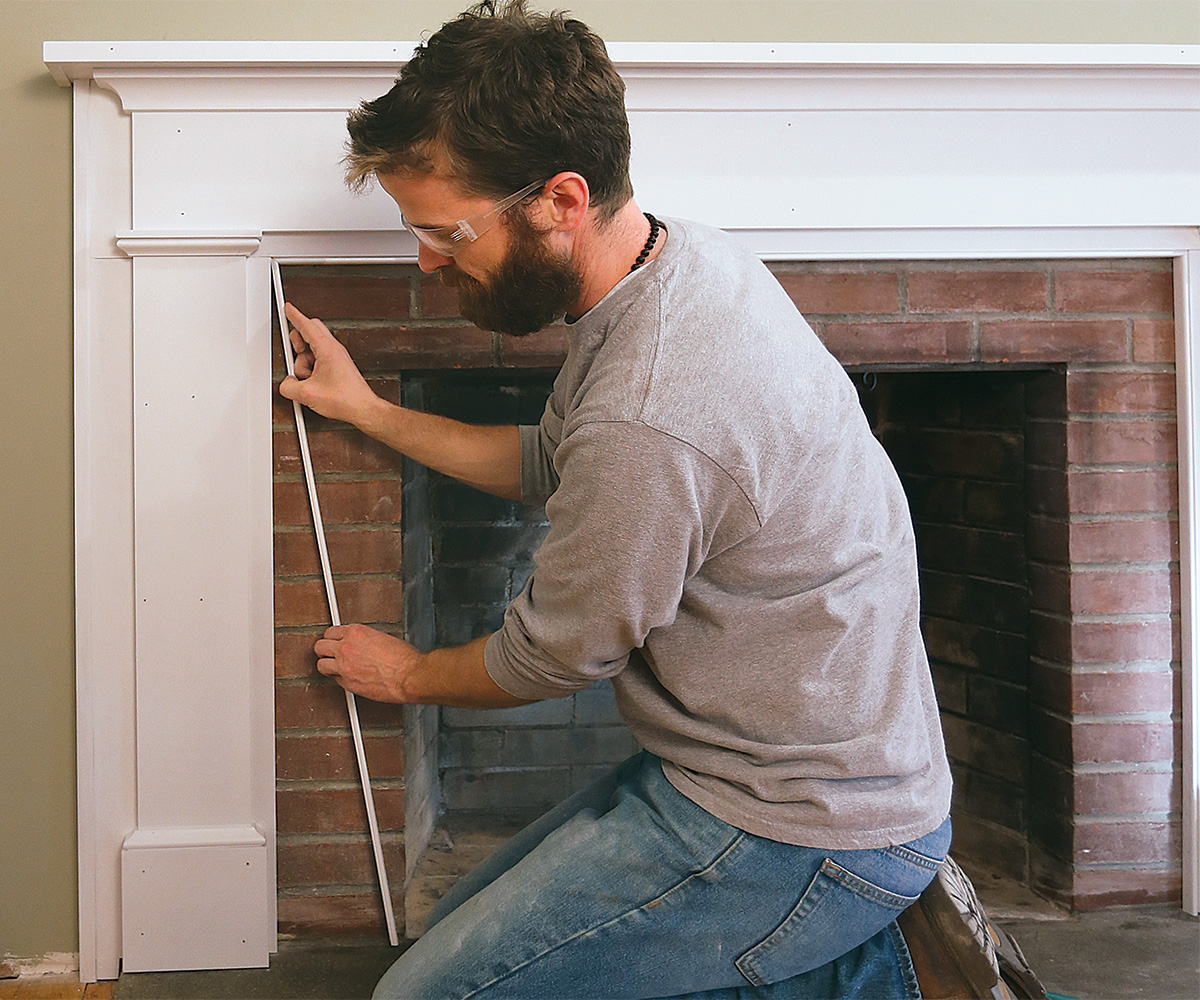
An easy fit, even on wavy walls

At just 3/4 in. thick, the foundation boards don’t leave room for scribing to meet the wall. Instead, focus on getting the foundation boards plumb and in plane with each other, then cover the gaps with a scribed shelf on top and backbands on each side.

prying the mantel foundation so its plumb
Pry it plumb. Once the glue sets, the foundation boards will act as a single unit. At this point, it can be pulled away from the wall as much as necessary to get it plumb before adding a few more finish nails through and into the framing around the masonry.
installing the frieze as one piece
One-piece frieze. Prefabbed in the shop to include the cove molding installed over an angled backer, the frieze and cove molding can be set as a single piece. Center it on the horizontal foundation board, align it flush along the top edge, and fasten it with finish nails.

installing the pilasters
In and up. Left just short of full length to allow for an easy fit, each pilaster gets glue and biscuits along the top edge before being slid up tight to the underside of the frieze. The gap at the bottom will be covered by the base detail.

scribing the backbands
Easier backbands. After scribing and cutting the beveled edge of an extrawide piece of poplar to fit the wall on each side of the mantel assembly, mark where it overlaps the face of the foundation boards. Add 1⁄8 in. to this marked line to create a slight reveal and cut along the line using a tracksaw.
nailing the mantel shelf to the frieze
Hide the top. After scribing the mantel shelf to fit any waves in the wall, set it in place and fasten it down to the frieze assembly with finish nails.
adding a hardwood nose to the MDF mantel shelf
A stronger shelf. The MDF mantel shelf is likely to take abuse, and therefore demands a hardwood nosing. To ensure alignment and help provide positive fastening, use a tablesaw to cut both shelf and nosing with nesting rabbets, leaving a slight reveal on the top and bottom to create a nice shadowline and eliminate the need for sanding in place.

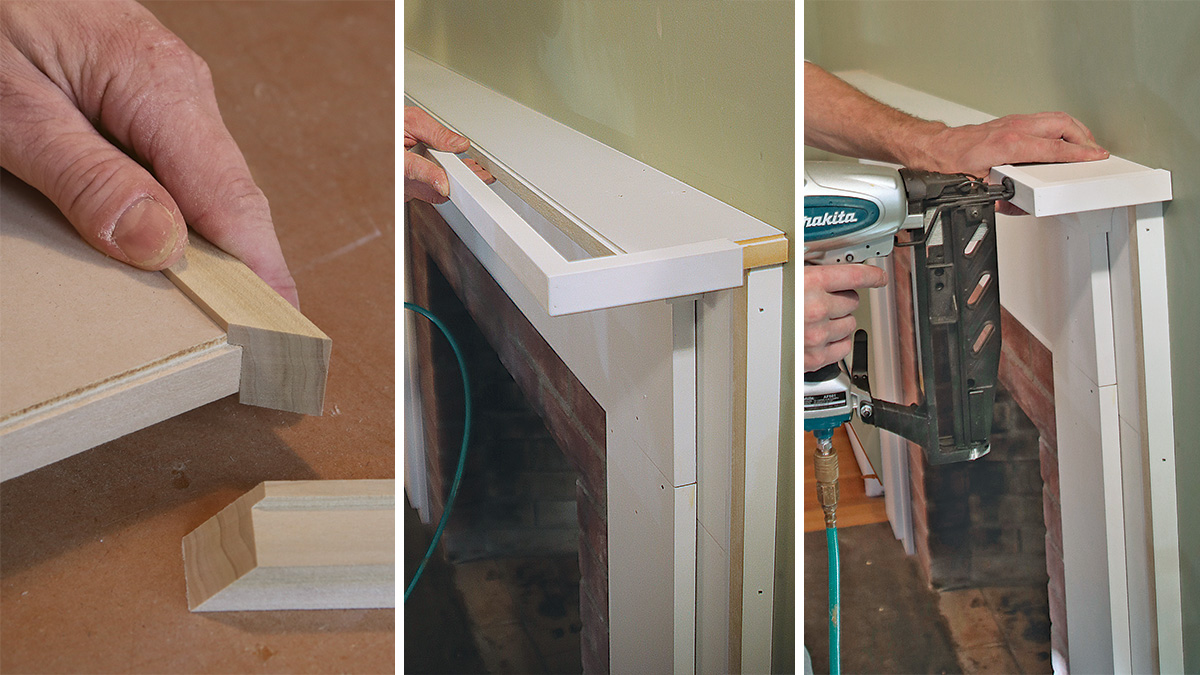
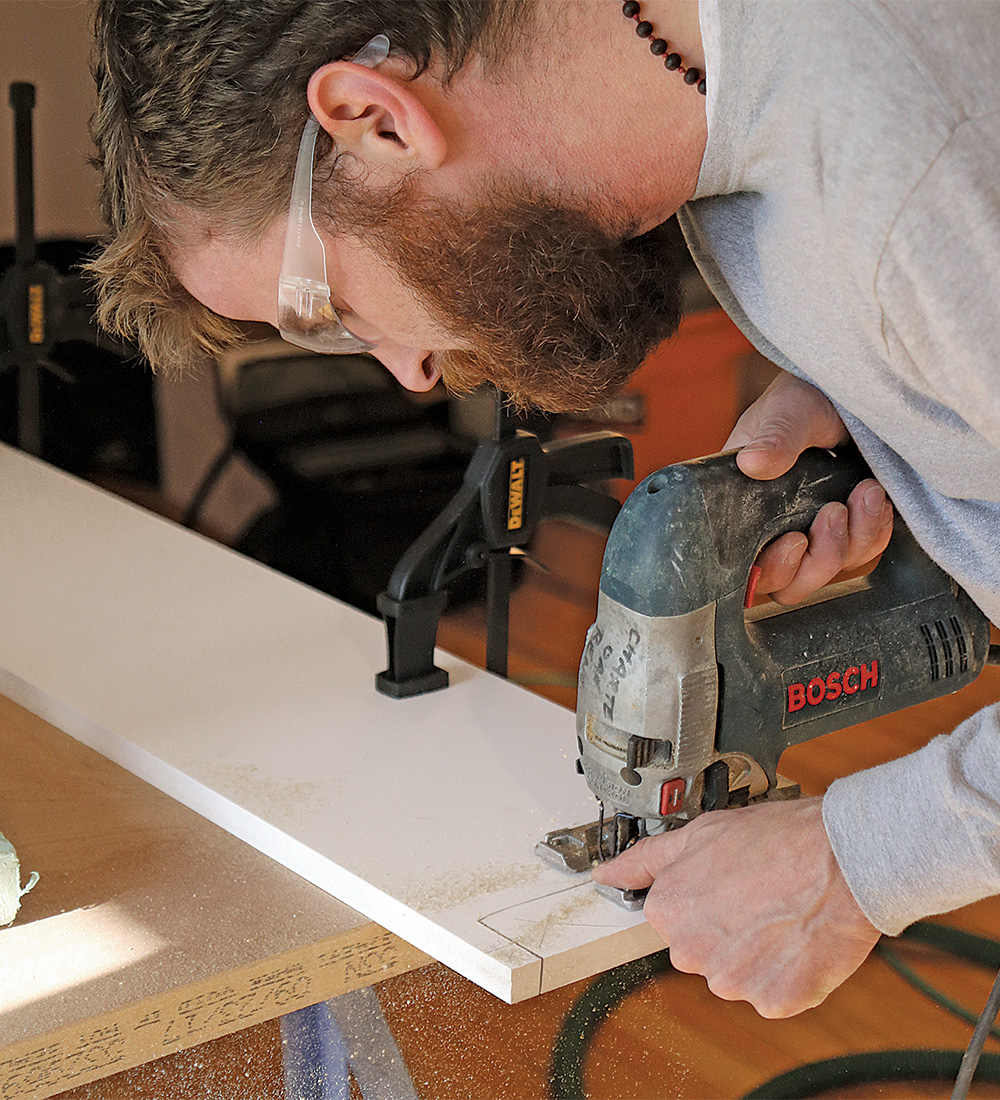
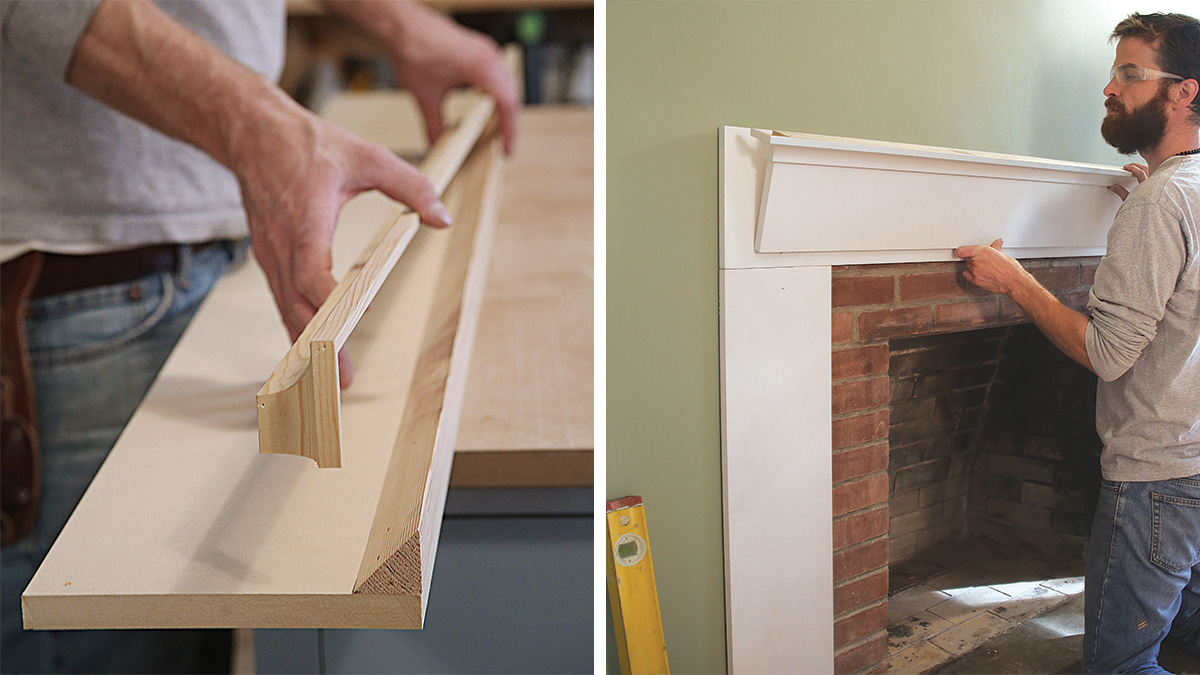
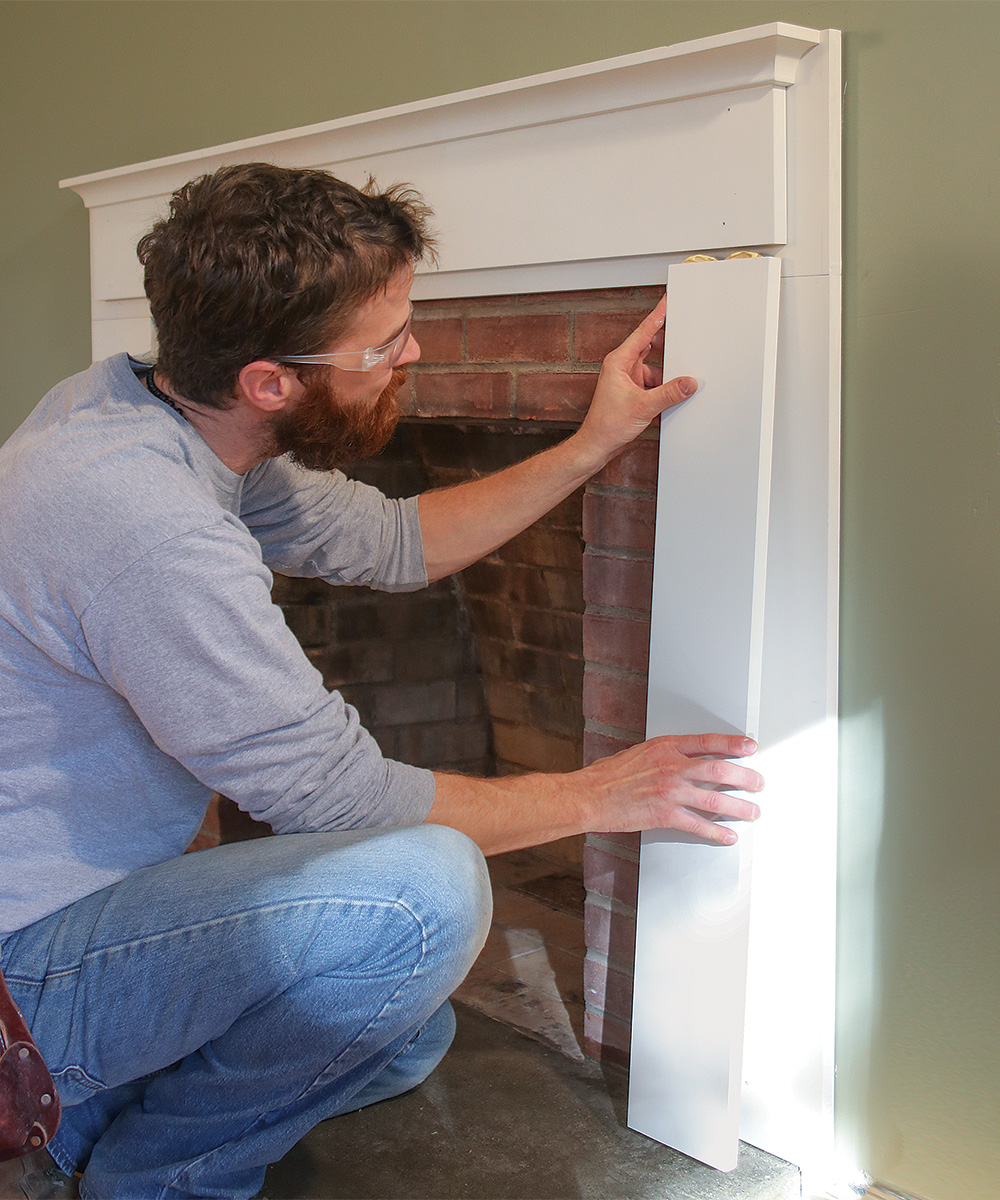
Moldings make a finished mantel

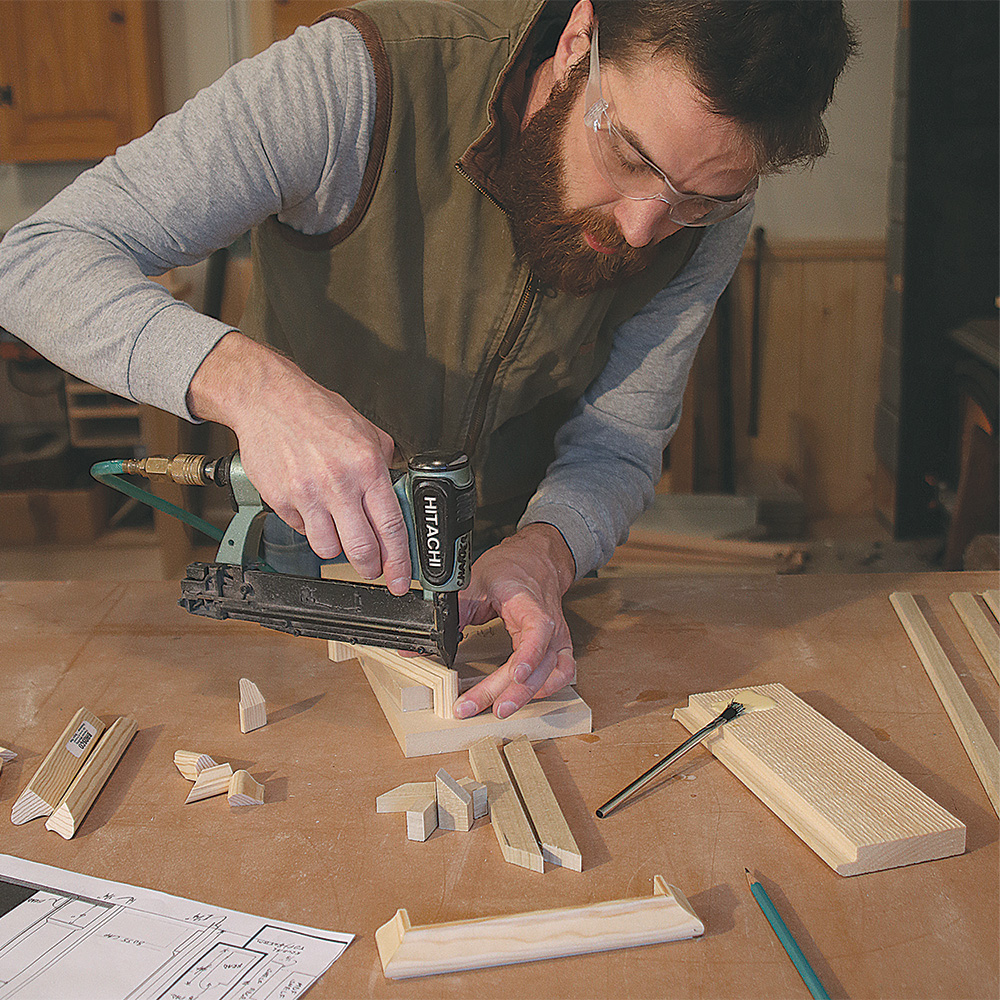
Moldings can be mitered and fastened to the mantel piece by piece, but preassembling them is a better approach. When the focus is on joining each piece of molding to another rather than to a substrate, you end up with strong assemblies that behave as a unit, reducing the chance that miters will open up over time.

making the pilaster caps
Cap the pilasters. By flipping the base-cap molding upside down and adding a 3⁄8-in. cap made from poplar, the top of each pilaster can be finished with a look that matches the plinths.

ripping bead molding
Finish with a bead. The beads used to conceal the gap between foundation board and masonry—which are the only shop-cut molding on this project—are routed into the edge of a piece of poplar and then ripped off to create profiled strips ready for miters and pin nails.

making MDF plinths
Easy plinths. After scribing the preassembled MDF plinths to the hearth at the bottom of each pilaster, slide them into place and tack them with a few finish nails before fastening the base molding to conceal their top edges.

installing molding on fireplace mantel

Check out a video related to this article: Scribing Made Simple

From FineHomebuilding #273

Previous: Three Unique Styles of Fireplace Mantels Next: How To Build a Craftsman-Style Fireplace Mantel

Guide

Finish & Trim Carpentry

Chapter

Mantels and Fireplace Surrounds

Sign up for eletters today and get the latest how-to from Fine Homebuilding, plus special offers.

Signing you up...

This site is protected by reCAPTCHA and the Google Privacy Policy and Terms of Service apply.
See all newsletters
See all newsletters

Log in or create an account to post a comment.

Sign up Log in

Become a member and get full access to FineHomebuilding.com

Finish & Trim Carpentry

Finish & Trim Carpentry

Trusted, comprehensive guidance from the pros for creating perfect trim details in any room of the house

View Project Guide

View All Project Guides »

Become a member and get unlimited site access, including the Finish & Trim Carpentry Project Guide.

Start Free Trial

Trim Design
  • Trim Style and Design
Tools and Materials
  • Tools
  • Materials
Interior Trim Basics
  • Tips and Tricks
  • Techniques
  • Using Jigs
Window and Door Casings
  • Windows
  • Doors
Baseboard and Crown Molding
  • Baseboard
  • Crown Molding
  • Specialty Crown Situations
Wainscot and Paneling
  • Beadboard Wainscot
  • Paneled Wainscot
  • Chair Rails
  • Wall Treatments
Mantels and Fireplace Surrounds
  • Design
  • Installing Mantels and Surrounds
Coffered Ceilings

Fine Home Building

Newsletter Sign-up

  • Fine Homebuilding

    Home building tips, offers, and expert advice in your inbox.

  • Green Building Advisor

    Building science and energy efficiency advice, plus special offers, in your inbox.

  • Old House Journal

    Repair, renovation, and restoration tips, plus special offers, in your inbox.

Signing you up...

This site is protected by reCAPTCHA and the Google Privacy Policy and Terms of Service apply.
See all newsletters

Follow

  • Fine Homebuilding

    Dig into cutting-edge approaches and decades of proven solutions with total access to our experts and tradespeople.

    Start Free Trial Now
    • Facebook
    • Instagram
    • X
    • LinkedIn
  • GBA Prime

    Get instant access to the latest developments in green building, research, and reports from the field.

    Start Free Trial Now
    • Facebook
    • YouTube
  • Old House Journal

    Learn how to restore, repair, update, and decorate your home.

    Subscribe Now
    • Facebook
    • Instagram
    • X

Membership & Magazine

  • Online Archive
  • Start Free Trial
  • Magazine Subscription
  • Magazine Renewal
  • Gift a Subscription
  • Customer Support
  • Privacy Preferences
  • About
  • Contact
  • Advertise
  • Careers
  • Terms of Use
  • Site Map
  • Do not sell or share my information
  • Privacy Policy
  • Accessibility
  • California Privacy Rights

© 2025 Active Interest Media. All rights reserved.

Fine Homebuilding receives a commission for items purchased through links on this site, including Amazon Associates and other affiliate advertising programs.

  • Home Group
  • Antique Trader
  • Arts & Crafts Homes
  • Bank Note Reporter
  • Cabin Life
  • Cuisine at Home
  • Fine Gardening
  • Fine Woodworking
  • Green Building Advisor
  • Garden Gate
  • Horticulture
  • Keep Craft Alive
  • Log Home Living
  • Military Trader/Vehicles
  • Numismatic News
  • Numismaster
  • Old Cars Weekly
  • Old House Journal
  • Period Homes
  • Popular Woodworking
  • Script
  • ShopNotes
  • Sports Collectors Digest
  • Threads
  • Timber Home Living
  • Traditional Building
  • Woodsmith
  • World Coin News
  • Writer's Digest
Active Interest Media logo
X
X
This is a dialog window which overlays the main content of the page. The modal window is a 'site map' of the most critical areas of the site. Pressing the Escape (ESC) button will close the modal and bring you back to where you were on the page.

Main Menu

  • How-To
  • Design
  • Tools & Materials
  • Video
  • Blogs
  • Forum
  • Project Guides
  • Reader Projects
  • Magazine
  • Members
  • FHB House

Podcasts

  • FHB Podcast
  • ProTalk

Webinars

  • Upcoming and On-Demand

Podcasts

  • FHB Podcast
  • ProTalk

Webinars

  • Upcoming and On-Demand

Popular Topics

  • Kitchens
  • Business
  • Bedrooms
  • Roofs
  • Architecture and Design
  • Green Building
  • Decks
  • Framing
  • Safety
  • Remodeling
  • Bathrooms
  • Windows
  • Tilework
  • Ceilings
  • HVAC

Magazine

  • Current Issue
  • Past Issues
  • Magazine Index
  • Subscribe
  • Online Archive
  • Author Guidelines

All Access

  • Member Home
  • Start Free Trial
  • Gift Membership

Online Learning

  • Courses
  • Project Guides
  • Reader Projects
  • Podcast

More

  • FHB Ambassadors
  • FHB House
  • Customer Support

Account

  • Log In
  • Join

Newsletter

Get home building tips, offers, and expert advice in your inbox

Signing you up...

This site is protected by reCAPTCHA and the Google Privacy Policy and Terms of Service apply.
See all newsletters
See all newsletters

Follow

  • X
  • YouTube
  • instagram
  • facebook
  • pinterest
  • Tiktok

Join All Access

Become a member and get instant access to thousands of videos, how-tos, tool reviews, and design features.

Start Your Free Trial

Subscribe

FHB Magazine

Start your subscription today and save up to 81%

Subscribe

Enjoy unlimited access to Fine Homebuilding. Join Now

Already a member? Log in

We hope you’ve enjoyed your free articles. To keep reading, become a member today.

Get complete site access to expert advice, how-to videos, Code Check, and more, plus the print magazine.

Start your FREE trial

Already a member? Log in

Privacy Policy Update

We use cookies, pixels, script and other tracking technologies to analyze and improve our service, to improve and personalize content, and for advertising to you. We also share information about your use of our site with third-party social media, advertising and analytics partners. You can view our Privacy Policy here and our Terms of Use here.

Cookies

Analytics

These cookies help us track site metrics to improve our sites and provide a better user experience.

Advertising/Social Media

These cookies are used to serve advertisements aligned with your interests.

Essential

These cookies are required to provide basic functions like page navigation and access to secure areas of the website.

Delete My Data

Delete all cookies and associated data