Fastening Tools for Trim
Steve Cory profiles nailers, hammers, clamps, and other fastening tools you'll need to attach trim.
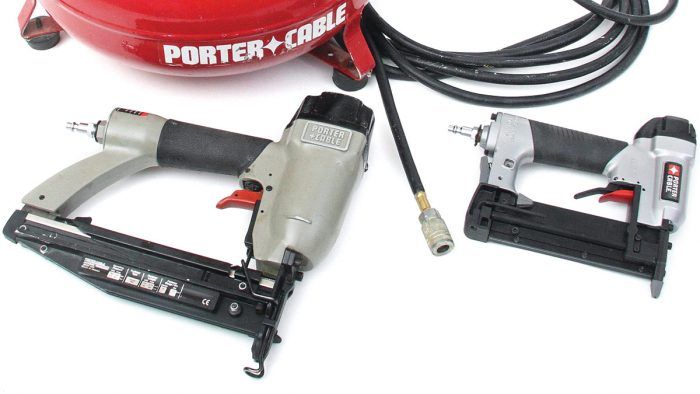
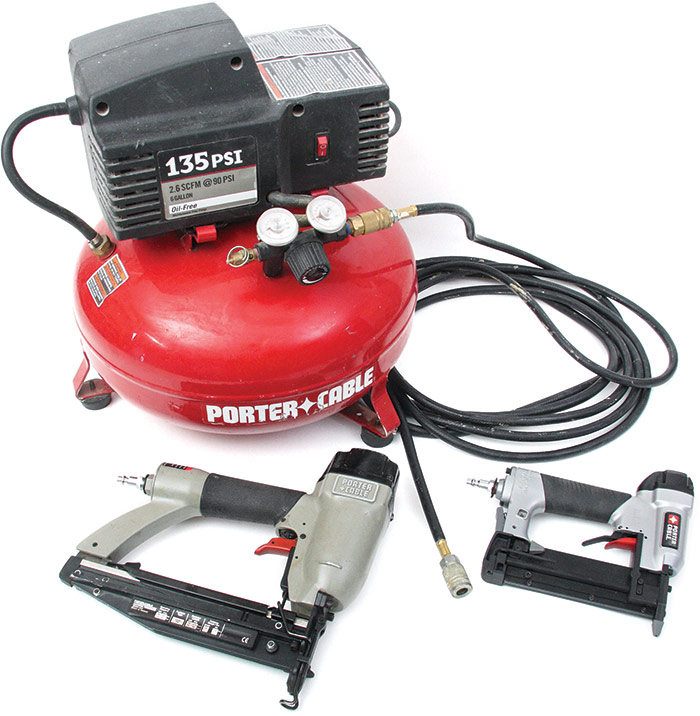
A set of nail guns may set you back a few hundred dollars, which is a good deal if it saves hiring a pro for a couple of days. For small jobs, you can get by with hand nailing.
Nailers
Also called air guns, pneumatic nailers are definitely the tool of choice for people who do a good deal of trim carpentry. The advantages are many: Using a nailer, you can drive nails with one hand while you hold the board with another. The nails are thinner and have smaller heads, so they are easier to fill and sand—or often, they don’t need filling at all. And although it’s easy to miss your mark with a hammer and dent a board, that will not happen with a nailer.
| TIP: A typical air gun set includes a framing nailer and a stapler, which you may not need often for trimwork. You will use one or two finishing nailers, and you may need to buy a separate pin nailer. |
A modestly priced set may include two or three nailers and a pancake-style compresser. This setup may not last long if you are a professional who works with it daily, but it can be a good old friend for a homeowner.
Gas-powered and cordless battery-powered finish nailers are also available. These generally cost more than pneumatic nailers but can allow you to move around more easily without being tied to an air compressor and air hose. Cordless nailers can be a good value if you already have other cordless power tools that use the same batteries.
Hammer
Even if you attach all your trim with nail guns, you will still need a hammer from time to time—for instance, for demolition and for tapping boards into place.
Select a hammer that feels comfortable in your hand as you swing it. A wood-handled hammer absorbs shock fairly well and is a good inexpensive choice, or you may want to upgrade to a modern anti-vibration model. A 16-oz. model is ideal for attaching trim. There is no need for a heavier hammer, and you may want to go with an even lighter one—say, 12 oz.
| TIP: Some people prefer a hammer with a curved claw because it gives good leverage when removing nails. Others prefer a straight claw because it is more versatile and better for prying boards. It’s your choice. |
Drill
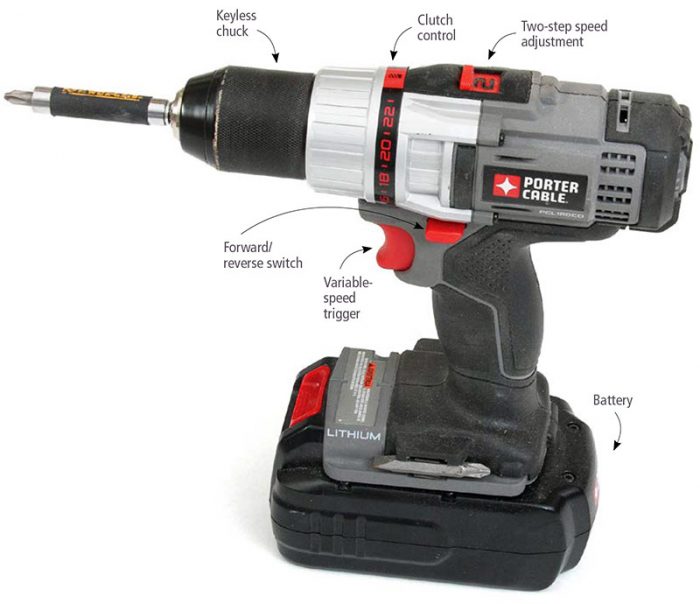
Use a drill (often called a drill driver) to bore pilot holes before driving fasteners, and use it to drive trimhead and other screws. Today most people use cordless drills; one with an 18-volt or 20-volt battery will take care of all your drilling and driving needs.
| TIP: Many cordless tools can be powered by only lithium or NiCad batteries. The model shown here can use either, so you can upgrade some of your cordless tools while keeping older versions of other tools. |
A 3⁄8-in. drill is the right size. (You need a 1⁄2-in. drill only for heavy-duty tasks.) A good drill has a light that shines on the work—a real help in dim conditions. Check out the battery’s “amp hour” and “charge time” ratings (you may need to go to a website and look under “specifications”). The battery should take no more than 1 hour to charge and should last at least 1 1⁄2 hours while in use. Be sure to have an extra battery so you can charge one while you use the tool.
A clutch control is helpful, especially when attaching softwood boards; it controls the torque, so you don’t overtighten and perhaps drive the head all the way through the board. A two-step speed adjustment is also a good feature, because you sometimes want to drive speedily and other times want to drive carefully. The keyless chuck should be gnarled or ridged in a comfortable way so you can hold it firm while turning on the drill to change bits.
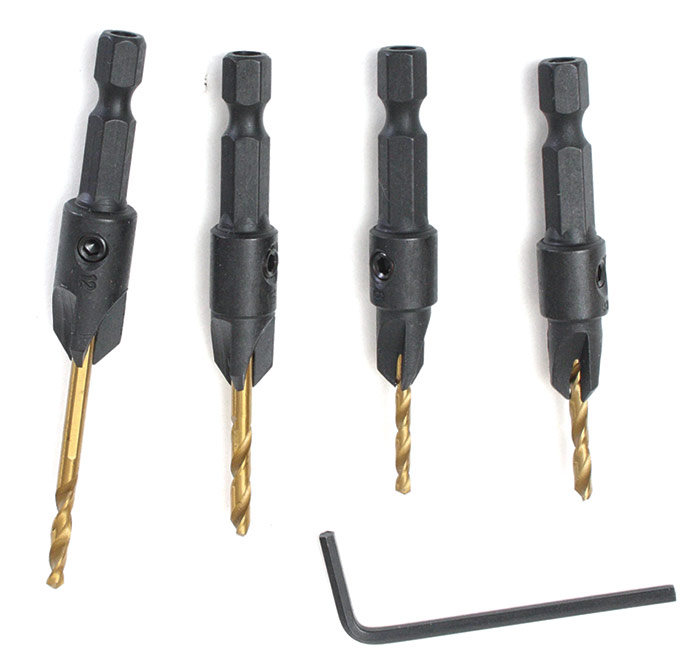
Countersink bits drill a pilot hole, a countersink hole (a shallow hole shaped like a screw’s head), and a counterbore hole as well, if you keep pushing. This allows you to drive standard screws with their heads either flush with the surface or sunk below the surface; you can fill the resulting hole with a dowel or with wood filler.
Pocket screws
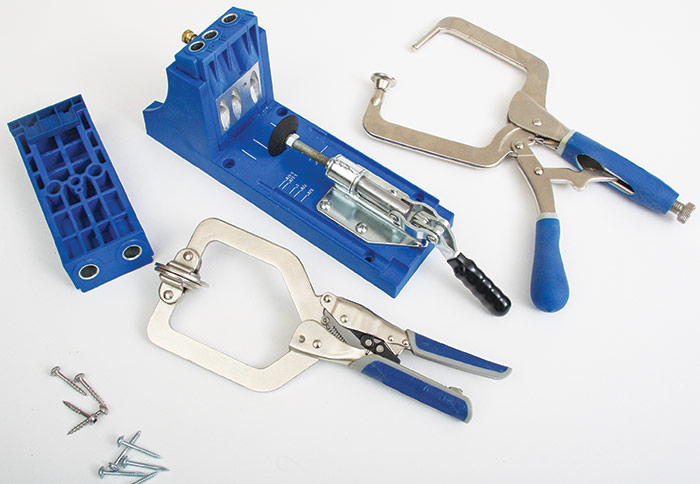
Pocket screws join pieces together quickly and with no visible fasteners. They are especially useful for panels and other pieces joined end to end or side by side. Specialized but modestly priced jigs make them easy to install.
Clamps
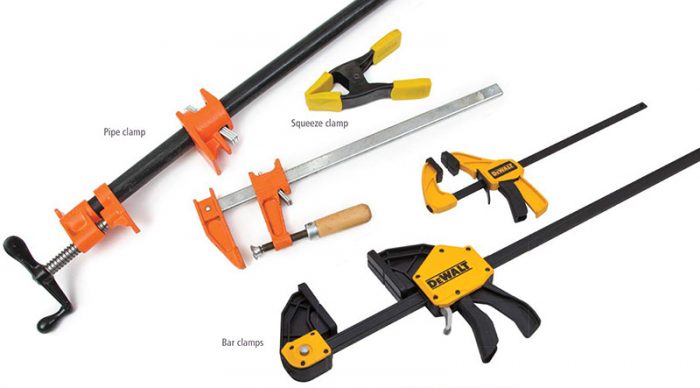
An old woodworker’s saying claims that “you can never have enough clamps.” That is especially true of cabinetry, but clamps are also often useful for trimwork. Use clamps to hold work in place while you sand or shape it, and to squeeze glued-together parts tight while the glue sets.
Situations vary, so variety is good. Small squeeze or pinch clamps are quick to attach and hold with modest power. Bar clamps take only a bit more time to attach, and they hold as firmly as you choose to turn the screw or squeeze the trigger. For large work, use pipe clamps, which are as long as the pipe you attach them to.
Caulk gun
If you will paint your trim, you’ll probably caulk some of the joints, including where trim meets a wall. Buy a good caulk gun, and keep it as clean as possible.
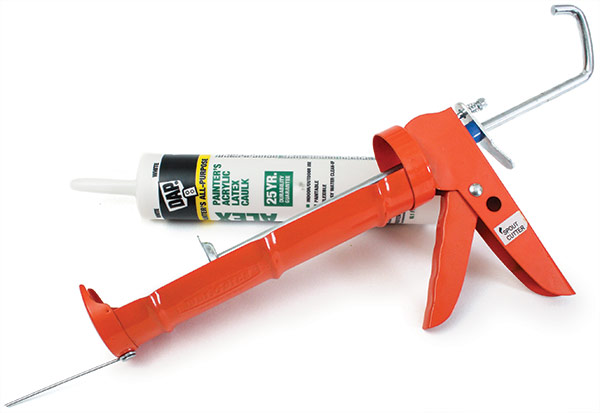
Many caulk guns will keep pushing caulk out of the tube after you’ve stopped squeezing the trigger, producing a mess and making the job difficult. Better caulk guns have a “dripless” or “anti-drip” feature, which allows the push rod to back up slightly when you release the trigger and greatly reduces the annoying ooze.
Some caulk tubes have a seal that needs to be poked through before the caulk will flow, so choose a gun with a seal punch. A spout cutter is also a handy feature, though you may end up cutting spouts with a knife anyway.
Excerpted from Trim (The Taunton Press, 2015) by Steve Cory.
Fine Homebuilding Recommended Products
Fine Homebuilding receives a commission for items purchased through links on this site, including Amazon Associates and other affiliate advertising programs.
Milwaukee Compact Cordless Router (2723-20)
Makita Top-Handle Jigsaw (4350FCt)
Milwaukee Cordless Shop Vac (0880-20)

