
Modern Mantel Made Well
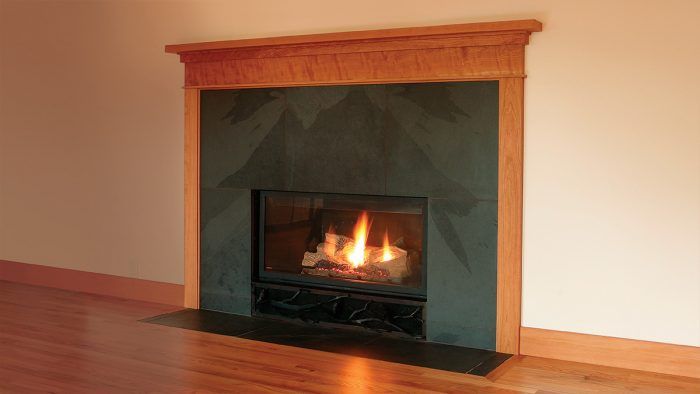
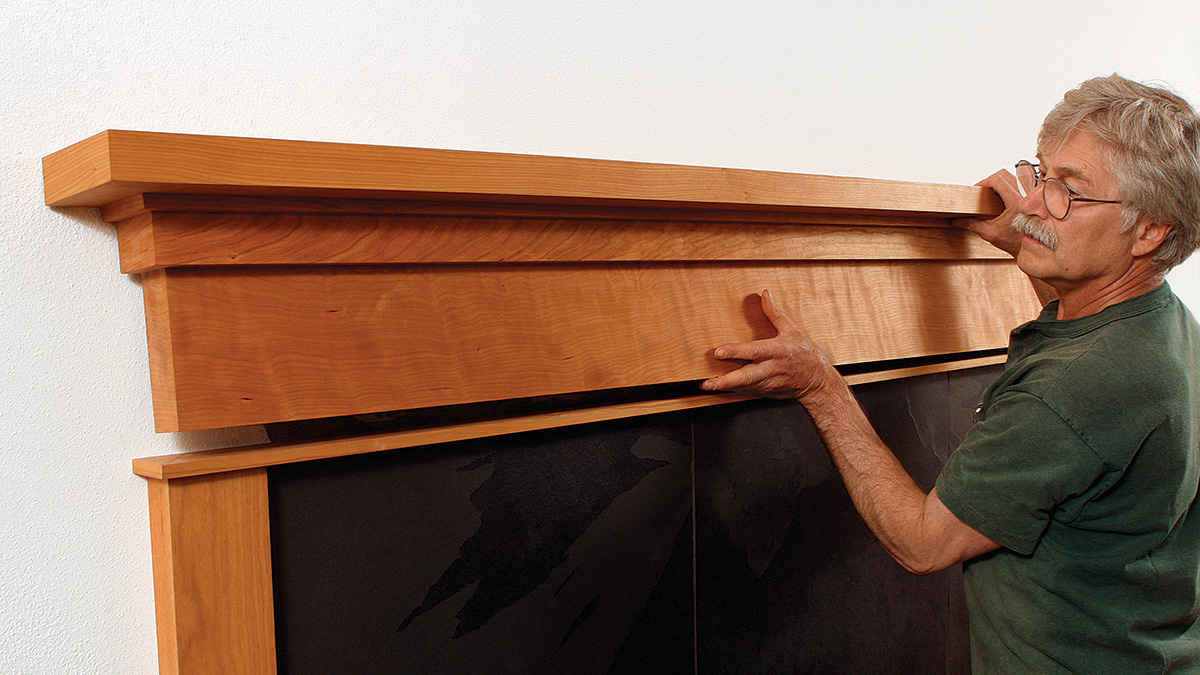
This cherry fireplace surround is assembled and installed with concealed fasteners.
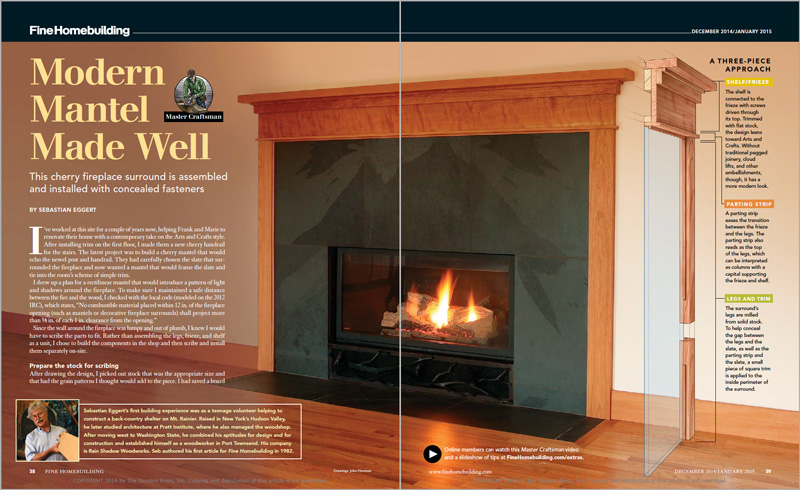
Synposis: This six-page article (and its companion video), part of the Master Craftsman series, reveals one woodworker’s take on a classic project: a fireplace surround. Author Seb Eggert first discusses the origins of his design, which was based on a modernist version of the Arts and Crafts vocabulary. In particular, his mantel was designed to be modular to make fitting it easier to an uneven wall. Rather than assemble it in the shop and install the entire piece on-site, he had to make three main parts–the shelf, the frieze, and the legs—and install them on the wall around the fireplace. Measured drawings of the individual parts and how they relate to the whole piece anchor each spread. The first section of the article details his techniques for the clean joinery that’s necessary when working with clear-finished wood: sharp, accurate miters, continuous grain on returns, square reference lines. On site, it’s all about scribing the pieces to the irregular surfaces of the wall and using hidden fasteners for each component so that it looks as though the mantel is an organic part of the wall.
I’ve worked at this site for a couple of years now, helping Frank and marie to renovate their house with a contemporary take on the arts and crafts style. After installing trim on the first floor, I made them a new cherry handrail for the stairs. The latest project was to build a cherry mantel that would echo the newel post and handrail. They had carefully chosen the slate that surrounded the fireplace and now wanted a mantel that would frame the slate and tie into the room’s scheme of simple trim.
I drew up a plan for a rectilinear mantel that would introduce a pattern of light and shadows around the fireplace. To make sure I maintained a safe distance between the fire and the wood, I checked with the local code (modeled on the 2012 Irc), which states, “no combustible material placed within 12 in. of the fireplace opening (such as mantels or decorative fireplace surrounds) shall project more than 1⁄8 in. of each 1 in. clearance from the opening.”
Since the wall around the fireplace was lumpy and out of plumb, I knew I would have to scribe the parts to fit. rather than assembling the legs, frieze, and shelf as a unit, I chose to build the components in the shop and then scribe and install them separately on-site.
Prepare the stock for scribing
After drawing the design, I picked out stock that was the appropriate size and that had the grain patterns I thought would add to the piece. I had saved a board of curly cherry for a project like this and now planned to use it as the frieze board—the star of the show. as continuity is important in a clear-finished piece like this, I made sure to choose stock that was wide enough and long enough so that I could maintain the grain patterns going around mitered returns.
Working with rough lumber, I had to mill all the parts. Of course, I could have designed a similar surround using factory-surfaced stock found at the lumberyard. at the joiner, I planed one face and one edge of each piece, then ripped and planed the opposite edges to make the stock slightly bigger (about 1/8 in.) than I needed so that I could correct any cup or bow after the initial milling.
When milling the legs, I dadoed their backs to make scribing them to the wall easier. I could have made them from thinner stock and ripped a long miter along the outside edges, but then the grain wouldn’t have been continuous. I also dadoed the back of the thick shelf to ease the scribing process.
Assembly on the bench
The basic plan was to build up the frieze board, attach the shelf to it, and then apply the bands of trim. Once I had milled the legs, I would wait to fit them together with the parting strip and the shelf-and-frieze assembly on-site.
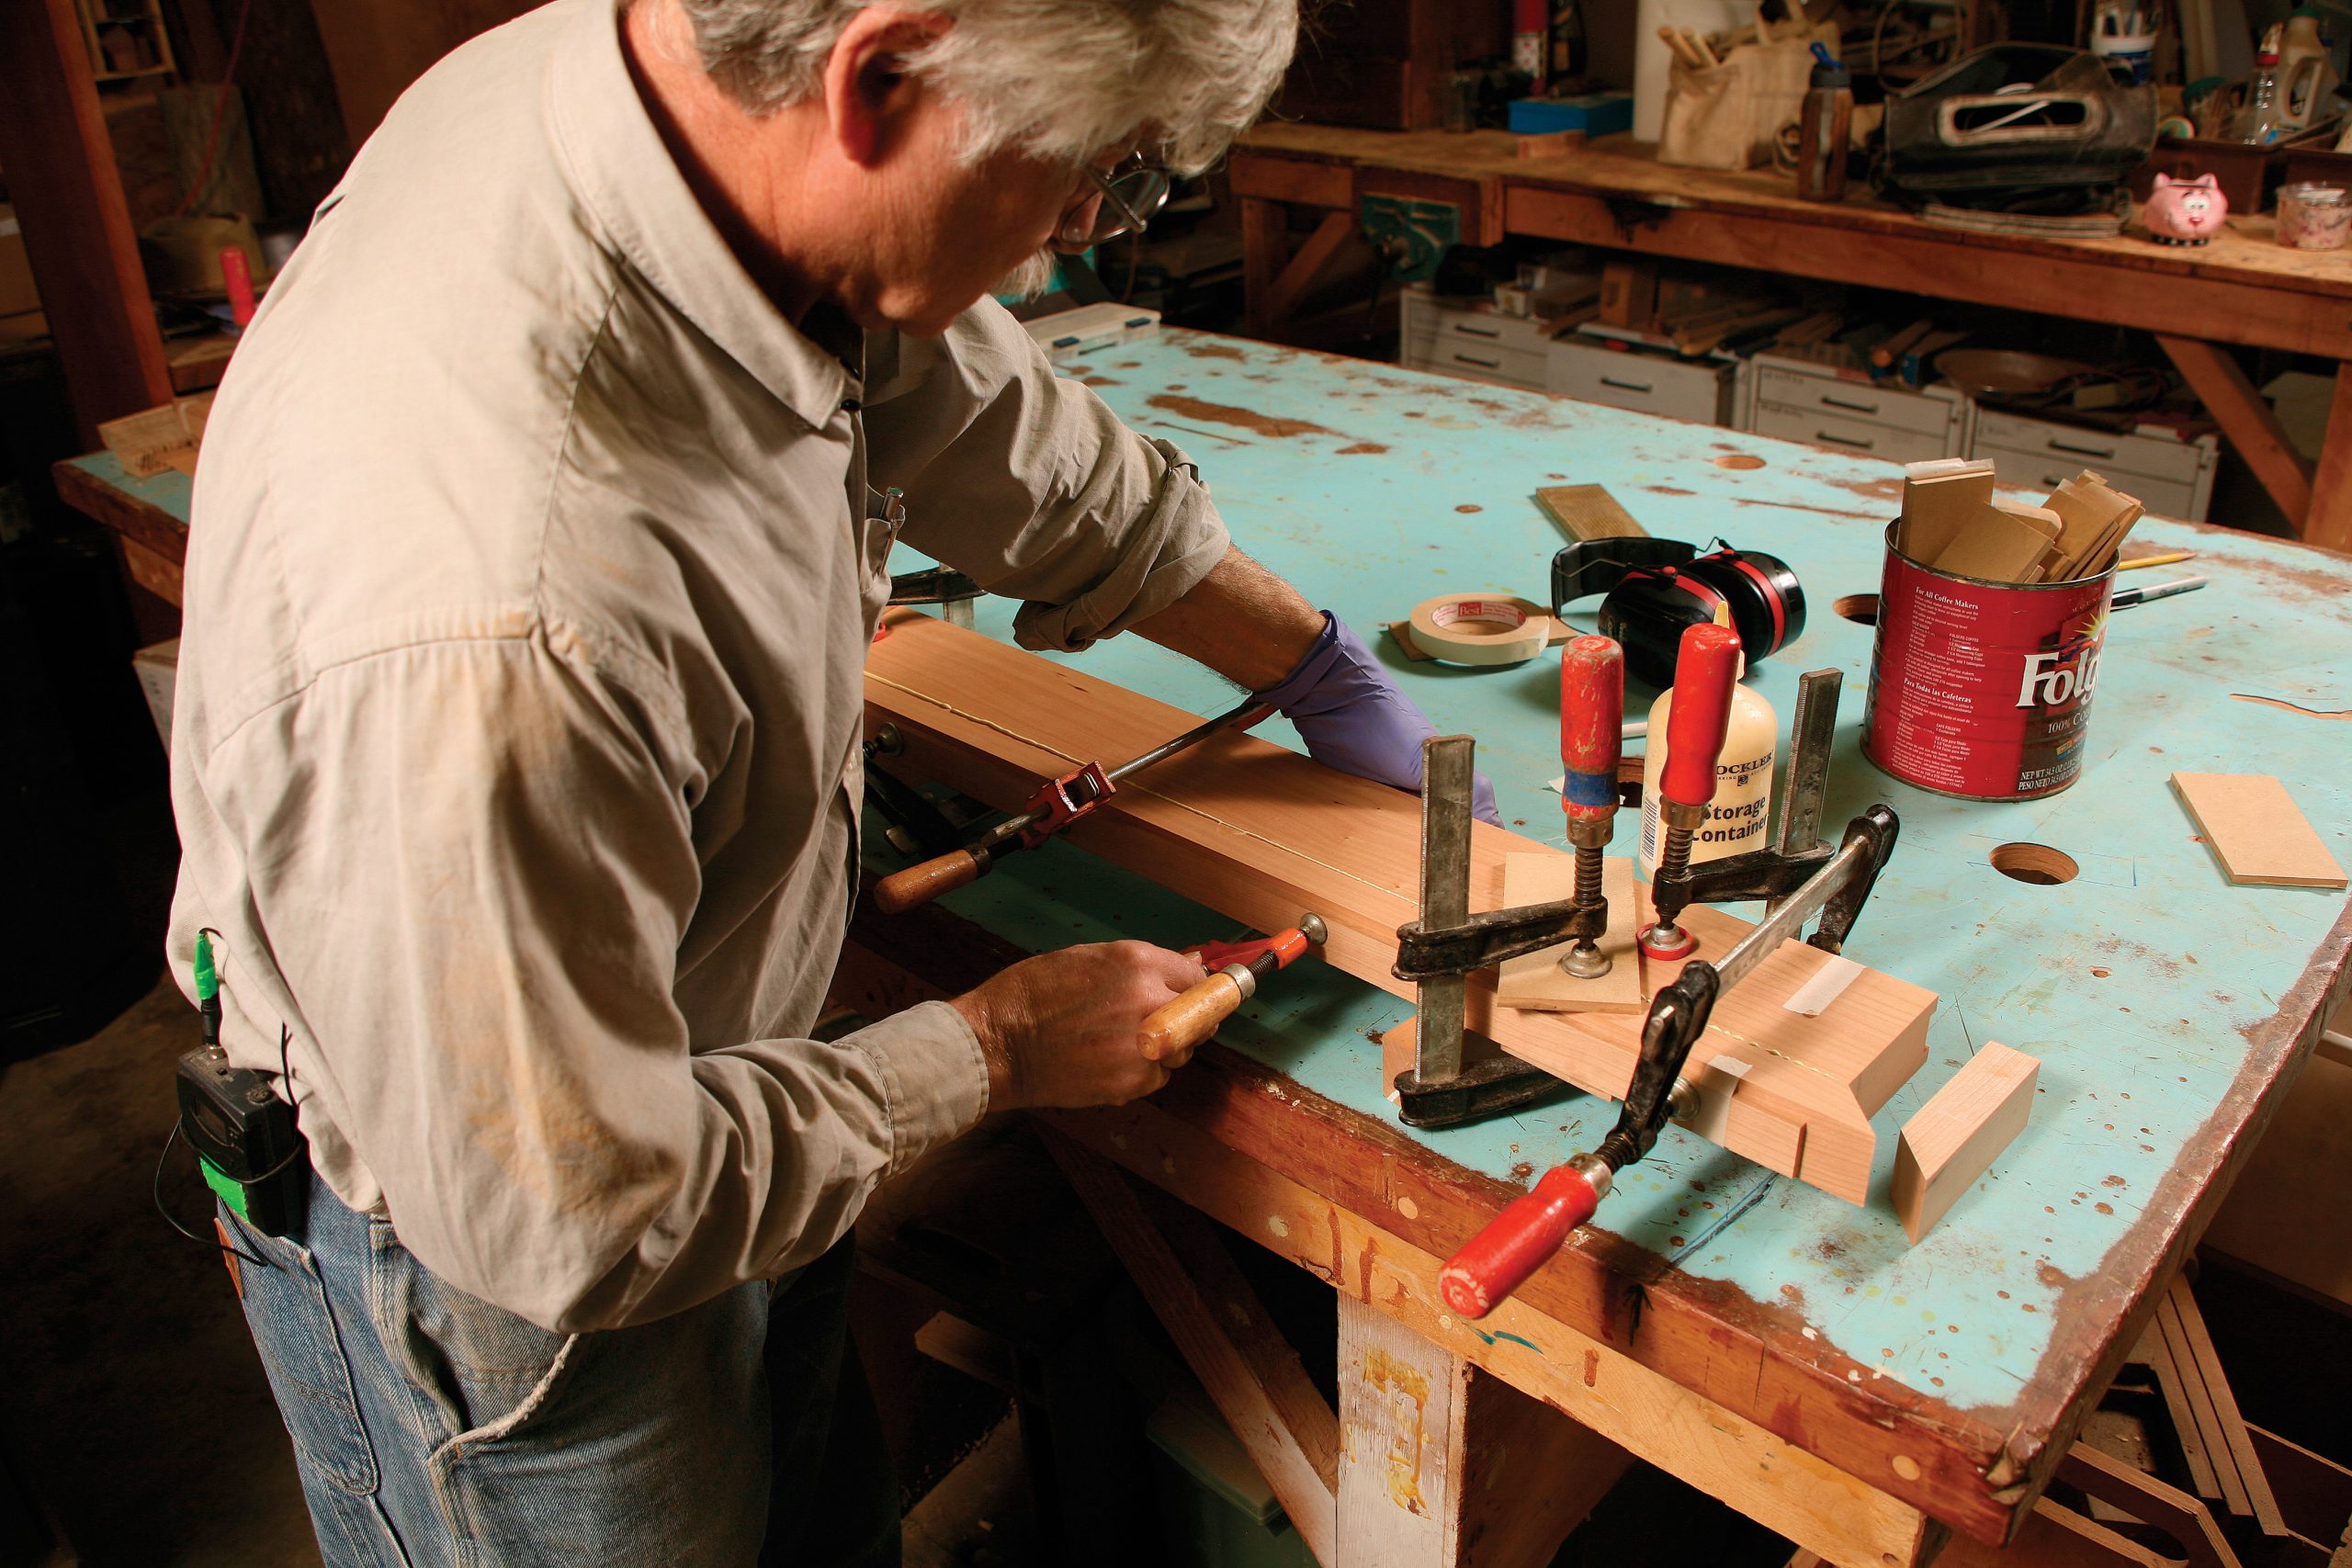
Although it was a gorgeous piece of wood, my prized frieze board wasn’t quite wide enough, so I started the assembly by edge-gluing a piece of cherry to the top of the frieze, where the joint would be covered by trim. next, I wrapped the shelf with a band of 1-1/4-in.-thick stock to hide the end grain. The 1-1/4-in.-thick shelf was well seasoned and less than 4 in. wide, so I wasn’t worried about the band popping off at the mitered corners when the humidity changed. I clamped the long front piece to the shelf and marked the miters before cutting them on a chopsaw. I made sure to leave enough material at each end of the piece so the off-cuts could be used as mitered returns with a continuous grain pattern.
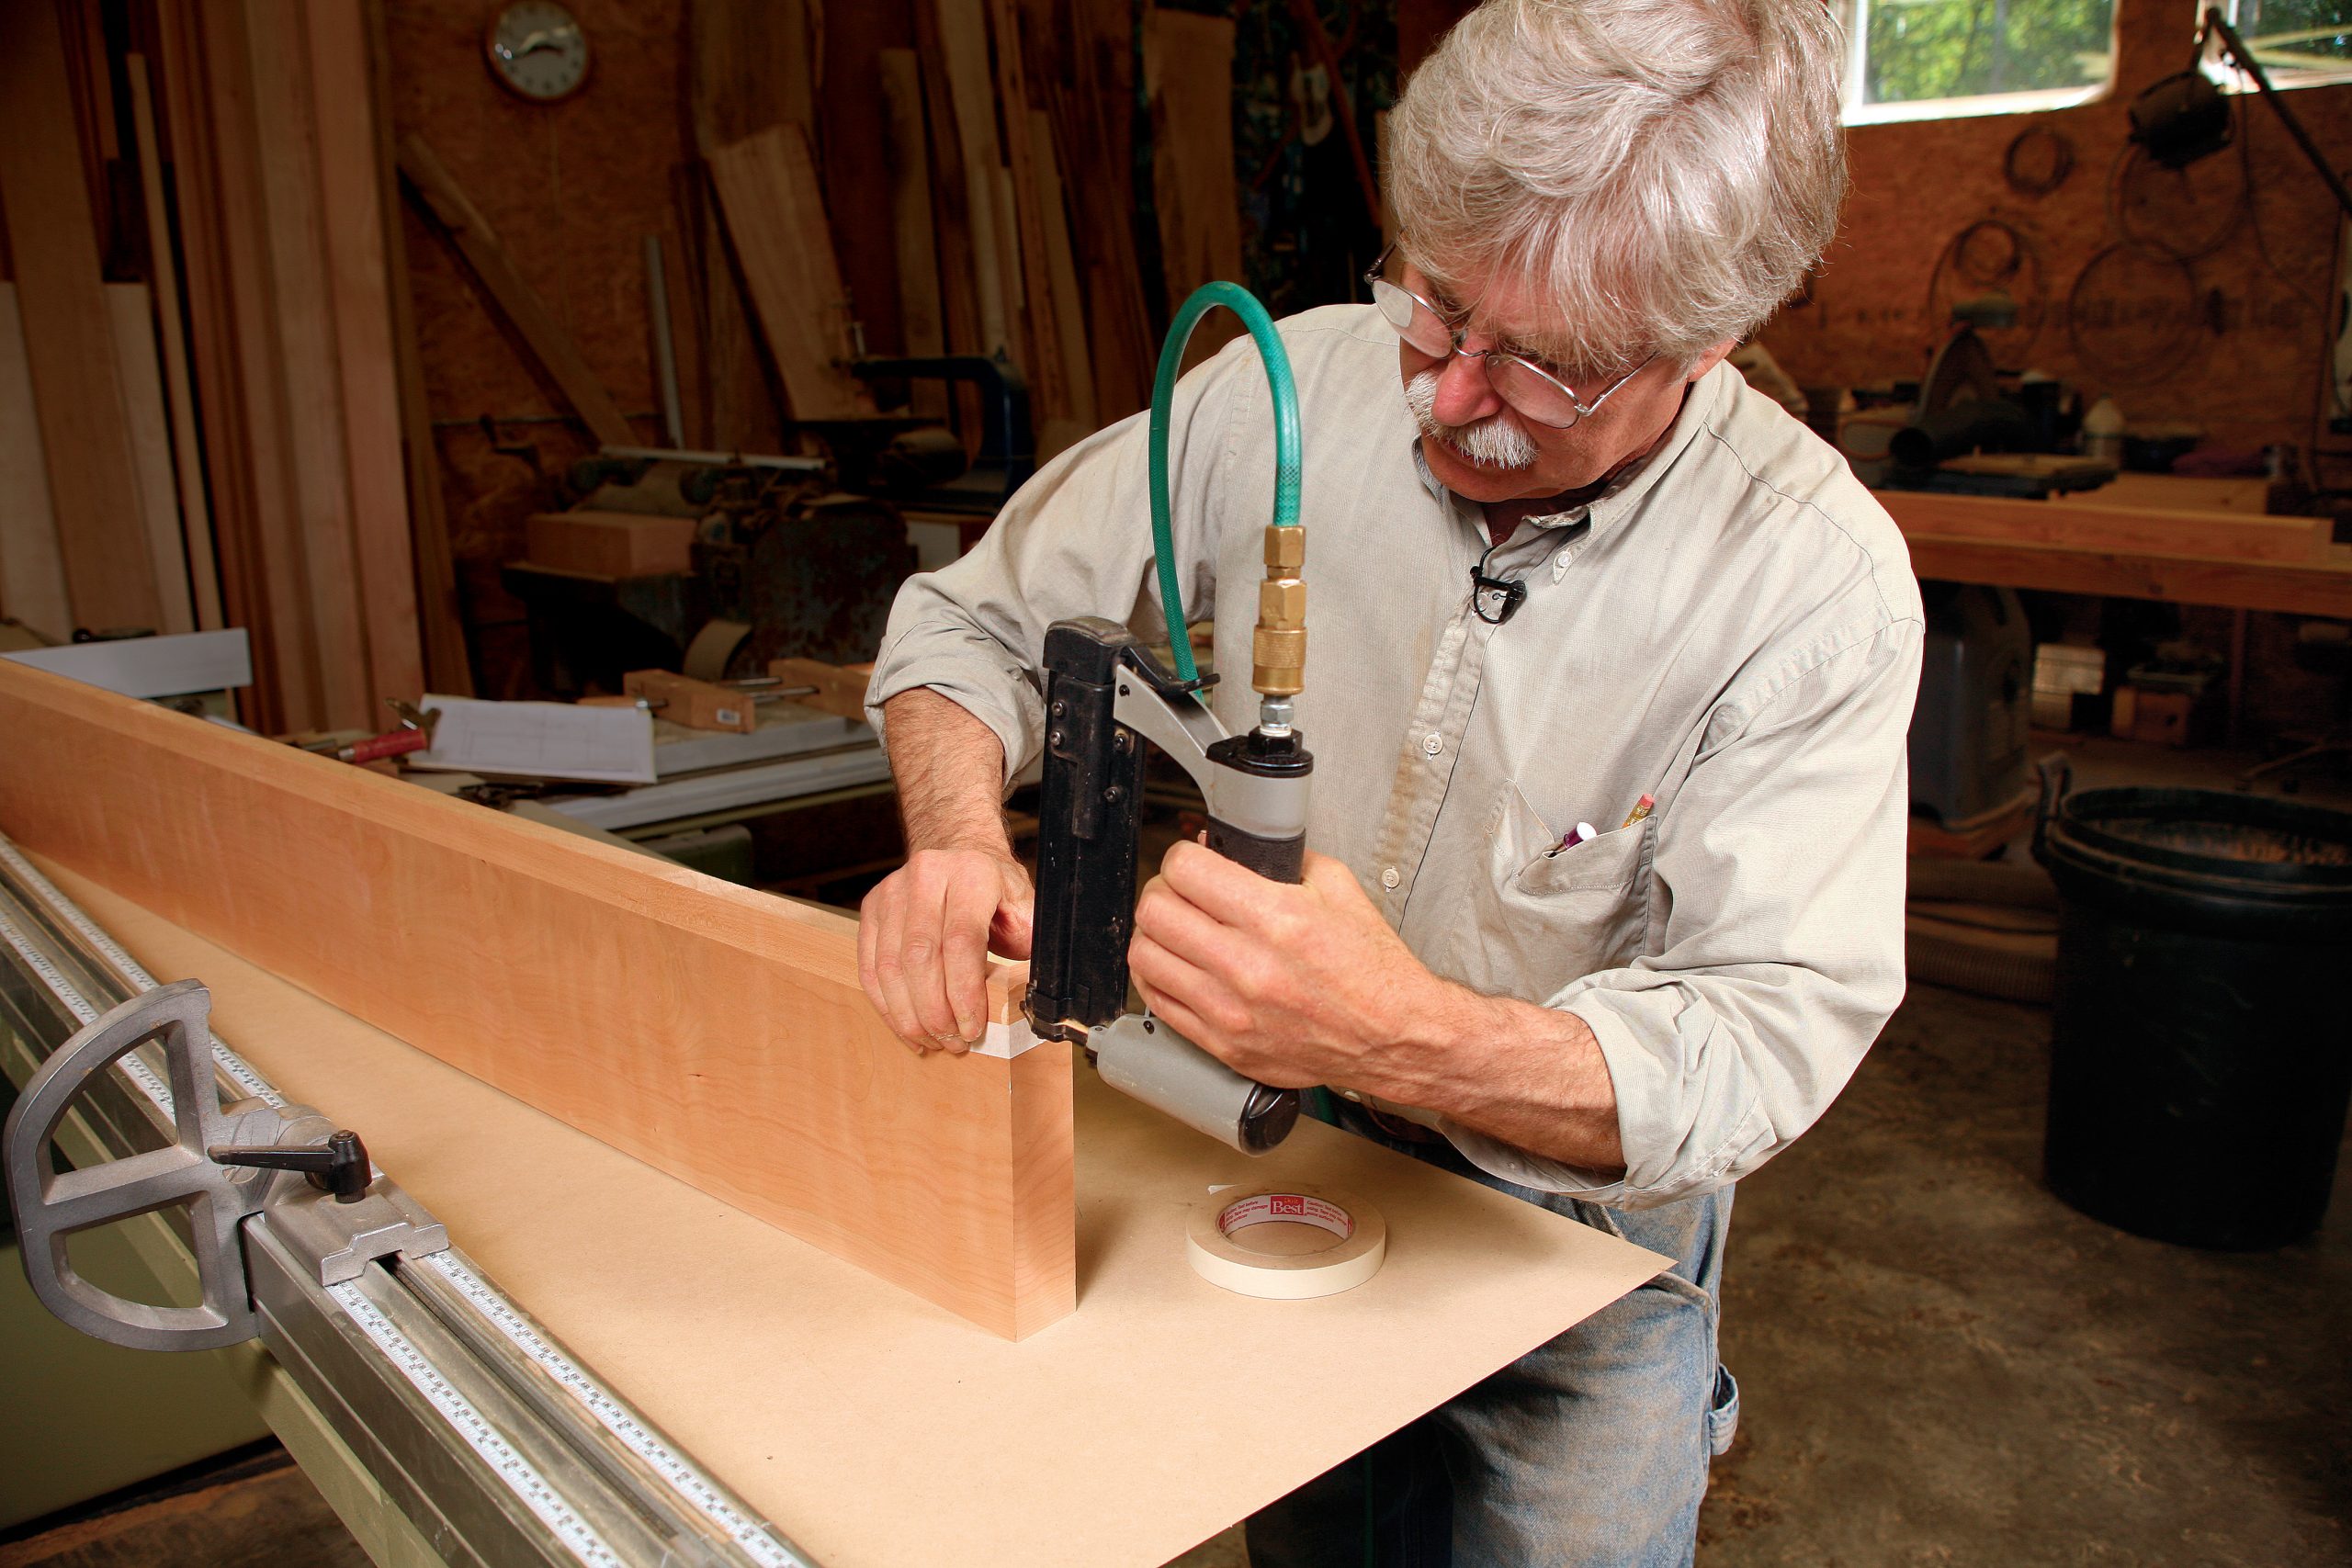
To reduce tearout, I cut the stock using a sacrificial fence and bed made from 1/4-in. mdF. after gluing and clamping the band along the front edge, I attached the mitered returns and left them to dry. Returning to the frieze, I sanded and scraped off any dried glue and then cut the mitered returns at both ends. although I could have used a crosscut sled on a tablesaw or a sliding compound-miter saw to make this wide cut, I used a sliding tablesaw instead. (These big tablesaws have a sliding carriage on the left that pushes past the blade. They’re great for cutting sheet goods or straight-lining rough lumber, too. mine is made by ScmI.) I cut the short returns on a compound-miter saw, then applied glue to both sides of the miter, taped the returns in place, and fastened them with pin nails.
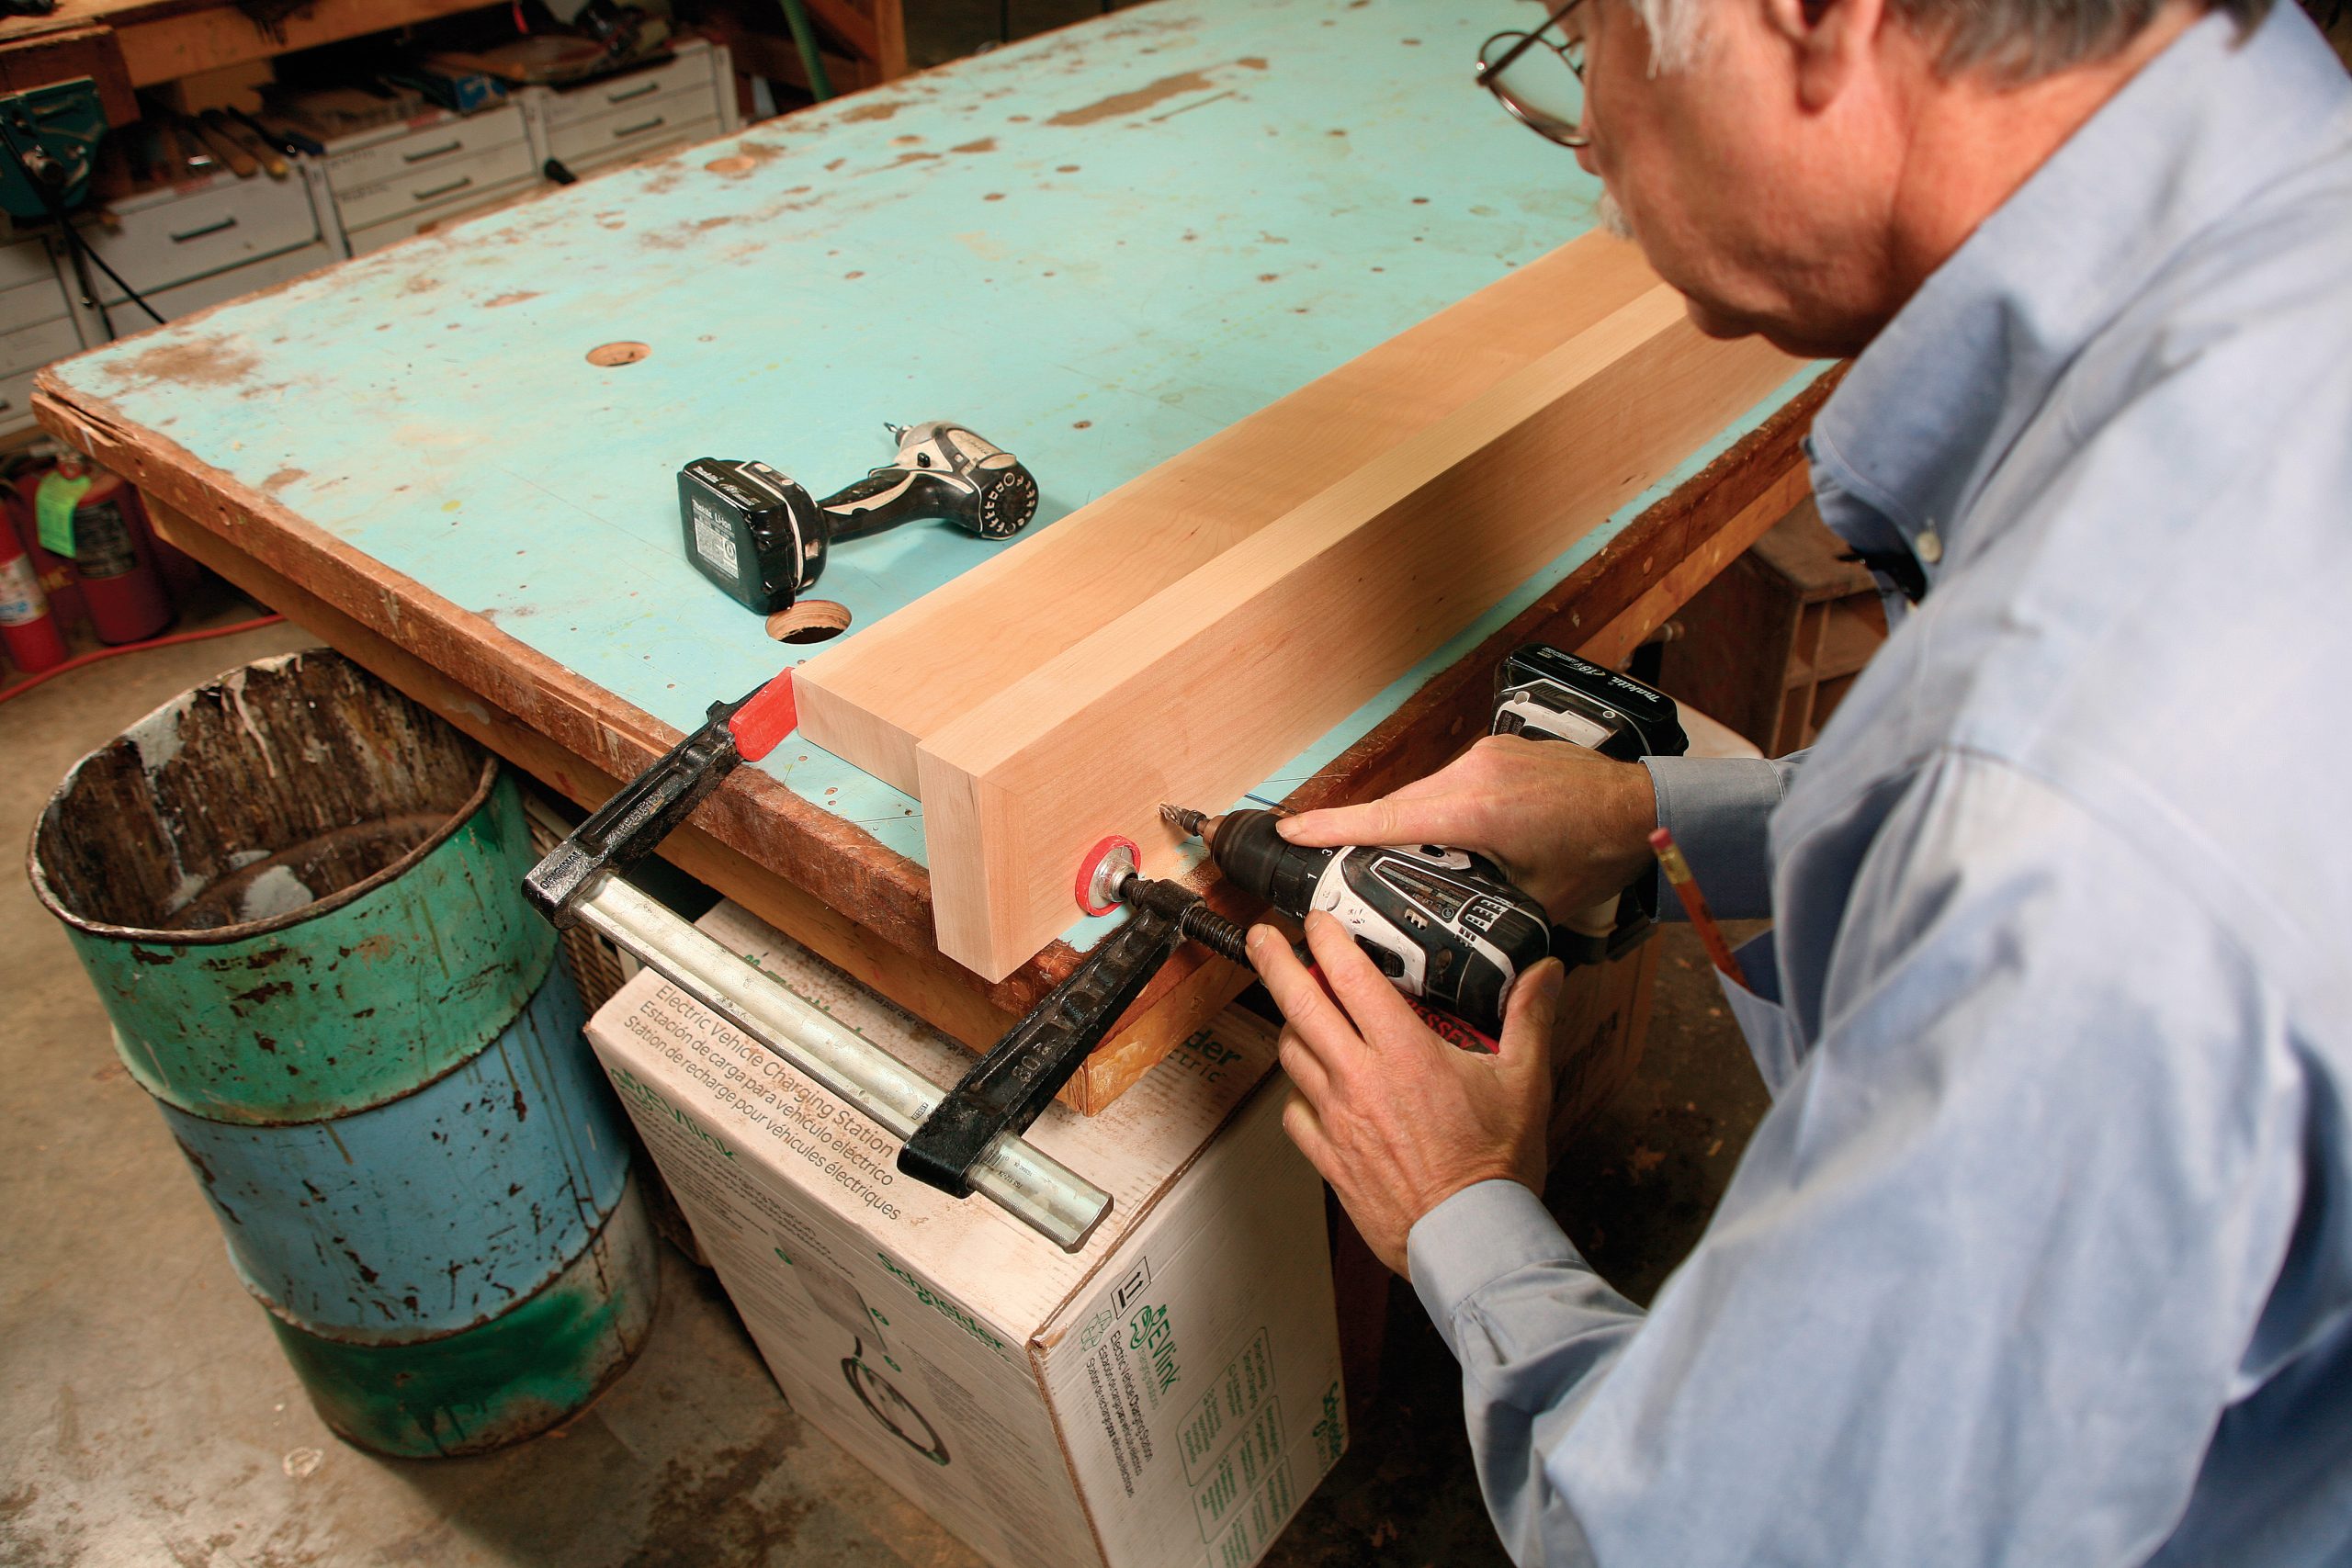
I flipped the frieze onto its face and added the bottom piece of blocking and one-half of the French cleat, a length of 1x stock ripped to a 45° angle. after sanding the mantel shelf, I glued and clamped it to the frieze, then fastened the two pieces together with countersunk #10 screws and plugged the holes.
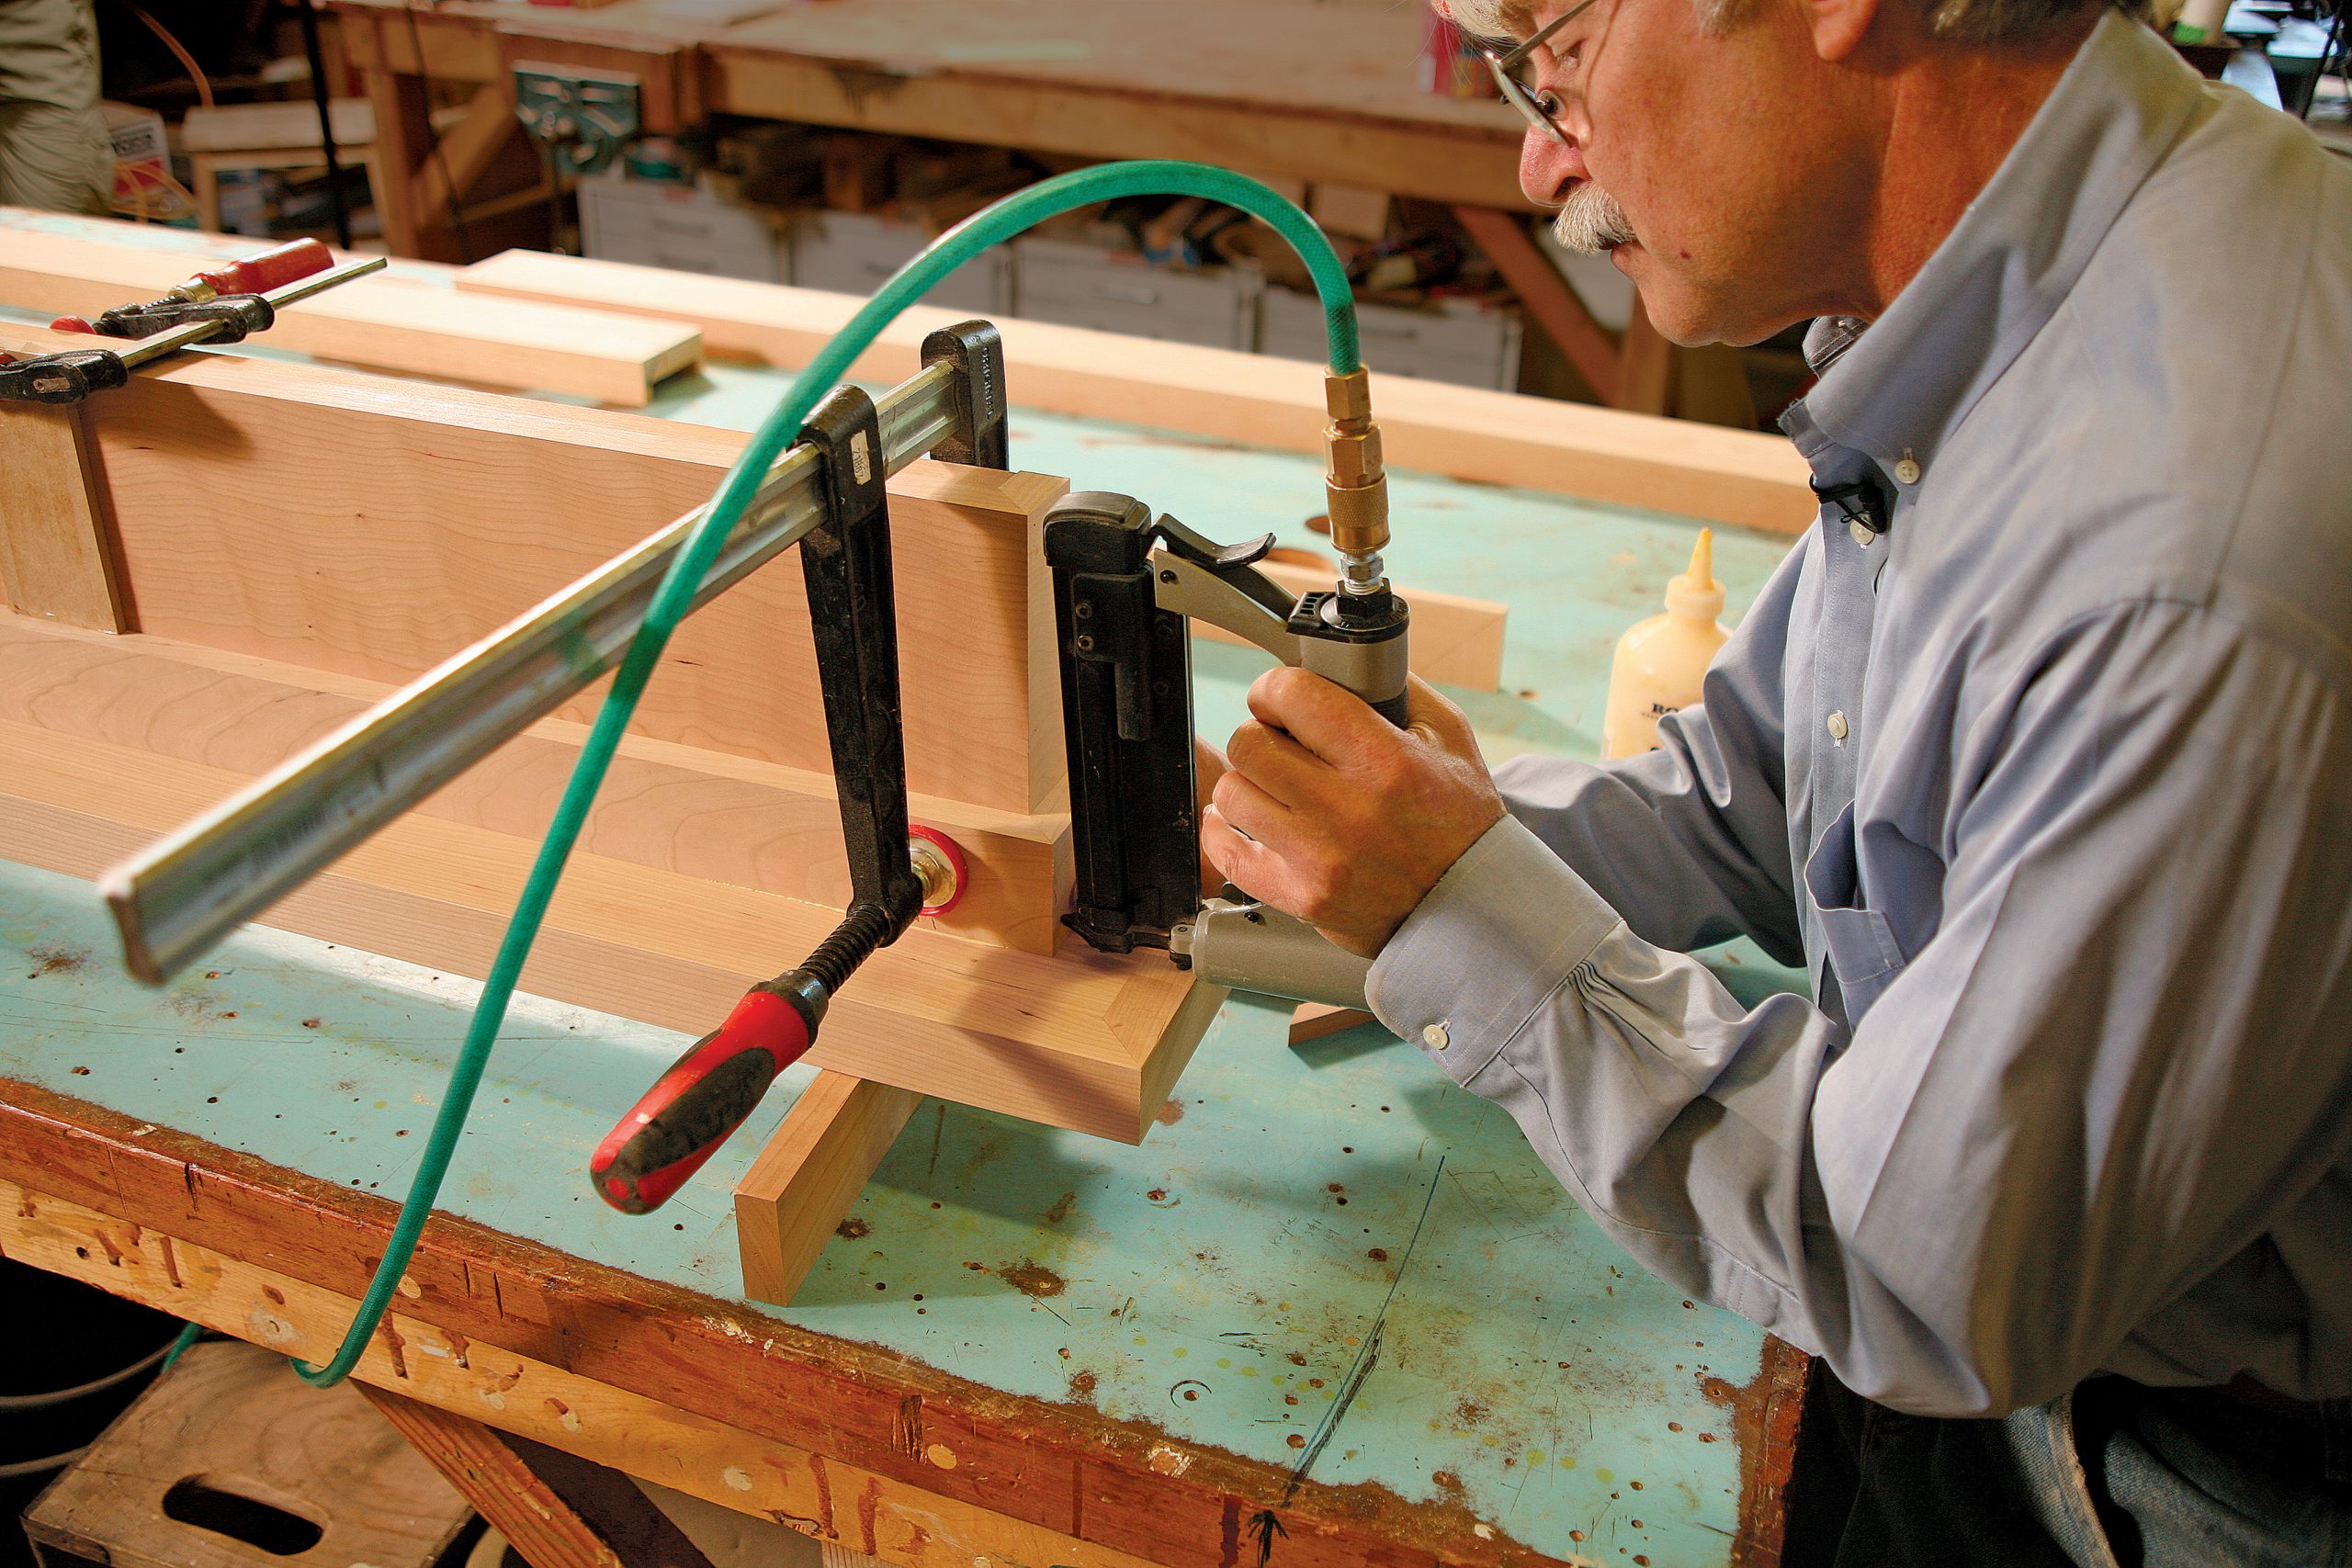
With the frieze attached to the shelf, I turned the unit upside down on my bench so that I could fit and attach the next two pieces of trim below the shelf. I was very careful to keep the miters clean, especially with these smaller pieces, and I reinforced the glue with a few pin nails. The last piece to assemble in the shop was the parting strip. Like the other components, it has mitered ends. because the stock was too thin to nail, I attached the returns with cyanoacrylate (ca) glue. I’ve found that it’s best to apply a layer of thin viscosity glue to the surface to act as a primer, then apply a second coat of a glue with thicker viscosity, stick the pieces together, and hit the joint with a quick spray of accelerator.
Build the Parts in the ShopBuild the shelf/frieze
A slick return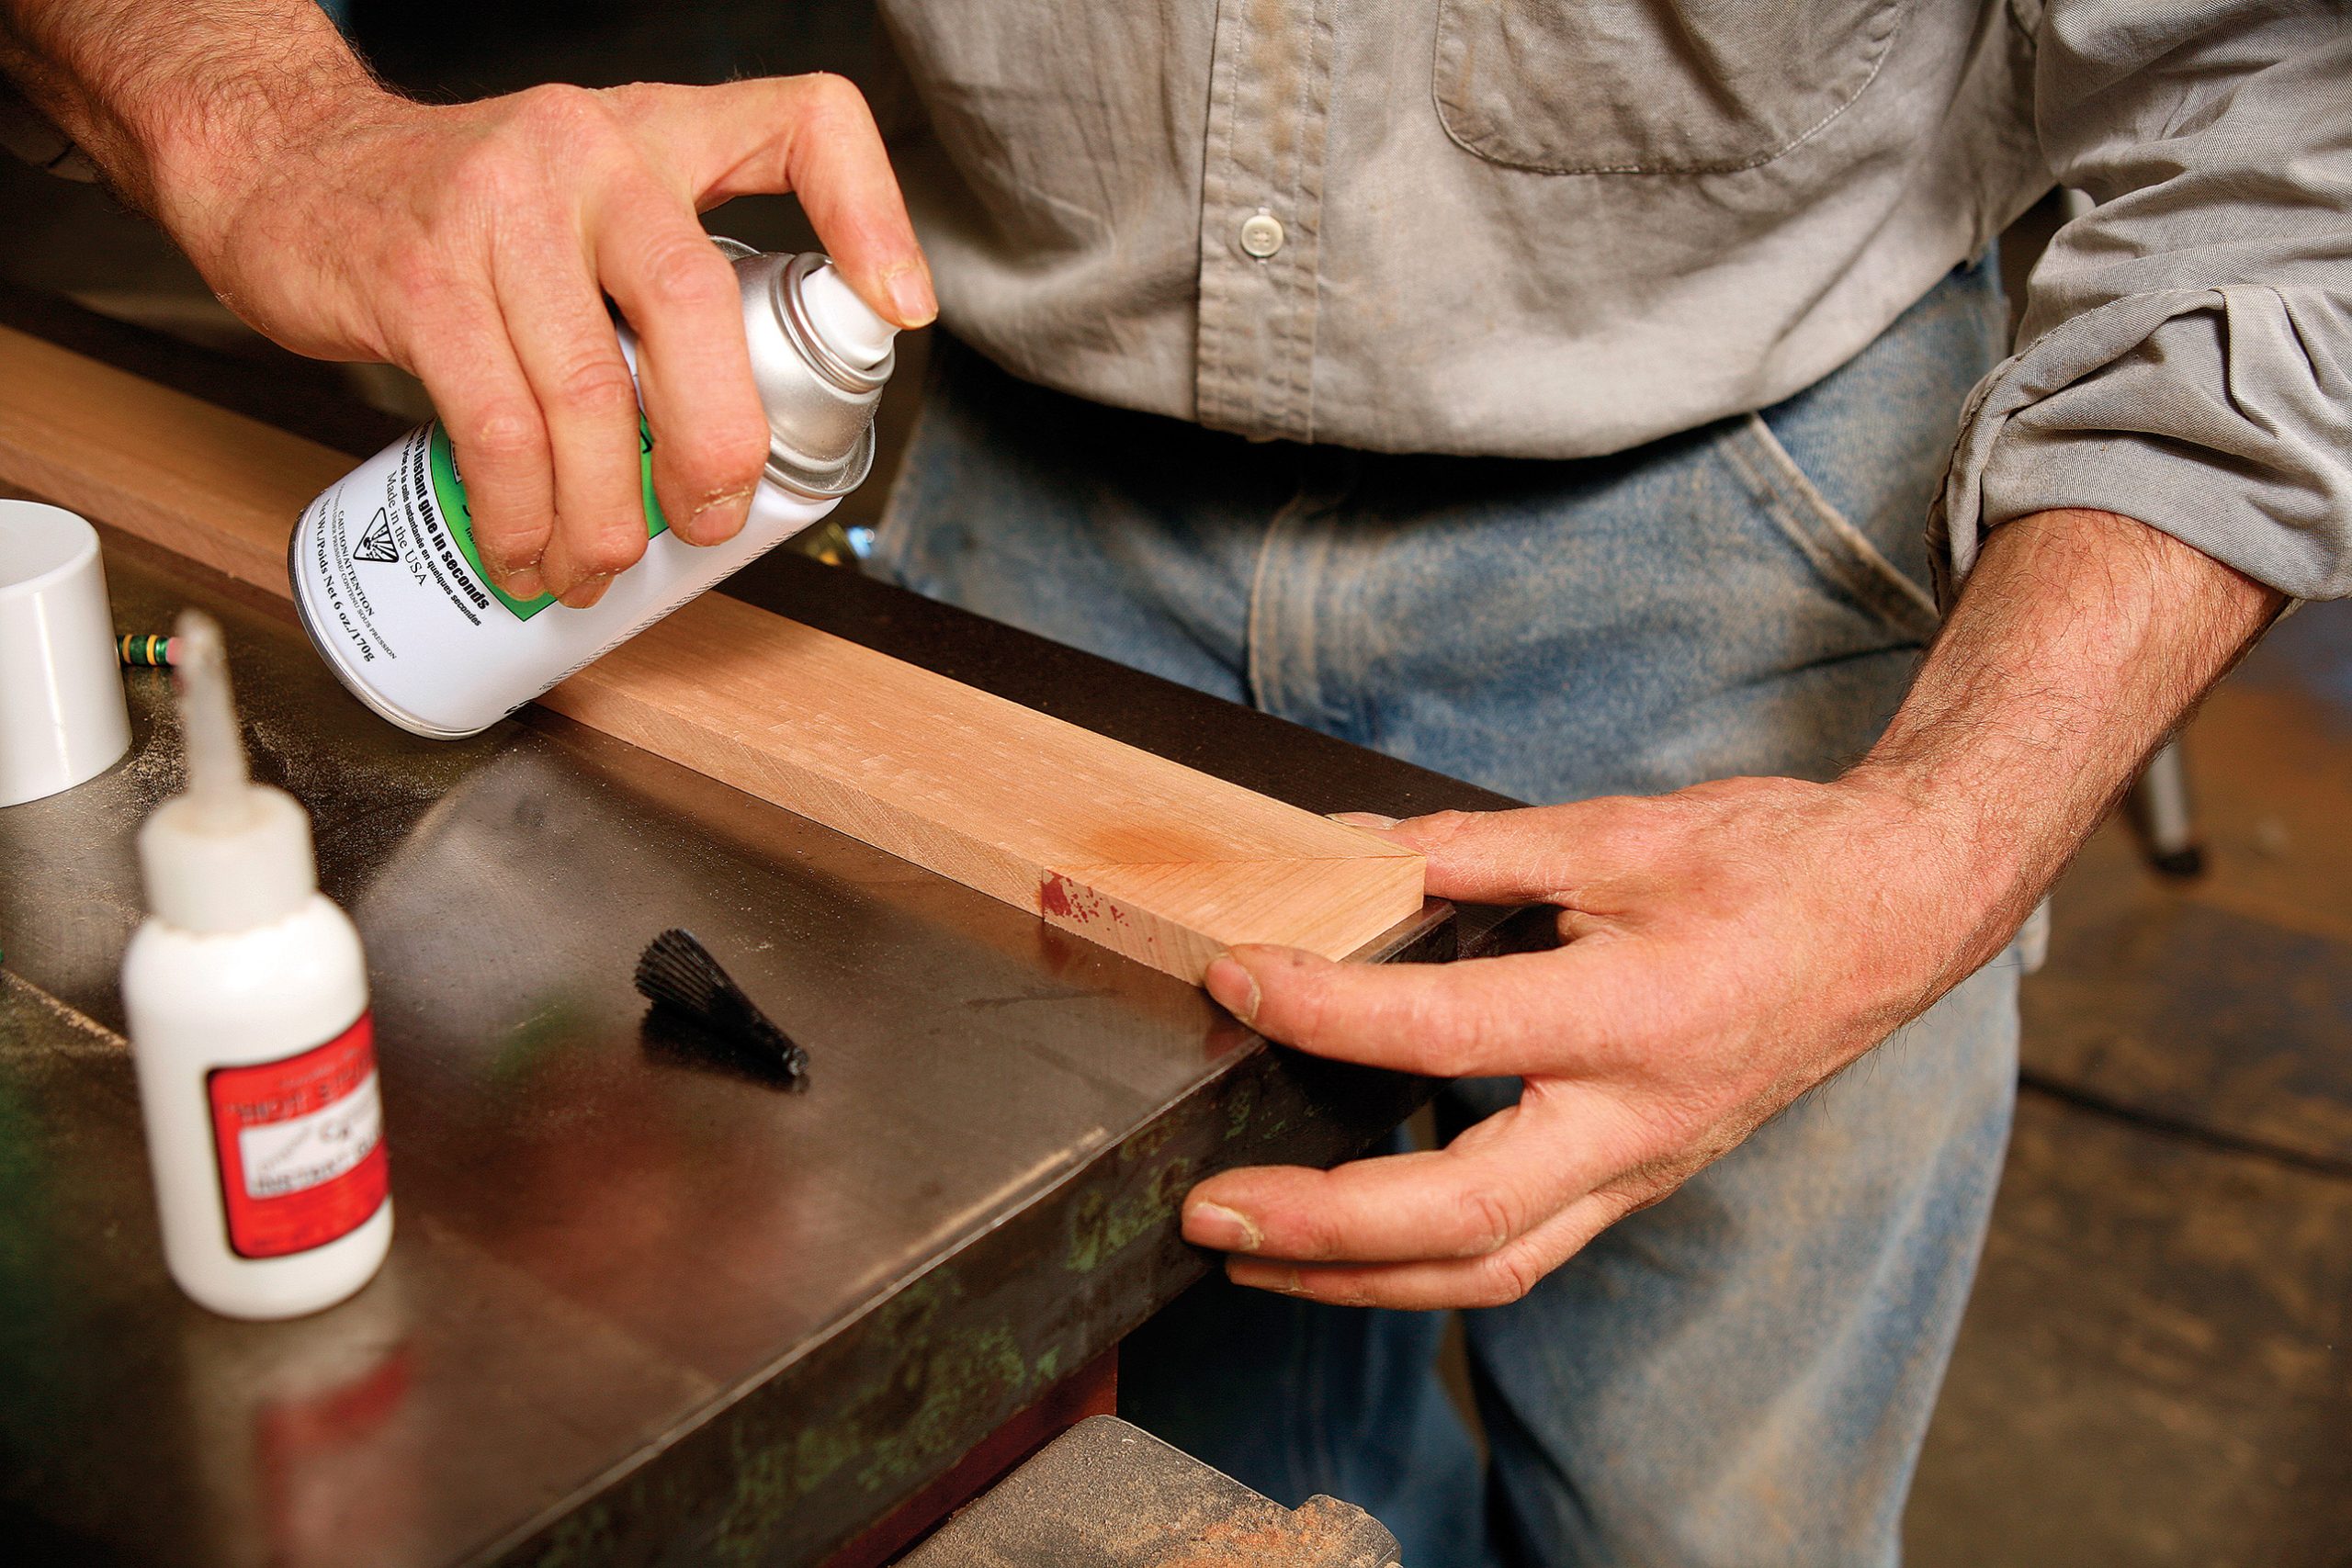 I use cyanoacrylate (CA) glue in different viscosities for attaching pieces too small for nails or clamps. Here I used it to glue the thin mitered returns on the parting strip. The glue also comes in handy for repairs. For about $40, you can get a kit from Satellite City Instant Glues (caglue.com) that includes three viscosities (thin, medium, and thick), an accelerator, and a debonder. Dado legs and trim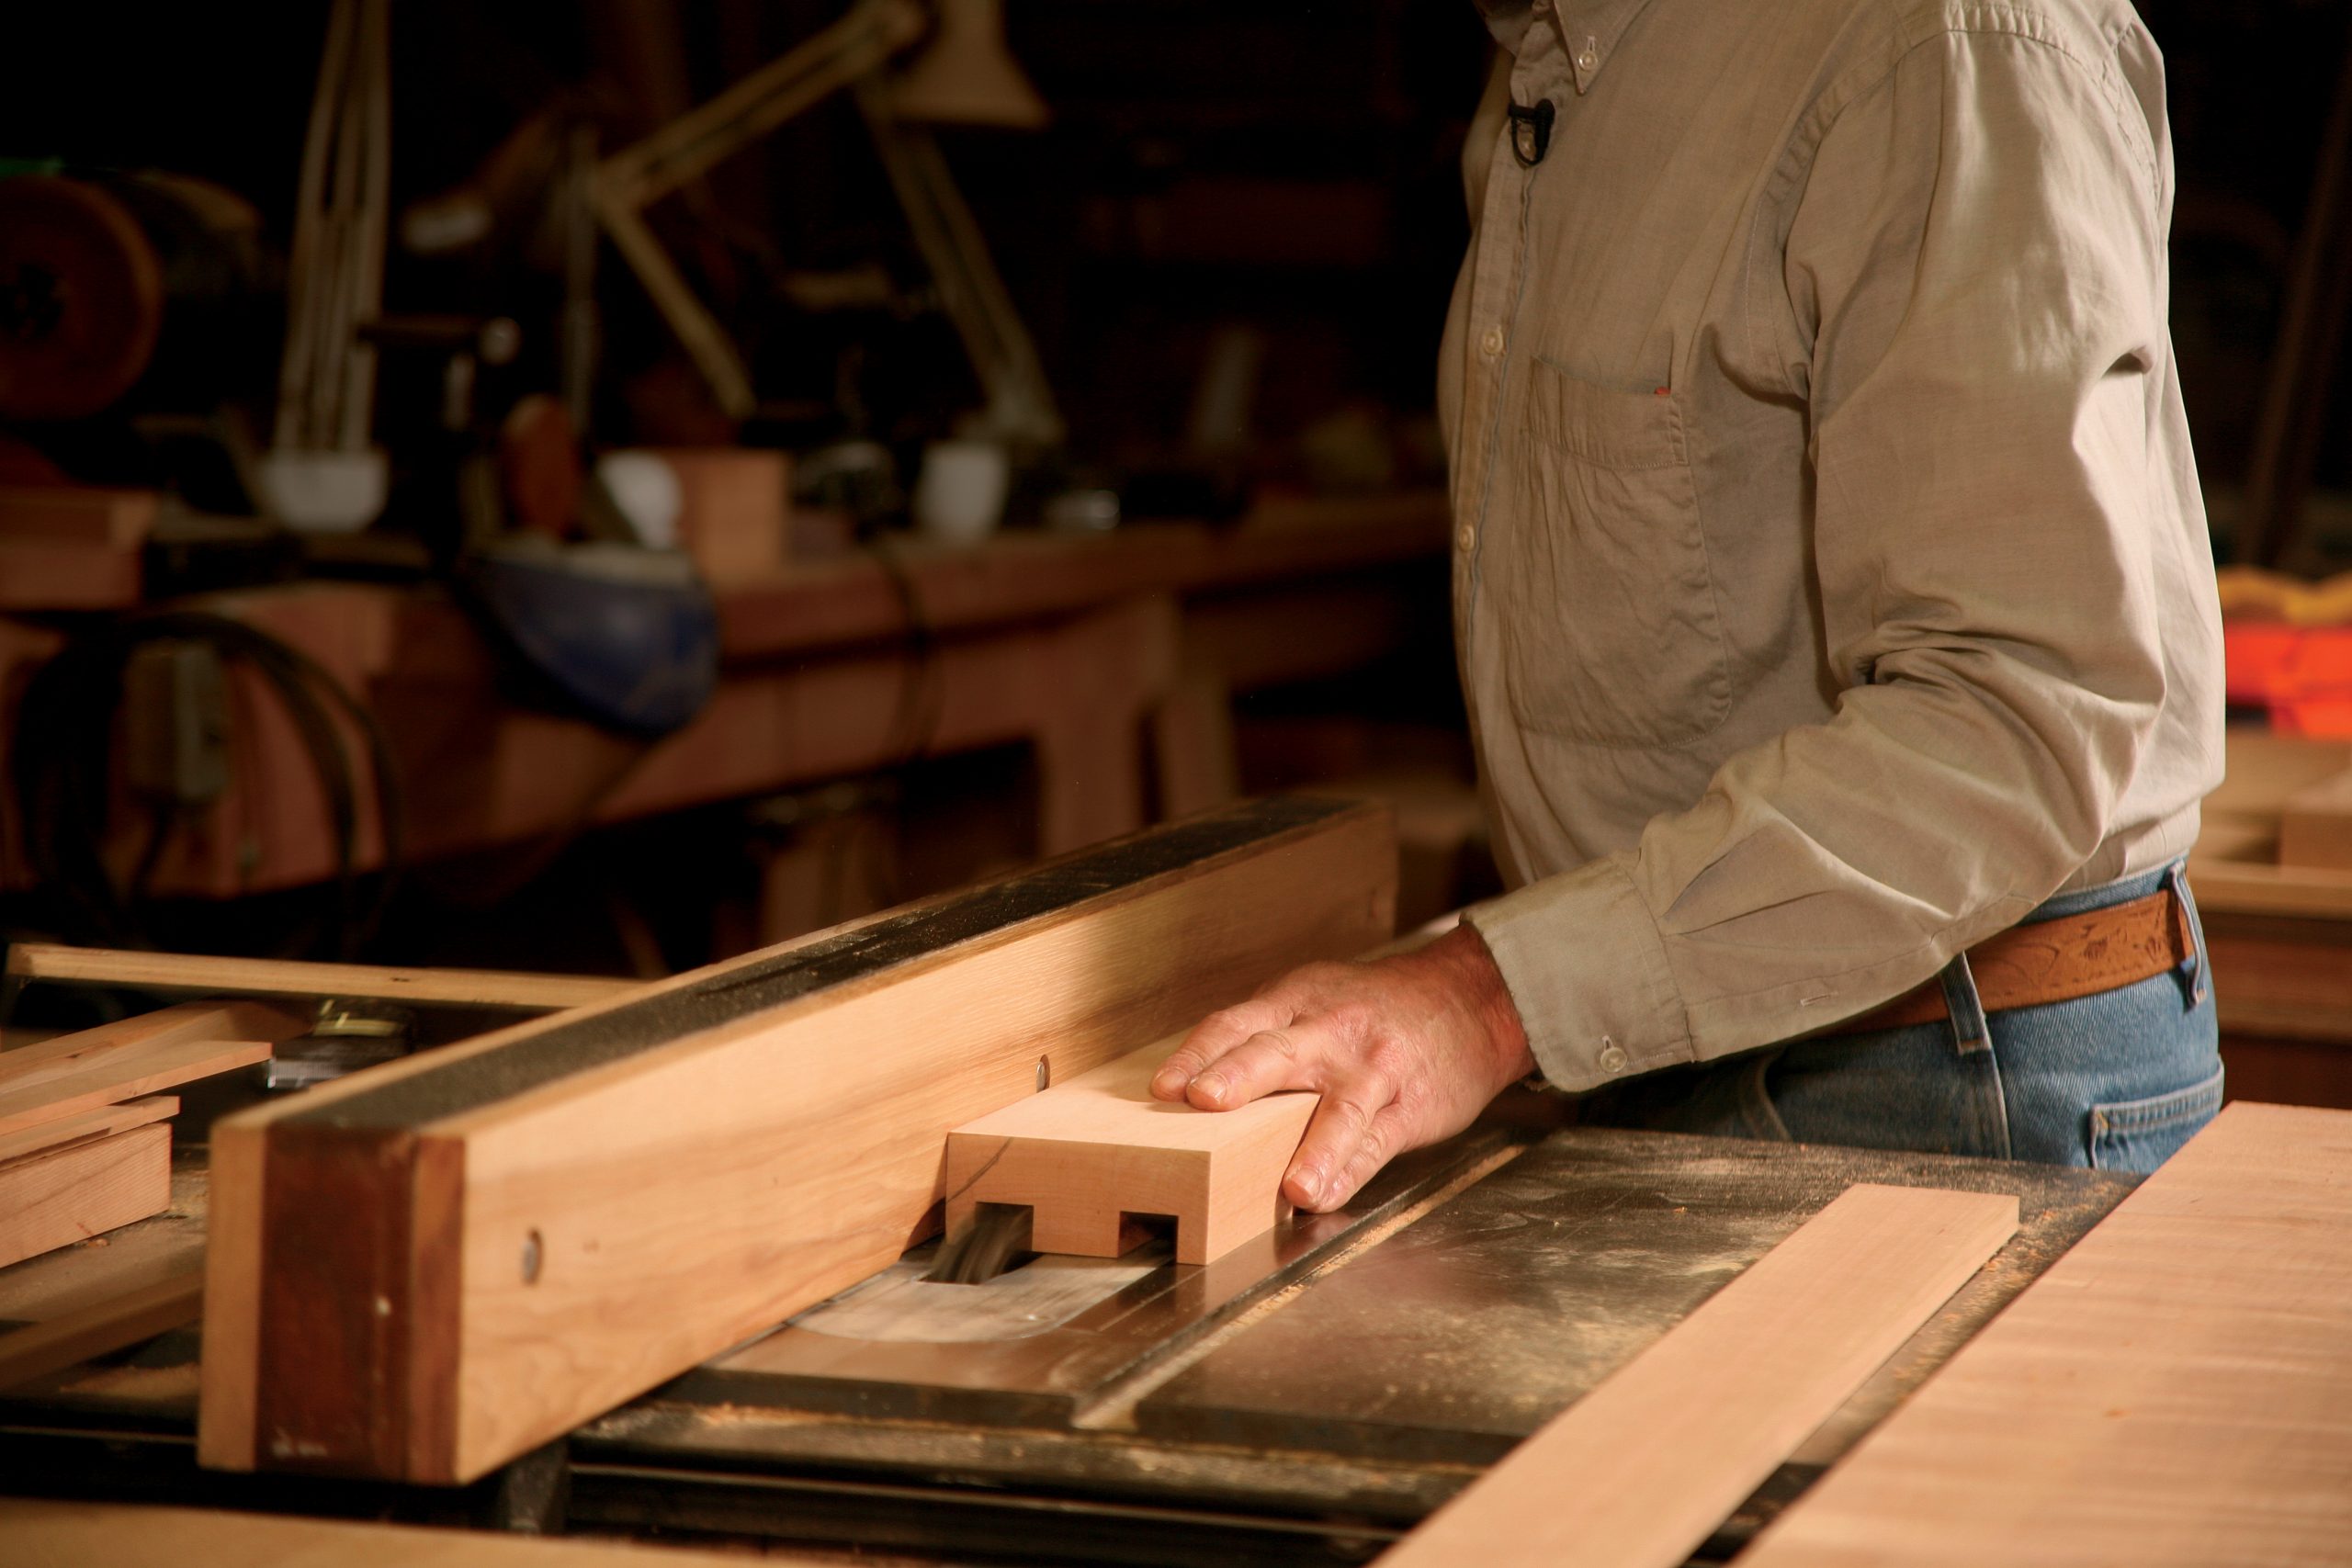 Remove stock for an easier scribe. After the simple one-piece legs are milled, dado the backs, leaving 1/2 in. to scribe on the sides. |
Finish the parts
When the glue was dry, I sanded all of the mantel components with 180-grit paper, using a random-orbit sander on the larger surfaces and a small foam sanding block for the thinner pieces. I wanted an understated finish for this project, but one that still made the wood grain pop, so I chose a penetrating oil made by bioShield. I applied a liberal coat of the finish with a foam brush and wet-sanded it with 320-grit wet/dry paper. I let it penetrate for about 20 minutes before wiping it off with a clean cloth, then disposing of the combustible wet cloth outside. The next day, I applied a second coat without sanding. Subsequent coats deepen the finish and provide better protection.
Installation from the ground up
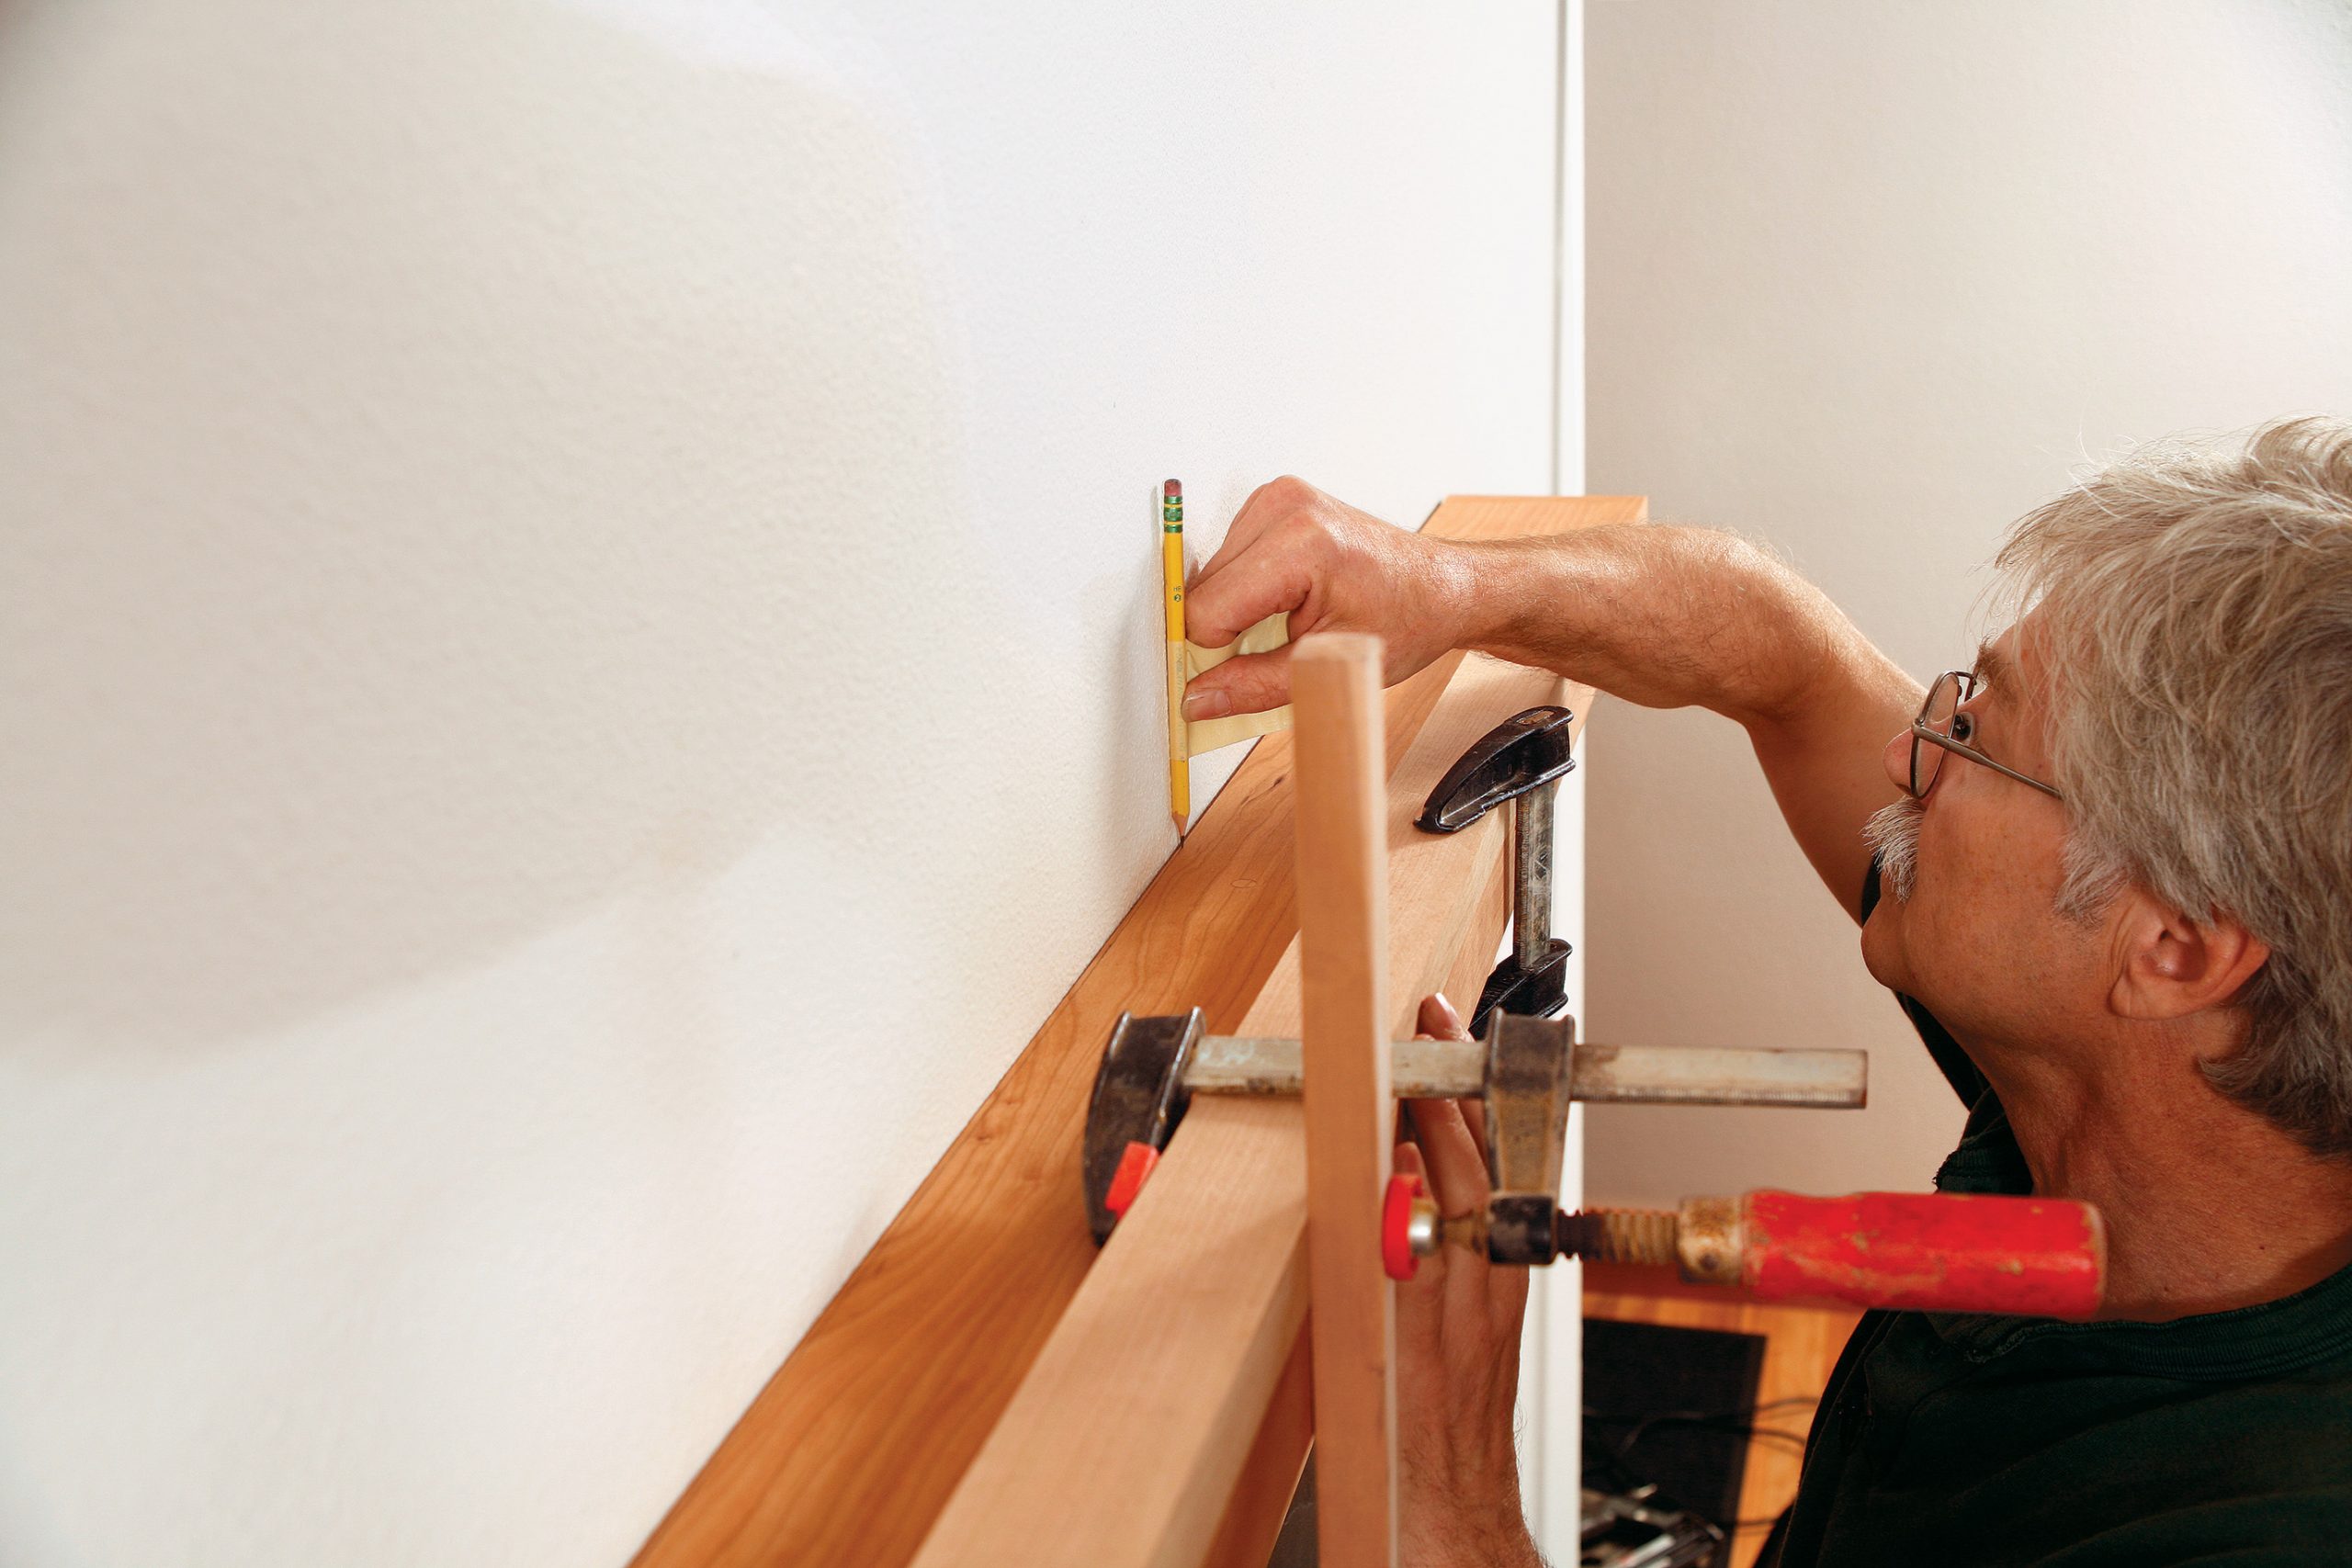
After protecting the floor with mats and setting up my tools, I found the framing in the wall around the fireplace. I began to scribe the legs to the drywall, which was 1/2 in. out of plumb over 5 ft. I taped a couple of shims together and placed them between the top of each leg and the wall, set my compass to the widest gap, and drew the scribe line down both sides of the leg.
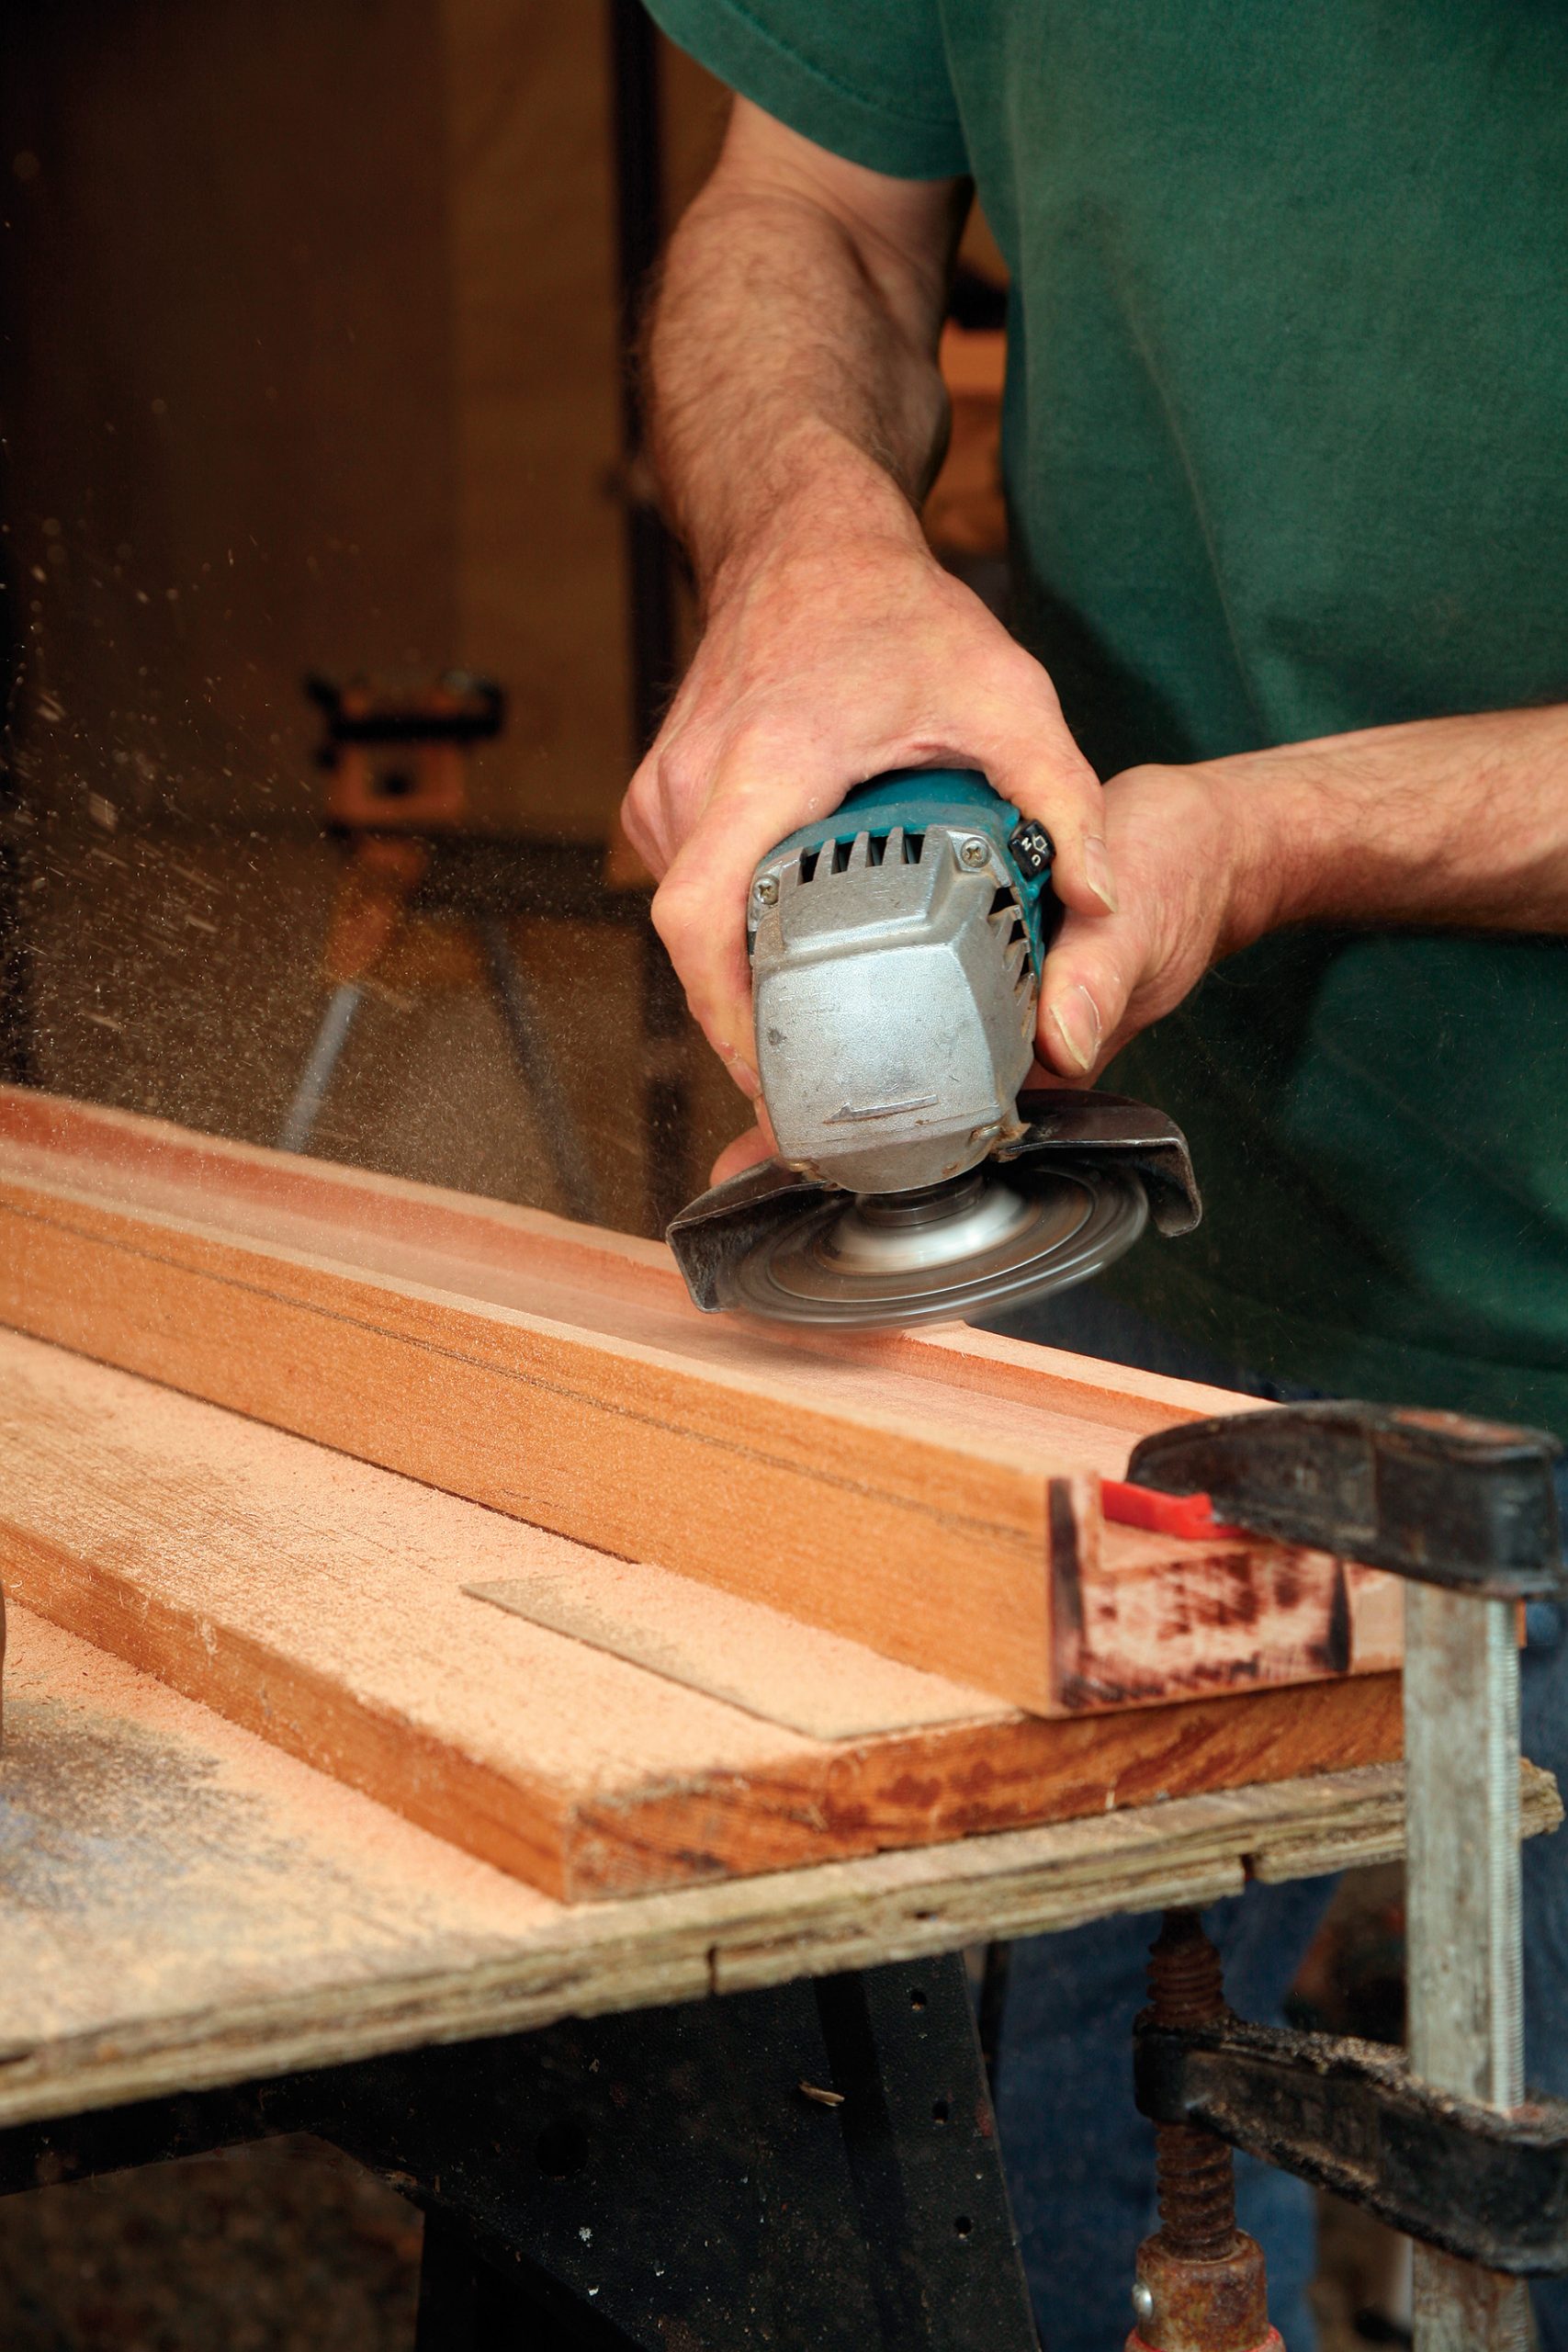
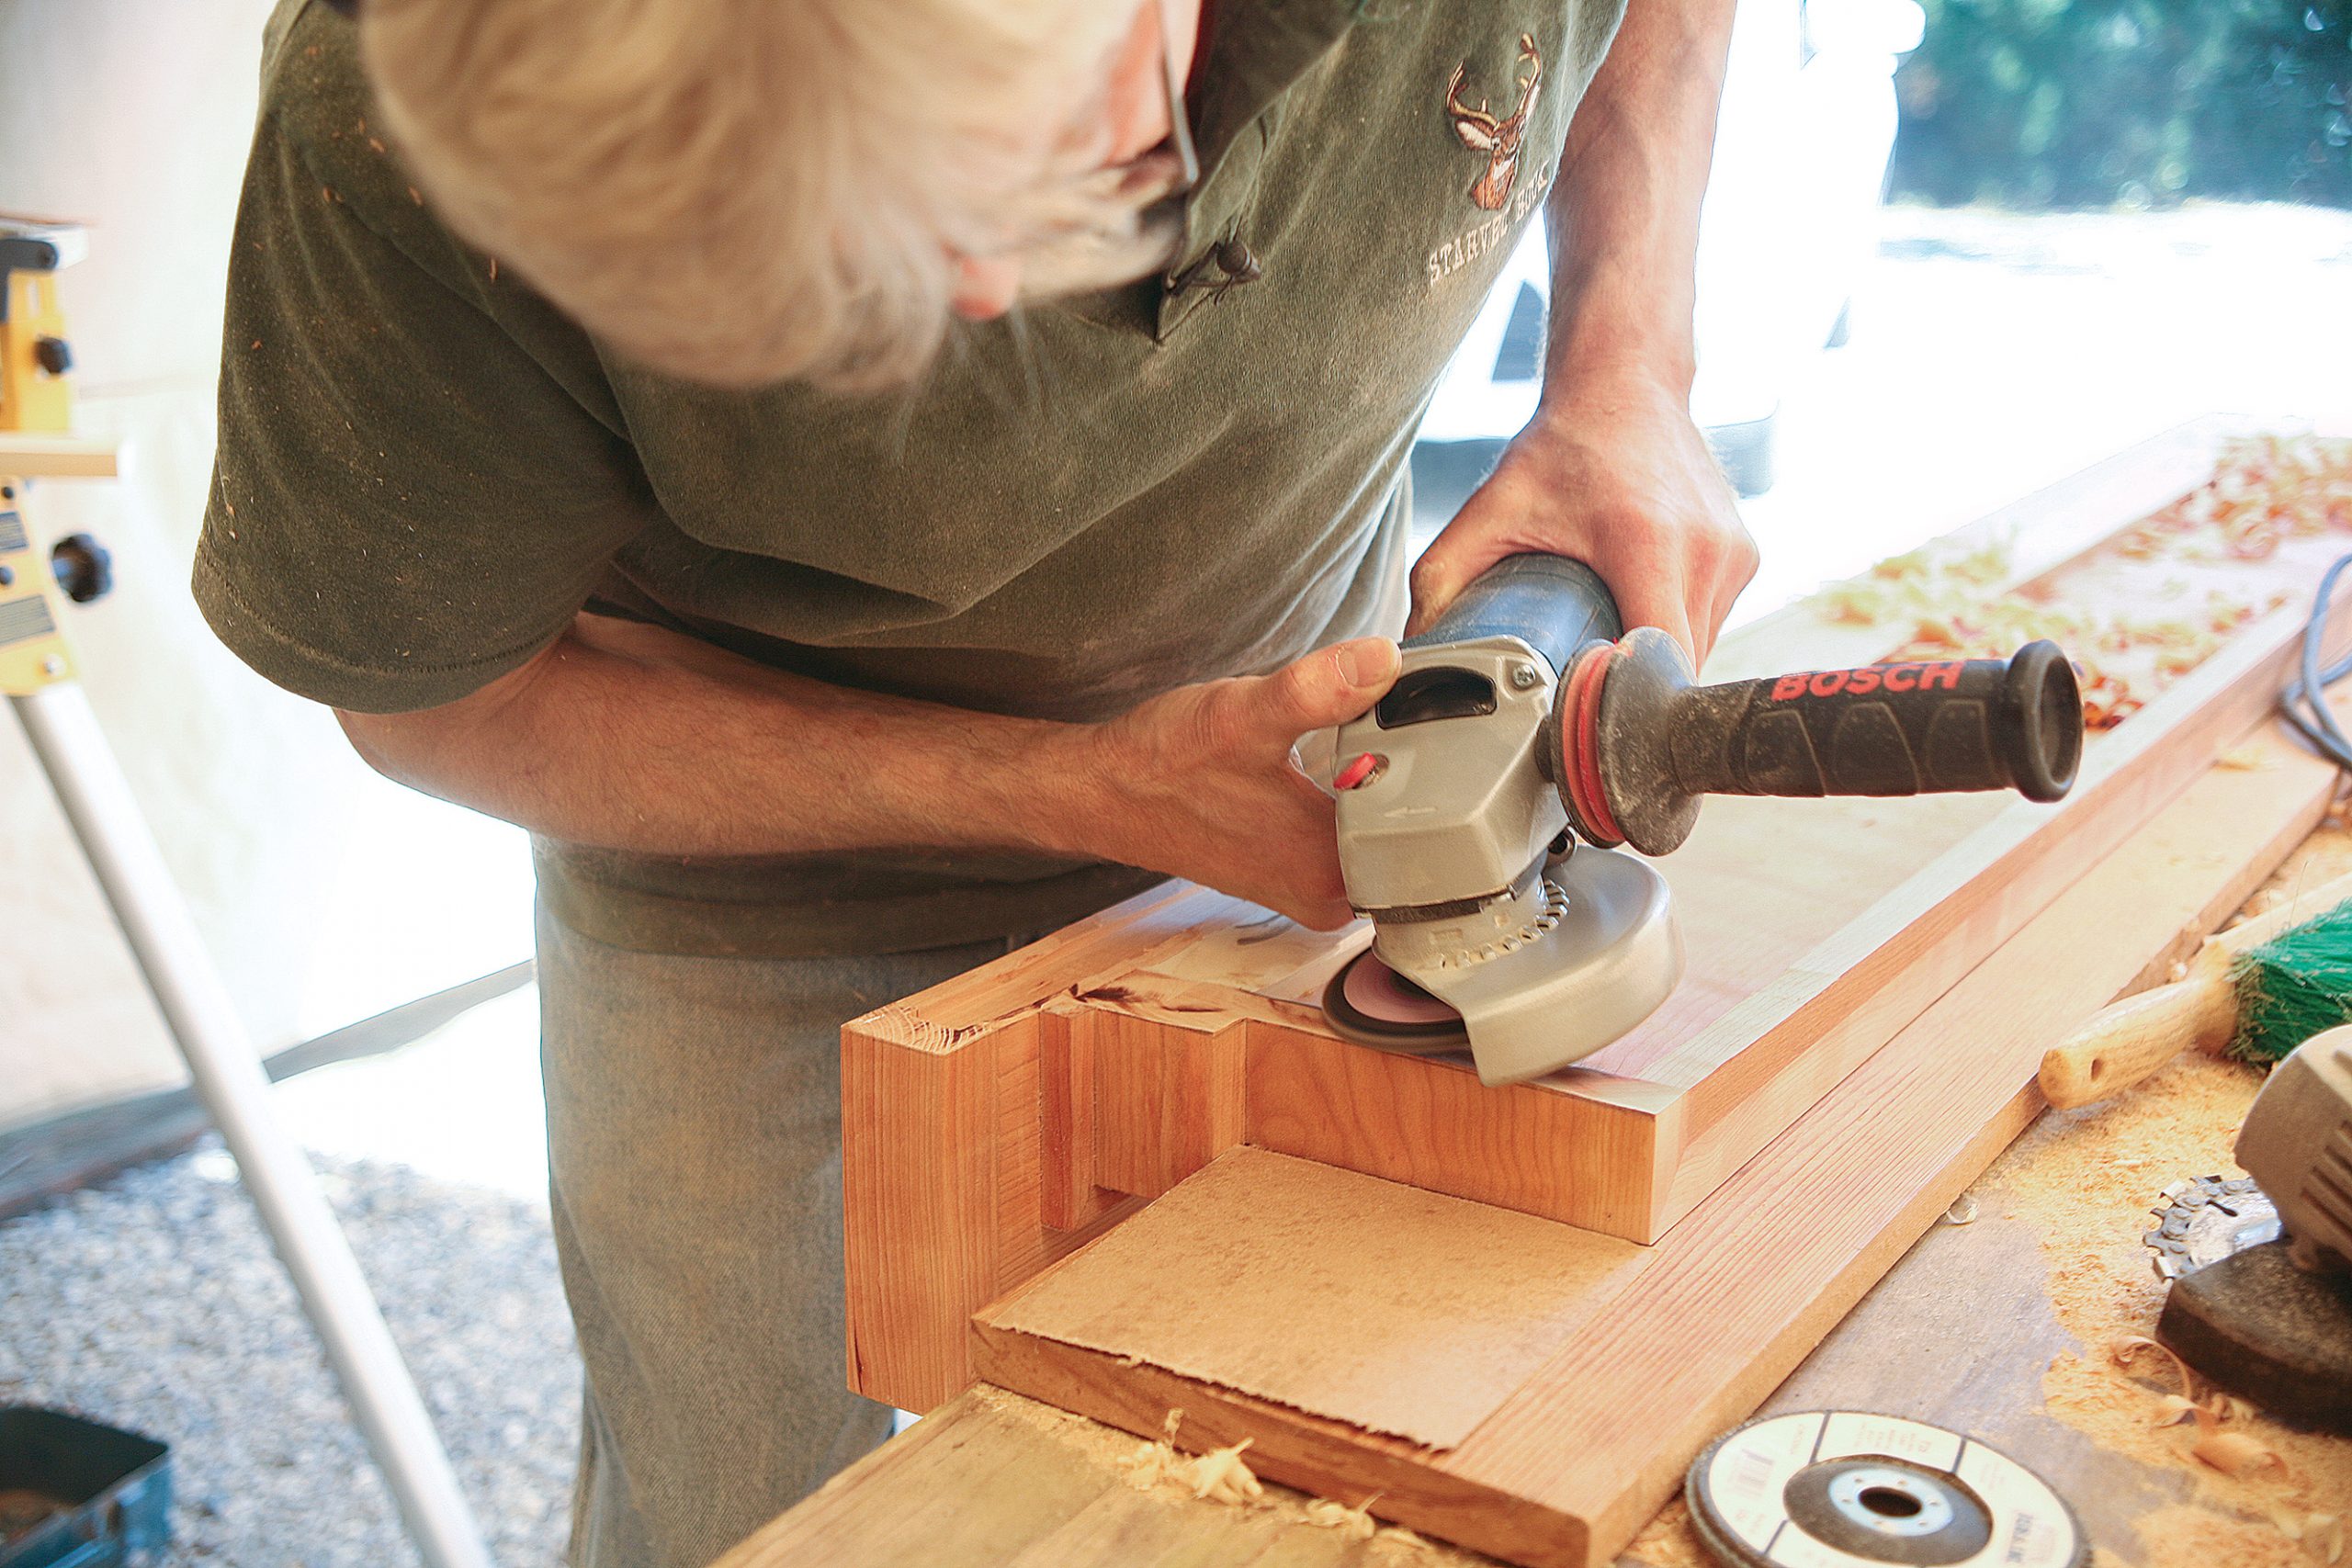
Outside, I used a variety of tools to pare to the scribe line. I have found that a fast way for removing a lot of stock is an angle grinder fitted with a chainsaw blade made by King arthur (katools.com). I place the back side of the blade flat against the wood, angle it down slightly, and pull back with light strokes. For removing stock on end grain, I use an angle grinder with an abrasive wheel. For touch-ups, I rely on a makita 9031 narrow-belt sander and a sharp block plane.
After a couple of trial fits, the legs were ready to mount to the wall. On the bottom end of the legs, I drilled a pilot hole 1/2 in. from the floor. On the top end, I drilled diagonally through the end grain, then drove trim-head screws through both holes and into the framing. (The screw hole at the bottom of each leg gets plugged.) After fitting the parting strip, I attached it to the top of the legs with pin nails. Next, I braced the shelf-and-frieze assembly in position, scribed the back and sides until the shelf was level front to back, then scribed the top so that the shelf conformed to the wall.
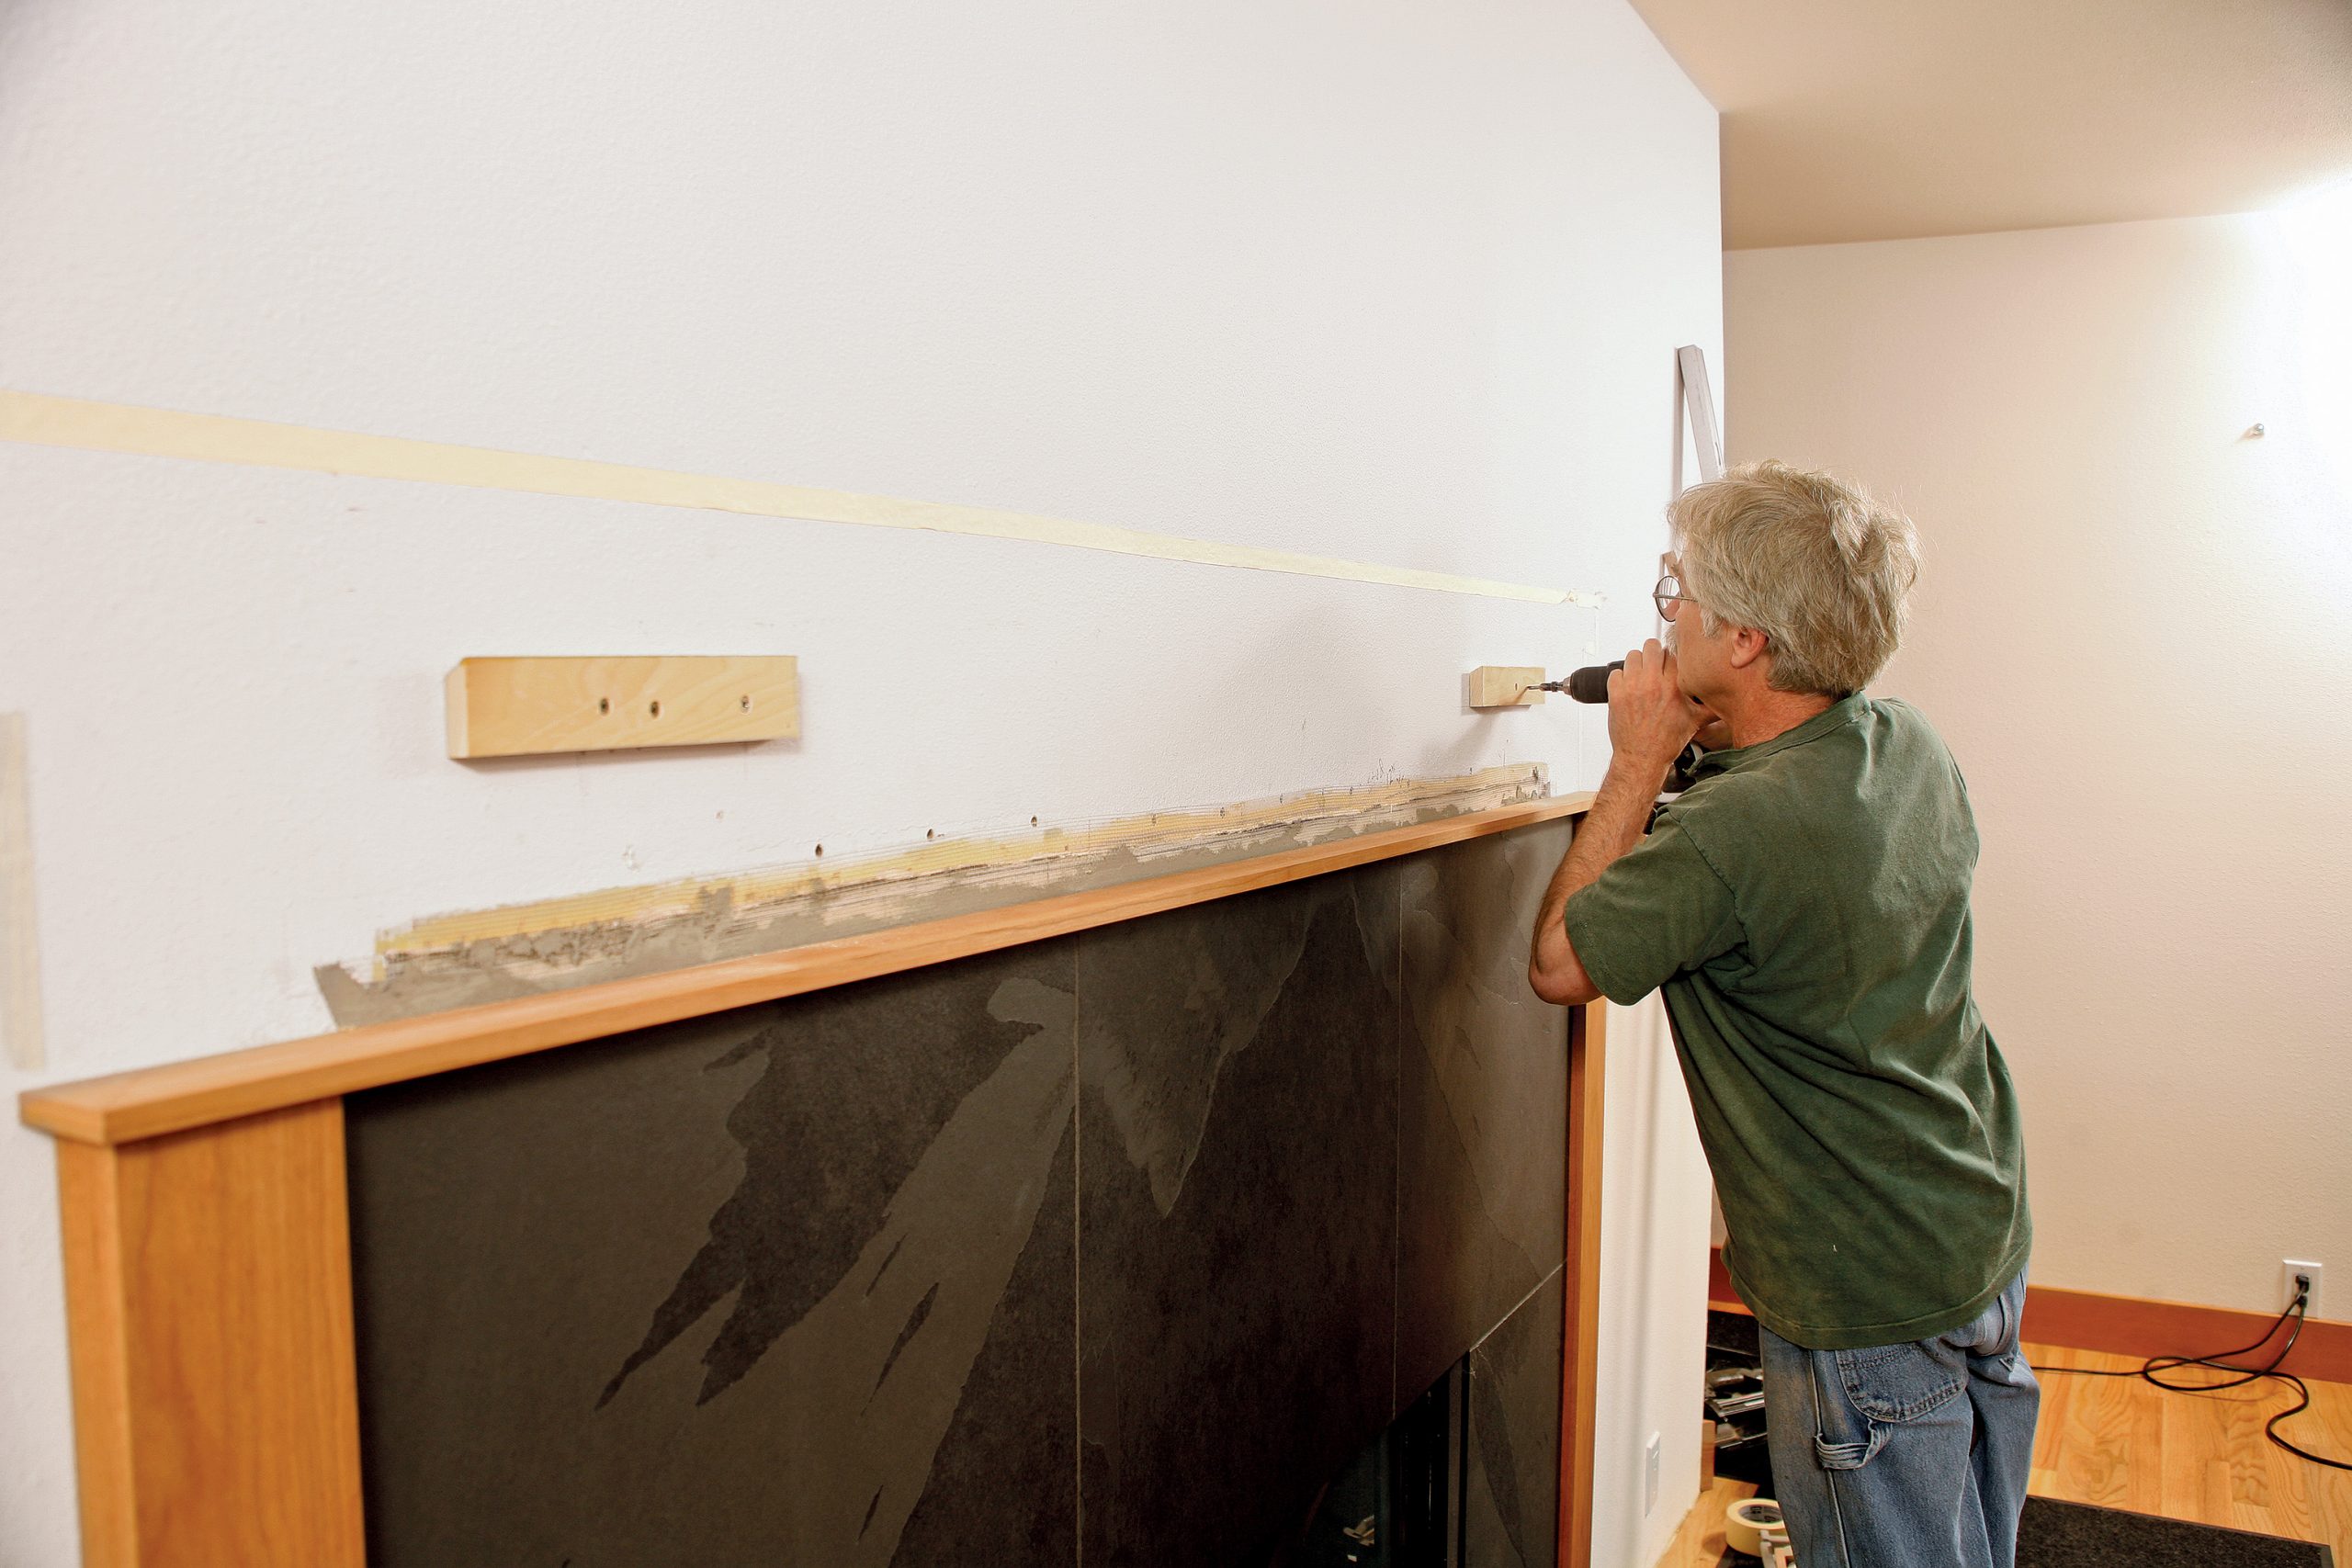
With the shelf in place, I marked its height and length on the wall and then removed it to install the 12-in. wall cleats. by nesting the cleats together on the back of the frieze, I could take a measurement from the top of the shelf to the bottom edge of the wall cleat. I then transferred this dimension to the wall. Initially, I attached each cleat with a single screw and hung the shelf and frieze to test the fit. To make minor adjustments, I planed the bevel edge of each cleat until the shelf and frieze were seated against the parting strip correctly. To make significant adjustments, I removed the screw and repositioned the cleat. When everything fit as it should, I locked the cleats in place with additional screws, applied a bead of construction adhesive on each cleat, and reinstalled the shelf-and-frieze assembly. I finished up by pin-nailing a 3/8-in. square band around the inside perimeter of the mantel and installing the baseboard on each side of the legs.
Scribe and Install the Parts On-SiteScribe the legs and trim
Fit parting strip Adjust the reveal. To compensate for the uneven plaster, position the parting strip on the legs and use the compass to mark the amount to be scribed. The result should be an equal reveal over the legs on both sides. Hang the shelf/frieze
The moment of truth. Carefully drop the shelf-and-frieze assembly onto the cleats, align it to the leg on each side, and check the fit. (It may need a tap to settle properly.) If the fit is good, remove the assembly, apply more screws and a thin bead of construction adhesive to the wall cleats, and replace the assembly. If the fit is off, adjust the placement of the wall cleats and try again. |

Web Extras:
Article: Great Tips for Building a Mantel
Video: Building a Modern Mantel
To view the entire article, please click the View PDF button below.
From FineHomebuilding #248
