Tongue-and-Groove Paneled Ceiling Tips
A remodeling contractor gives his advice on creating a paneled ceiling with tongue-and-groove boards.

Q: “My wife and I would like to cover our ceiling with tongue-and-groove boards. Do you have any tips?”
– Brian Lengel, via email
A: Jim Blodgett, a remodeling contractor in Roy, Washington, replies:
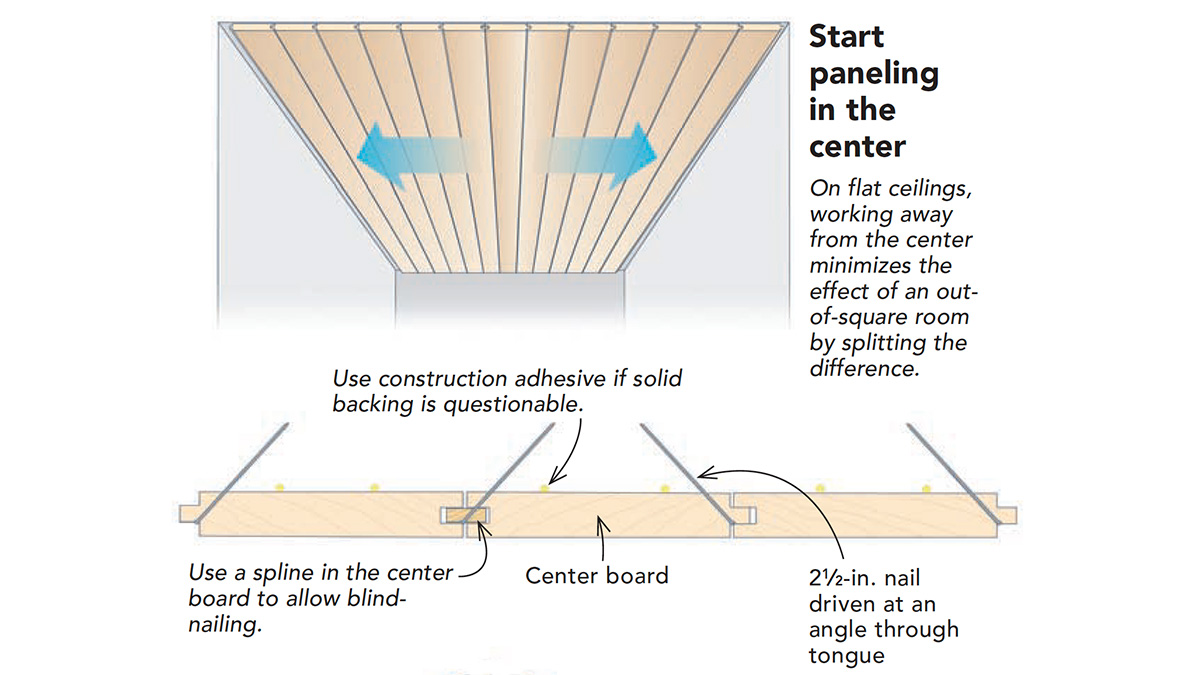
It seems intuitive that you’d start against one wall and work across the room until the ceiling is covered, but that’s not the best way. Walls on opposing sides of a room often are not parallel, which causes the final ceiling board to be tapered.
To minimize the tapered effect, I start in the middle of the ceiling and work toward the edges. By starting in the center, I can split the taper against each end wall, which is less visually jarring.
To begin in the center, mill a spline from a piece of scrap the same thickness and twice as wide as the tongue, and insert it into the groove of the first board, in effect creating a board with two tongues and no groove. This same technique long has been a staple of tongue-and-groove flooring installers, who call it a slip tongue.
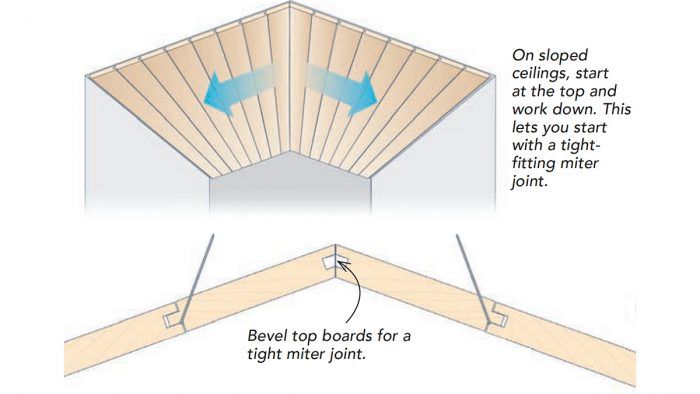
This technique works well for flat ceilings. For vaulted ceilings, start at the peak, skip the spline, and work down the slopes. It’s also important to start at the top on a shed-type sloped ceiling (a ceiling that slopes in one direction) because starting anywhere else would make it difficult to fit the nail gun at the high point where the ceiling meets the wall.
From Fine Homebuilding #185


View Comments
The nailing pattern seems to be at the wrong angle to me. Why would you not want to reverse the angle, toe-nailing through the tongue? In the illustration the nail goes through both boards, meaning you couldn’t secure the first board before the second was attached, which seems awkward and difficult. Am I missing something here?