Trimming a Window on a Paneled Wainscot Wall
Learn how to measure, cut, and install window casings before fitting shop-built wall paneling.
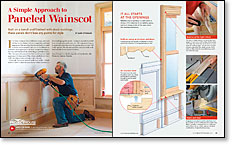
In this Project House video series, Justin Fink visits Arkansas, where longtime finish carpenter Gary Striegler teaches his simplified technique for building and installing paneled wainscot. Although Gary has done wainscot many ways, this is one of his favorite approaches because it’s fast but doesn’t sacrifice appearance for speed. The heart of the approach is using a pocket-screw-joined frame assembled on a workbench or sawhorses, which is then finished with a piece of plywood attached to the backside and panel molding attached to the front. Then, the wainscot is installed in prebuilt sections.
Episode 1: Windows, Doors, and Backband Molding
Before the wainscot panels can be sized and cut, the trim surrounding the windows and doors has to be measured, cut, and installed. The standard package includes an extra deep window stool and casing around the windows and doors, but Gary also shows us how to get a bit of extra depth on the edge of a piece of casing by adding a backband to the outside edges of the casing.
 |
Episode 1: Windows, Doors, and Backband Molding
Whether new house or remodel, wainscot always starts the same: trimming windows and doors. |
 |
Episode 2: Sizing and Assembling Wainscot Panels
Plan the wainscot panels on the wall, but build them on the bench |
 |
Episode 3: Wainscot Cap and Two-Piece Baseboard Molding
With the panels in place, it’s just a matter of adding molding to finish the job |
 |
Episode 4: Installing Crown Molding
No wainscot job is complete without a run of crown molding above to visually anchor the whole installation |



View Comments
MAYBE in Episode 1, the contributing editor of the magazine should not lean all the way over into the center of the Window to install a nail - while taking one foot off the ladder to make the reach (@ 6:44 point of video). I know I'm a pot calling the kettle black here, but I don't publish a major magazine touting safe work habits. I just read and enjoy all the great tips and information.