Synopsis: Finish carpenter Joseph Laskey describes a project in which he trimmed out a series of casement windows in a round bump-out to surround a soaking tub. The bay includes all the elements of a conventional multiunit cased window, but the parts must be cut and fit individually to match the curve. Laskey describes each part of the process, from cutting and fitting the stool segments to adding extension jambs and casing before fitting the mull covers and curved apron.
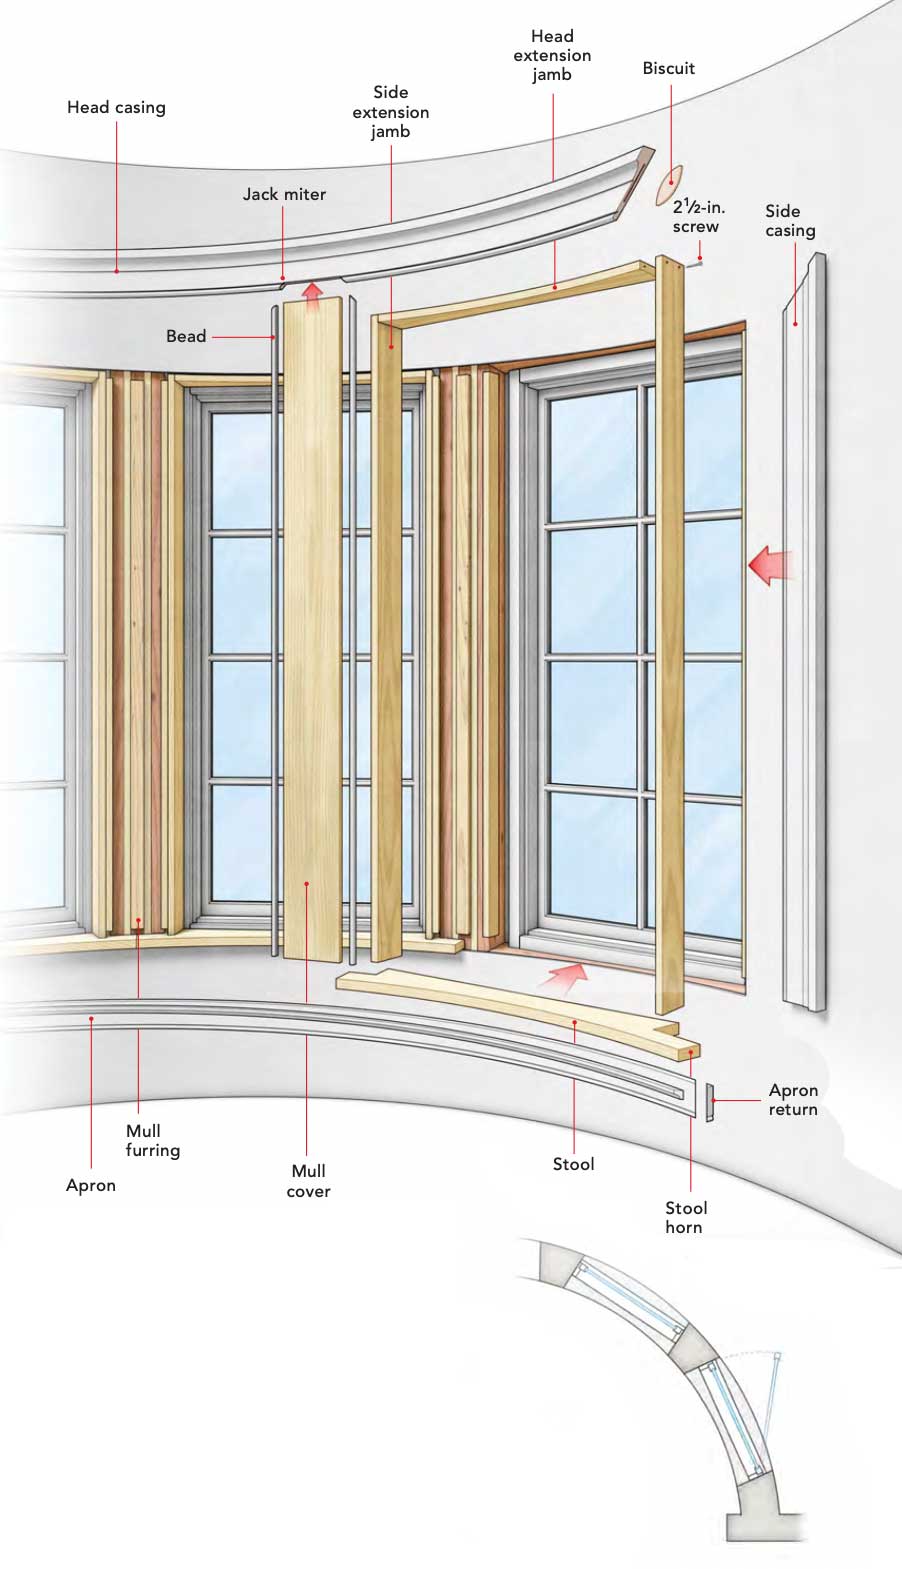
Breakdown of a Curved Bay. A curved bay has all the elements of a conventional multiunit cased window, but the curves require that the parts be individually cut and fit.
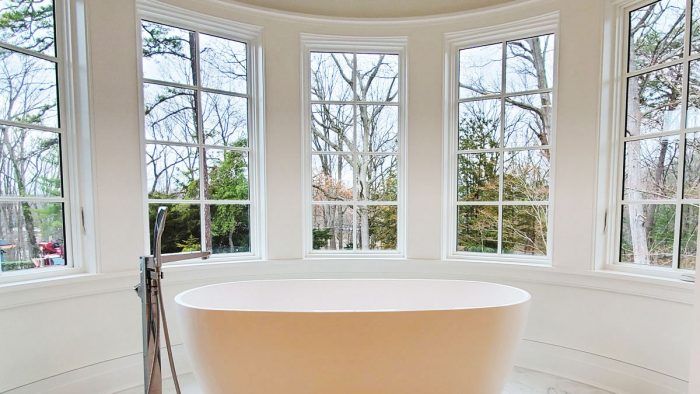
I’m a finish-carpentry subcontractor for Bayview Builders, a custom home builder in Annapolis, Maryland. This affluent suburb of Washington, D.C., provides plenty of interesting carpentry projects for me to work on. Recently I had to trim out a series of casement windows in a round bump-out for a luxury master bath.
The windows, which surround a soaking tub, were trimmed with mitered casing and a traditional stool and apron.
A project like this requires patience, attention to detail, and a good millwork supplier. Here we used a mix of materials, some radiused, some square. A custom millwork shop provided the laminated mahogany apron and head casing with the correct radius, but I had to fit and install them. For the stool, we started with square poplar stock, and I rough-cut the curve for these pieces on my bandsaw. To guide that work, I created a template, which I marked with the location of each extension jamb and decorative bead that surrounds the windows.
In the end, it took a little over three days to finish the job. It was a fun project and I think the finished space is among my favorite in the house.
Start with the stool
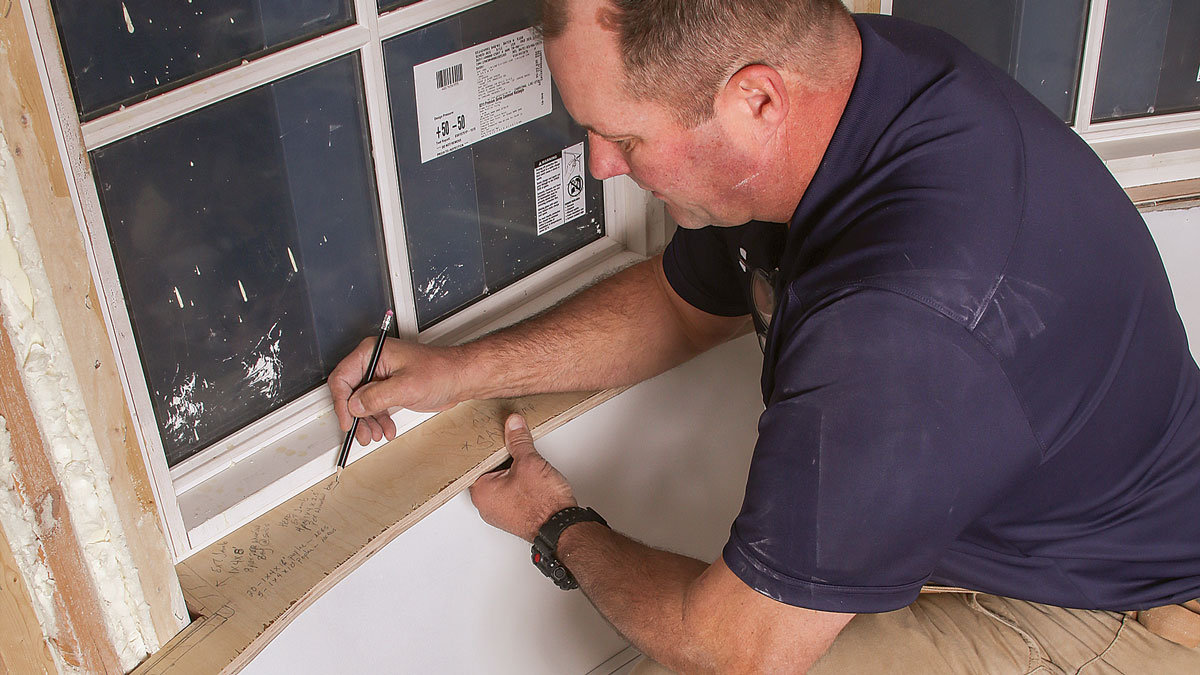
The stool segments, made from 5/4 by 8-in. poplar, are the first component to cut and fit. Each stool segment has one straight side and one curved side. The straight side butts against the casement window frame and the curved side matches the 6-ft. radius of the bay window. The oversize blanks are field-trimmed before the individual segments are joined together and fastened to the framing.
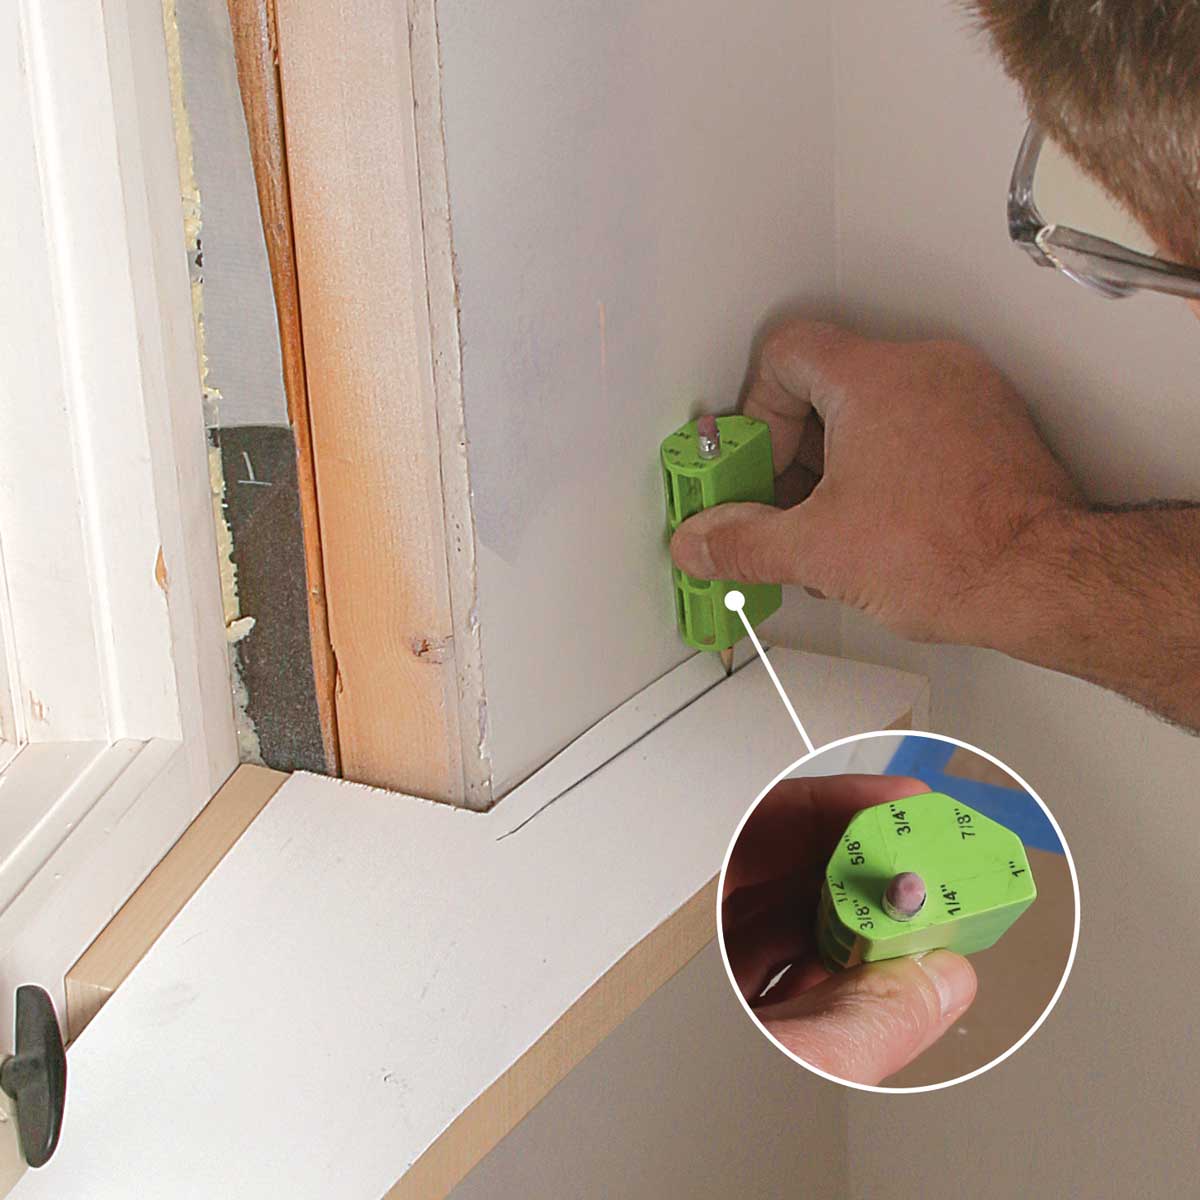
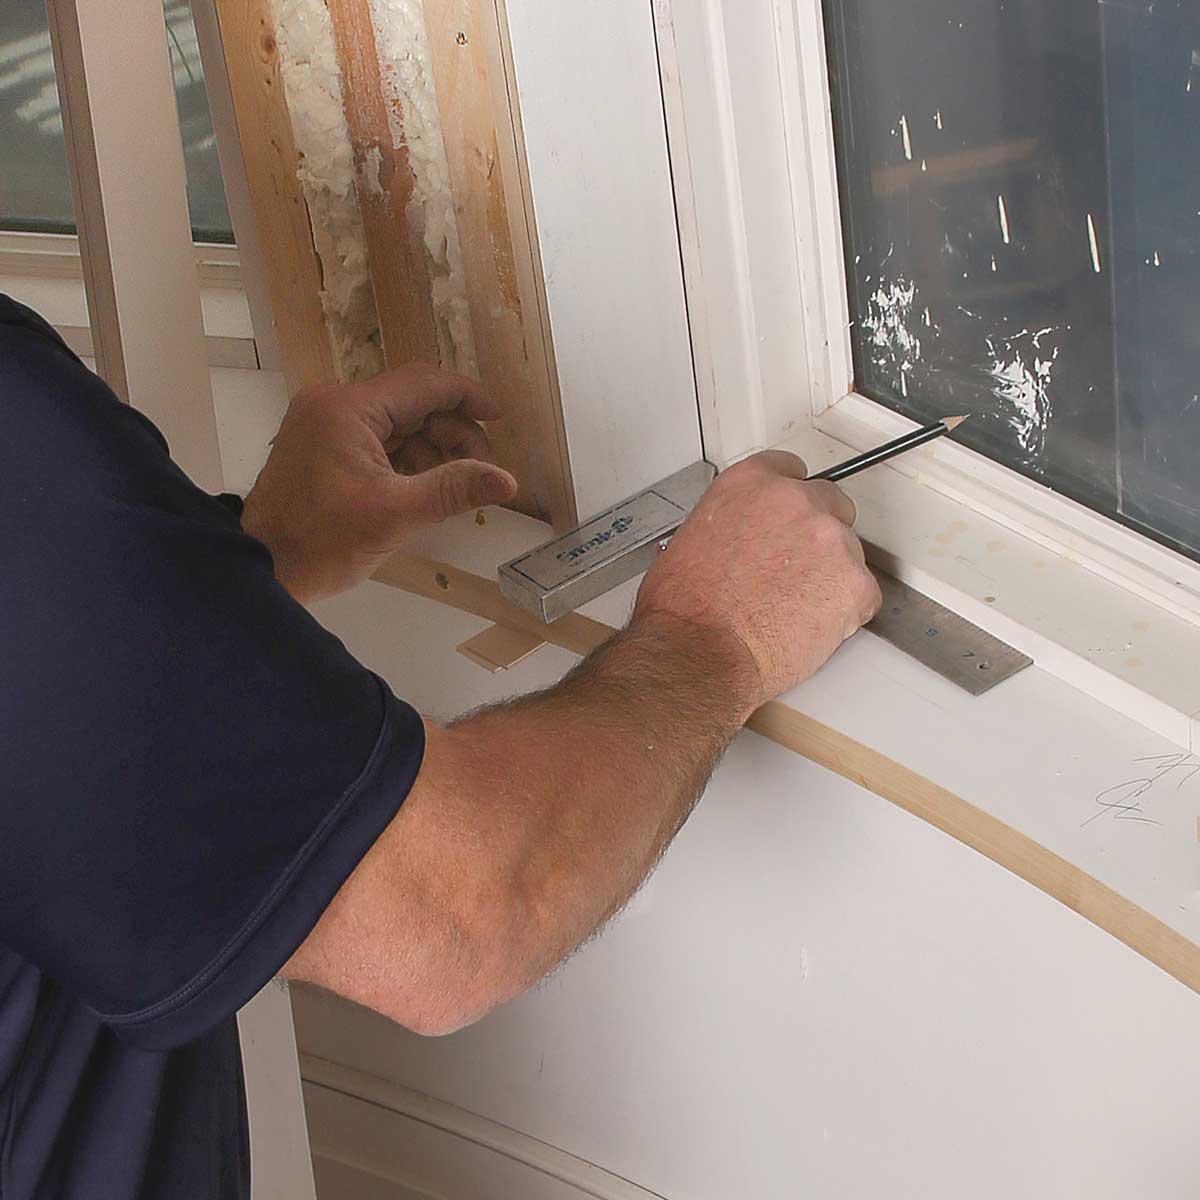
Make a template. A 3 ⁄ 4-in.-thick MDF stool template, used for all five windows, shows the location of casing, mull cover, and decorative bead. A centerpoint on each window is aligned with a centerpoint on the template and, later, each stool blank, ensuring a fair curve.Trim the horns. The poplar blanks have oversize horns that need to be trimmed. I align the center marks on the stool and the window to mark the horn length. The two end horns, which receive casing, are longer than the interior horns, which meet in the center of the mull.
Scribe the horns. I use an AccuScribe to trace the horns so they match the wall’s curve, but a compass would work as well.
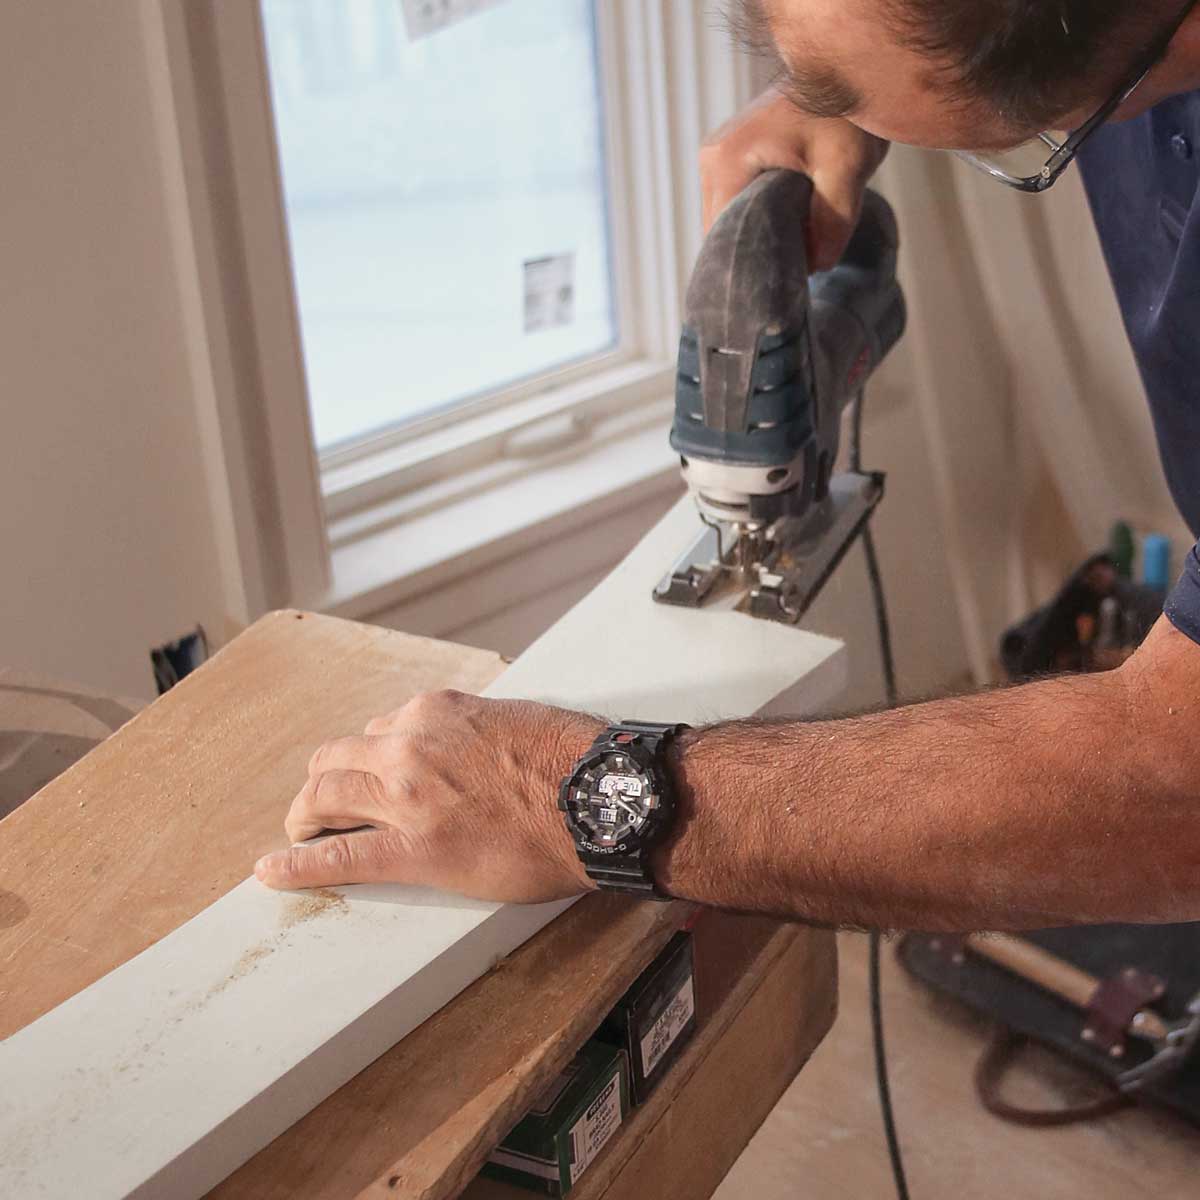
Cut the scribe. Depending on how much material I have to remove, a jigsaw or hand plane is best for scribing the stool. I sand off any saw marks.
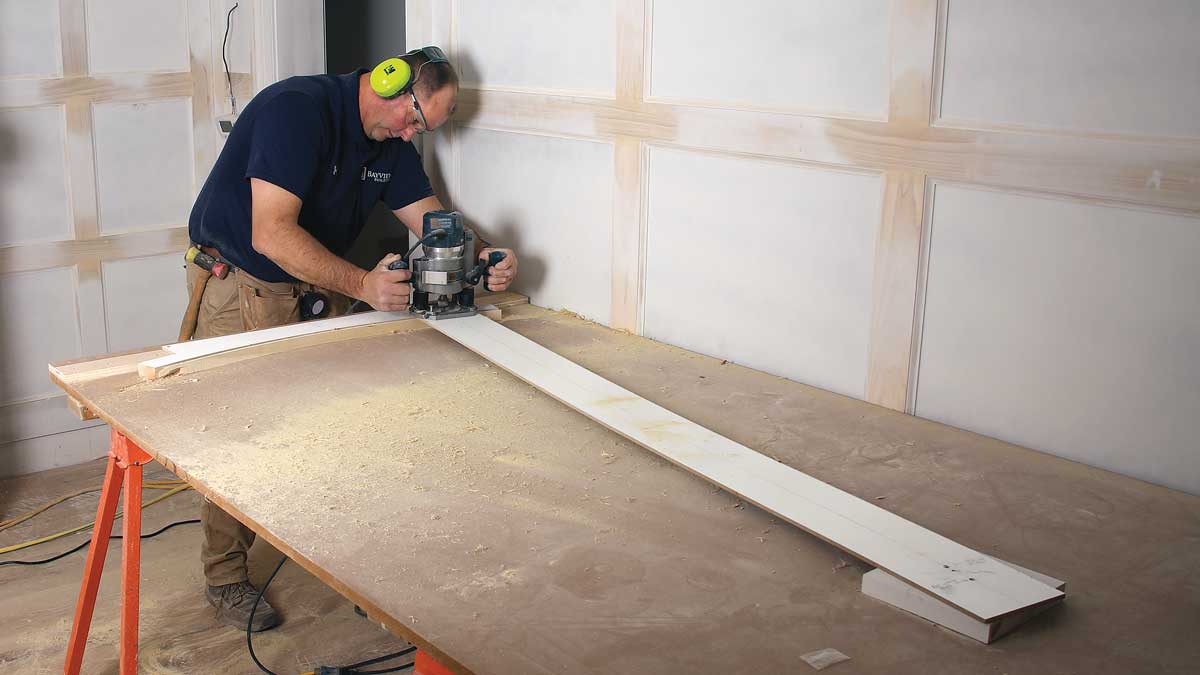
Fair the front. The fronts of the band-sawn blanks are trimmed with a router using a 6-ft. trammel arm to ensure a fair curve that matches the radius of the windows. Blocks that stand in for the window opening hold the stool in the right spot, and the cut is made in a few passes so as not to burn up the router.
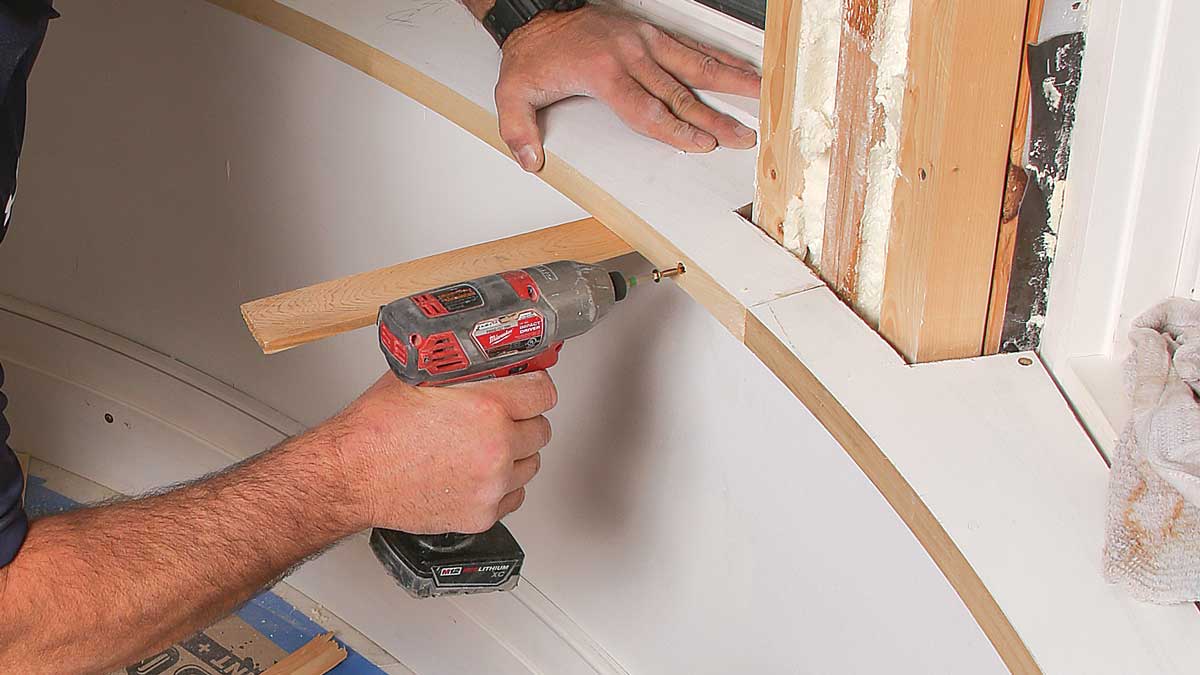
Screws join stool segments. To prevent gaps from opening where segments butt together, the individual stool segments are joined together using pocket holes and screws placed on the underside of the stool where they will be hidden by the apron.
Fasten to the wall. Once the segments are joined and leveled with shims, they’re screwed to the wall. The screws are driven into counter-bored holes, which are later plugged.
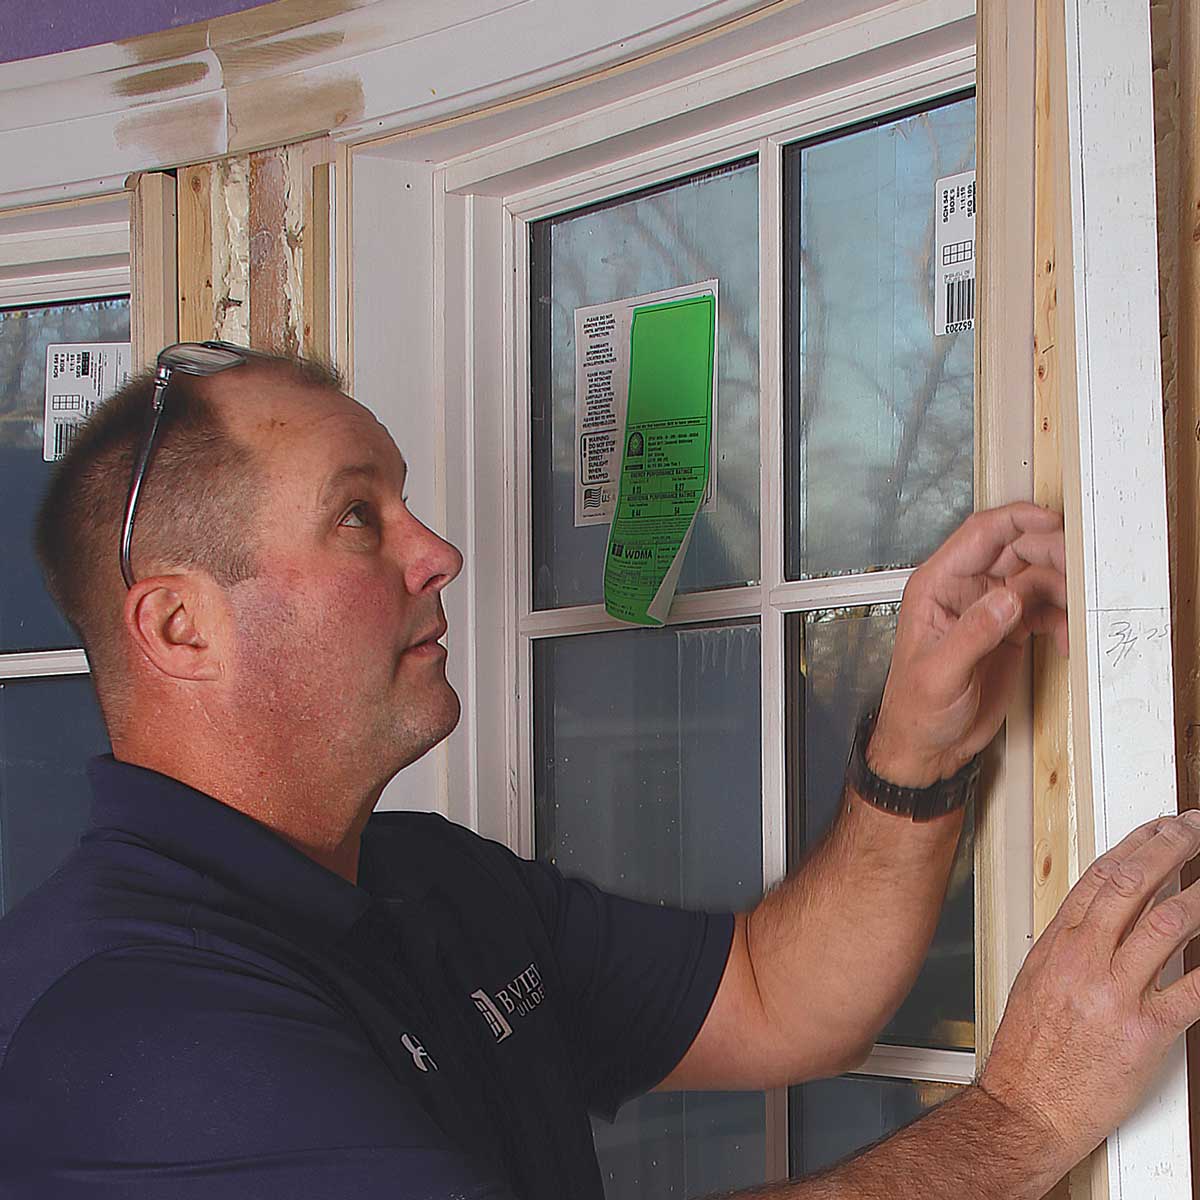
Add extension jambs
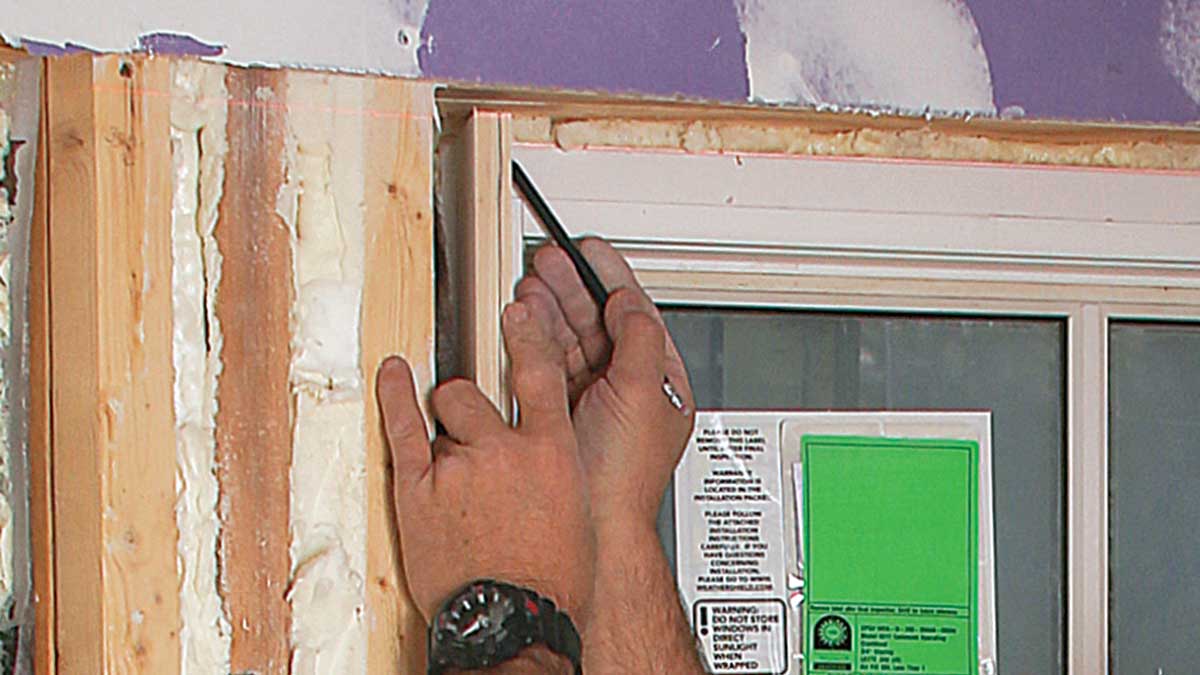
The casement windows require extension jambs to fully conceal the bump-out’s 2×6 walls. The reveals for the side extensions are all 1⁄4 in., and I use a laser line to ensure all the extension-jamb tops are at the same height so the casing reveal is consistent.
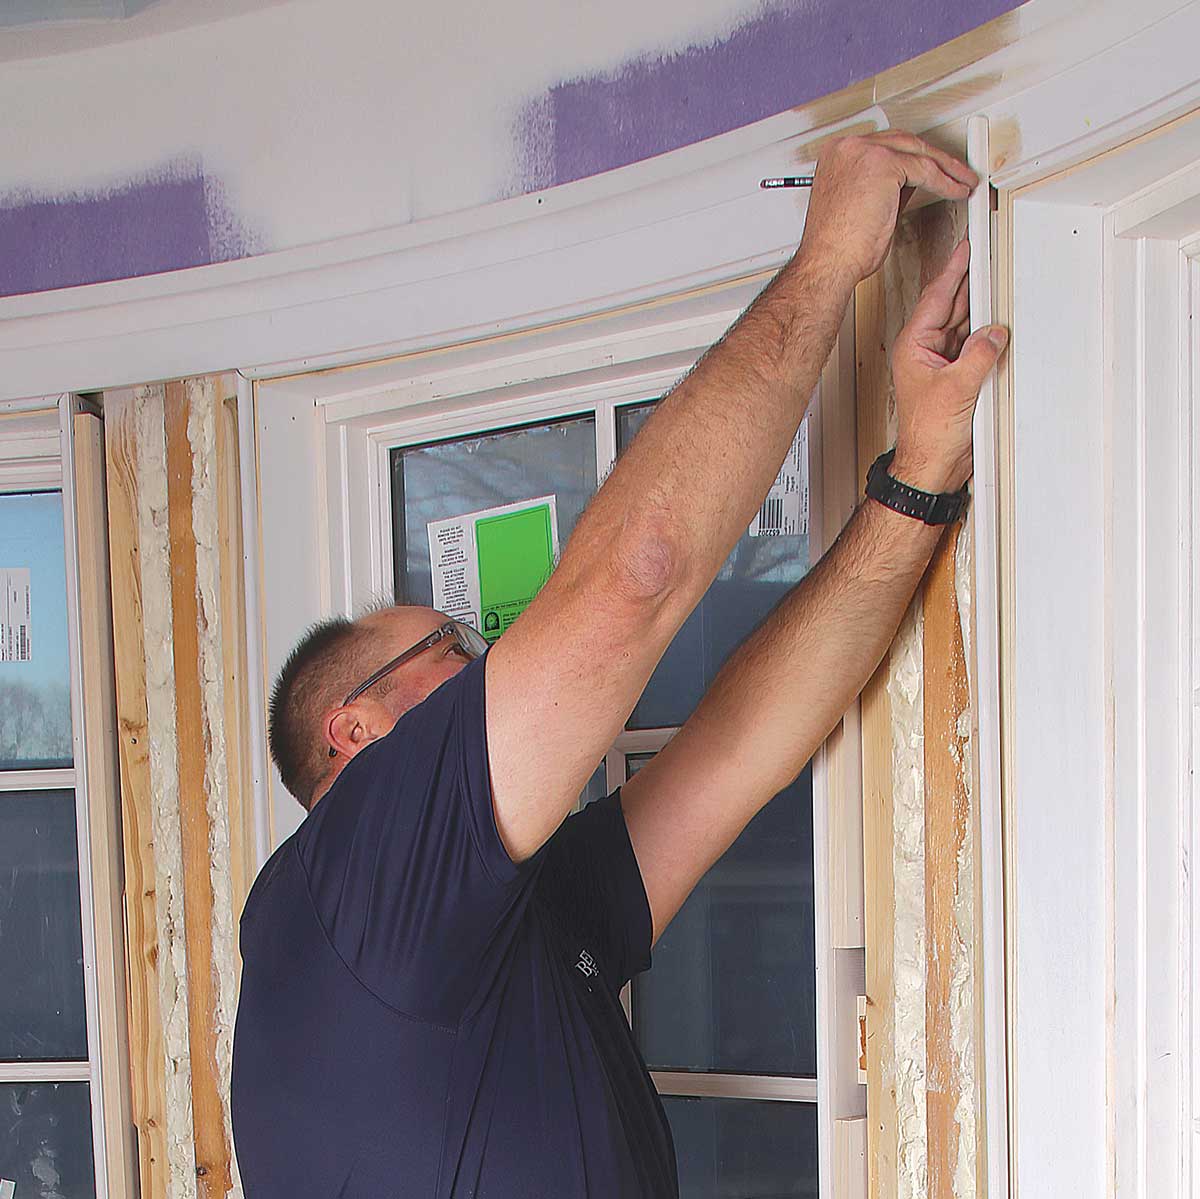
Mark the sides. With the extension-jamb side held in position, I mark its length using a laser. The top extension jamb fits between the sides, so I mark the location of its top side on the extension jamb sides.
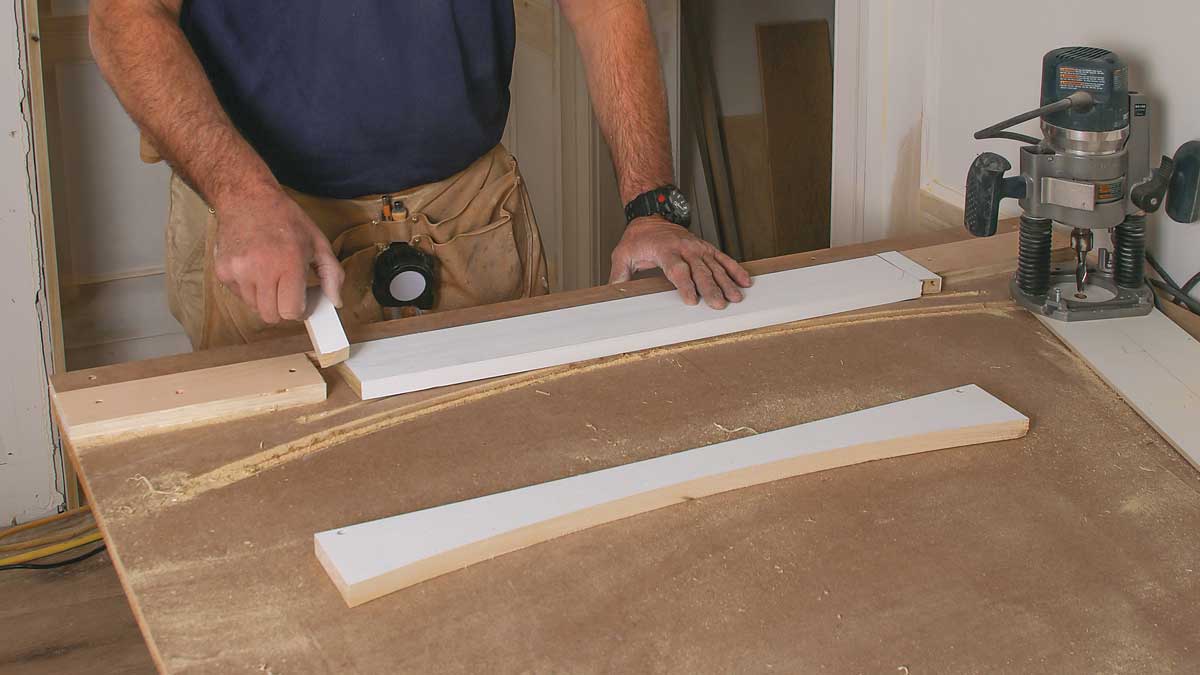
Curve the top. The top extension jamb is curved to match the space’s 6-ft. radius. The curve is cut using the same setup as the stool, but it’s narrower, so 3⁄4-in.-thick scraps, placed on both ends, stand in for the side extension jambs and keep the top centered in the original template.
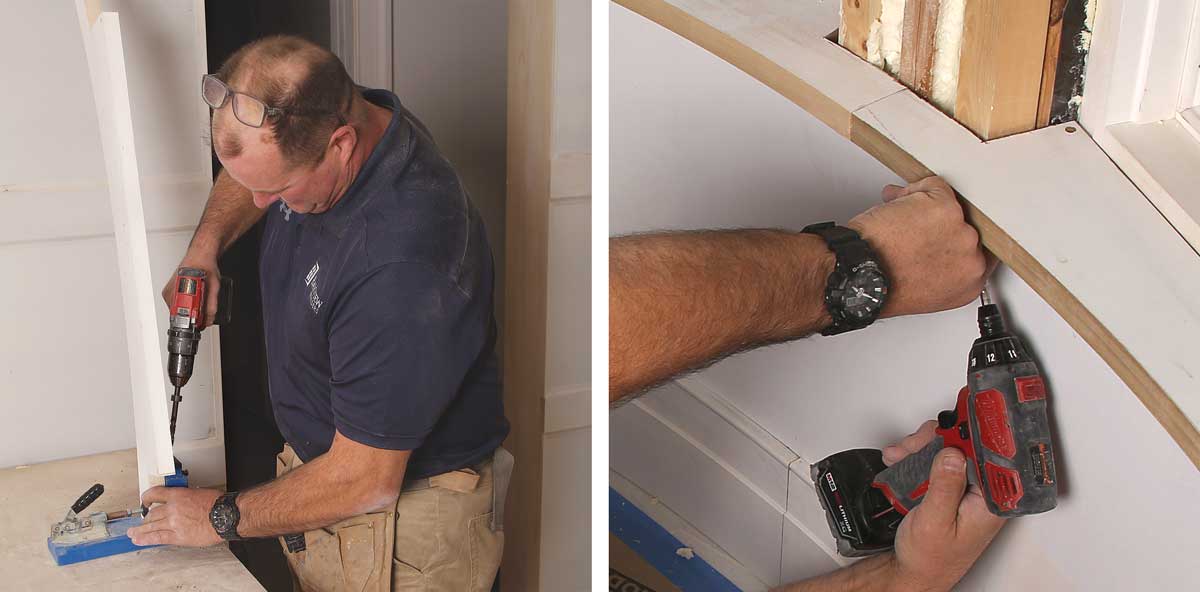
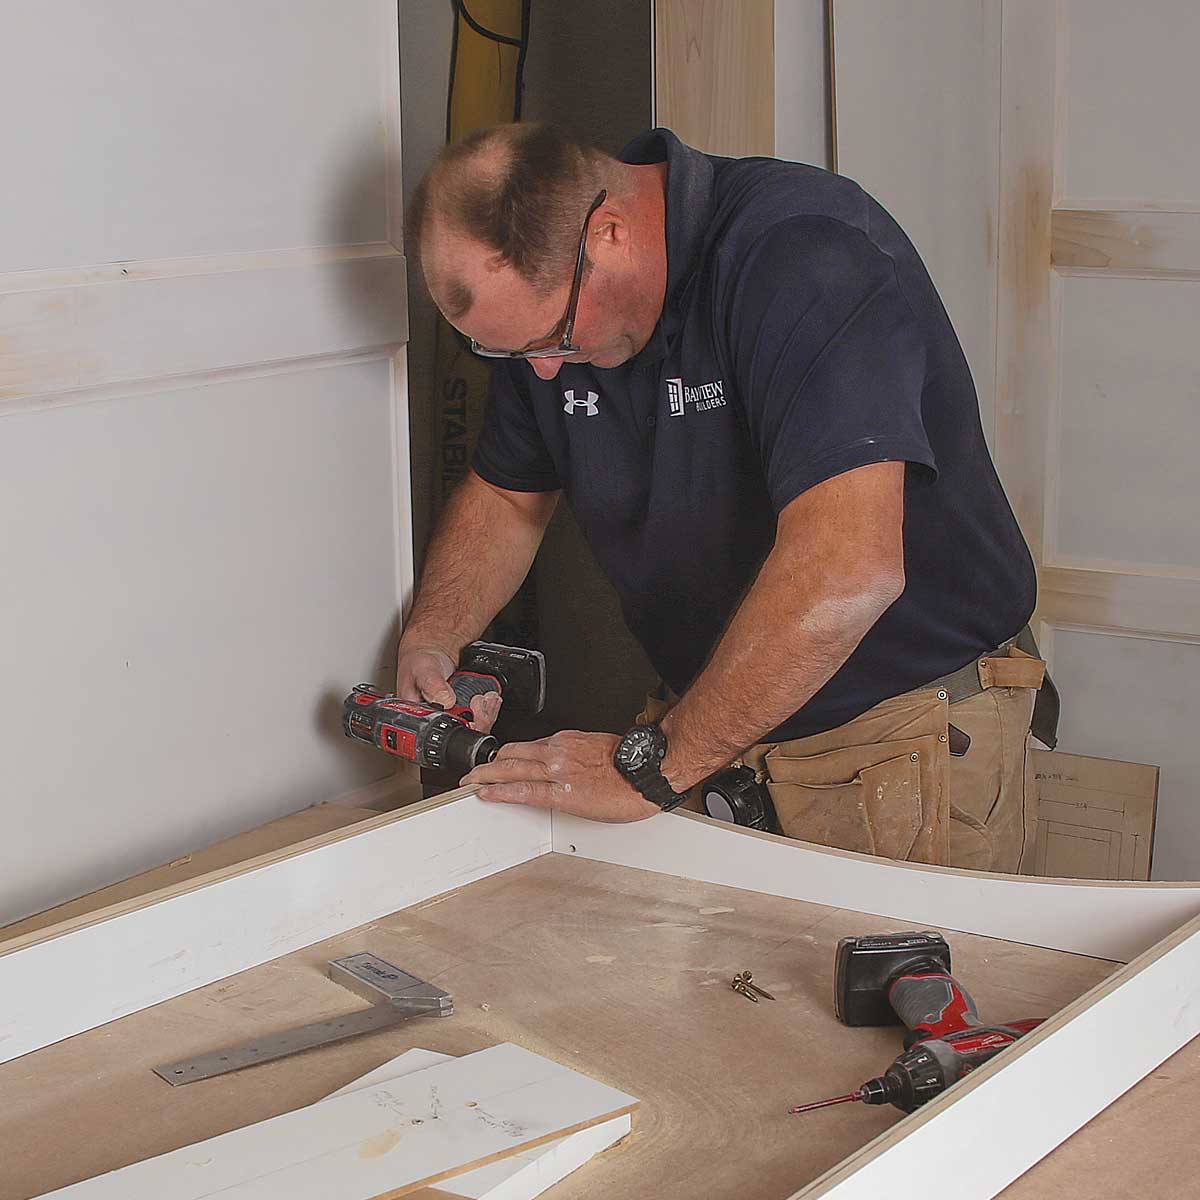
Join the top and sides. The top is connected to the sides with 2-1⁄2-in. screws driven through the side extension jambs. The holes are made with a Fuller #8 countersinking bit that drills a tapered hole and countersink simultaneously. A try square ensures the top and sides are perpendicular before drilling.
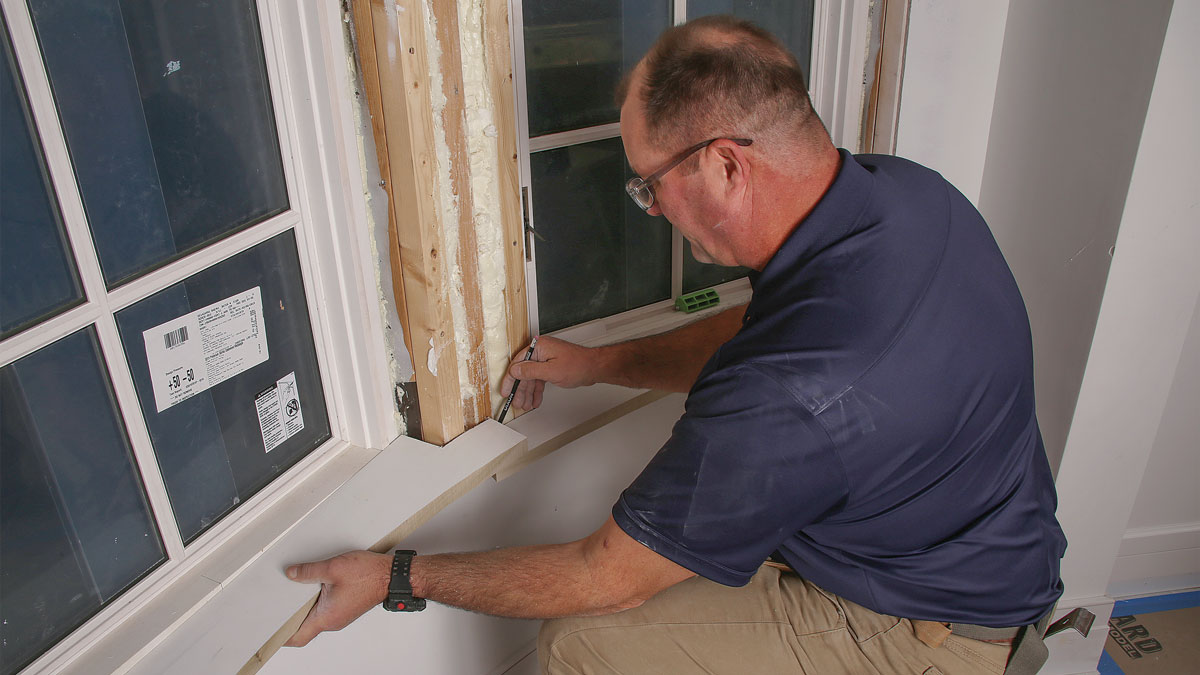
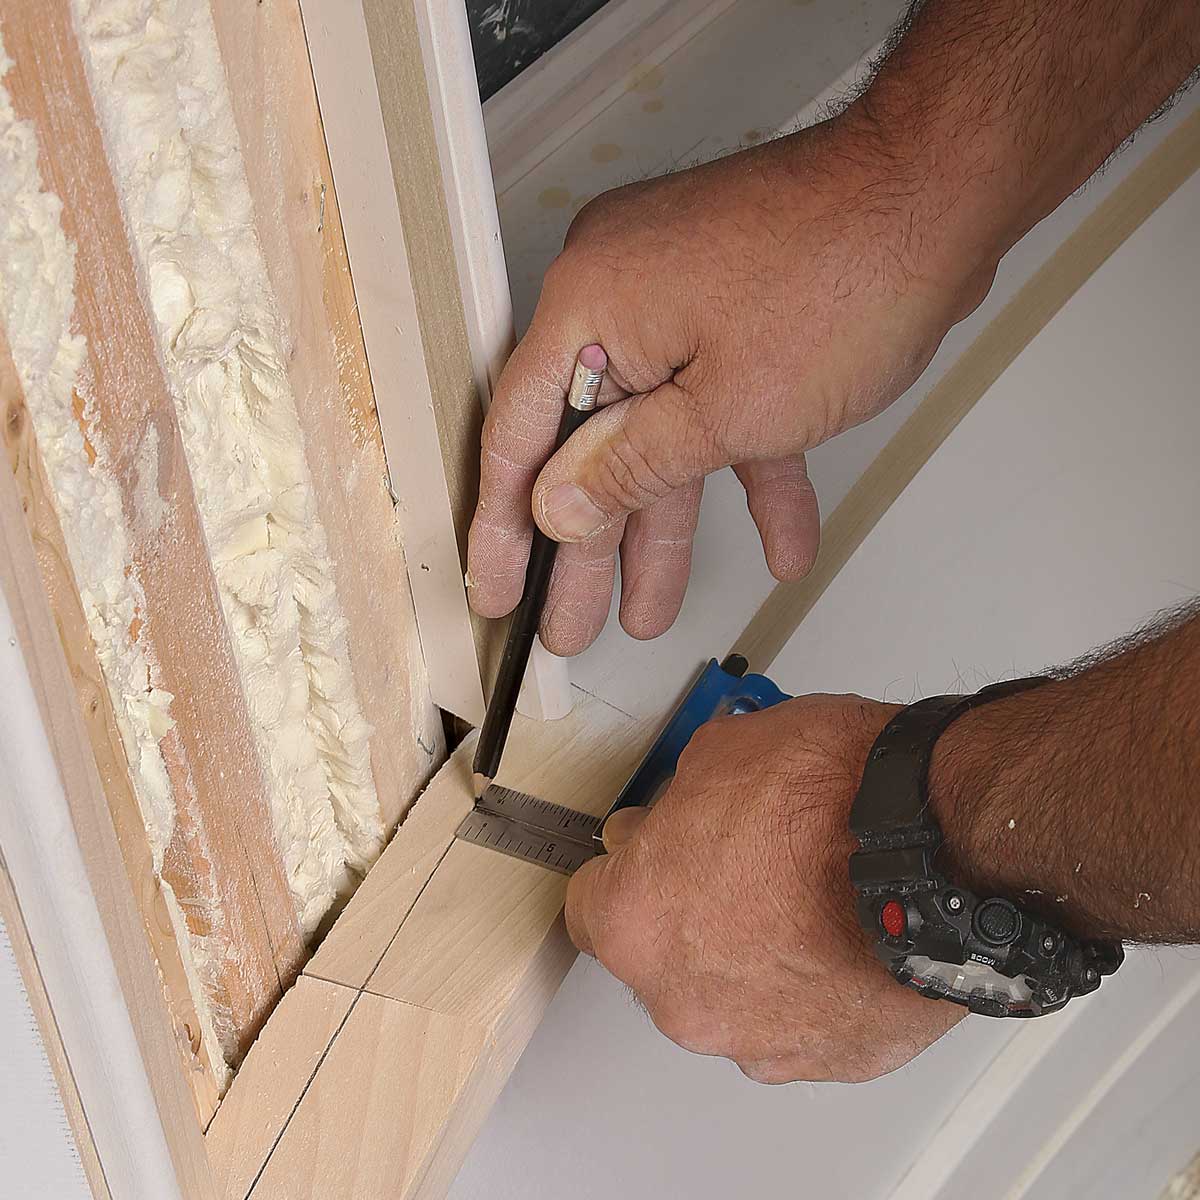
Square the sides. Measure from the center of the window to where the side extension jambs should land, and lightly mark their inside edge on the stool. Then square the extension jamb to the window sash, and mark its full depth on the stool.
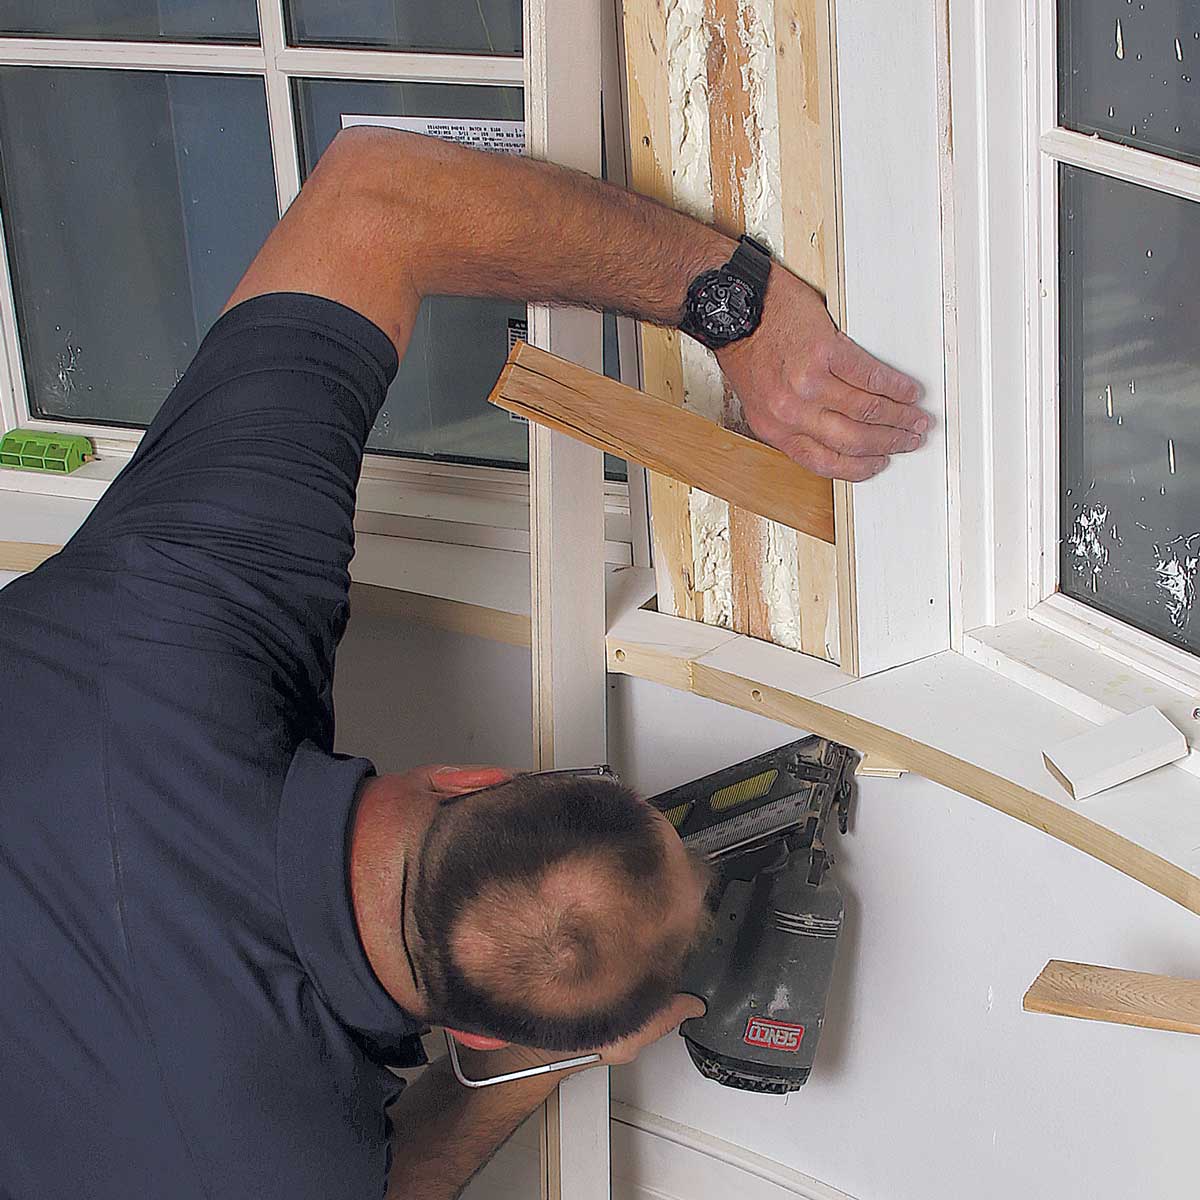
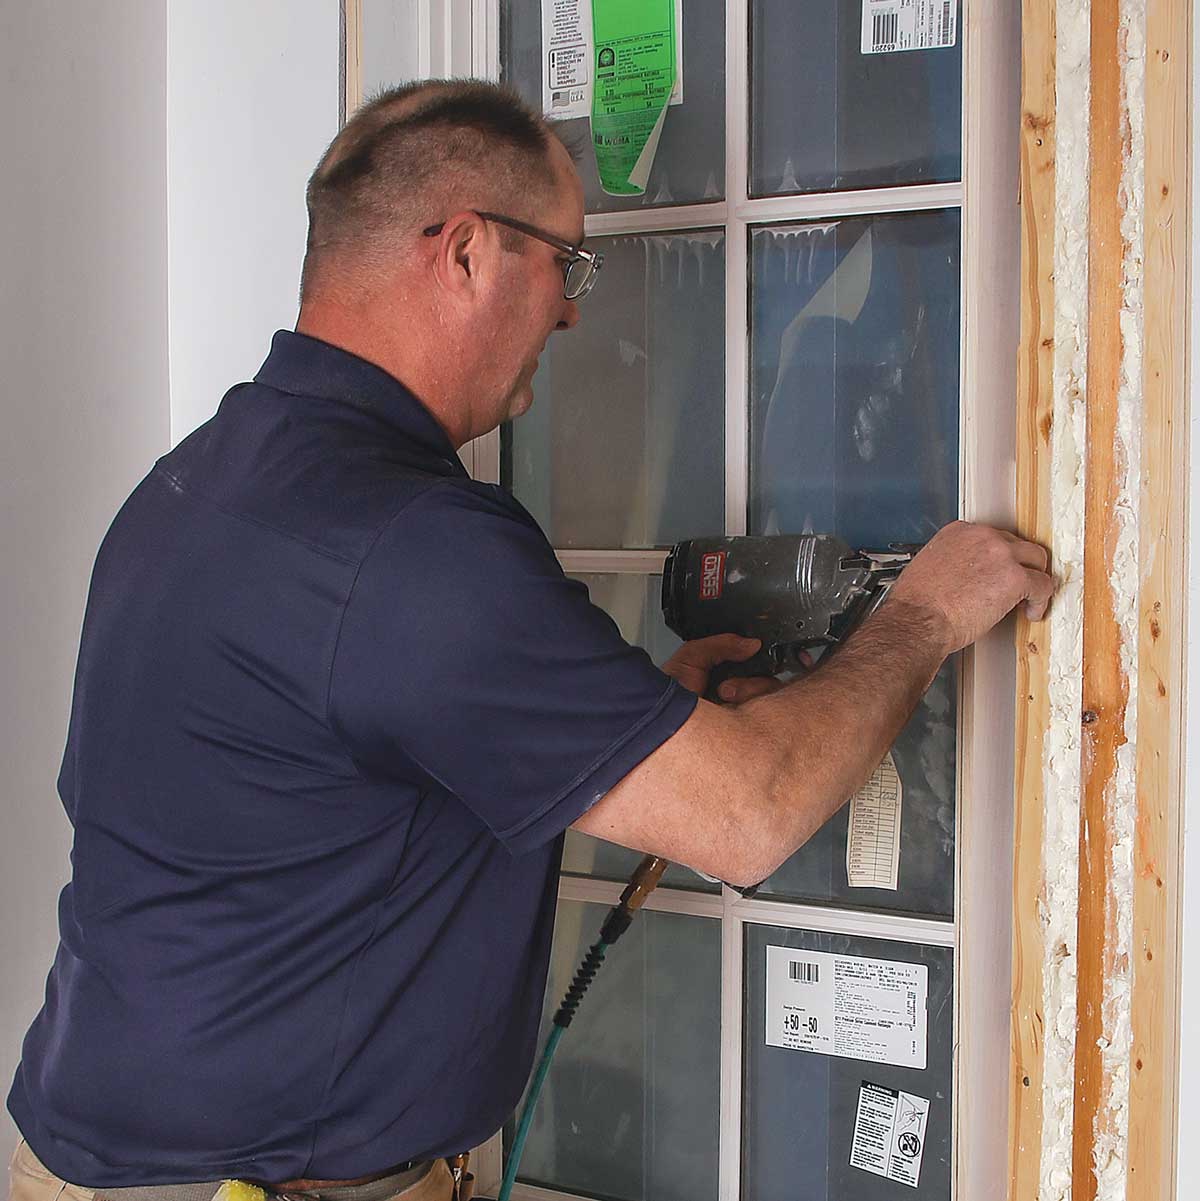
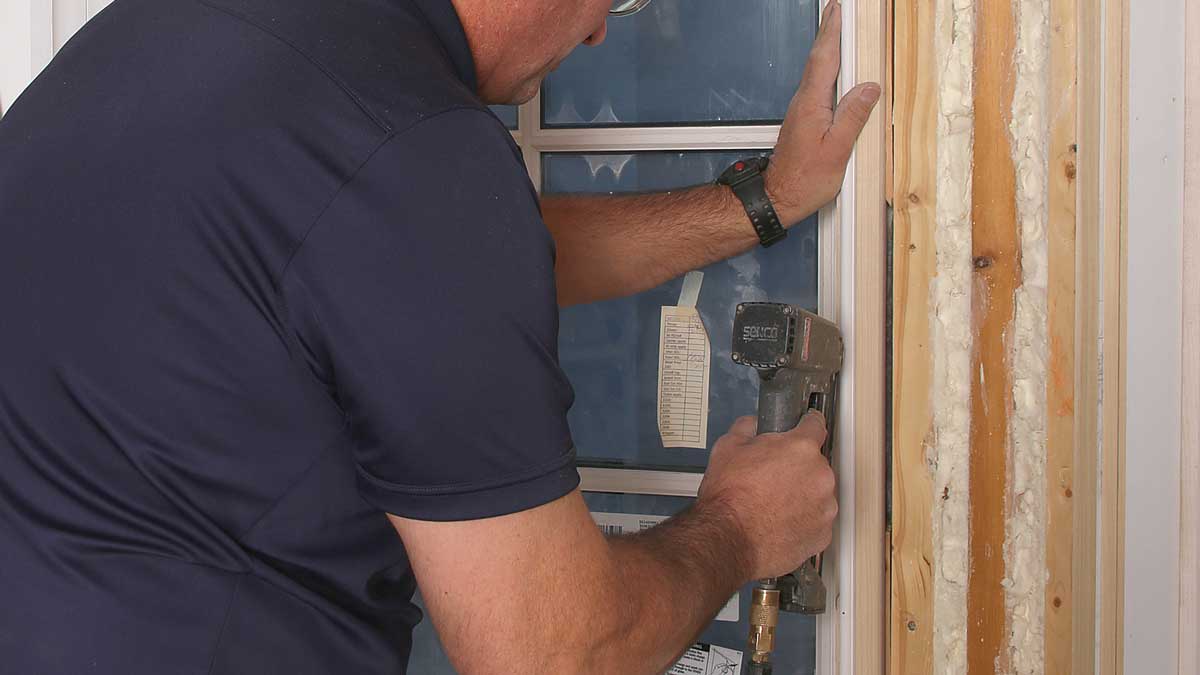
Fasten from below. I shim the extension jambs so their exposed sides align with the marks on the stool, and fasten them by nailing from the underside of the stool into the end of the extension jambs with 2-in. 15-ga. nails.
Fasten through the sides. A level or straightedge confirms whether the extension jambs are straight along their length. I shim them plumb and then fasten through the sides to the jack studs with 2-1⁄2-in. 15-ga. nails.
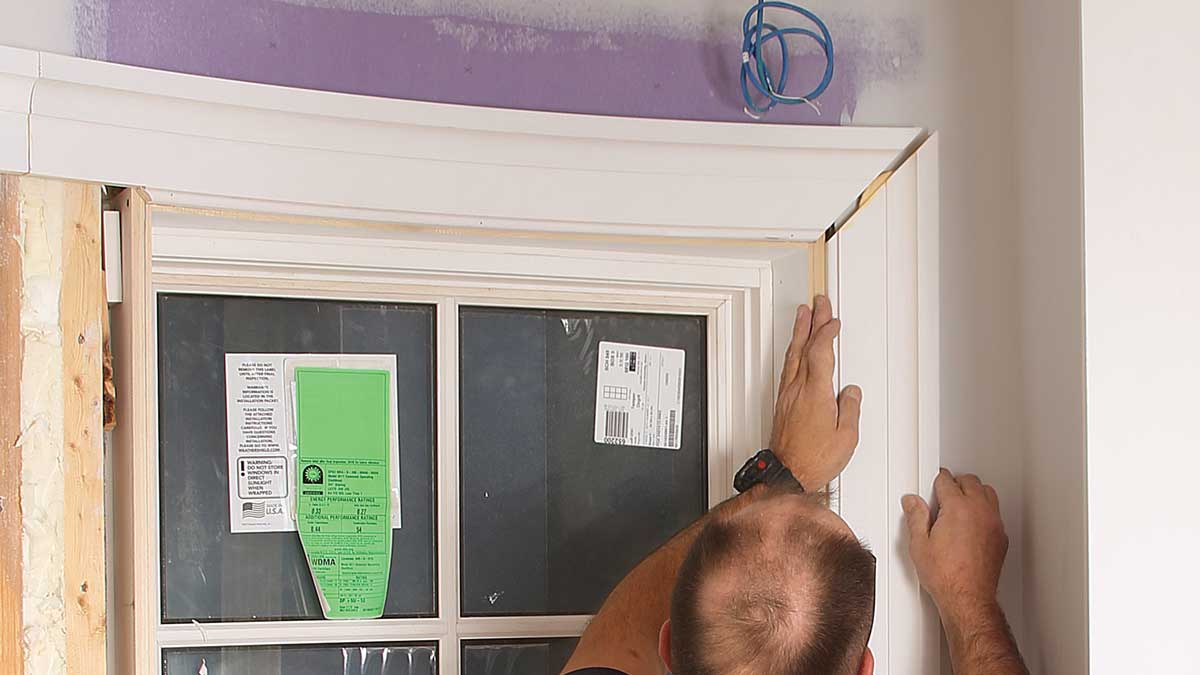
Casing comes next
The curved head casing and apron are made from hardwood laminations by a specialty millwork shop. They’re made oversize and must be field-trimmed. Like anything made from wood laminations, they won’t hold a perfect curve for very long after being unclamped from their forms. The parts must be coaxed up and down as they’re fastened to keep them perfectly horizontal.
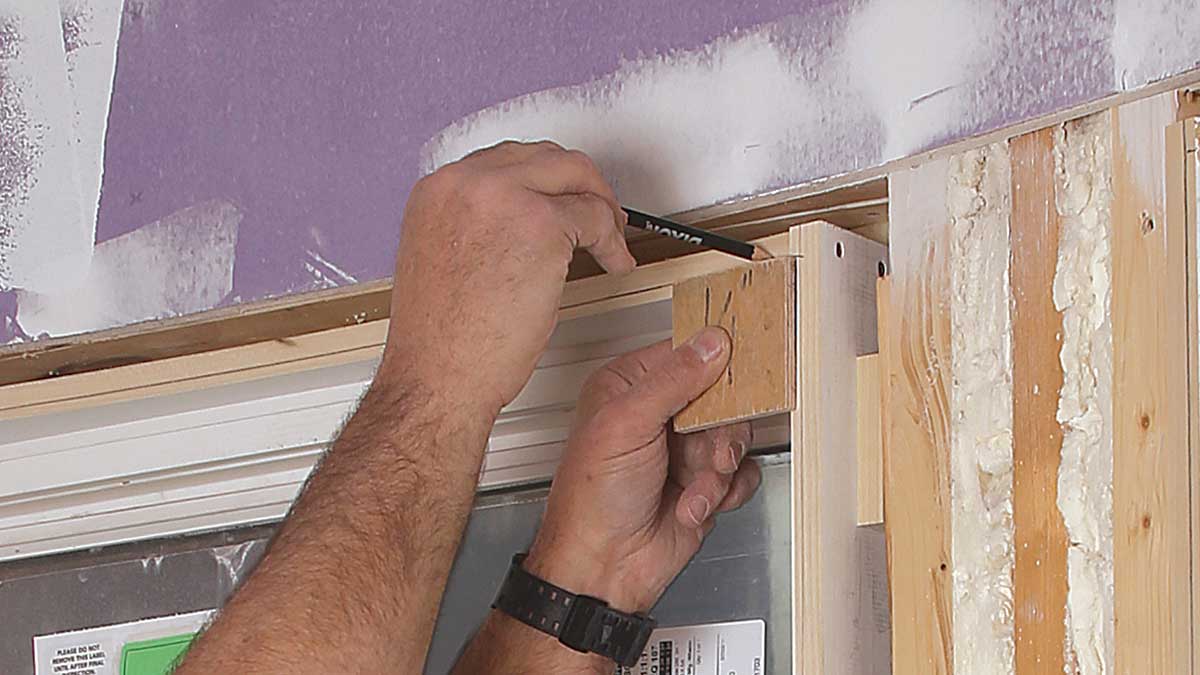
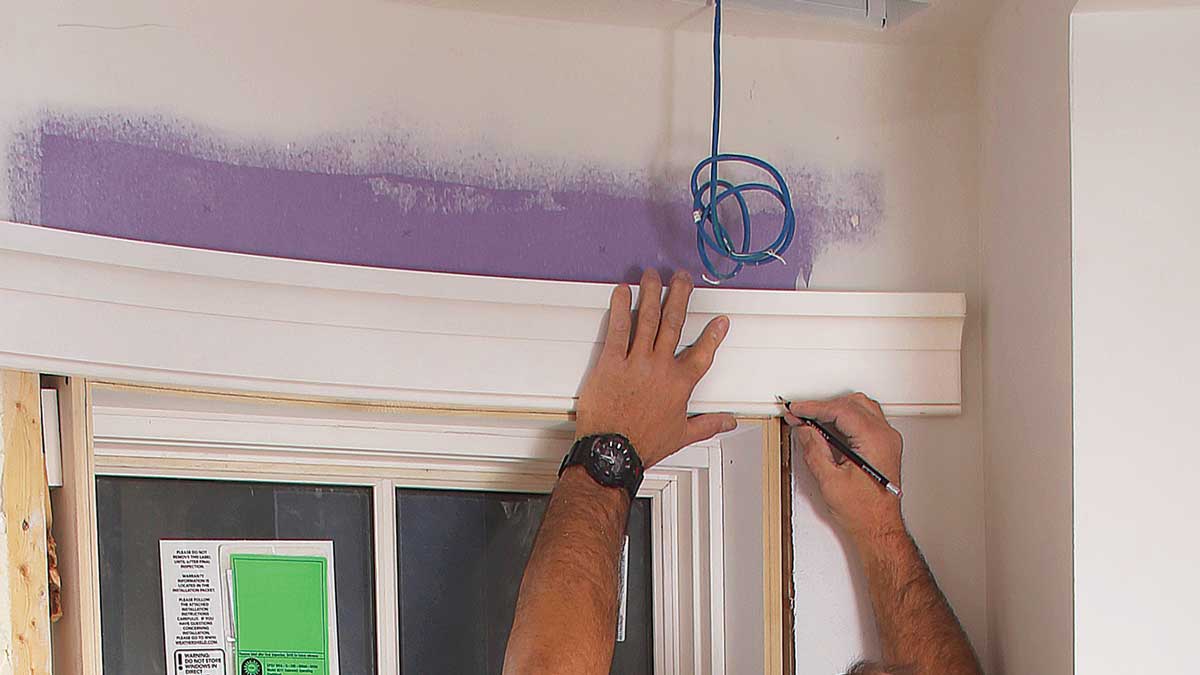
Mark the reveals. A 2-1⁄2-in.-square piece of 1⁄4-in.-thick plywood glued to the center of a 3-in.-square piece of plywood makes an accurate tool for marking the casing reveal. I move the square along the extension jamb while I hold a pencil tight to the 3-in. plywood’s edge.
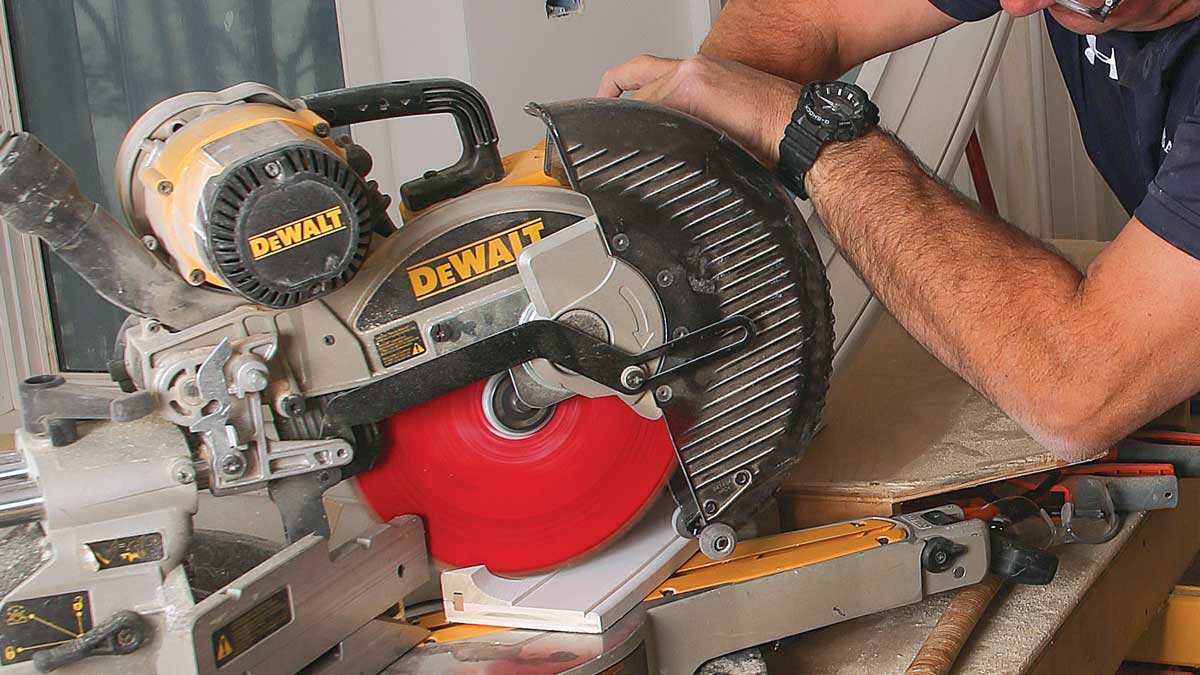
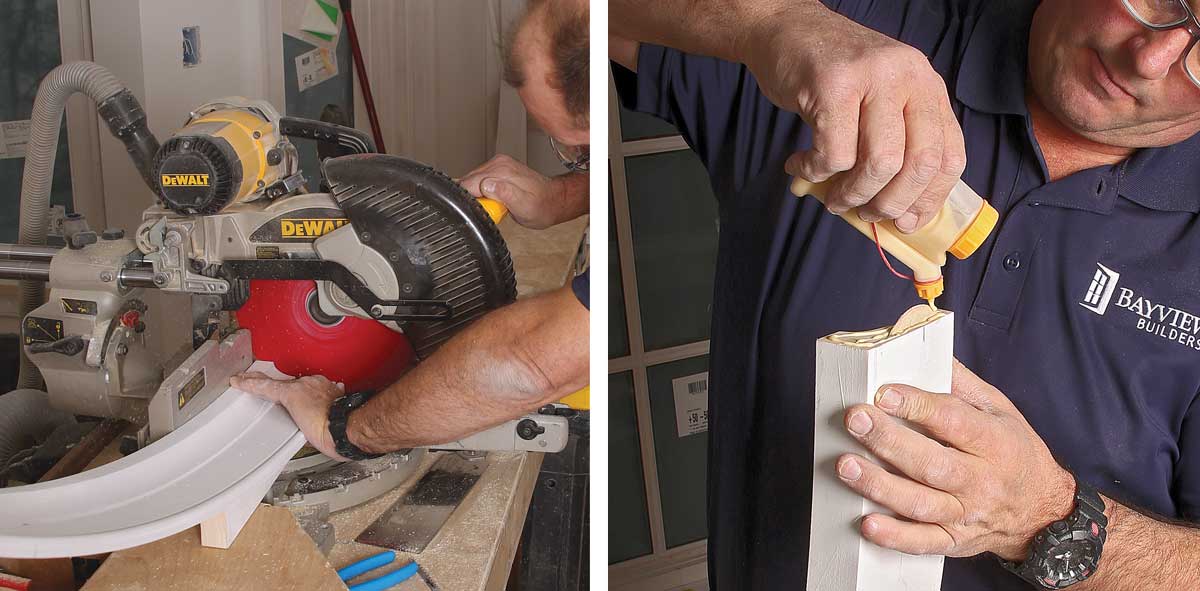
Cut one end. With the end of the casing tight to the miter-saw table, I make a 45° cut on one end of the head casing so it can be joined to the side casing. A curved offcut of the stool blanks (shown right) is placed on the saw’s table to help support the stock while it’s cut.
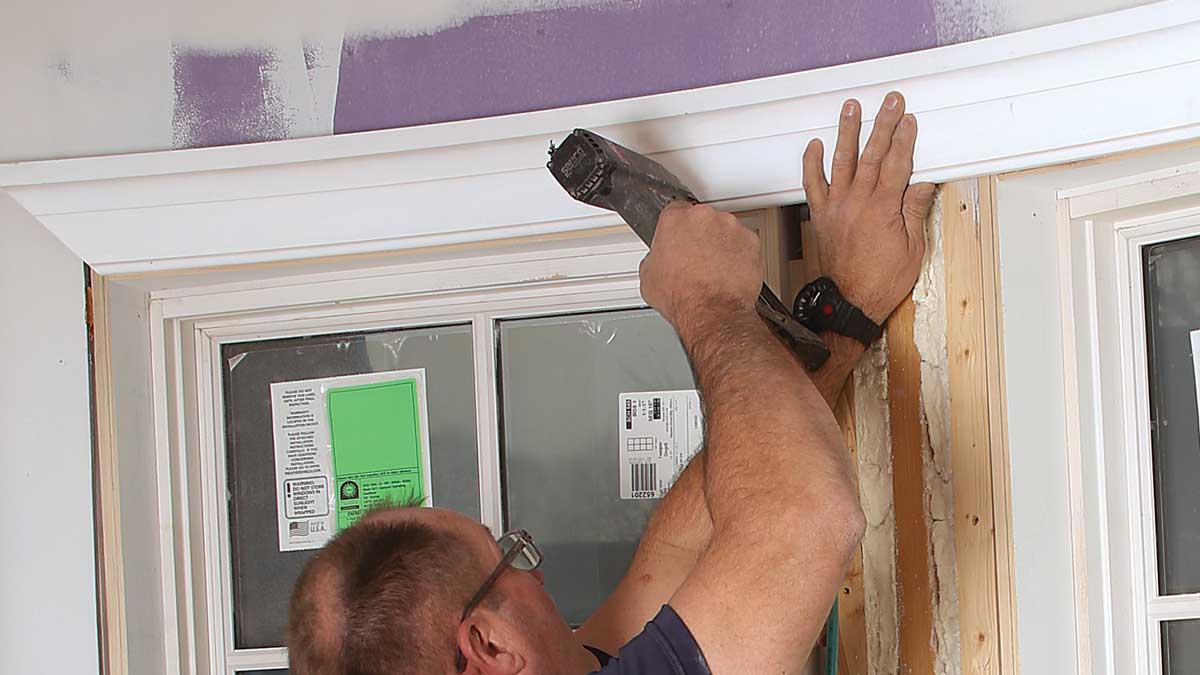
Tack it up. I align the mitered end with the line marking the reveal for the side casing and then drive a few 1-in. 18-ga. brads to temporarily hold the head casing in position.
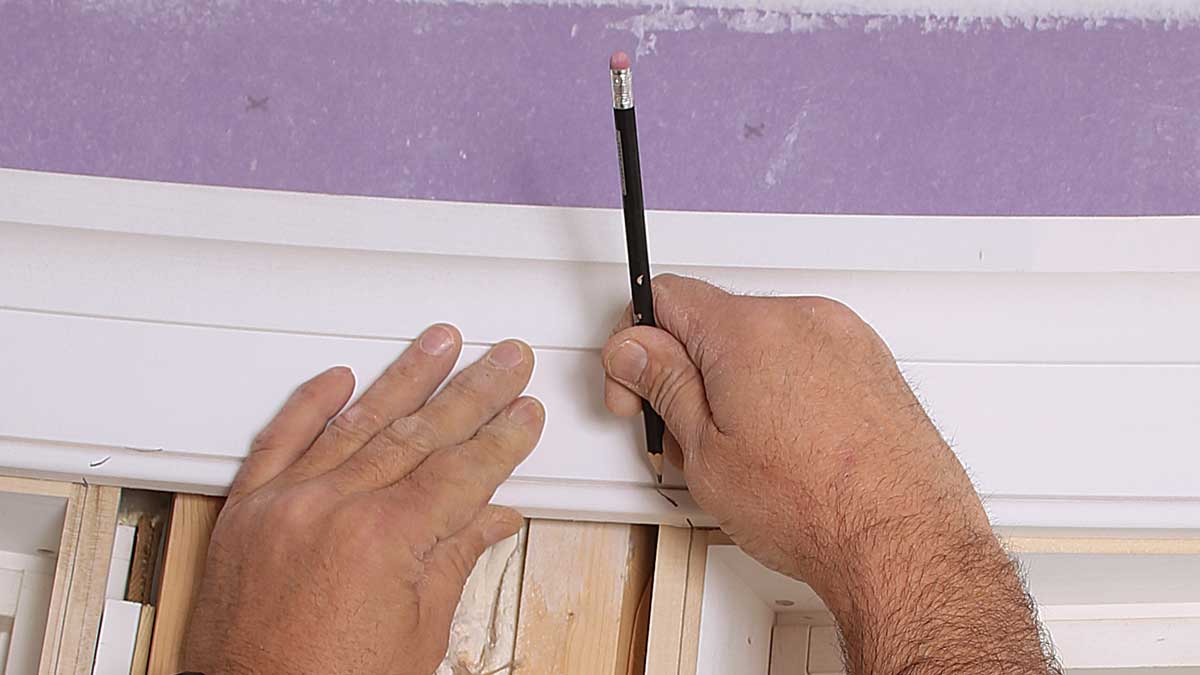
Mark for jack miters. The head casing has a decorative bead that lines up with decorative beads on the mull covers. I mark where the bead meets the reveal line on the mull, and approximate the angle so I don’t get mixed up when I saw.
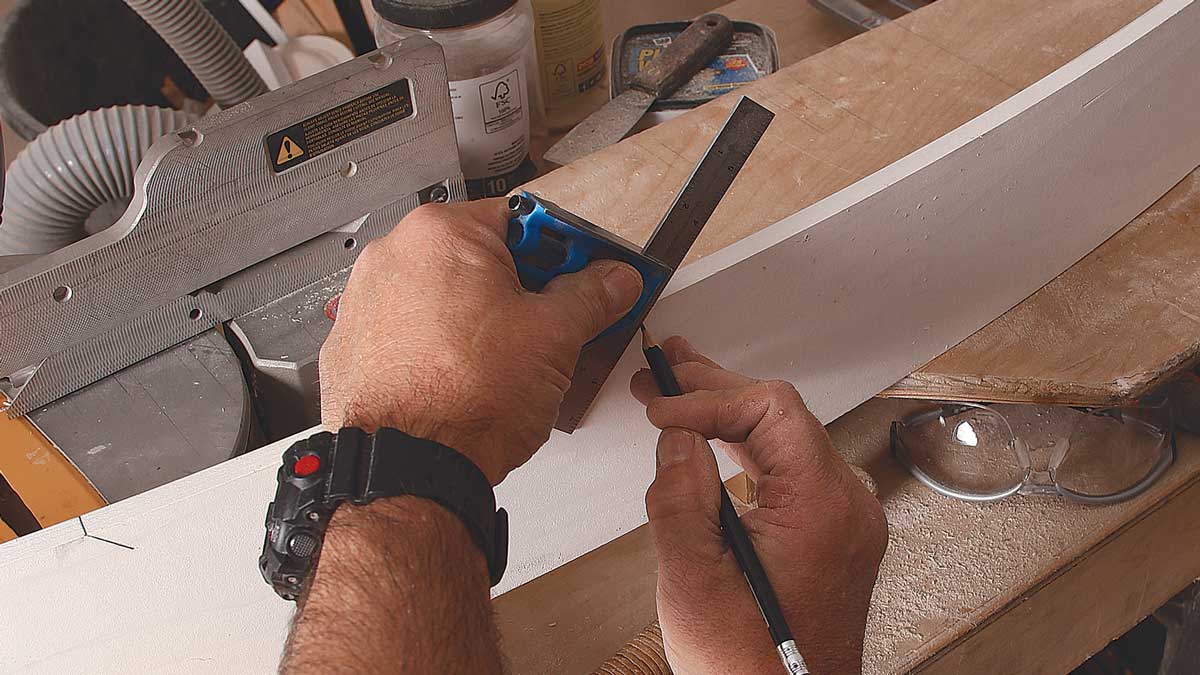
Switch to the backside. Back at the saw bench, I use my marks on the front and transfer them to the flat backside, which makes it easier to mark and follow with a saw. I mark the 45° angles with a small combination square.
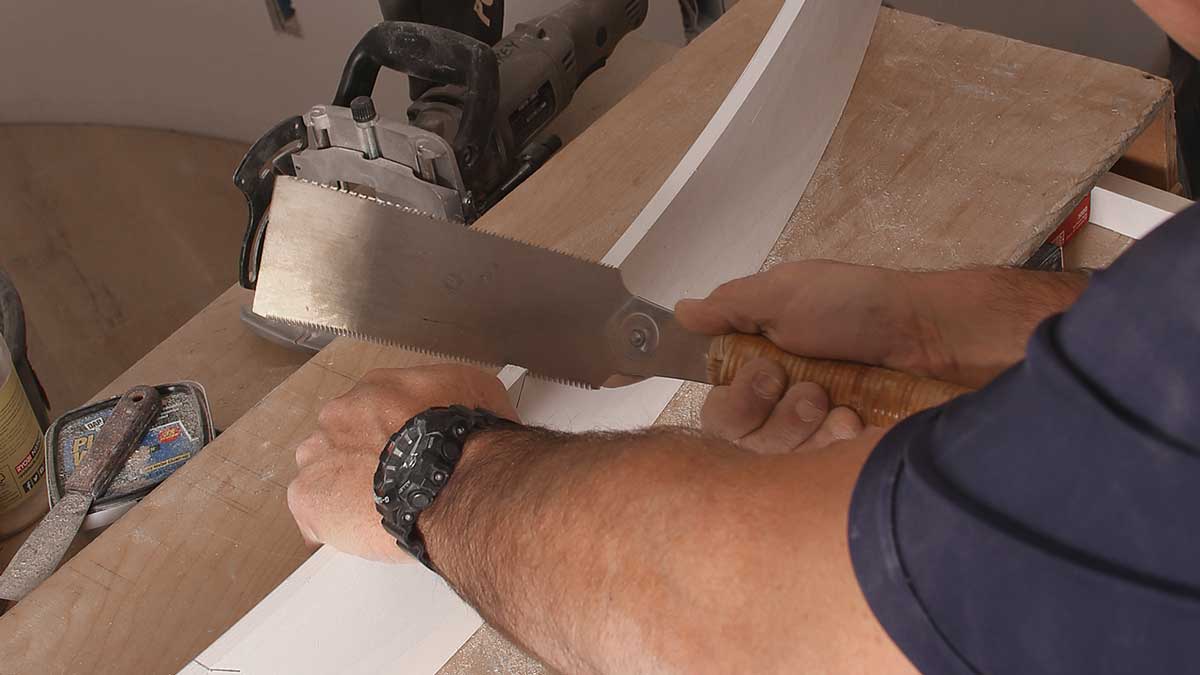
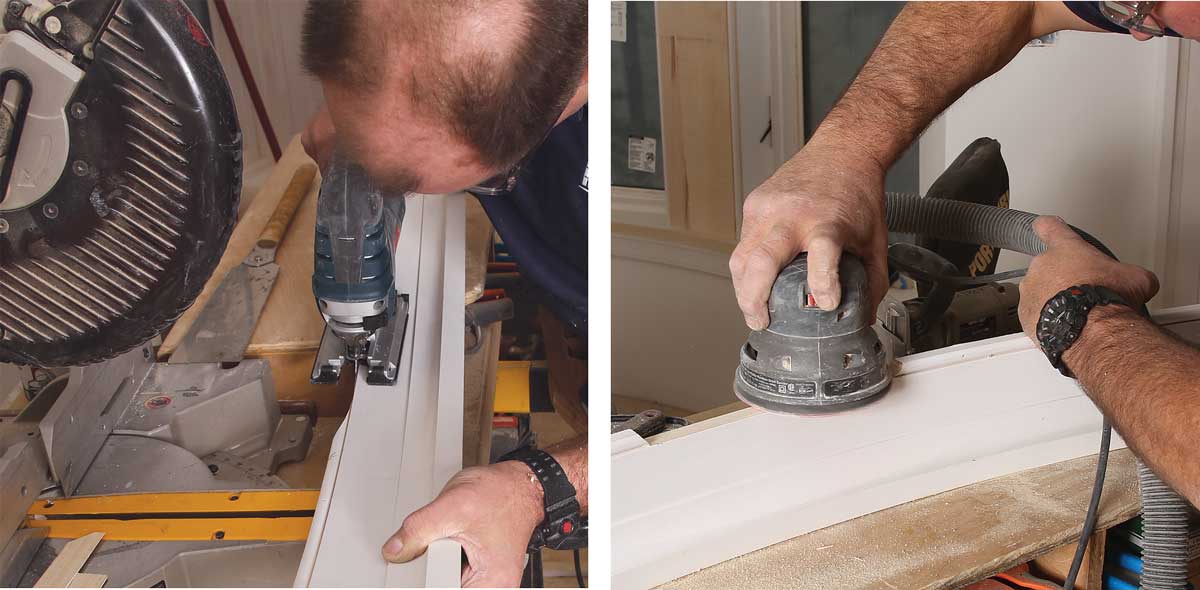
Cut jacks by hand. A Japanese-style pull saw is the easiest and most accurate way I’ve found to make the angled cuts for the jack miters. I stop cutting as soon as I’ve gone through the bead on the front side.
Connect the miters. I use a jigsaw to remove the bead between the two jack miters. Once the cut is complete, I use a 5-in. orbital sander with 150-grit paper to remove the saw marks.
Glue the biscuits. After the casing pieces are confirmed correct with a dry fit, I put glue on both sides of the biscuit joint and quickly move the casing in place before nailing. The biscuits prevent gaps from opening in the joints.
Fit, then fasten. Before installing the first piece of head casing, I make a 90° cut on the end opposite of the miter and make a biscuit slot for joining it to the next piece of head casing. I hold the piece in place to mark the miter and jack-miter locations, cut them, and then dry-fit the piece to ensure the jack miter is correct before gluing the biscuit joint.
Biscuit miters too. Biscuits at the mitered corners help align the head and side casing and prevent gaps over the long haul. I also drive three or four extra nails on each side of the miter, about 4 in. apart, which helps prevent the joint from opening.
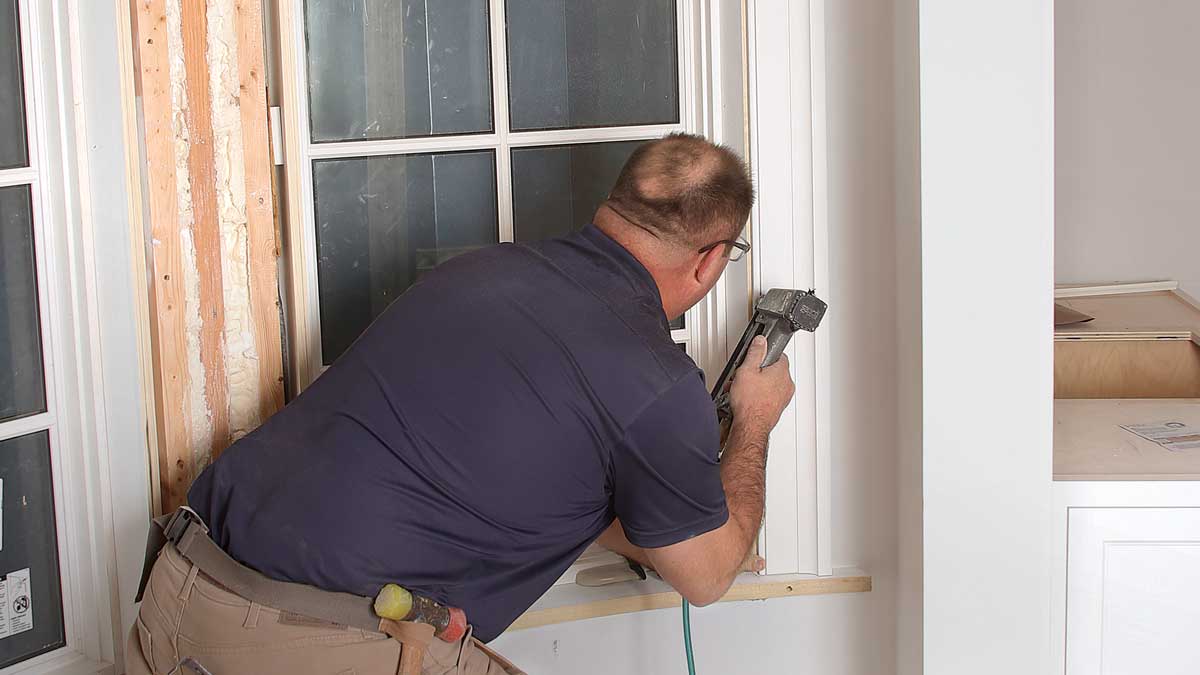
Nail the casing. The outer edge of the casing is fastened with 2-1⁄2-in. 15-ga. finish nails about every 10 in. to 12 in. I fasten through the beaded edge with 1-1⁄4-in. 18-ga. brads into the extension jambs, and drive the brads through the top of the bead so the holes are easy to fill.
Finishing touches
Mull covers made from 1⁄4-in.-thick bending plywood hide the framing between windows. The plywood fits between decorative bead that hides the plywood’s edge and ties into the bead on the head and side casing. The final step is to fit a curved apron beneath the stool.
Install backing. The edges of the bending plywood need backing for fastening, so I install pieces of 1x stock to the backside of the extension jamb. A pencil line that corresponds with the thickness of the bead shows where to position them. I fasten them by driving 1-1⁄4-in. brads through the extension jamb into the backing.
Bead comes next. I cut the decorative bead to rough length and then I mark the miter where it meets the jack miter on the head casing. The bottom sits on top of the stool and gets a straight cut.
Fasten the bead. I run a small bead of glue on the backsides of the bead and fasten the lengths to the extension jambs with 1-1⁄4-in. 18-ga. brads about every 8 in.
Transfer the curve. I use a small combination square to transfer the stool’s curve to the bottom of the mull cover. This will show me how thick to make the furring between the jack studs and the bending plywood. The furring is the secret to a fair curve with the mull covers.
Fasten the furring. 1x stock ripped to match the thickness between the curved reference line and jack studs takes up the space between the bending plywood and the jack studs. Nailing the mull covers tight to the furring is what gives the bending plywood its fair curve.
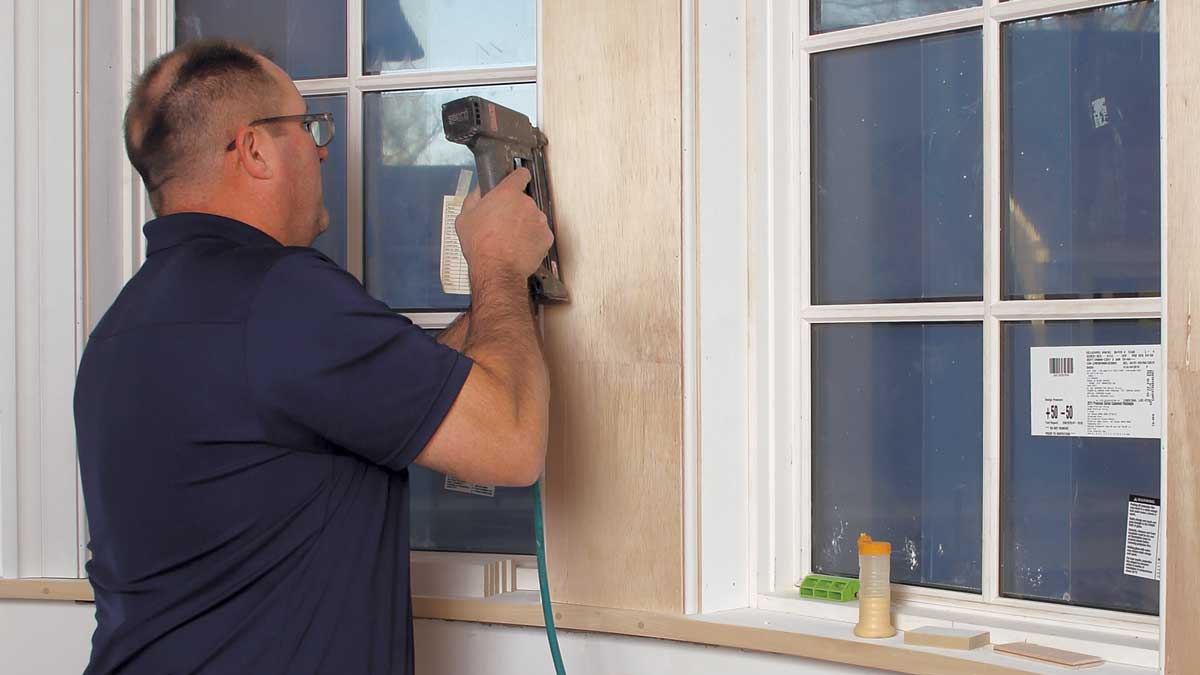
Fasten the mull covers. I use 1-in. brads to fasten the bending plywood along the edges and to the furring in the center. I fasten the center first, and hold the plywood tight to the furring as I nail.
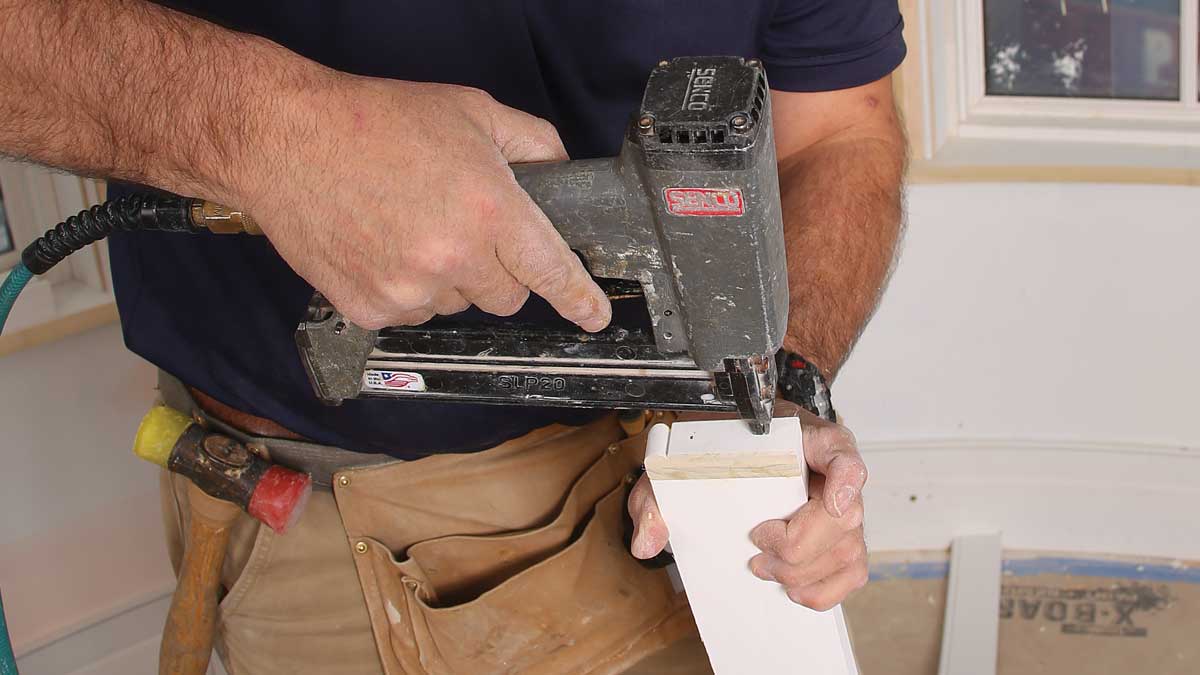
Attach self returns. The final element, the apron, has self-returns on its ends. The small pieces are cut on the miter saw. I use wood glue on the miter and hold it in place with a pair of 1-in. brads.
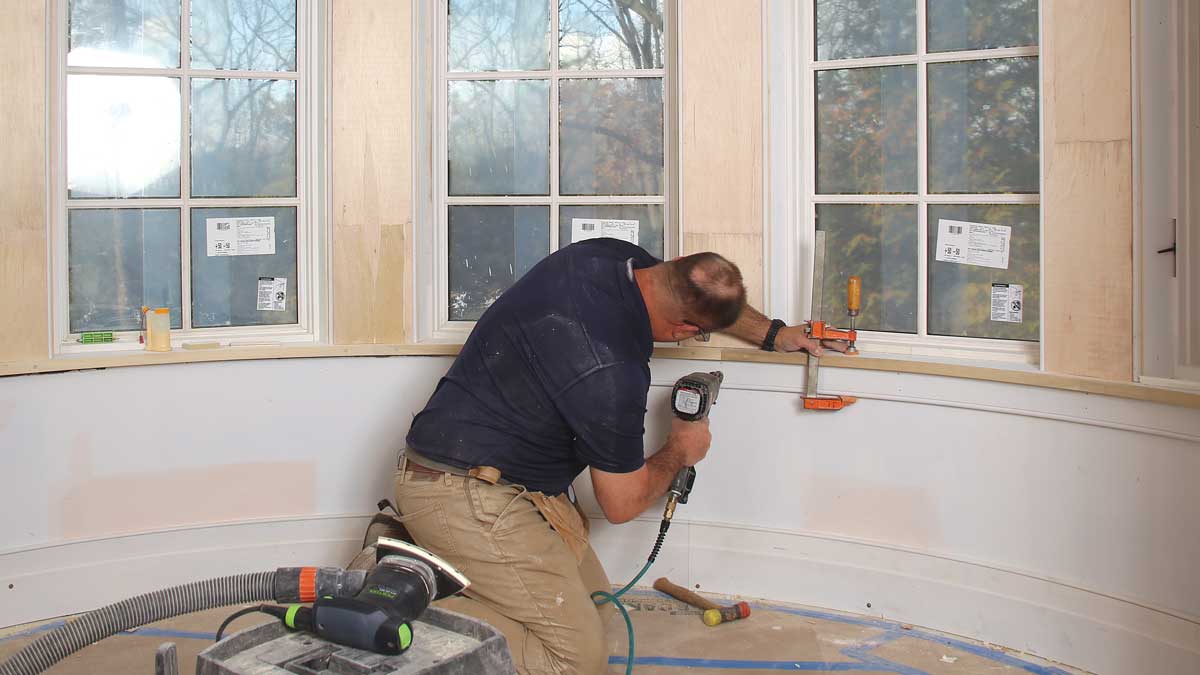
Attach the apron. The apron is nailed to the studs with 2-1⁄2-in. 15-ga. nails arranged in pairs with one on top of the other. An F-clamp holds the apron tight to the underside of the stool while it’s fastened to the studs.
Joseph Laskey is a finish carpenter in Crownsville, Md. Top Photo: Julie Carlisle. Drawing: John Hartman. Photos by Patrick McCombe, except where noted.
This is a dialog window which overlays the main content of the page. The modal window is a 'site map' of the most critical areas of the site. Pressing the Escape (ESC) button will close the modal and bring you back to where you were on the page.
We use cookies, pixels, script and other tracking technologies to analyze and improve our service, to improve and personalize content, and for advertising to you.
We also share information about your use of our site with third-party social media, advertising and analytics partners.
You can view our Privacy Policy
here and our Terms of Use here.