
Wainscot for a Window
A simple frame and panel with applied moldings gives an ordinary window an extraordinary appearance.
Synopsis: Professional finish carpenter and frequent contributor Gary Striegler walks us through the process of building a simple wainscot panel for below a window. Sharing his techniques for frame-and-panel design, Gary provides detailed instruction and insight on panel-to-window proportion, materials, and tools, as well as final installation.
Window-trim details can have a huge effect on the overall look of a room. With the right combination of materials and molding proportions, window-trim details transform a drab space into an elegant one. Getting those details wrong, however, really can disrupt the room’s design.
Many of the houses I build have large windows with sills that are close to the floor. If I install a tall baseboard molding, I’m left with a strip of awkward-looking drywall beneath the window. To avoid that strip, I like to build a wainscot panel that extends from the windowsill to the baseboard molding. This detail grounds the window by connecting it to the baseboard and the floor. The window gains mass, and the little bump-out created by the wainscot has a big impact, breaking the wall plane with molding profiles that add visual interest.
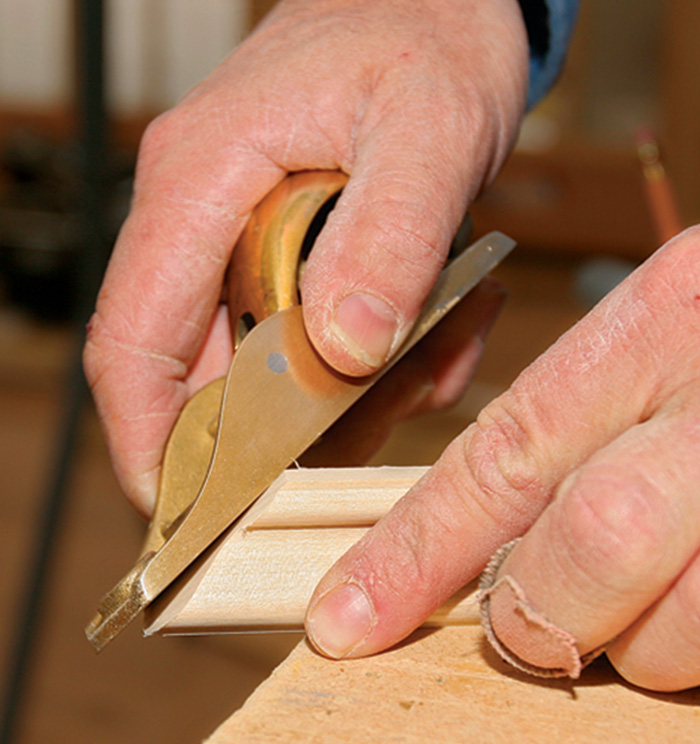
Molding profiles dictate the proportions
This wainscot detail works well when these profile sizes are used on a window from 18 in. to 30 in. off the floor with 6-in.- to 7-in.-tall baseboard. Use casing widths ranging from 3 in. to 4½ in. Working outside these dimensions can make the field of the panel either too small or too large, which creates awkward proportions. Before you cut, take the time to plan the size of the wainscot panel carefully, and make a cutlist for the rails and stiles. Because the area behind the panel is going to be hidden, I lay out the dimensions right on the wall, sometimes going as far as drawing everything to scale if I’m concerned about how the overall proportions will look. This takes some time, but it lets me work out problems before any wood has been cut.
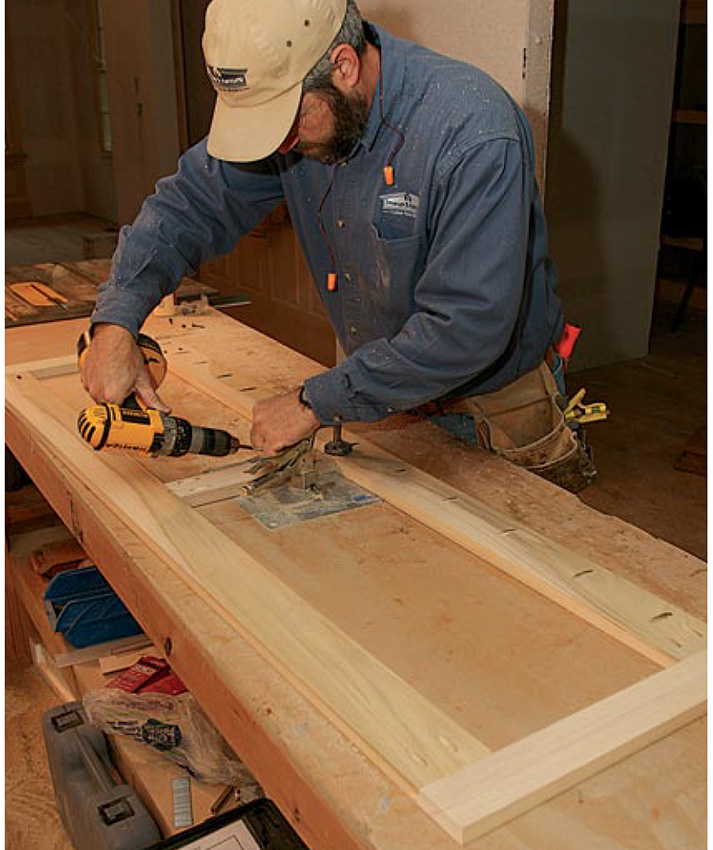
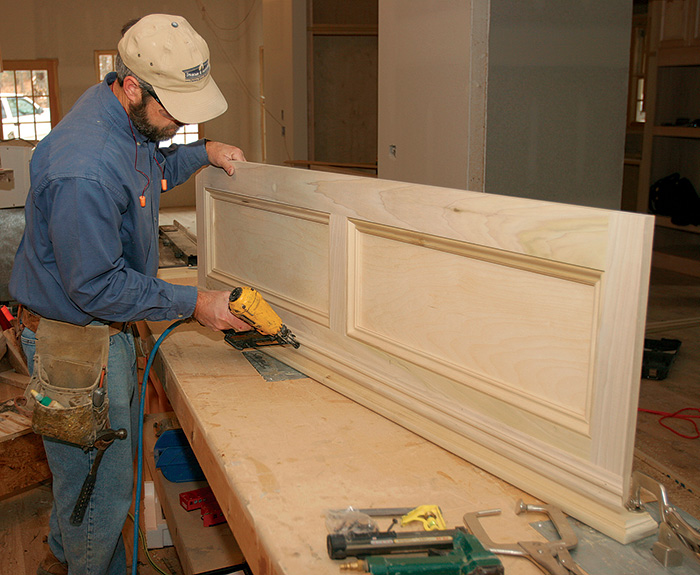
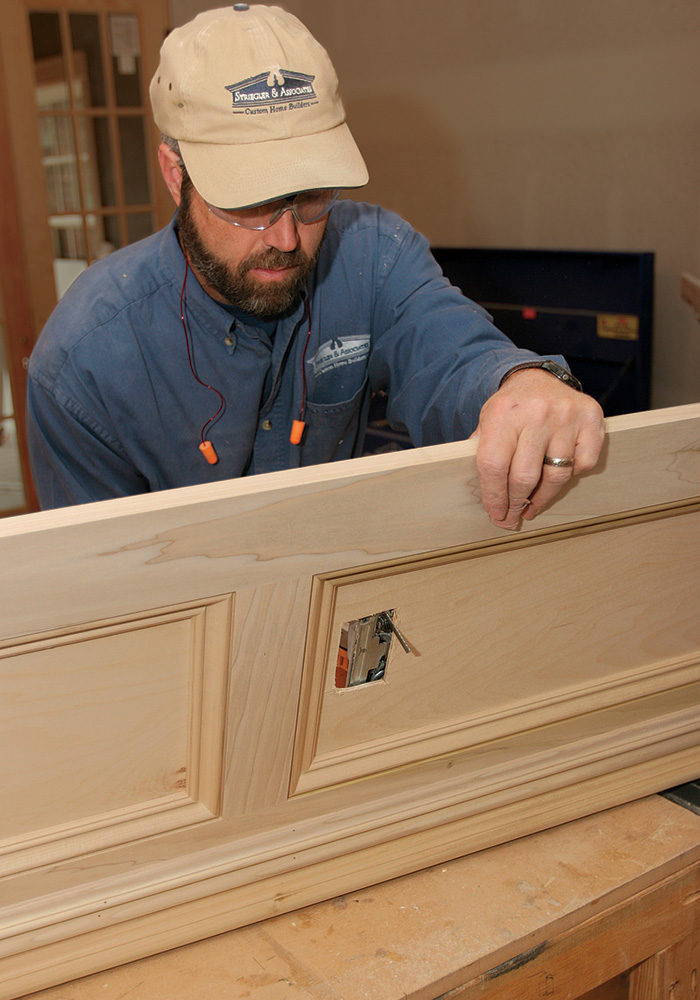
Assemble pieces on a workbench
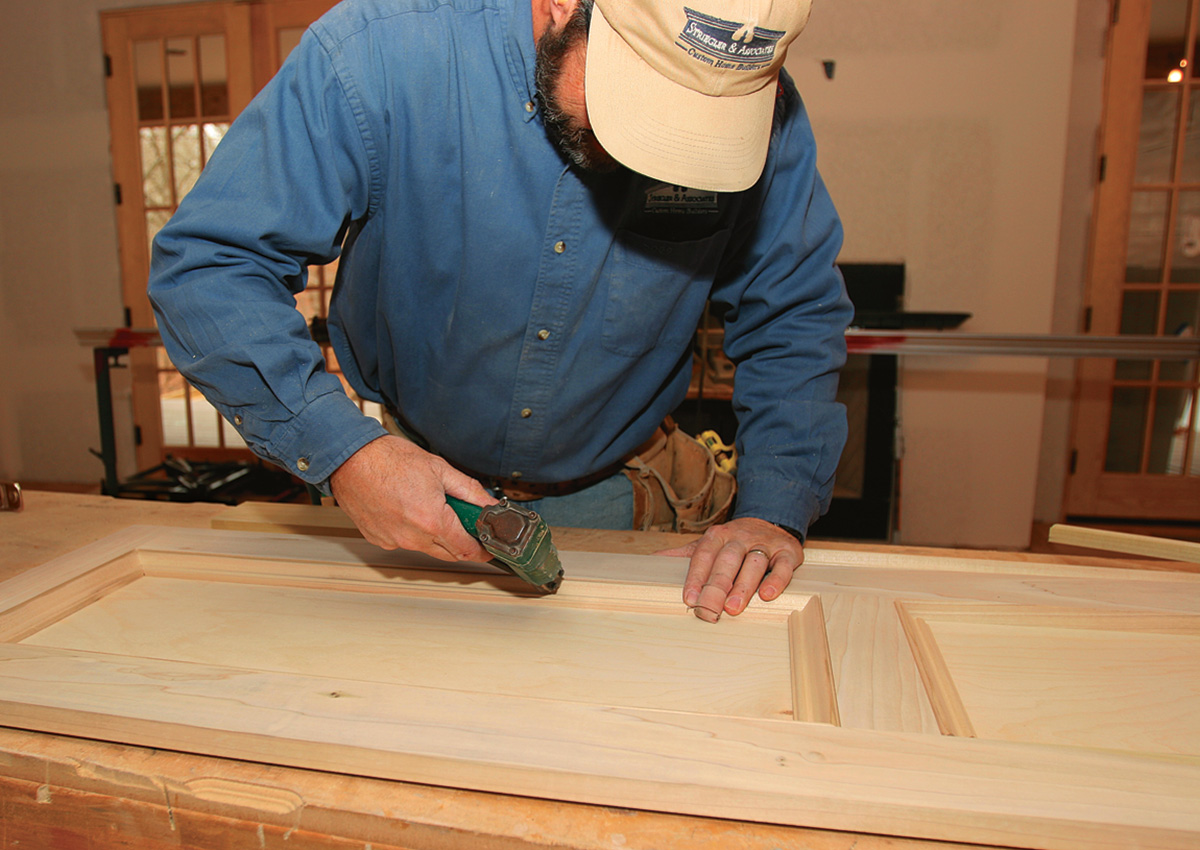
With the rails and stiles cut, I assemble the frame with pocket-hole joinery, then add the plywood. During assembly, I make sure that the good side of the rails, stiles, and plywood will face outward when the panel is attached to the wall. I find it easier to build the frame and apply the stool, apron, and inside-panel moldings on a workbench before installing it.
 |
 |
Molding profiles dictate the proportionsThis wainscot detail works well when these profile sizes are used on a window from 18 in. to 30 in. off the floor with 6-in.- to 7-in.-tall baseboard. Use casing widths ranging from 3 in. to 4-1 ⁄ 2 in. Working outside these dimensions can make the field of the panel either too small or too large, which creates awkward proportions. Before you cut, take the time to plan the size of the wainscot panel carefully, and make a cutlist for the rails and stiles. Because the area behind the panel is going to be hidden, I lay out the dimensions right on the wall, sometimes going as far as drawing everything to scale if I’m concerned about how the overall proportions will look. This takes some time, but it lets me work out problems before any wood has been cut. 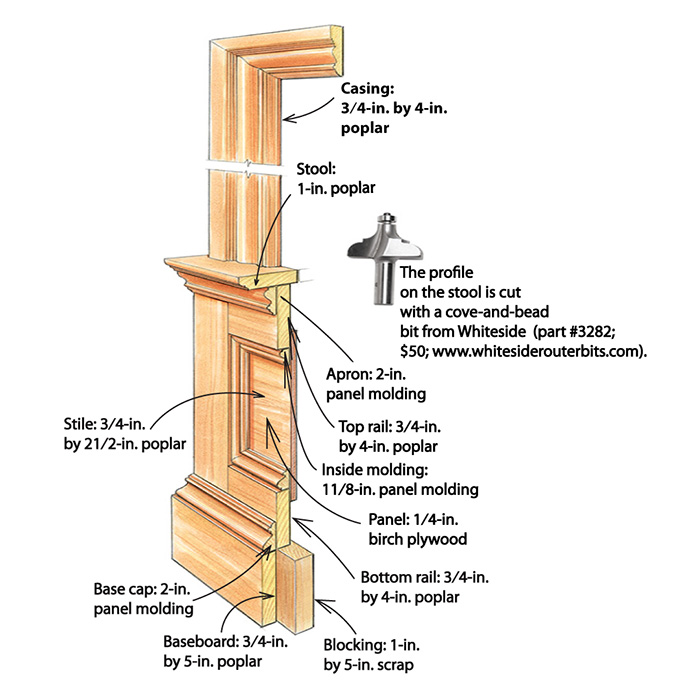 |

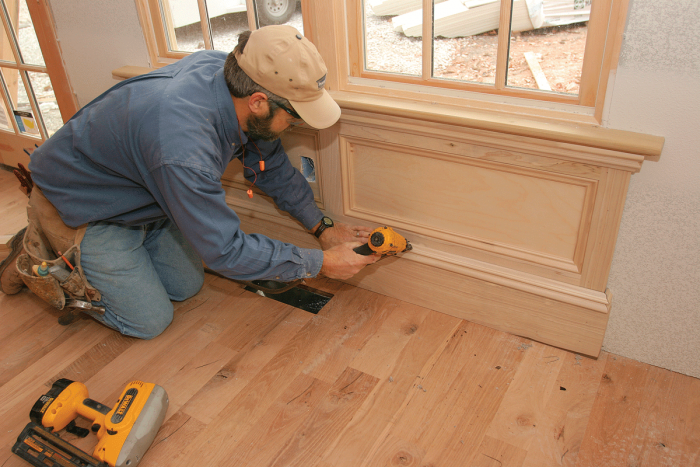
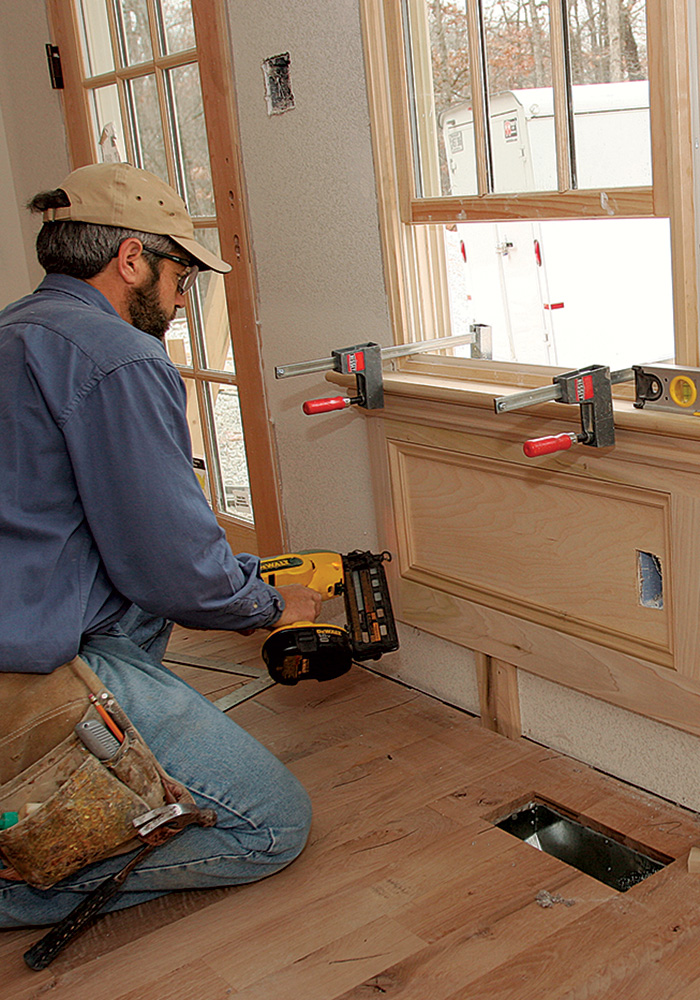
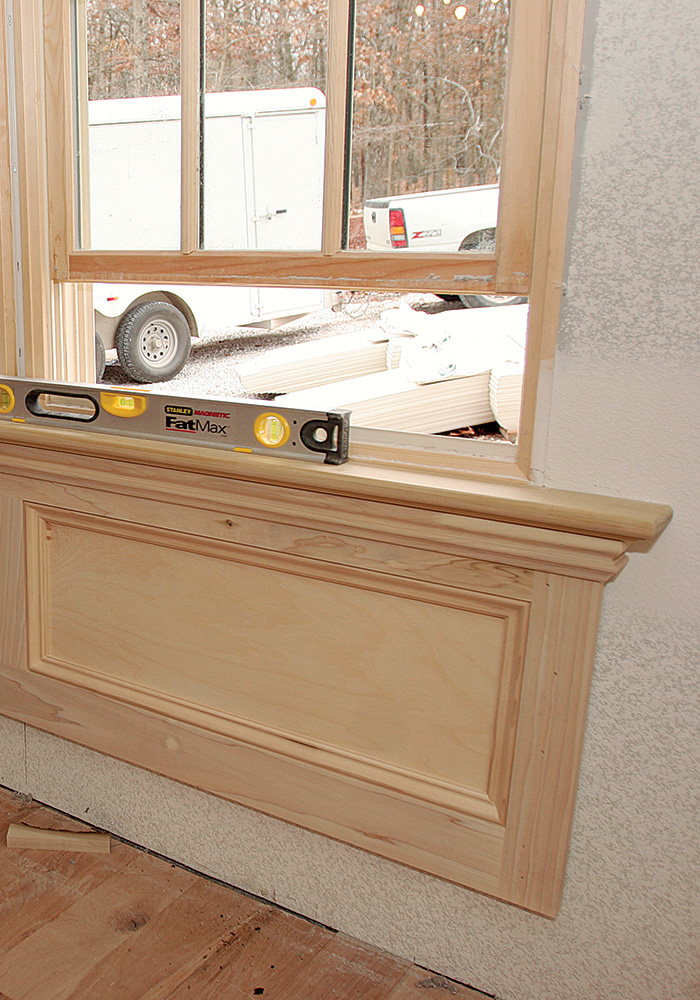
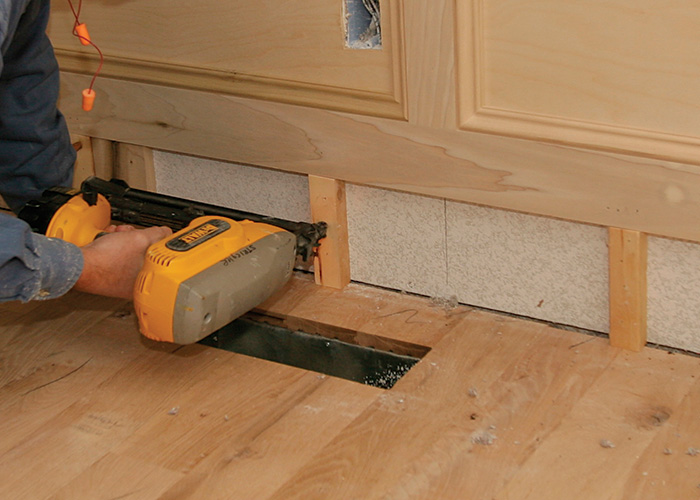
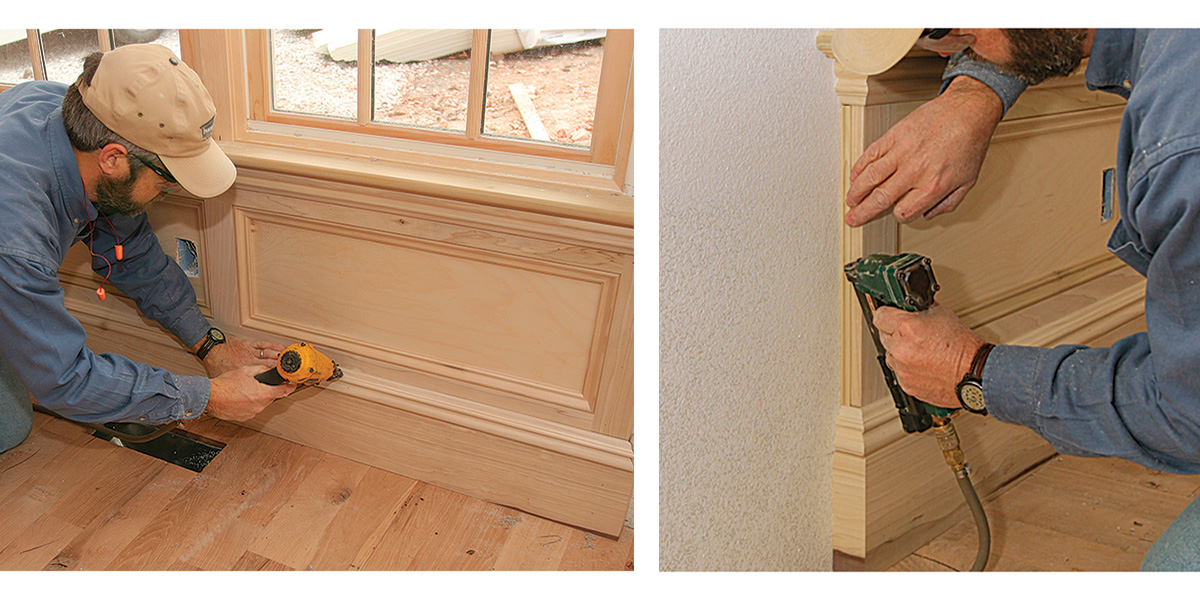
Add the final moldings after panel is on the wall
Once the frame is built and the moldings are applied, I attach the unit below the window, keeping the top of the stool 1/4 in. to 3/16 in. beneath the top of the jamb to create a reveal. Blocking and baseboard moldings are next; then I install the casing around the window to complete the job.
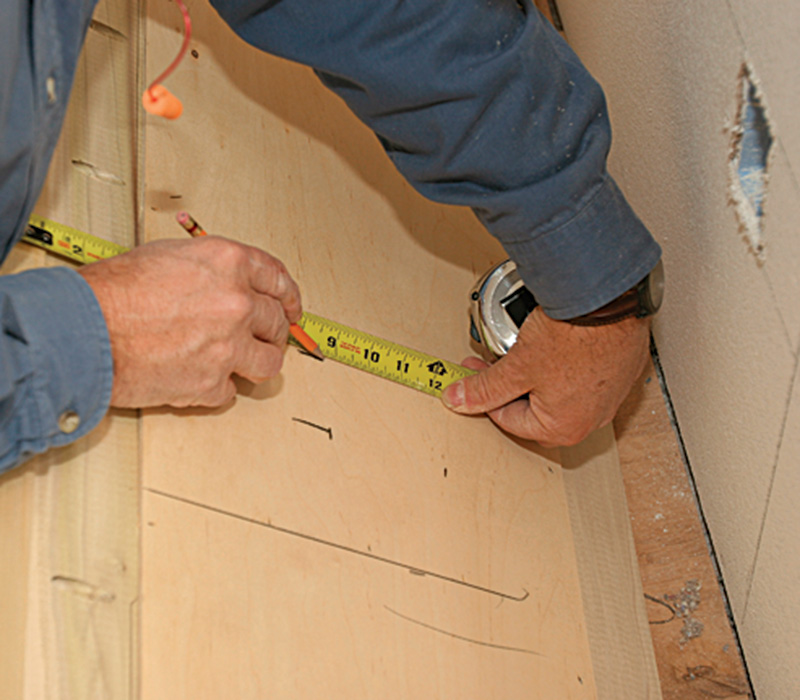
Locate boxes with centerlinesPlumb a line down the wall at the window’s center, and draw a line down the center of the back of the panel. Measure off these two lines and the top of the stool to pinpoint the cutout for an electrical box. An alternative approach is to have an electrician locate electrical boxes horizontally in the baseboard.
|
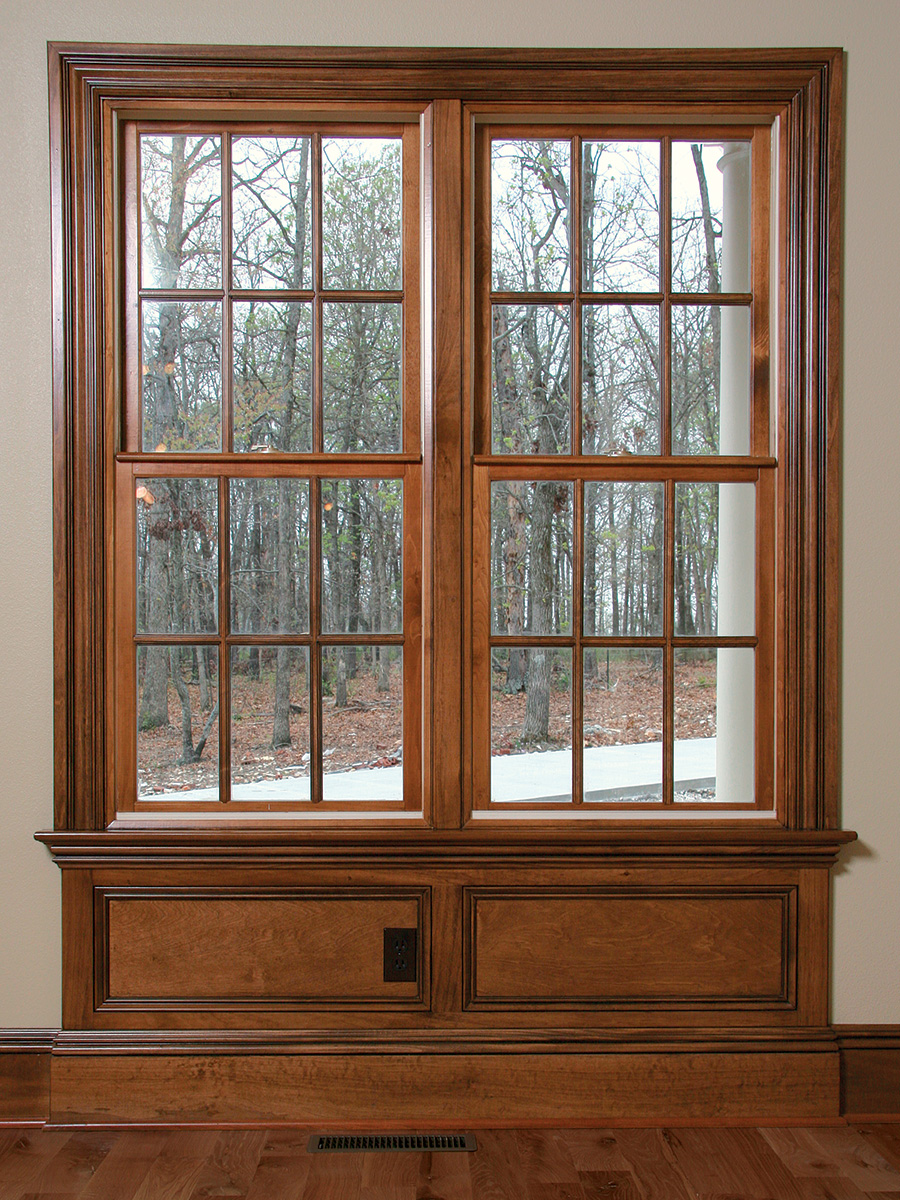
Panel is on the wall

Gary Striegler is a builder in Fayetteville, Ark.
Photos by Christopher Ermides, except where noted.
From FineHomebuilding #180
To view the entire article, please click the View PDF button below.
