Building a Fire Pit: Design and Planning
Size, materials, and whether it's raised or flush with the ground are just a few of the details you need to figure out before you create your own backyard fire pit.
If you want a fire pit for practical reasons, such as disposing of leaves and large branches, consider making a pit with a 4-ft.-diameter or larger opening (check to see that it’s legal to burn yard debris in your community before going through the trouble to build such a pit). For a smaller recreational fire pit, a 30-in. to 36-in. inside diameter is a good size. For any fire pit, take into account that the overall diameter will be 2 ft. larger than the inside opening (1 ft. on each side).
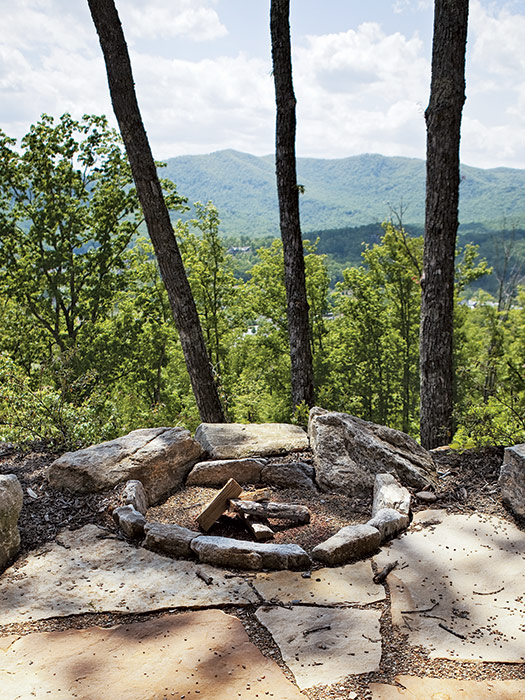
Also consider whether to build a fire pit with raised walls or flush to the ground. Raised fire pits allow people to sit on the walls or rest their feet on the edge when sitting in chairs. Raised walls also prevent hot ashes from blowing in the wind and shield you from some of the heat if the fire gets too hot. However, a fire pit flush to the ground is slightly warmer, can feel more intimate, and is good for people who prefer small fires.
You will need to incorporate fire clay into the mortar when building the walls and cap of the fire pit to keep the mortar from cracking under intense heat. Fire clay, sold at most masonry supply stores, is a dry ingredient and needs to be added to the mortar mix prior to adding water.
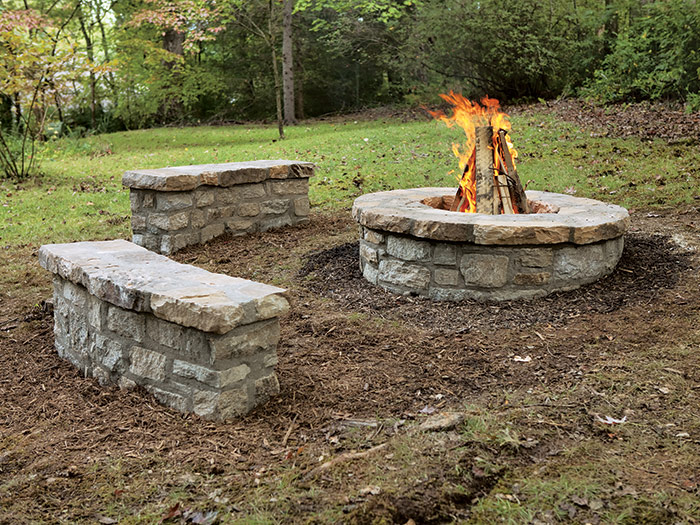
When choosing the location of your fire pit, place it well away from the house to prevent smoke and sparks from blowing indoors. Similarly, put the pit well away from trees or shrubbery to reduce the danger of an accidental fire.
What You’ll Need
|
Before You Begin
Look at the fire-pit layout options below and spend time thinking about the plan to be sure it will fit your needs. Build a fire in the spot you’ve chosen, and set up some chairs or buckets to sit on. Spend a few nights tweaking the arrangement to be sure you’re happy with it; once it’s set in stone, you’ll have to live with it or spend considerable effort ripping it out.
Another option is to create the fire pit first, build a fire, and then try various seating arrangements. For the project shown here, we chose a compact design with two benches (or seat walls) around a smallish, 54-in.-dia. walled fire pit. If you want to use the fire pit before you build the walls, protect surrounding grass from the work with plastic (or plan on reseeding when the stonework is complete).
Fire-Pit Options
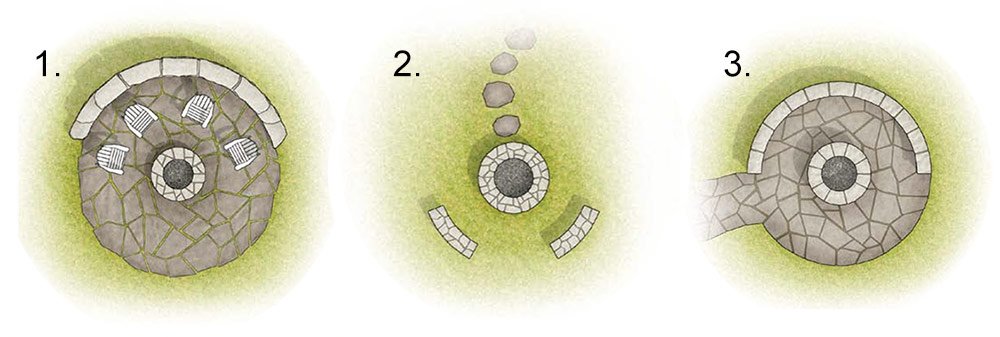
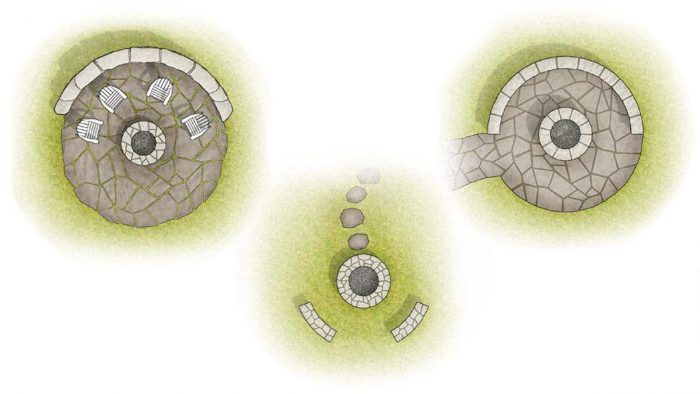
Three common fire-pit layout options allow you to configure the space depending on how you will use it.
- Fire pit with patio and a seat wall behind movable chairs. This design offers the most flexibility. Surrounding the fire pit is an open patio or lawn space where garden chairs can be freely moved depending on the situation. A seat wall, located behind the open area, defines the perimeter of the space and is a comfortable space for people to gather during parties and warm evenings.
- Fire pit with seat-wall benches. This is an intimate design with benches close enough to feel the heat from the fire (less than 4 ft.). It’s ideal for a small yard and for people who want a place to sit but who don’t want the hassle and clutter of lawn furniture.
- Fire pit with continuous seat wall. This design offers some of the benefits of both flexible and intimate designs. Here, the semicircular wall is close enough to the fire pit to feel the heat but far enough away so people can gather and enjoy the fire as a backdrop.
Excerpted from Masonry Complete (The Taunton Press, 2012) by Cody Macfie
Available at Amazon.com.

