FHB Logo Facebook LinkedIn Email Pinterest Twitter X Instagram Tiktok YouTube Plus Icon Close Icon Navigation Search Icon Navigation Search Icon Arrow Down Icon Video Guide Icon Article Guide Icon Modal Close Icon Guide Search Icon Skip to content
Subscribe
Log In
  • How-To
  • Design
  • Tools & Materials
  • Restoration
  • Videos
  • Blogs
  • Forum
  • Magazine
  • Members
  • FHB House
  • Podcast
Log In

Fine Homebuilding Project Guides

Foundations and Masonry Work

Guide Home
  • Concrete & Masonry Basics
  • Building Foundations
  • Waterproofing Foundations
  • Retrofits and Add-ons
  • Masonry in the Landscape
  • Brick
How-To

Building a Fire Pit: Assembling the Walls

Adding fireclay to the mortar will allow you to have blazing fires without worrying about damaging the stone walls.

By Cody Macfie
  • X
  • facebook
  • linkedin
  • pinterest
  • email
  • add to favorites Log in or Sign up to save your favorite articles

Laying the First Row

Fire pits are not likely to fail. The circular design is inherently strong, and there is no force on the fire-pit wall from soil being retained. By carefully locating the fire pit and properly preparing its base, drainage and other water-related issues are easily dealt with. For these reasons there is no need to incorporate a large footing or rebar.

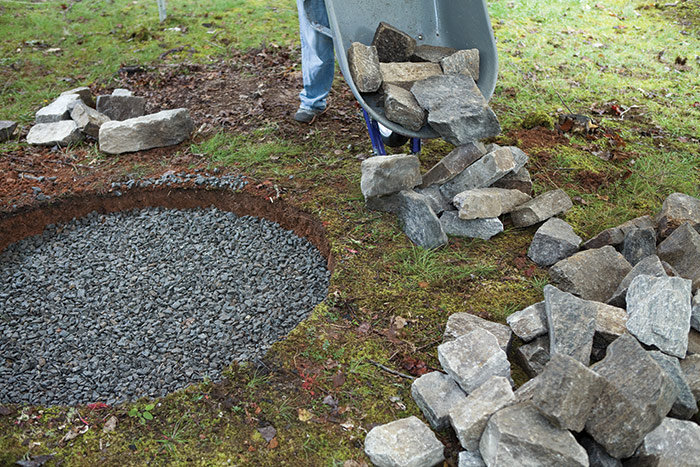
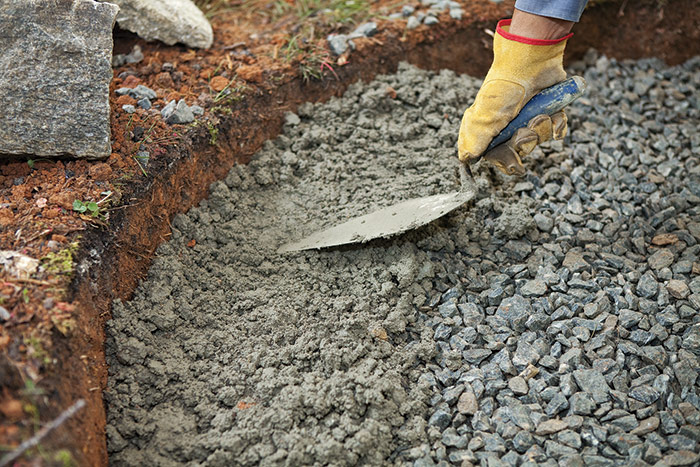
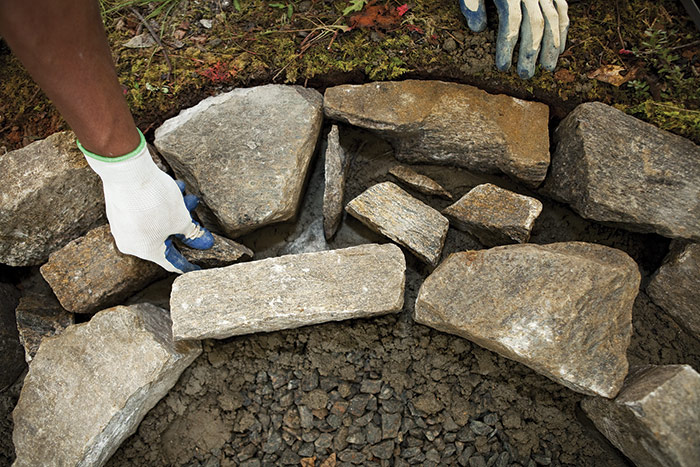
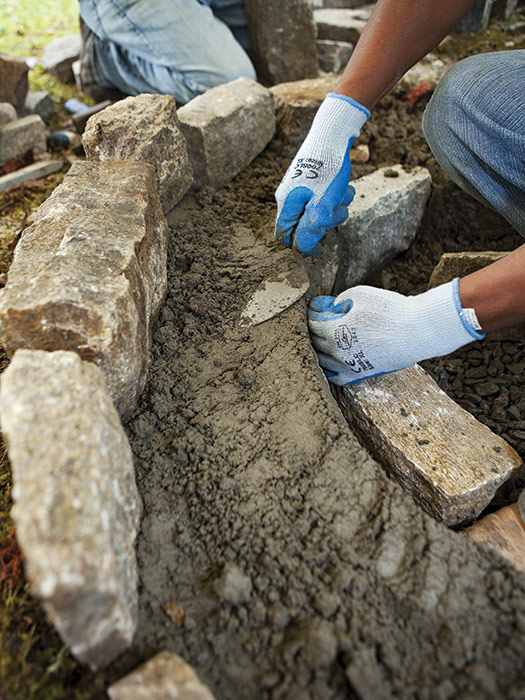
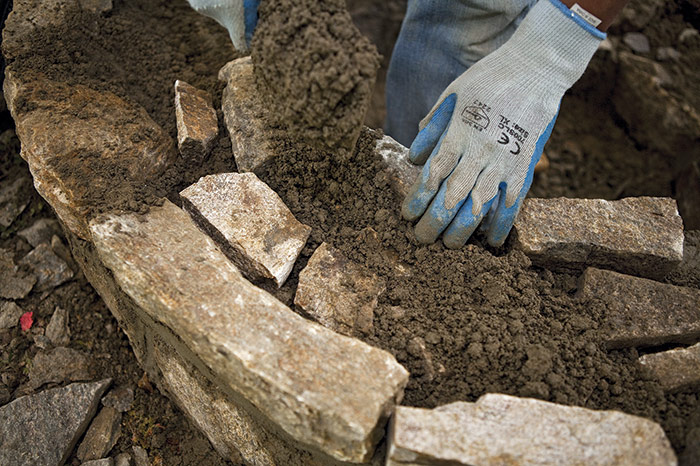
To avoid extra movement while laying the first course (and risk stepping on and collapsing the carefully cut sidewall), shape a decent pile of stone and put it within easy reach 1.

Stage wall stones within easy reach
1. Stage wall stones within easy reach. The fewer times a stone is handled, the more efficient you will be with your work.


the right mortar consistency
TRADE SECRET:

To attain the right mortar consistency, mix the dry ingredients first. Then add small amounts of water until you can form the mixture into a ball with one hand and the ball stays together when tossed in the air.


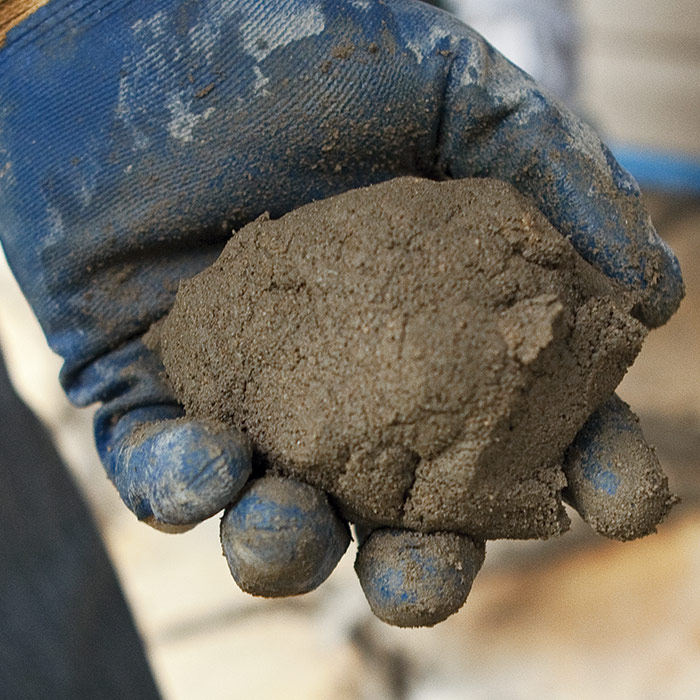
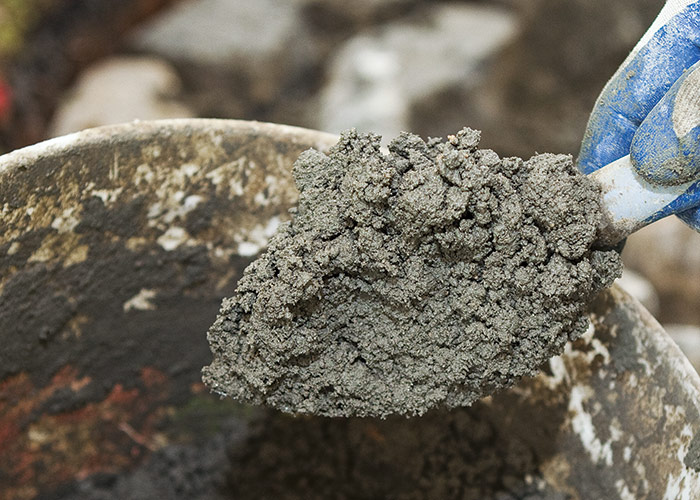
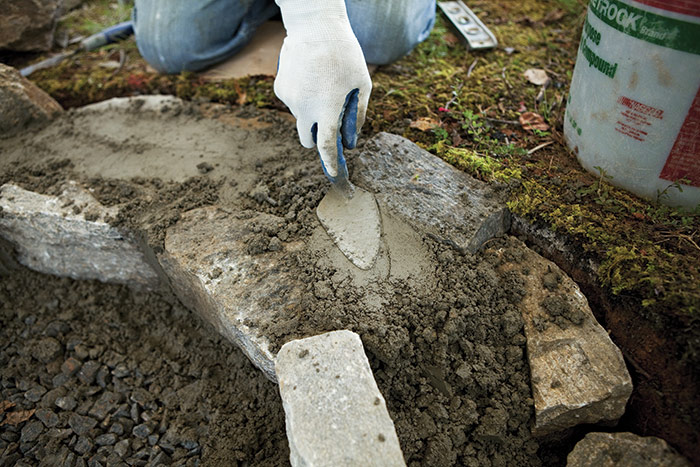
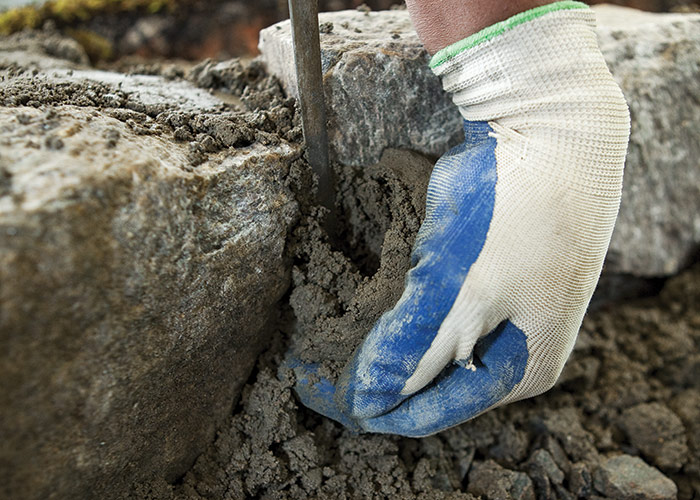
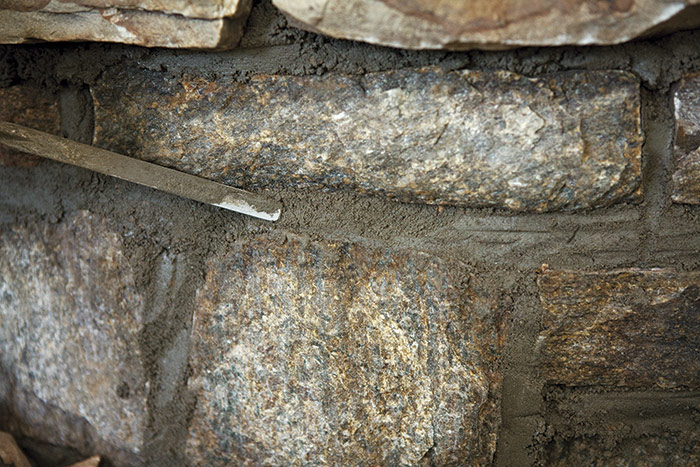
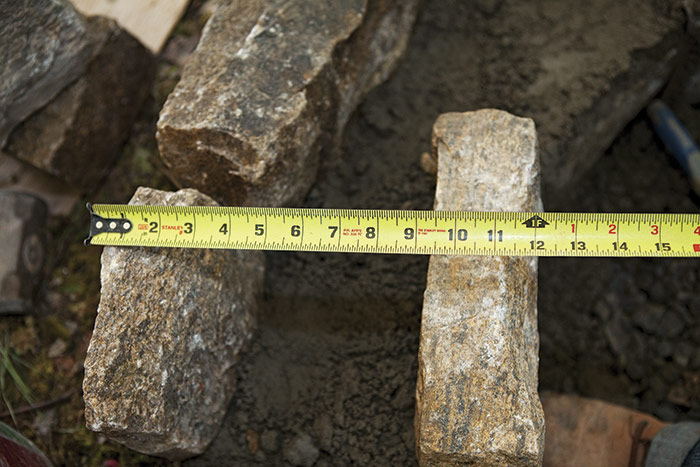
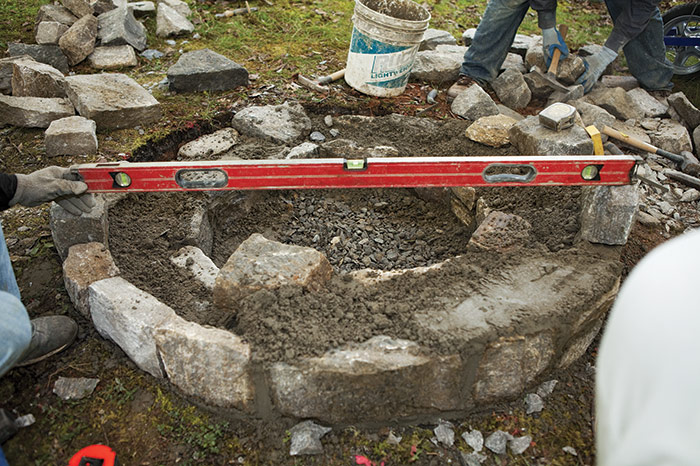
For a jointed fire-pit wall like the one shown here, mix mortar using one part portland cement, one part masonry sand, and two parts fire clay. To avoid staining the stones, do not mix the mortar too wet 2. For a mortared wall in the dry-stack style, mix a wetter, but not soupy, mortar. Spread the mortar bed 3 in. deep and 12 in. wide 3. If you dug the sidewall of the hole with care, simply butt the end of the tape against the soil to measure for the mortar bed 4.

mortar should hold together
2. Mix mortar to the consistency of dry cottage cheese. The mortar should hold together when pressed but not be wet.


Spread a layer of mortar
3. Spread a layer of mortar 3 in. deep around the outer rim where you will begin laying stones.


Limit the mortar to a 12-in.-wide band
4. Limit the mortar to a 12-in.-wide band. Keep the fire-pit center free of mortar to allow water to drain.


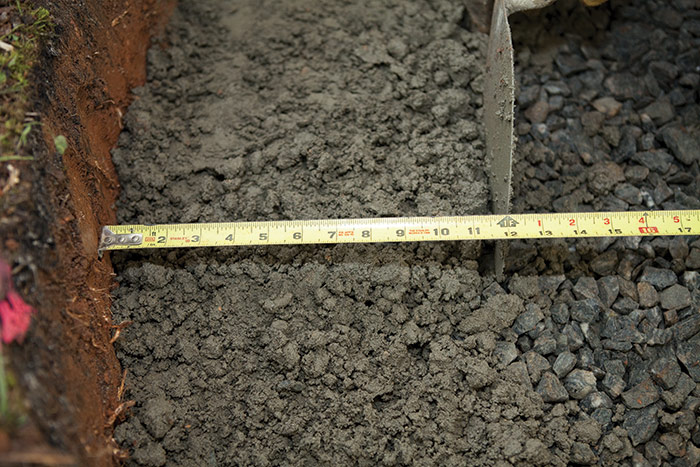
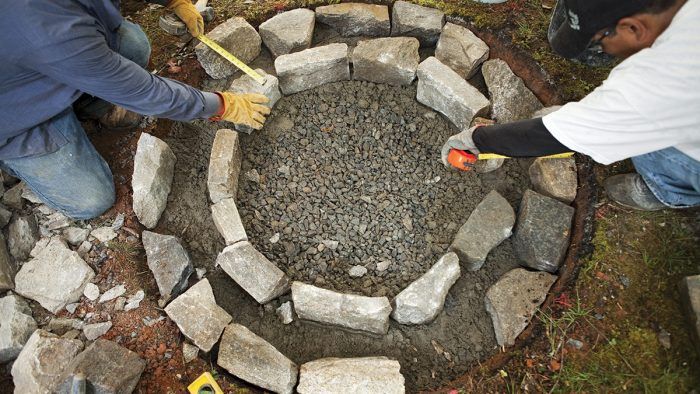
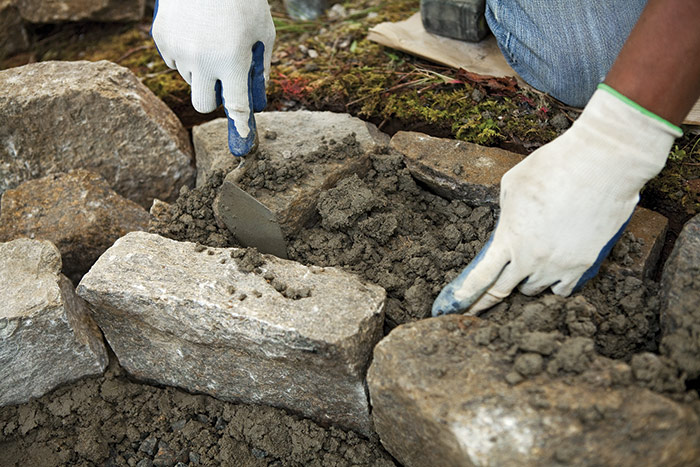
Lay the first stone against the earthen sidewall, and pack mortar behind the stone to stabilize it 5. When laying stones for the first course, try to use stones with tops and bottoms that are parallel, which will make setting a stable foundation easier. Measure 12 in. from the outside face and set the face of the inside stone 6. Then pack mortar behind the inside stone to stabilize it.

Place the first stone
5. Place the first stone to the outside against the earthen wall. Select a stone with parallel top and bottom, or shape one that way.


Wall stones, measured face to face, should be 12 in. apart
6. Wall stones, measured face to face, should be 12 in. apart. Push mortar behind the stones to stabilize them.


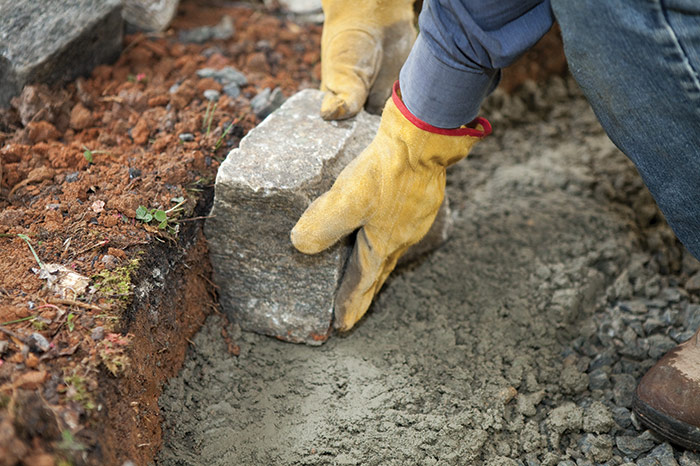
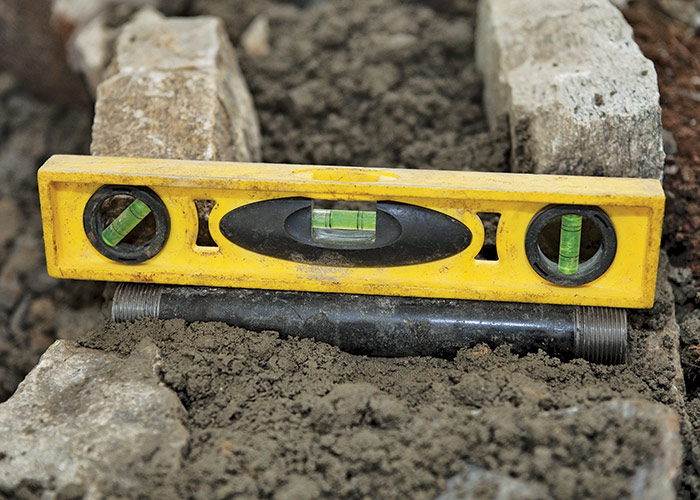
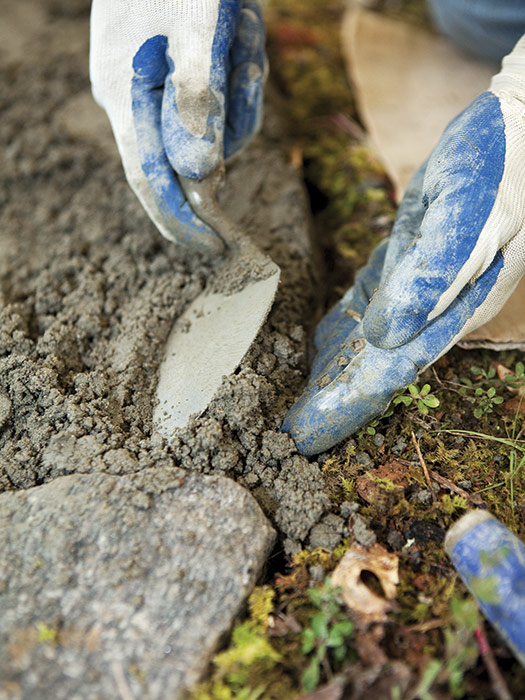
Continue setting the first course of stones using the side-wall of the pit excavation as the outside reference and measuring back 12 in. to set the inside stones 7. Level the tops of the stones as you set them 8, and pack mortar underneath to keep them level. When the first course is set, fill between the stones with shards and rubble left over from shaping (set them in the mortar bed rather than just dumping them in) 9. Fill the rest of the space with mortar using your trowel and fingers to pack the mortar into the crevices 10. Add mortar to fill to the top of the stones, and then pack it down with a trowel 11. Continue adding and packing mortar until it doesn’t yield to moderate pressure. To complete the first course, pack mortar between the joints with a pointing trowel 12.

Continue setting wall stones
7. Continue setting wall stones around the fire pit. Measure often to maintain the 12-in. wall depth.


Level the tops of stones
8. Level the tops of stones as you set them. If a stone needs to be adjusted, pack mortar behind and under it until it’s level.


Fill the wall interior
9. Fill the wall interior with rubble and shards left over from shaping stones.


Pack mortar between the stones
10. Pack mortar between the stones and rubble. Use a trowel and your fingers to work the mortar into all the crevices.


Fill the wall with mortar
11. Fill the wall with mortar flush to the top of the first course of stones. Pack the mortar until it is firm and smooth the top.


Pack the joints with mortar
12. Pack the joints with mortar using a pointing trowel. Fill the joints until they are slightly mounded.


Let the water out
Let the Water Out

Set a drainpipe between the first and second course to prevent your fire pit from becoming a water feature. Make sure the pipe has a minimum 1 in. diameter and is about as long as the wall is wide. Set the pipe just above finish grade and pitch it to the outside for proper drainage. So the pipe doesn’t interfere with the coursework, set the pipe in a joint where four corners intersect. Grout around the pipe after you set it and continue stacking the stones.


Continuing the Coursework

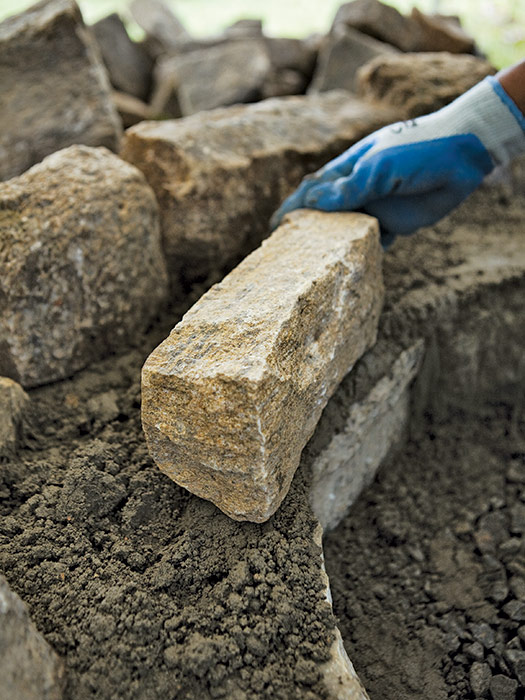
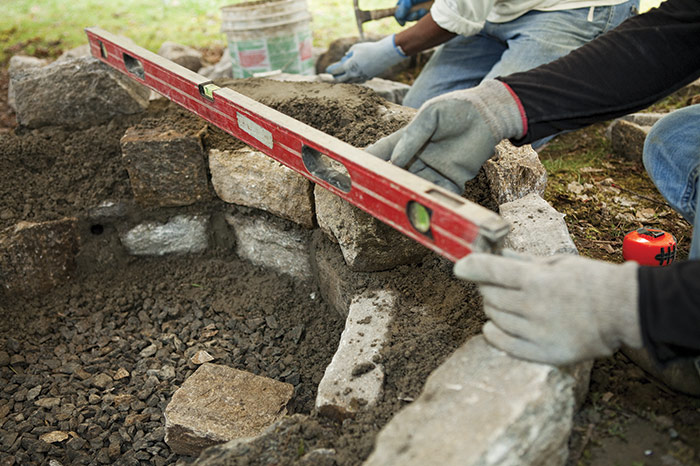
Continue building the circular fire-pit wall by spreading a 1-in. layer of mortar where you’ll set stones. Use your hand and trowel together to build up mortar at the edge 1. Align the face of each stone with the course below, and gently tap it into the mortar bed 2. Vary the stone heights to break up long-running horizontal joints 3 and create a more pleasing overall pattern.

Spread a bed of mortar
1. Spread a 1-in.-thick bed of mortar for the first few stones of the second course.


Align second-course stones
2. Align and set second-course stones to the course below.


Vary the height of the stones
3. Vary the height of the stones to avoid long-running horizontal joints that will draw attention to themselves.


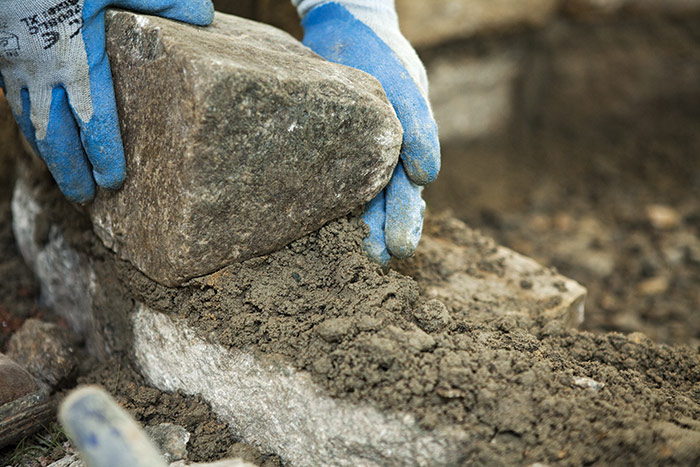
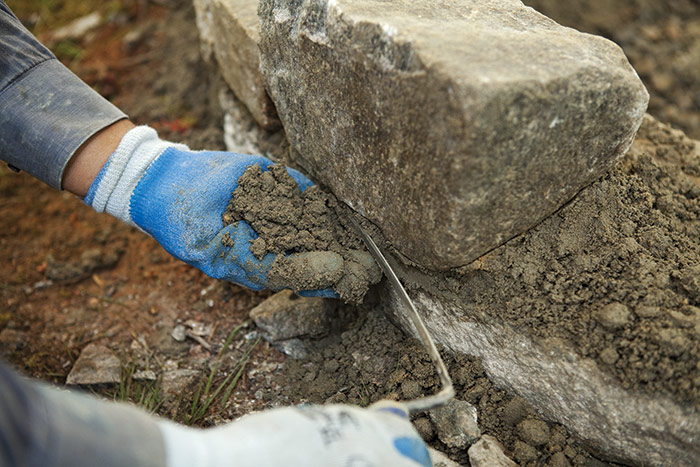
To set the stones on the fire pit’s inside face, use your hand and trowel to build up a 1-in.-thick mortar bed along the inside edge 4. Set a stone with the face aligned with the course below 5. Then level the top and pack mortar behind it 6. Use a pointing trowel to pack mortar into the joints until it is flush with the face 7. Sometimes it’s more efficient to lay a long course of stones and then pack mortar (or grout) around the stones all at once, instead of working each stone individually. Make sure you grout all around the stones of one course before beginning the next. Finally scrape the joints flush after they dry—but before they harden—using a pointing trowel 8. Brush away the excess mortar with a whisk broom 9.

Set the inside ring of stones
4. Set the inside ring of stones the same as the outside ring. Build up an edge by pressing the mortar between your hand and trowel.


shape stones to match the inside curve
5. Select or shape stones to match the inside curve. Cross the vertical joints whenever possible.


Pack mortar behind the stone
6. Pack mortar behind the stone to level its top.


Pack mortar into the joints
7. Pack mortar into the joints with a pointing trowel. (Some masons set a whole row of stone and then pack all the joints at once.)


Scrape the excess mortar
8. Scrape the excess mortar from between the joints after completing each row.


Brush excess mortar
9. Brush excess mortar from the surface. If it stains the concrete while brushing, it is too wet and you need to let it dry longer.


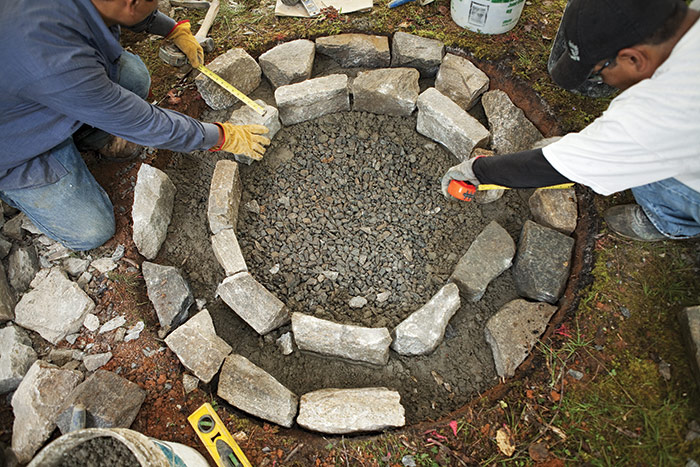
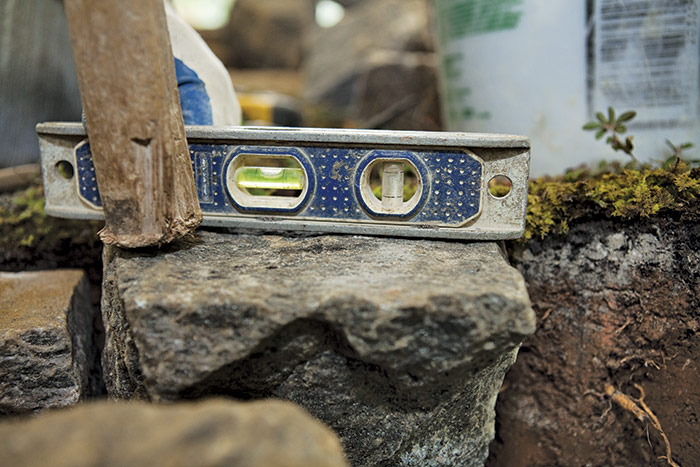
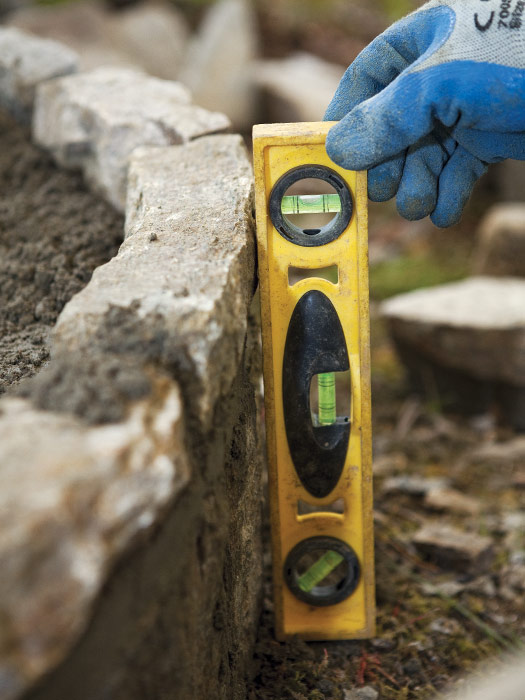
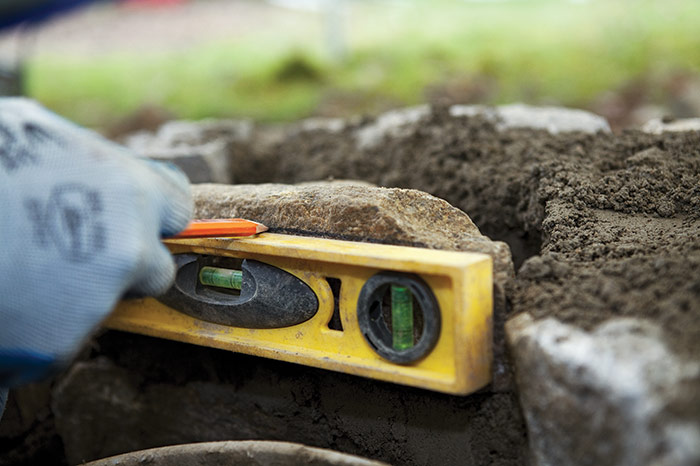
As you work, measure across the stones frequently to make sure you’re maintaining a 12-in. wall thickness 10. Also check the wall, inside and out, with a level to be sure it stays vertical 11. The inside and outside rings do not need to stay level across the top while laying courses until you reach the top. As with the first course, fill the inside of the wall with rubble and pack the crevices with mortar 12. It’s important to fill all the voids, so keep adding mortar and pressing it down until it is firm. Completely fill between the stones and then smooth the top of each course.

Check the wall width frequently
10. Check the wall width frequently for consistency. With irregular stones, it is easy to overlook a 1-in. discrepancy.


Check the outside of the wall for plumb
11. Check the outside of the wall for plumb and straightness. Having plumb and even walls greatly improves the overall look.


Fill between each course of stones with rubble and mortar
12. Fill between each course of stones with rubble and mortar. Work the mortar between the stones to increase wall strength.


Finishing the Coursework

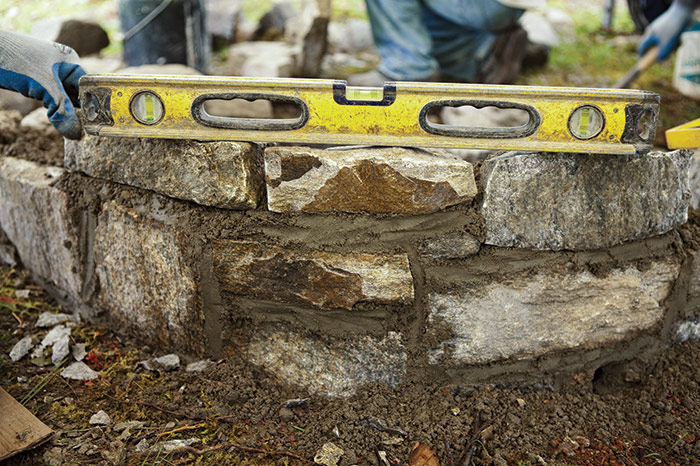
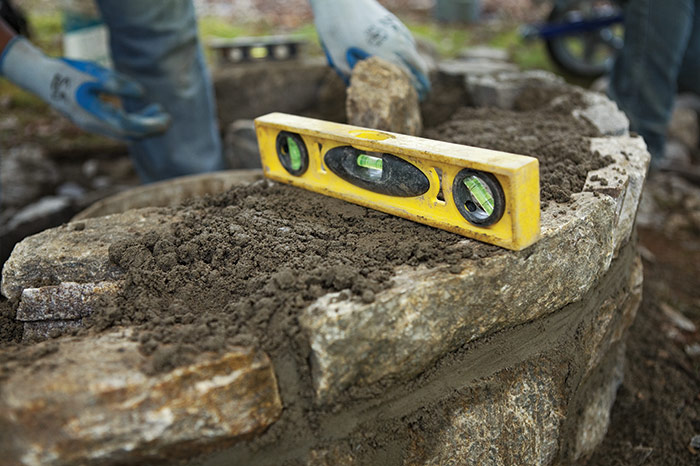
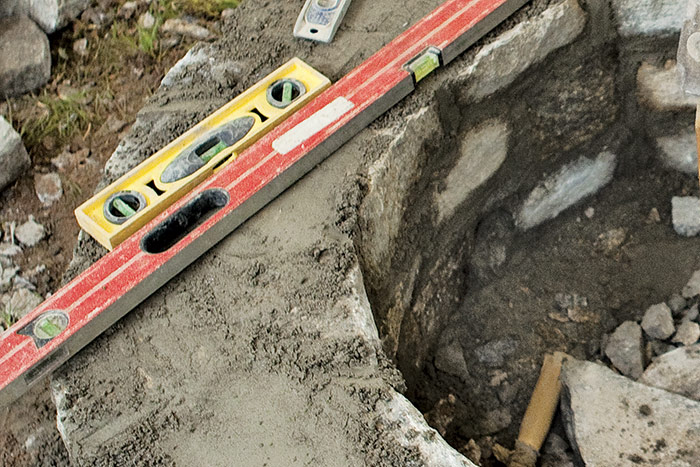
For a 19-in.-high wall (as for this project), the regular coursework ends at 15 in. 1. This leaves room for mortar and 3-in.-thick capstones. To level the top of the coursework all the way around, pick one spot that is the correct elevation. Then set the opposite-side stone to the correct height 2. Repeat this process, setting a pair of opposing stones 90 degrees from the first pair 3. Use these four stones as a guide to set adjacent stones to the correct elevation 4. As you work, level across the wall to be sure that both the inside and outside faces are at the same elevation 5. For stones that rest slightly high, it is better to mark and cut the stone to the proper elevation rather than set it deep and reduce the joint size 6. Fill the inside of the wall with mortar, and pack and smooth the top 7.
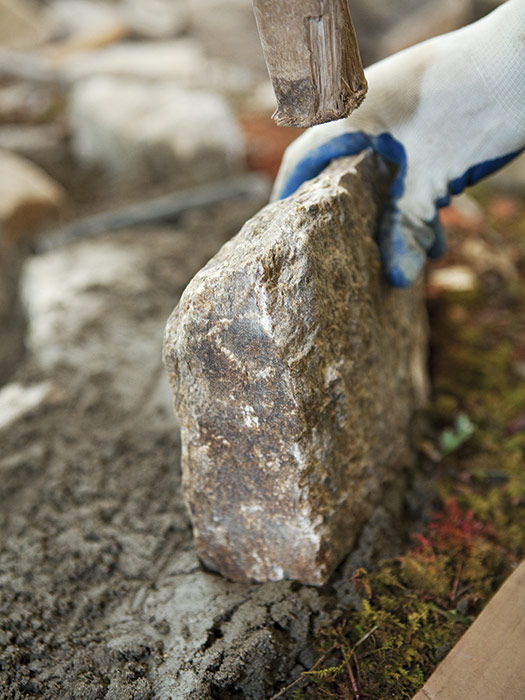
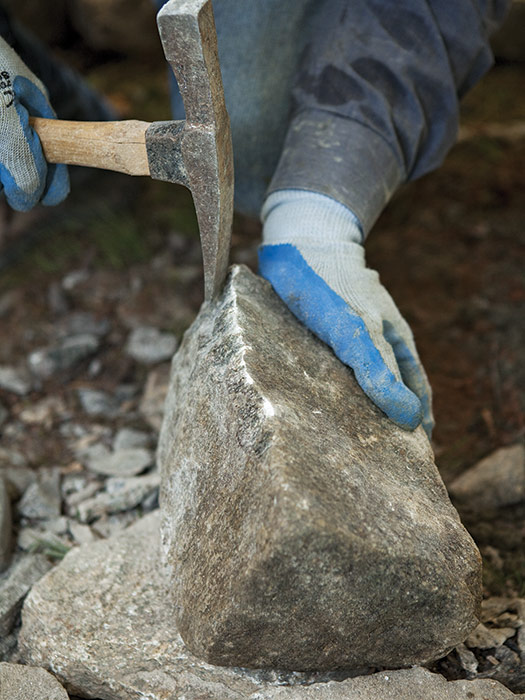
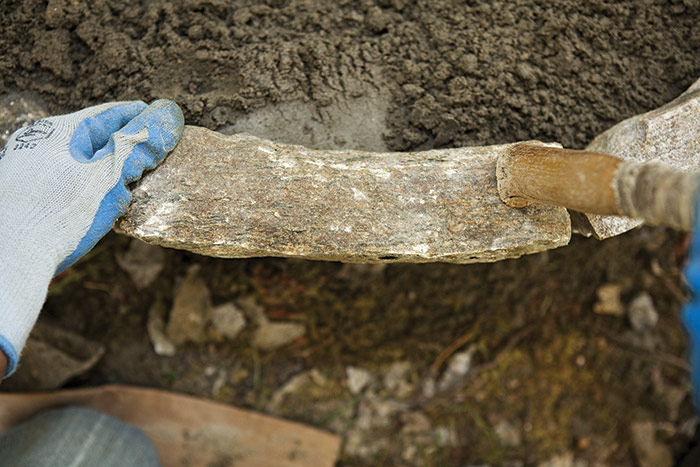
Establish the top-of-wall height
1. Establish the top-of-wall height by setting a stone 15 in. above grade. If the grade slopes, measure in the middle of the slope.


Level across the wall
2. Level across the wall and set another stone at the same elevation. Shape the stone rather than adjust the joint size.


set two more stones at the proper elevation
3. Use a level to set two more stones at the proper elevation, 90 degrees from the first pair.


Set adjacent stones
4. Set adjacent stones by leveling across the tops until the entire outside ring is set.


set the inside stones
5. Level across the wall’s width to set the inside stones to the same elevation.


mark a straight line
6. Use a level to mark a straight line if you need to trim the top of a stone.


smooth the top of the wall
7. Pack mortar between the stones and smooth the top of the wall. You are now ready to set the cap.


Making Curved Stonework

Cut a slight curve onto the face of each stone as you set them around the circle. To do this, take the sharp edge of a brick hammer and chip away the face of the stone in a downward motion on the left and right side of the stone. Some stones will have a natural curve to them, which can save you a lot of work. Train your eye to look for these stones and take advantage of them whenever possible.

chip away the face of the stone

natural curve stone


Masonry Complete

Excerpted from Masonry Complete (The Taunton Press, 2012) by Cody Macfie

Available at Amazon.com.

Previous: Building a Fire Pit: Gravel Base Next: Building a Fire Pit: Installing Capstones

Guide

Foundations and Masonry Work

Chapter

Masonry in the Landscape

Sign up for eletters today and get the latest how-to from Fine Homebuilding, plus special offers.

Signing you up...

This site is protected by reCAPTCHA and the Google Privacy Policy and Terms of Service apply.
See all newsletters
See all newsletters

Log in or create an account to post a comment.

Sign up Log in

Become a member and get full access to FineHomebuilding.com

Foundations and Masonry Work

Foundations and Masonry Work

Trusted, comprehensive guidance from the pros for working with concrete and masonry

View Project Guide

View All Project Guides »

Become a member and get unlimited site access, including the Foundations and Masonry Work Project Guide.

Start Free Trial

Concrete & Masonry Basics
  • Choosing & Mixing Concrete
  • Concrete & Masonry Tools & Techniques
Building Foundations
  • Foundation Basics
  • Foundation Footings
  • Insulated Concrete Forms (ICFs)
Waterproofing Foundations
  • Waterproofing Strategies
  • Foundation Drains
Retrofits and Add-ons
Masonry in the Landscape
  • Patios, Walkways, and Driveways
  • Retaining Walls
  • Dry Stone Walls
  • Fire Pits
Brick

Fine Home Building

Newsletter Sign-up

  • Fine Homebuilding

    Home building tips, offers, and expert advice in your inbox.

  • Green Building Advisor

    Building science and energy efficiency advice, plus special offers, in your inbox.

  • Old House Journal

    Repair, renovation, and restoration tips, plus special offers, in your inbox.

Signing you up...

This site is protected by reCAPTCHA and the Google Privacy Policy and Terms of Service apply.
See all newsletters

Follow

  • Fine Homebuilding

    Dig into cutting-edge approaches and decades of proven solutions with total access to our experts and tradespeople.

    Start Free Trial Now
    • Facebook
    • Instagram
    • X
    • LinkedIn
  • GBA Prime

    Get instant access to the latest developments in green building, research, and reports from the field.

    Start Free Trial Now
    • Facebook
    • YouTube
  • Old House Journal

    Learn how to restore, repair, update, and decorate your home.

    Subscribe Now
    • Facebook
    • Instagram
    • X

Membership & Magazine

  • Online Archive
  • Start Free Trial
  • Magazine Subscription
  • Magazine Renewal
  • Gift a Subscription
  • Customer Support
  • Privacy Preferences
  • About
  • Contact
  • Advertise
  • Careers
  • Terms of Use
  • Site Map
  • Do not sell or share my information
  • Privacy Policy
  • Accessibility
  • California Privacy Rights

© 2025 Active Interest Media. All rights reserved.

Fine Homebuilding receives a commission for items purchased through links on this site, including Amazon Associates and other affiliate advertising programs.

  • Home Group
  • Antique Trader
  • Arts & Crafts Homes
  • Bank Note Reporter
  • Cabin Life
  • Cuisine at Home
  • Fine Gardening
  • Fine Woodworking
  • Green Building Advisor
  • Garden Gate
  • Horticulture
  • Keep Craft Alive
  • Log Home Living
  • Military Trader/Vehicles
  • Numismatic News
  • Numismaster
  • Old Cars Weekly
  • Old House Journal
  • Period Homes
  • Popular Woodworking
  • Script
  • ShopNotes
  • Sports Collectors Digest
  • Threads
  • Timber Home Living
  • Traditional Building
  • Woodsmith
  • World Coin News
  • Writer's Digest
Active Interest Media logo
X
X
This is a dialog window which overlays the main content of the page. The modal window is a 'site map' of the most critical areas of the site. Pressing the Escape (ESC) button will close the modal and bring you back to where you were on the page.

Main Menu

  • How-To
  • Design
  • Tools & Materials
  • Video
  • Blogs
  • Forum
  • Project Guides
  • Reader Projects
  • Magazine
  • Members
  • FHB House

Podcasts

  • FHB Podcast
  • ProTalk

Webinars

  • Upcoming and On-Demand

Podcasts

  • FHB Podcast
  • ProTalk

Webinars

  • Upcoming and On-Demand

Popular Topics

  • Kitchens
  • Business
  • Bedrooms
  • Roofs
  • Architecture and Design
  • Green Building
  • Decks
  • Framing
  • Safety
  • Remodeling
  • Bathrooms
  • Windows
  • Tilework
  • Ceilings
  • HVAC

Magazine

  • Current Issue
  • Past Issues
  • Magazine Index
  • Subscribe
  • Online Archive
  • Author Guidelines

All Access

  • Member Home
  • Start Free Trial
  • Gift Membership

Online Learning

  • Courses
  • Project Guides
  • Reader Projects
  • Podcast

More

  • FHB Ambassadors
  • FHB House
  • Customer Support

Account

  • Log In
  • Join

Newsletter

Get home building tips, offers, and expert advice in your inbox

Signing you up...

This site is protected by reCAPTCHA and the Google Privacy Policy and Terms of Service apply.
See all newsletters
See all newsletters

Follow

  • X
  • YouTube
  • instagram
  • facebook
  • pinterest
  • Tiktok

Join All Access

Become a member and get instant access to thousands of videos, how-tos, tool reviews, and design features.

Start Your Free Trial

Subscribe

FHB Magazine

Start your subscription today and save up to 81%

Subscribe

We hope you’ve enjoyed your free articles. To keep reading, become a member today.

Get complete site access to expert advice, how-to videos, Code Check, and more, plus the print magazine.

Start your FREE trial

Already a member? Log in

Privacy Policy Update

We use cookies, pixels, script and other tracking technologies to analyze and improve our service, to improve and personalize content, and for advertising to you. We also share information about your use of our site with third-party social media, advertising and analytics partners. You can view our Privacy Policy here and our Terms of Use here.

Cookies

Analytics

These cookies help us track site metrics to improve our sites and provide a better user experience.

Advertising/Social Media

These cookies are used to serve advertisements aligned with your interests.

Essential

These cookies are required to provide basic functions like page navigation and access to secure areas of the website.

Delete My Data

Delete all cookies and associated data