FHB Logo Facebook LinkedIn Email Pinterest Twitter X Instagram Tiktok YouTube Plus Icon Close Icon Navigation Search Icon Navigation Search Icon Arrow Down Icon Video Guide Icon Article Guide Icon Modal Close Icon Guide Search Icon Skip to content
Subscribe
Log In
  • How-To
  • Design
  • Tools & Materials
  • Restoration
  • Videos
  • Blogs
  • Forum
  • Magazine
  • Members
  • FHB House
  • Podcast
Log In

Fine Homebuilding Project Guides

Foundations and Masonry Work

Guide Home
  • Concrete & Masonry Basics
  • Building Foundations
  • Waterproofing Foundations
  • Retrofits and Add-ons
  • Masonry in the Landscape
  • Brick
Tools & Materials

Choosing and Using Masonry Trowels

Learn the types and functions of these common concrete, brick, and stone setting tools.

By Cody Macfie
  • X
  • facebook
  • linkedin
  • pinterest
  • email
  • add to favorites Log in or Sign up to save your favorite articles

Trowels and pointers are considered setting tools. A rubber mallet is also a setting tool used to tap or set a stone into mortar without the risk of marring its surface or breaking it in half (which a sledgehammer might do).

In practice, a mason might consider tape measures, short levels, a builder’s square, chalk lines, and marking pencils as setting tools because they reside in the same bucket and are used to set stones.

There are no hard and fast rules about which tool to use when you are setting stone. Often, it’s the tool in your hand that will get the job done fastest.


Trowels

A mason’s trowel (sometimes called a brick trowel) has a diamond-shaped blade and is used for working with both wet and dry mortar. It is the mainstay of mortar work. A 10-in. mason trowel is good for working with block, brick, and stone. A large mason trowel also makes a great dustpan and brick setter. Trowels are usually available in 10-in. to 13-in. sizes. I have a 4-in. trowel the same shape (called a pointing trowel) that I use for laying brick and small stonework in tight spaces. The shape and size of the blade are ideal for transferring small amounts of mortar and spreading small patches. One person on my crew ground down his pointing-trowel blade to 3 in. and uses it for digging mortar from bucket bottoms and packing mortar between wall stones.

Large brick trowels are preferred for setting block because they pick up more mortar.


No tool a mason uses has only one function. The heft of a large brick trowel makes it great for tapping bricks and stones into place.


Buckets are extremely useful on a masonry job for toting and mixing mortar; this brick trowel with a ground-down point makes it easier to access mortar at the bottom of the bucket.


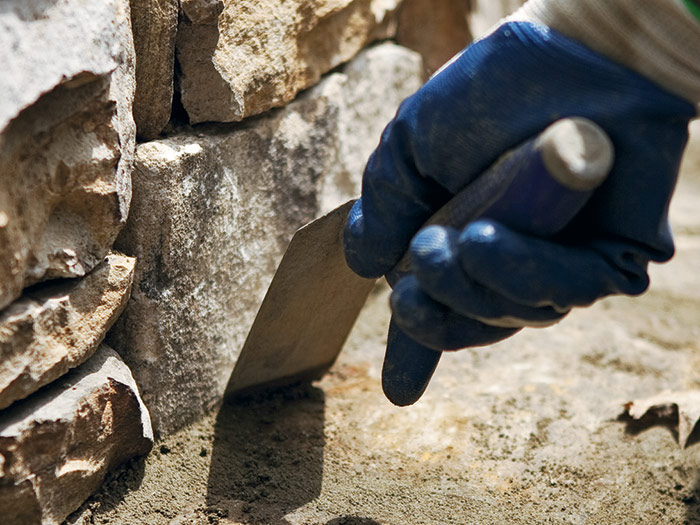
A tuck-pointing trowel has a narrow, flexible blade. It is primarily used to set mortar into joints. Tuck-pointing trowels are also used for removing mortar from between stones to leave sufficient room for grout, and for packing and shaping mortar when grouting. These trowels are available with blades of different widths. I generally use a 1⁄4-in. to 3⁄8-in. one, but you can get them as large as 3⁄4 in. for wider joints.

Tuck-pointing trowels are excellent for packing grout between capstones and for shaping joints.


Other common trowels include finishing trowels for spreading brown coat and smoothing concrete, plastic finishing trowels for applying stucco, and margin trowels for working wide mortar joints. Stucco trowels are your best option for applying a scratch coat, or brown coat or for smoothing small areas of concrete, such as footings. They are available in 11-in. to 14-in. lengths and 4-in. to 5-in. widths. Other trowels used for general masonry include edgers, floats, and corner tools.

A good finishing trowel, used to smooth concrete, has good balance and solid construction.


Metal stucco trowels can be used for applying brown coats and stucco.


Margin trowels are excellent for working in confined areas or when grouting wide joints, as shown here.


No matter which trowel you use, keep it clean and it will last longer. Once mortar sets up, it will be much harder to clean off. Over time, mortar buildup will weaken the bond where the handle meets the blade, eventually causing it to break off. Clean your trowel several times a day when possible.

Pointers and Jointers

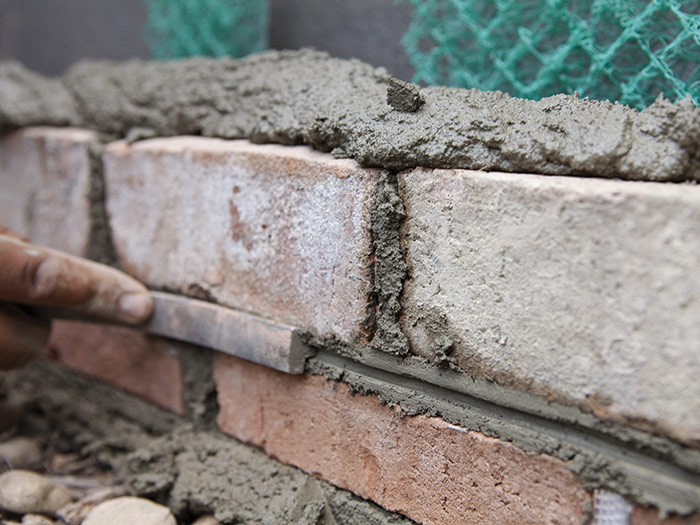
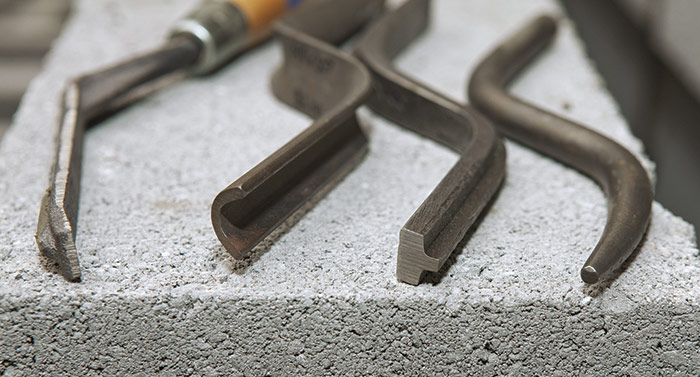
Pointing and jointing tools are primarily used to finish joints between brick, block, and stone. Pointers are used to pack mortar into the joints of brick and stone. Jointers are used to finish the joints of stone, brick, and block work. They vary in shape, size, length, and material. Bullhorn jointers, concave stone beaders, hard jointers, double-blade slickers, wheeled-joint rakers, brick jointers, grapevine jointers, and stone and brick beaders are just some of the names you’ll encounter. Most of these are for brick joints, but some apply to stone and block.

For some stone joints, such as the extruded joint, it is essential to buy a jointer for this purpose. If your block wall is going to be veneered with brick or rock, or covered with stucco, it doesn’t really matter how you finish the joints. Your local masonry supply store should have samples of various joints and the tools with which to create them.

A T-shaped pointing trowel creates a grapevine joint profile.


Each of these pointing trowels leaves a distinct profile. Profiles from left to right will produce a recessed V shape (grapevine jointer), a raised curve (brick jointer), a groove (grapevine jointer), and a recessed curve (convex jointer).


Jointers can also be homemade. This jointer leaves an extended joint and is made from a 1⁄2-in.-dia. piece of PVC pipe.


Spreading Mortar for Concrete Block

There are a couple of trowel skills you’ll need when spreading mortar for block work: spreading mortar for bedding joints on a footing or on the top of each course, and buttering the block ends. Keeping the mortar on the trowel will be the challenge because it has a tendency to slide off, but you’ll get the hang of it with a little practice.

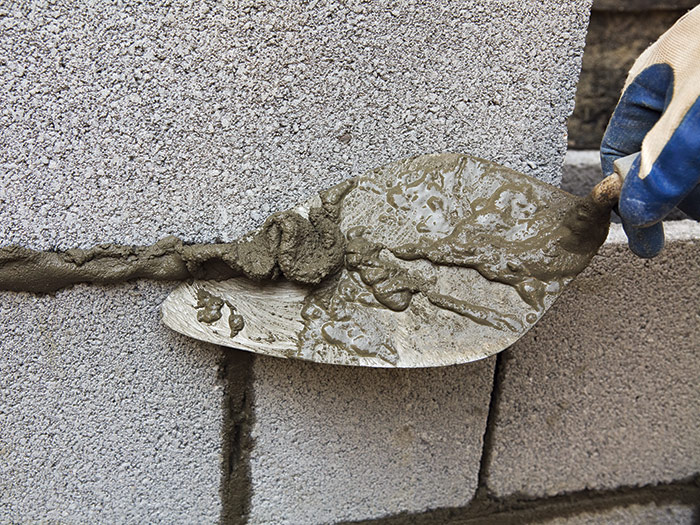
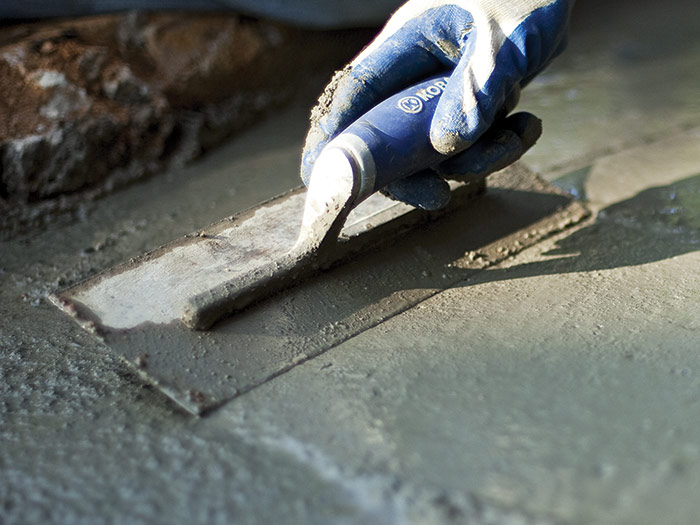
To spread mortar on a footing, put a little on a trowel and flip the trowel down with your wrist, about 3 in. to 4 in., and come to an abrupt stop. This will level the mortar on the trowel 1. Rotate your wrist sideways and make a downward slicing motion with the trowel. The mortar should spread in a straight line on the footing 2.

1—Remove excess mortar from a trowel by stopping its downward motion abruptly.


2—Spread mortar on a footing by using a cake-slicing motion.


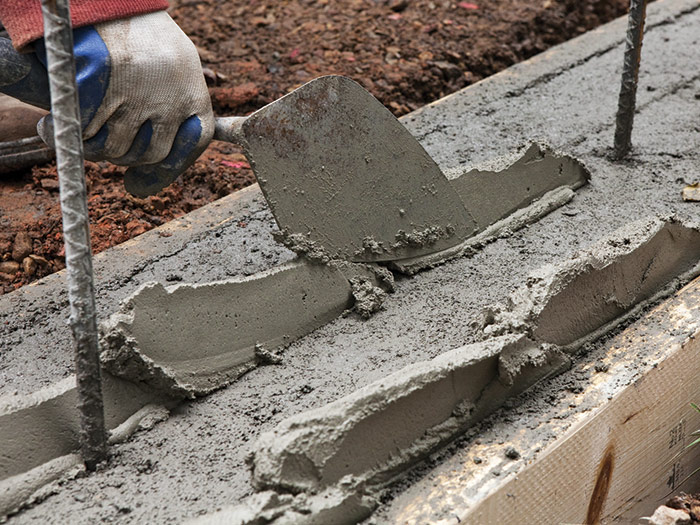
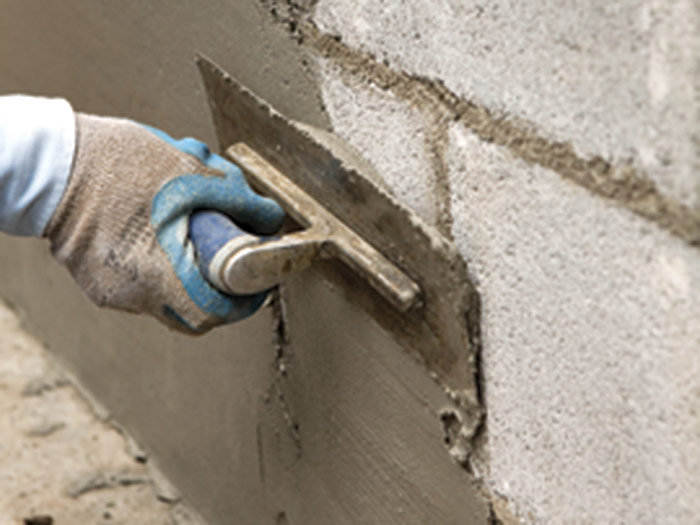
To butter ends or spread mortar on top of blocks and bricks, use the same technique to flatten the mortar on the trowel. Then turn the trowel upside down and scrape it sideways down the edge of the block. You have to do this rather quickly so that the mortar doesn’t slide off the trowel before it gets to the block 3. Do the same if you are spreading mortar on the top of a block 4.

3—Use the same motion to butter block ends before placing them.


4—Throw mortar on top of a block with a slicing motion, too, but let the trowel blade pass the edge of the block.


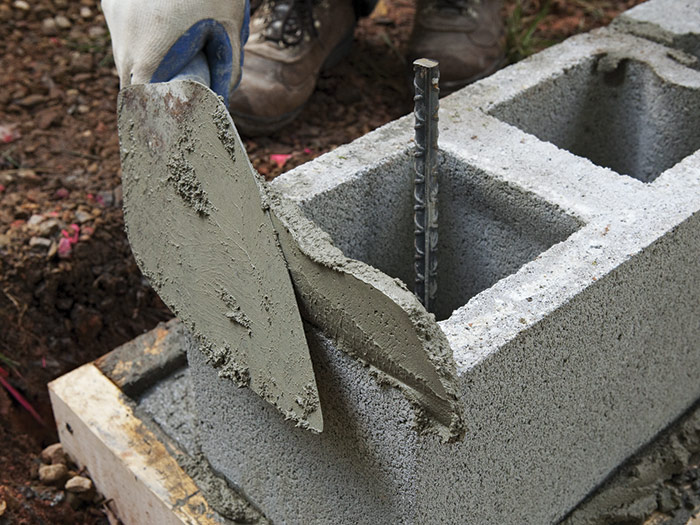
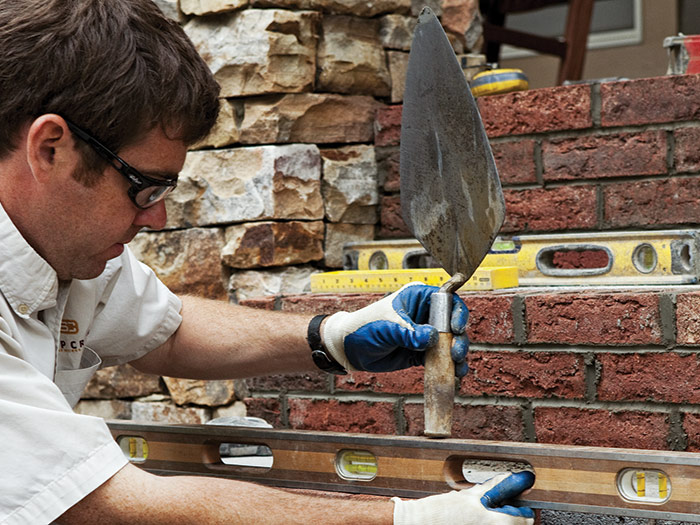
To adjust and set blocks, tap lightly with the trowel blade or handle 5. Avoid pushing on the block, because it is easy to over-adjust. Scrape away excess mortar by angling the trowel and slicing upward 6. This will remove the mortar cleanly without smearing it on the block.

5—Gentle tapping is all that’s needed to set concrete blocks in properly mixed mortar.


6—Remove excess mortar by slicing it off with a trowel and pulling the blade away. Avoid smearing the mortar.


Dry-Grouting Flagstones and Capstones

There are a few advantages to dry grouting over wet grouting. It doesn’t take as long to apply, and it is a cleaner process. The disadvantage is that when the mortar dries, it is not as dense as wet grout because it’s not mixed with as much water. Water can therefore penetrate the joint over time. I recommend dry grouting on porches or indoors, places that are not as exposed to water.

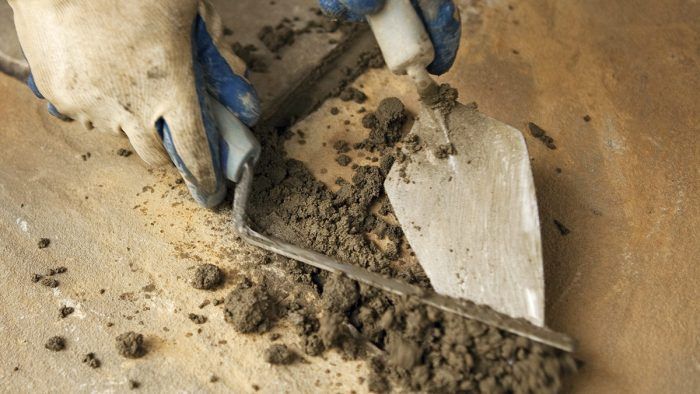
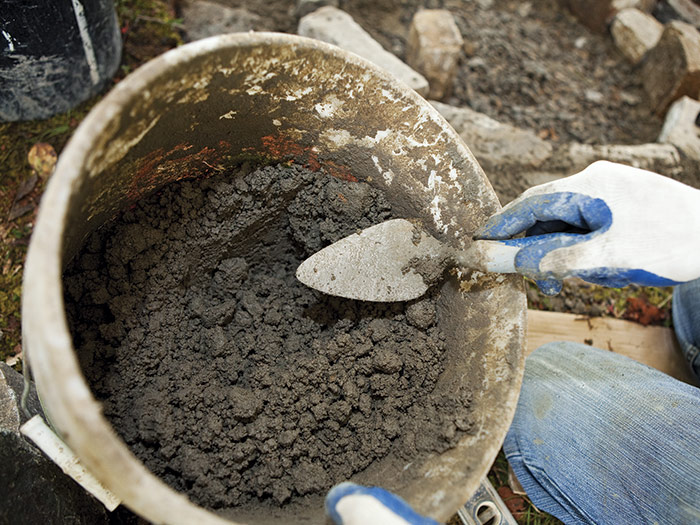
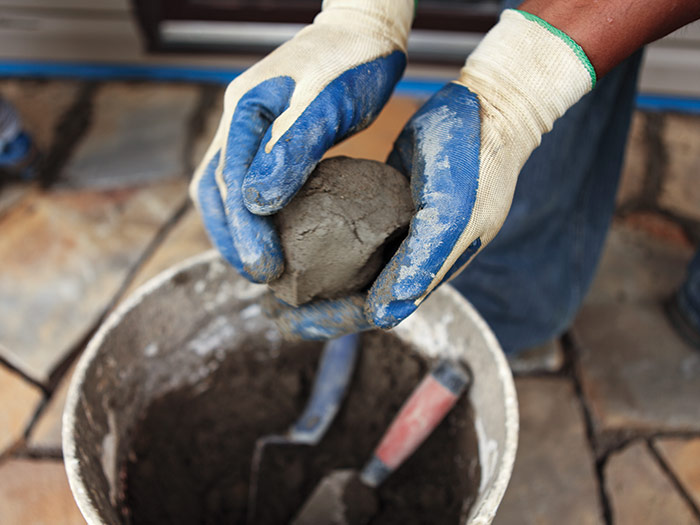
Mix the mortar and sand using this recipe. Add just enough water to the mix so it retains its shape when you form a ball in your hand 1. If it crumbles, add more water. If it sticks to your hand or glove, you’ve added too much water.

1—Mix joint mortar with enough water so that it hangs together when pressed into a ball.


2—Fill joints using a brick trowel to hold the mortar and a tuck pointer to press it into the joints.


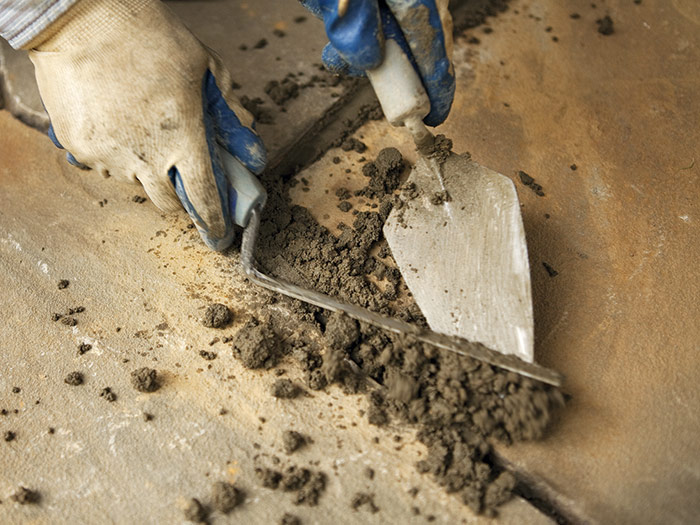
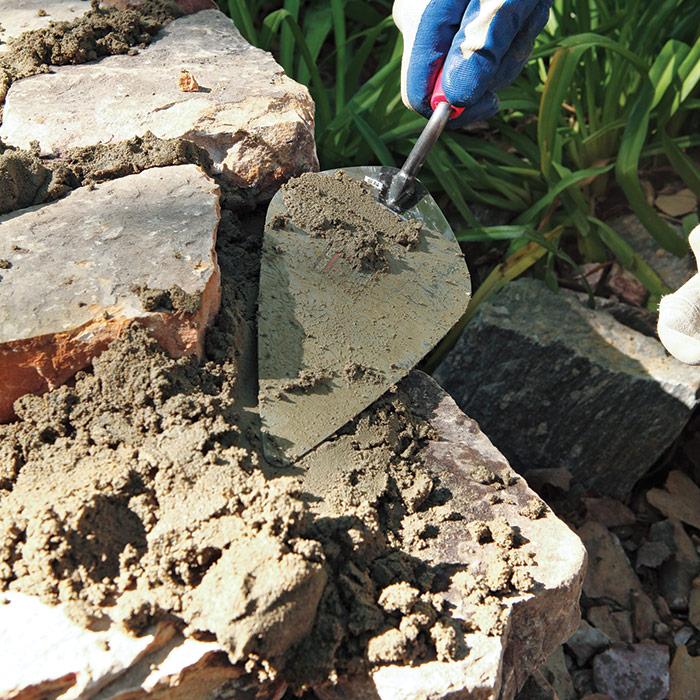
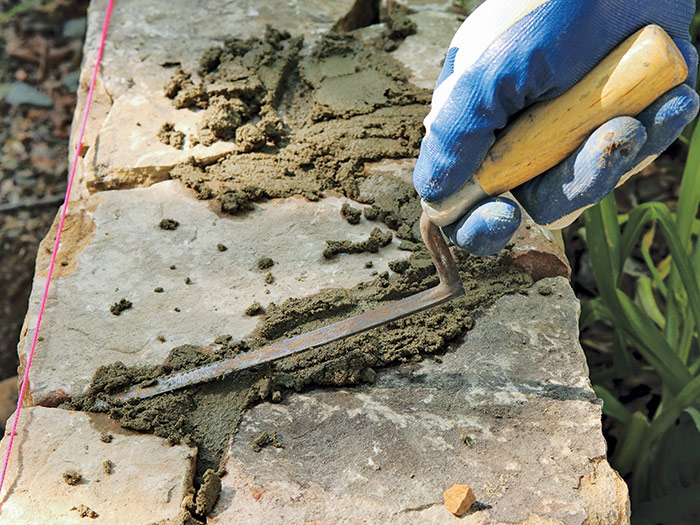
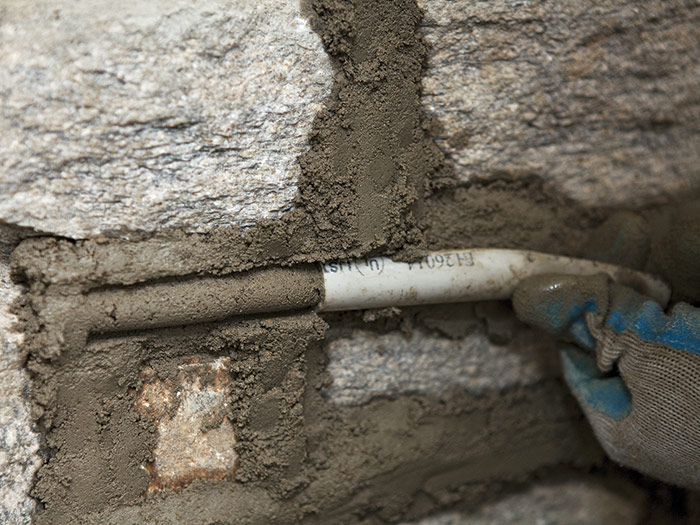
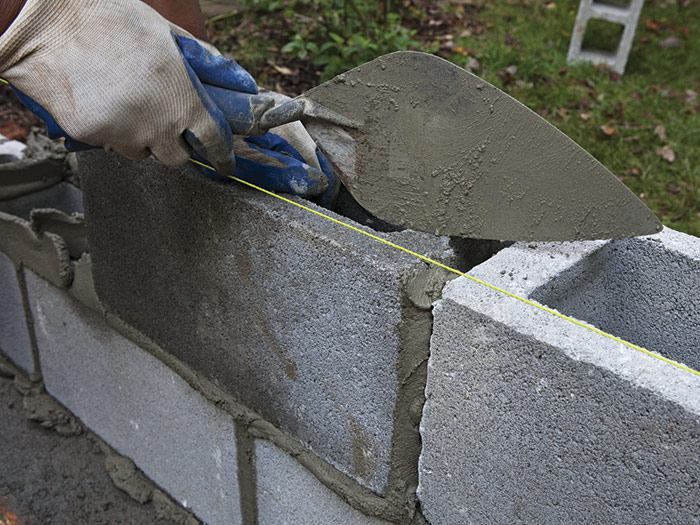
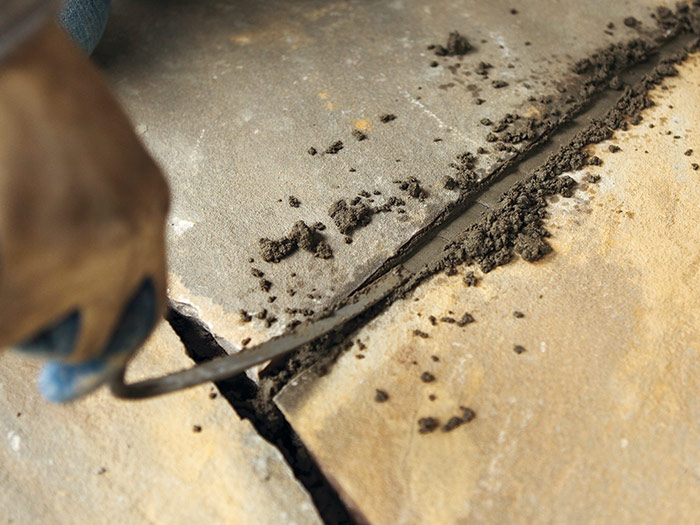
Pick up some mortar with your trowel and press it into the joints with a tuck pointer 2. Press firmly and pack enough so that it rises above the flagstone surface 1⁄4 in. 3. Let the mortar dry slightly and then rake it flush with the top of the flagstones using the blade of your tuck pointer 4. If the mortar leaves stains on the edges of the stones, let it dry for a little longer and then try scraping it off. Do not let the mortar dry for too long or it will be impossible to remove.

3—Pack the joint full until the mortar is slightly mounded above the surface.


4—Scrape away excess mortar once it’s dry enough to come away without staining the stone’s surface.


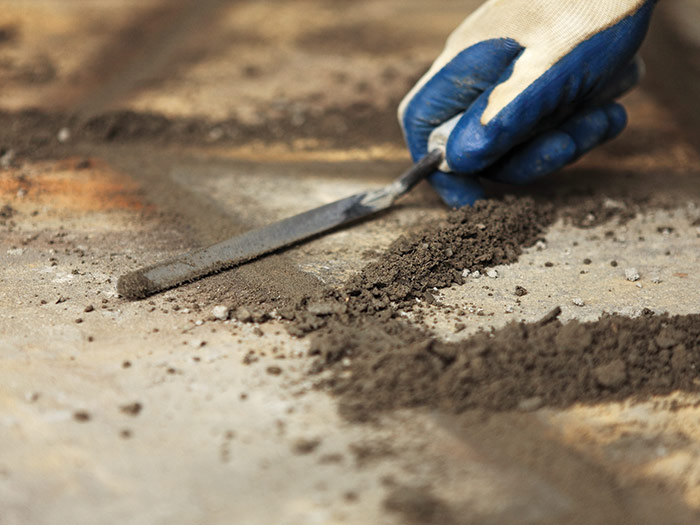
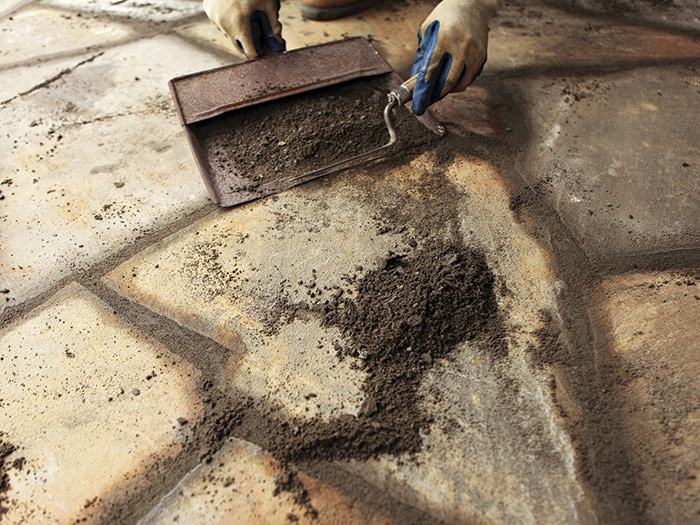
As you work, scrape the excess into piles. Let the joints dry for about 30 minutes and then sweep away the dust and debris 5. If there is staining on the stones, use a nylon brush to scrape it off. Do not put too much pressure on the joints until after they cure for a day or two.

5—Remove mortar dust by sweeping it into a dustpan.


Masonry Complete

Excerpted from Masonry Complete (The Taunton Press, 2012) by Cody Macfie

Available at Amazon.com.

Previous: Masonry Shaping Tools Next: Layout Tools for Masonry Projects

Guide

Foundations and Masonry Work

Chapter

Concrete & Masonry Basics

Sign up for eletters today and get the latest how-to from Fine Homebuilding, plus special offers.

Signing you up...

This site is protected by reCAPTCHA and the Google Privacy Policy and Terms of Service apply.
See all newsletters
See all newsletters

Log in or create an account to post a comment.

Sign up Log in

Become a member and get full access to FineHomebuilding.com

Foundations and Masonry Work

Foundations and Masonry Work

Trusted, comprehensive guidance from the pros for working with concrete and masonry

View Project Guide

View All Project Guides »

Become a member and get unlimited site access, including the Foundations and Masonry Work Project Guide.

Start Free Trial

Concrete & Masonry Basics
  • Choosing & Mixing Concrete
  • Concrete & Masonry Tools & Techniques
Building Foundations
  • Foundation Basics
  • Foundation Footings
  • Insulated Concrete Forms (ICFs)
Waterproofing Foundations
  • Waterproofing Strategies
  • Foundation Drains
Retrofits and Add-ons
Masonry in the Landscape
  • Patios, Walkways, and Driveways
  • Retaining Walls
  • Dry Stone Walls
  • Fire Pits
Brick

Fine Home Building

Newsletter Sign-up

  • Fine Homebuilding

    Home building tips, offers, and expert advice in your inbox.

  • Green Building Advisor

    Building science and energy efficiency advice, plus special offers, in your inbox.

  • Old House Journal

    Repair, renovation, and restoration tips, plus special offers, in your inbox.

Signing you up...

This site is protected by reCAPTCHA and the Google Privacy Policy and Terms of Service apply.
See all newsletters

Follow

  • Fine Homebuilding

    Dig into cutting-edge approaches and decades of proven solutions with total access to our experts and tradespeople.

    Start Free Trial Now
    • Facebook
    • Instagram
    • X
    • LinkedIn
  • GBA Prime

    Get instant access to the latest developments in green building, research, and reports from the field.

    Start Free Trial Now
    • Facebook
    • YouTube
  • Old House Journal

    Learn how to restore, repair, update, and decorate your home.

    Subscribe Now
    • Facebook
    • Instagram
    • X

Membership & Magazine

  • Online Archive
  • Start Free Trial
  • Magazine Subscription
  • Magazine Renewal
  • Gift a Subscription
  • Customer Support
  • Privacy Preferences
  • About
  • Contact
  • Advertise
  • Careers
  • Terms of Use
  • Site Map
  • Do not sell or share my information
  • Privacy Policy
  • Accessibility
  • California Privacy Rights

© 2025 Active Interest Media. All rights reserved.

Fine Homebuilding receives a commission for items purchased through links on this site, including Amazon Associates and other affiliate advertising programs.

  • Home Group
  • Antique Trader
  • Arts & Crafts Homes
  • Bank Note Reporter
  • Cabin Life
  • Cuisine at Home
  • Fine Gardening
  • Fine Woodworking
  • Green Building Advisor
  • Garden Gate
  • Horticulture
  • Keep Craft Alive
  • Log Home Living
  • Military Trader/Vehicles
  • Numismatic News
  • Numismaster
  • Old Cars Weekly
  • Old House Journal
  • Period Homes
  • Popular Woodworking
  • Script
  • ShopNotes
  • Sports Collectors Digest
  • Threads
  • Timber Home Living
  • Traditional Building
  • Woodsmith
  • World Coin News
  • Writer's Digest
Active Interest Media logo
X
X
This is a dialog window which overlays the main content of the page. The modal window is a 'site map' of the most critical areas of the site. Pressing the Escape (ESC) button will close the modal and bring you back to where you were on the page.

Main Menu

  • How-To
  • Design
  • Tools & Materials
  • Video
  • Blogs
  • Forum
  • Project Guides
  • Reader Projects
  • Magazine
  • Members
  • FHB House

Podcasts

  • FHB Podcast
  • ProTalk

Webinars

  • Upcoming and On-Demand

Podcasts

  • FHB Podcast
  • ProTalk

Webinars

  • Upcoming and On-Demand

Popular Topics

  • Kitchens
  • Business
  • Bedrooms
  • Roofs
  • Architecture and Design
  • Green Building
  • Decks
  • Framing
  • Safety
  • Remodeling
  • Bathrooms
  • Windows
  • Tilework
  • Ceilings
  • HVAC

Magazine

  • Current Issue
  • Past Issues
  • Magazine Index
  • Subscribe
  • Online Archive
  • Author Guidelines

All Access

  • Member Home
  • Start Free Trial
  • Gift Membership

Online Learning

  • Courses
  • Project Guides
  • Reader Projects
  • Podcast

More

  • FHB Ambassadors
  • FHB House
  • Customer Support

Account

  • Log In
  • Join

Newsletter

Get home building tips, offers, and expert advice in your inbox

Signing you up...

This site is protected by reCAPTCHA and the Google Privacy Policy and Terms of Service apply.
See all newsletters
See all newsletters

Follow

  • X
  • YouTube
  • instagram
  • facebook
  • pinterest
  • Tiktok

Join All Access

Become a member and get instant access to thousands of videos, how-tos, tool reviews, and design features.

Start Your Free Trial

Subscribe

FHB Magazine

Start your subscription today and save up to 70%

Subscribe

This is your last free article.

Don't miss another expert tip or technique from building pros. Start your free trial today.

Start your FREE trial

Already a member? Log in

We hope you’ve enjoyed your free articles. To keep reading, become a member today.

Get complete site access to expert advice, how-to videos, Code Check, and more, plus the print magazine.

Start your FREE trial

Already a member? Log in

Privacy Policy Update

We use cookies, pixels, script and other tracking technologies to analyze and improve our service, to improve and personalize content, and for advertising to you. We also share information about your use of our site with third-party social media, advertising and analytics partners. You can view our Privacy Policy here and our Terms of Use here.

Cookies

Analytics

These cookies help us track site metrics to improve our sites and provide a better user experience.

Advertising/Social Media

These cookies are used to serve advertisements aligned with your interests.

Essential

These cookies are required to provide basic functions like page navigation and access to secure areas of the website.

Delete My Data

Delete all cookies and associated data