FHB Logo Facebook LinkedIn Email Pinterest Twitter X Instagram Tiktok YouTube Plus Icon Close Icon Navigation Search Icon Navigation Search Icon Arrow Down Icon Video Guide Icon Article Guide Icon Modal Close Icon Guide Search Icon Skip to content
Subscribe
Log In
  • How-To
  • Design
  • Tools & Materials
  • Restoration
  • Videos
  • Blogs
  • Forum
  • Magazine
  • Members
  • FHB House
  • Podcast
Log In

Fine Homebuilding Project Guides

Foundations and Masonry Work

Guide Home
  • Concrete & Masonry Basics
  • Building Foundations
  • Waterproofing Foundations
  • Retrofits and Add-ons
  • Masonry in the Landscape
  • Brick
How-To

Layout Tools for Masonry Projects

Find out which tools are essential for keeping walls and hardscaping plumb, level, and square.

By Cody Macfie
  • X
  • facebook
  • linkedin
  • pinterest
  • email
  • add to favorites Log in or Sign up to save your favorite articles

Layout tools are a mason’s secret weapon. They are the tools that make the job easier and allow the mason to deliver perfect, accurate work as opposed to mediocre work. Sometimes these tools cost a little extra, but the time and money spent to make the work precise will pay dividends in the end.

Generally, a layout tool is anything that helps you decide where to put the stones, brick, or blocks according to the plan. Measuring and marking tools include tape measures and marking sprays, masonry twine, garden hoses, and plumb bobs. Levels, lasers, and transits are also important layout tools.

Good tools improve your work when they are used correctly. Here, the author checks a retaining wall for the correct batter.


Measuring and marking tools

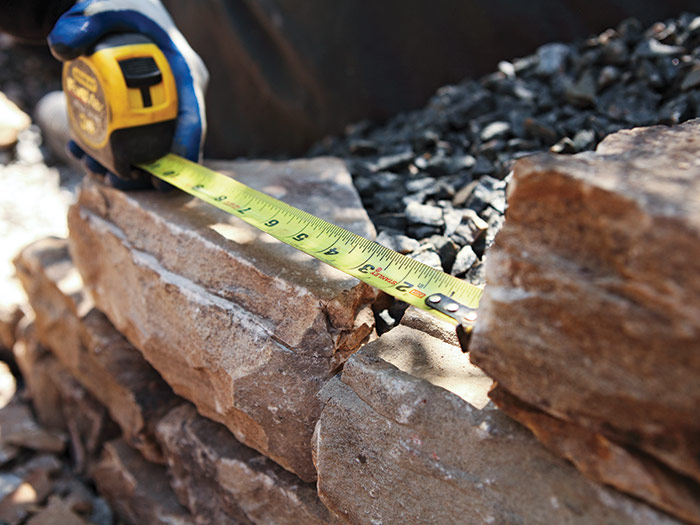
A quality tape measure is essential. Masonry work is hard on tape measures, so it’s worth spending a little extra to buy one that will last. You’ll use a tape measure for all the phases of masonry work, from planning and layout to setting capstones.

A durable tape measure may cost twice as much as a lesser brand, but it will last three times as long.


There are other measuring tools that are not essential but if you are planning on doing a lot of masonry work, you might want to invest in them or at least learn how they work. A measuring wheel (or walking tape) measures as you walk along rolling its wheel. This tool is great for measuring long walls and long brick walkways to determine how much material you will need. For more accurate measurements of long walls or walkways, an open-reel tape works great and is readily available in 50-ft. and 100-ft. lengths. A brick mason ruler is specifically designed to measure brick coursing in increments relative to brick sizes.

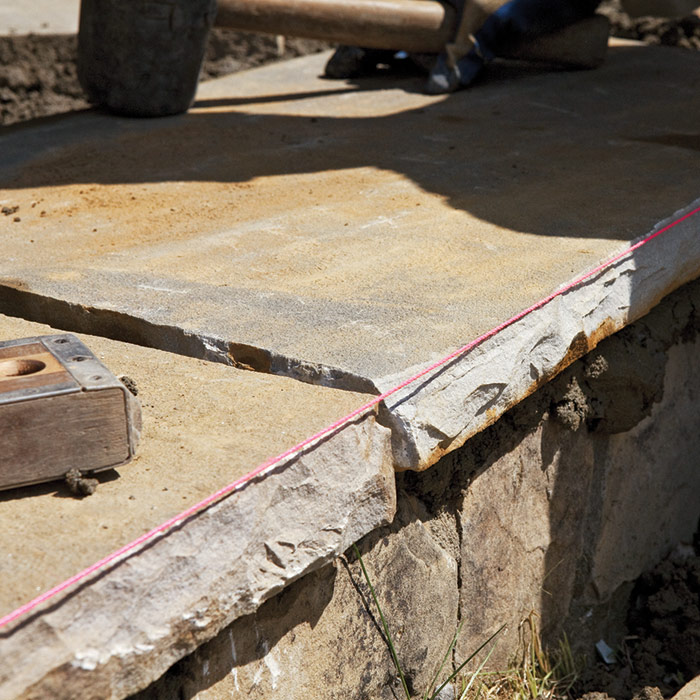
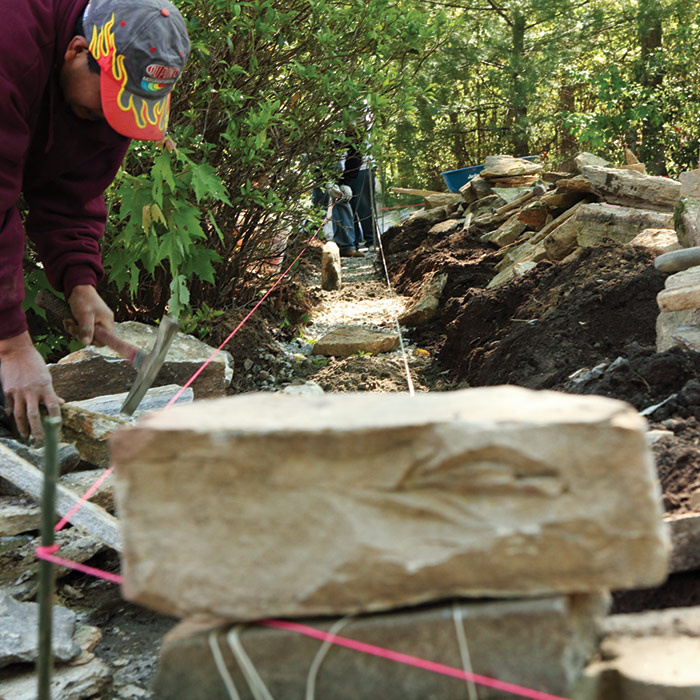
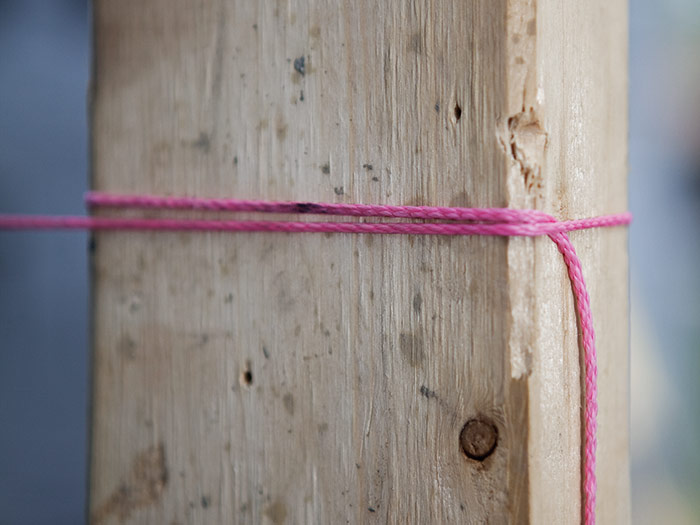
Stringlines are a necessity when laying stone corners. Nylon twine works particularly well because it allows you to stretch it tightly in a straight line. The twine is also easy to tie off at the ends. When laying stone to a stringline, stay slightly to the inside of the twine so that it stays straight. Stringlines are also handy when laying courses of block and brick, establishing wall heights, and using batter boards (see “Seven Ways to Use Stringlines” below).

When pulled tautly, nylon mason twine is as straight as the most expensive level and can be used to align stone in almost any situation.


Set stones as close to the stringline as possible—but without touching it. Otherwise, your reference line will be compromised.


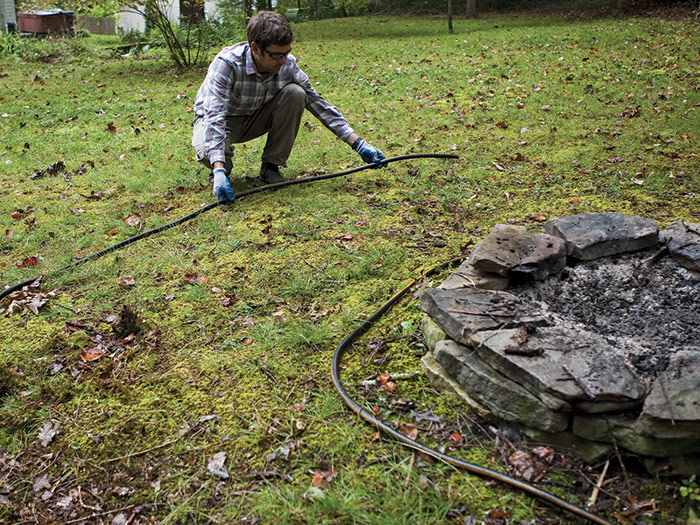
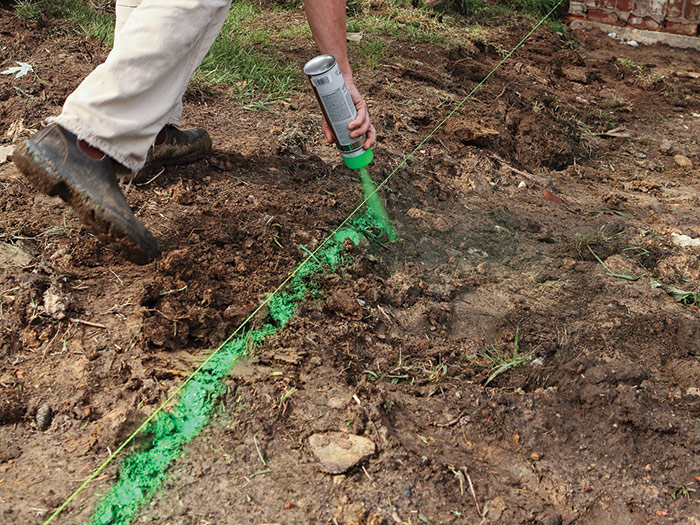
Because of its flexibility, a garden hose is a perfect tool for laying out a retaining wall or benches around a fire pit. A rope or even a row of bricks will work almost as well. Once a layout is determined, use marking spray to mark it and remove the garden hose or whatever else was used to mark the outlines.
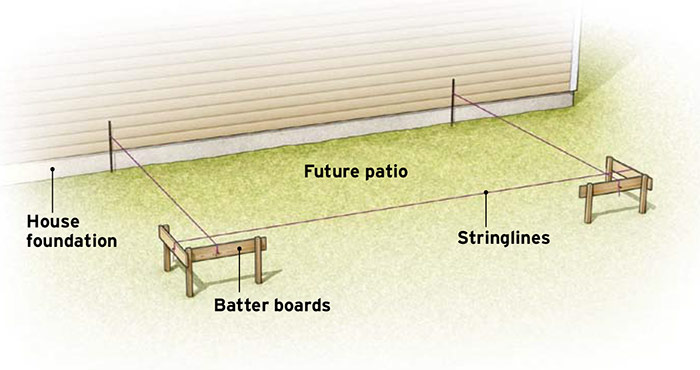
A common garden hose is a useful tool for establishing the contours of a project layout.


The nozzle of a marking spray can is designed to allow you to point the can straight down while you spray.


Using Batter Boards

Batter boards

Batter boards are horizontal boards nailed to posts placed just outside the corners of a project (which might be the construction of a new home or the building of a small patio or deck). They provide an easy way to establish the stringlines used for layout. For example, batter boards and stringlines can establish the desired height of a retaining wall, the location of a footing, or the outline for an excavation. Once stringlines have been established, batter boards are marked to preserve the string locations. The strings can be removed during excavation and construction but replaced later to continue serving as a reference.


Levels, lasers, and transits

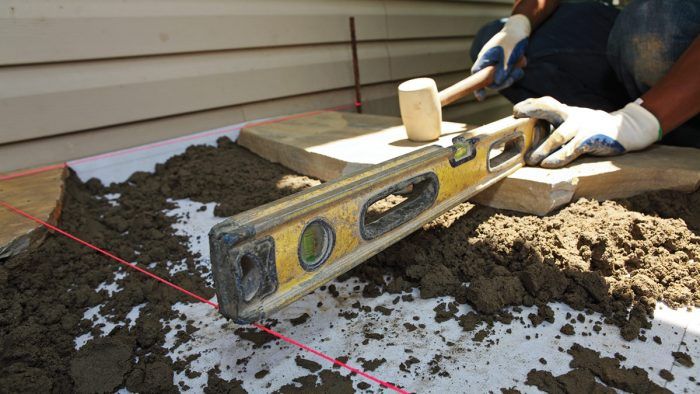
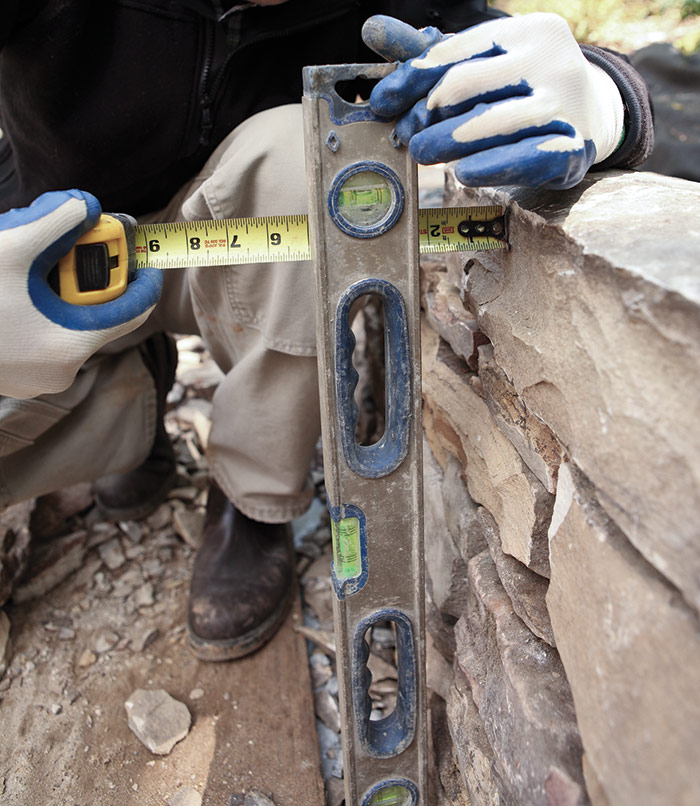
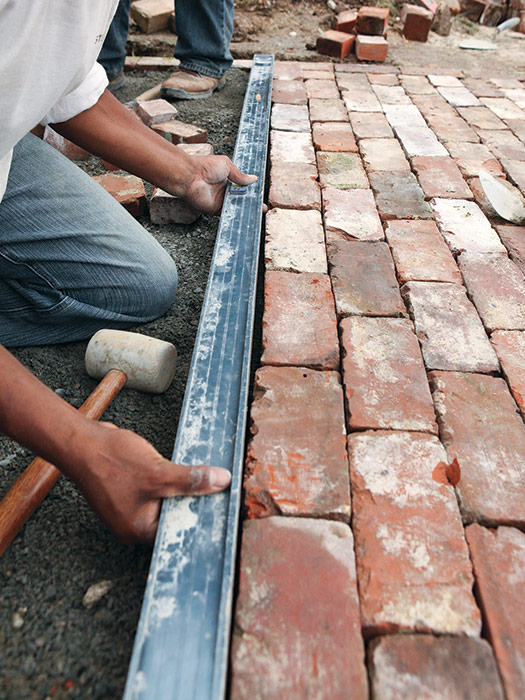
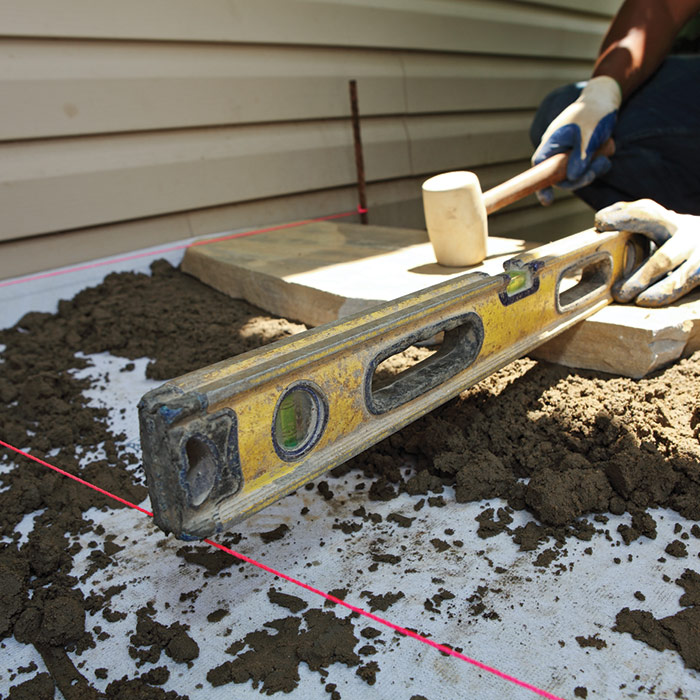
Levels are essential tools for masonry and come in various sizes, from 4-in. line to mason levels 6 ft. or longer. Whether you are laying block, brick, or stone, you need to make sure everything is level, including caps, footings, and coursework. Use a level often because laying one stone out of level on a stone wall can visually throw off the entire pattern. It can also set the stage for many unlevel stones to come.

I keep a 10-in. torpedo level with me to check my work in tight spots. However, torpedo levels allow you to check only one unit at a time, so keep a 4-ft. level close by for checking several stones at once.

Torpedo levels are handy in tight spaces, so keep one in your pocket. For greater accuracy, however, use the longest level the space allows.


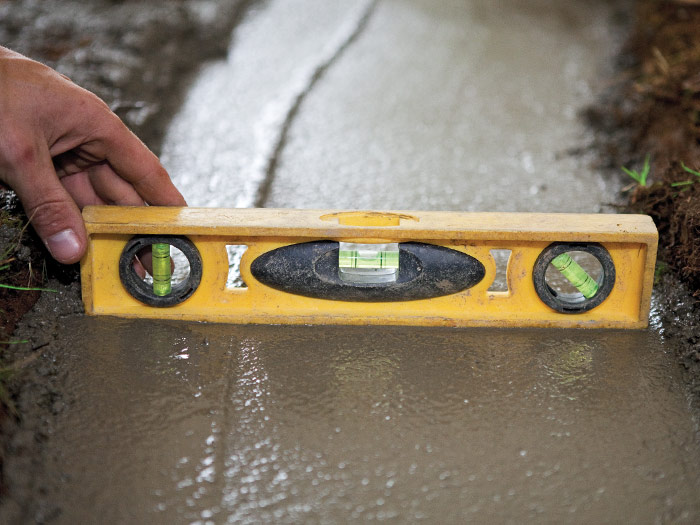
A 4-ft. level is standard and the size I use most often. It is also great for determining the pitch of a concrete slab before laying flagstone. A 6-ft. level is handy for projects such as patios and walkways, where it’s necessary to align stone tops and edges. It can also be used to flatten bedding gravel and align brick coursework.

A 4-ft. level is the most versatile leveling tool for masonry. It’s long enough to level courses of brick, block, and stone, yet short enough to level a narrow walkway or patio.


A 6-ft. level is as useful as a straightedge as it is a level. Its one drawback is that it is prone to getting bent, especially on a rough-and-tumble masonry jobsite.


Levels are also made of different materials, including wood, plastic, and aluminum. I have a 4-ft. wooden level that I use all the time, but it requires an occasional application of oil to preserve the wood. A wood level is not more accurate than an aluminum level per se, but I like the aesthetic of wooden levels; that, for me, is good reason to pay more to own one. For masonry, most levels are accurate enough but they will take considerable abuse, so it’s wise to buy a sturdy level. Many top-of-the-line levels come with protective cases.  Whatever level you buy, be sure to wipe off the cement frequently and avoid hitting it harder than a tap or dropping it on the ground.

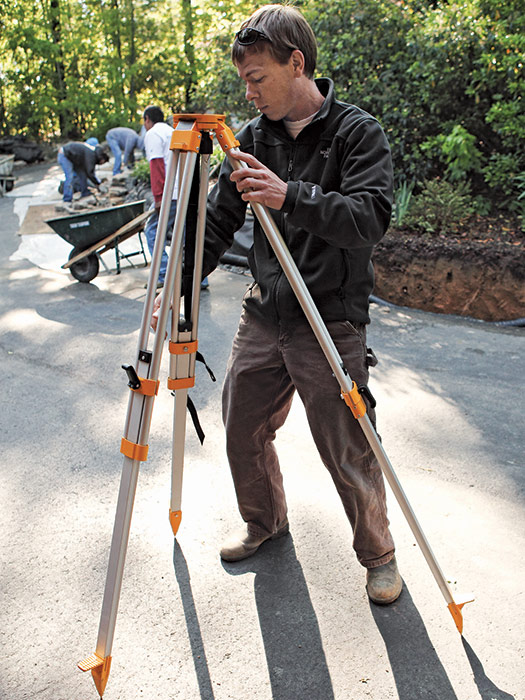
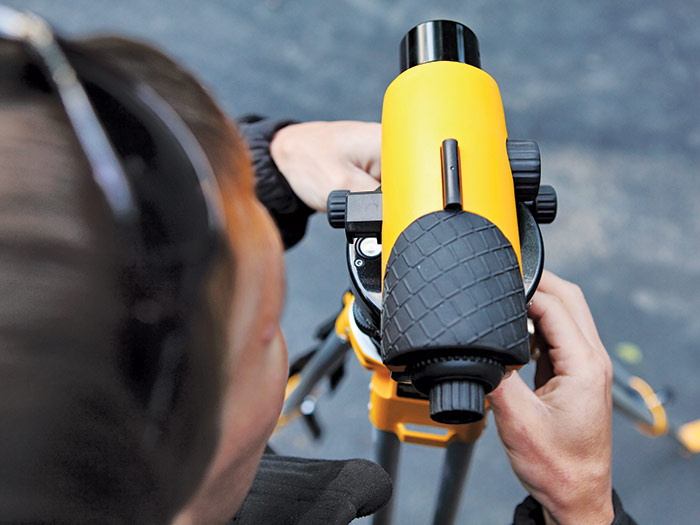
Laser levels and transits are primarily used by surveyors and site preparers, but they come in handy for small masonry projects, too. A laser level sits on a tripod and can spin 360 degrees, projecting a red laser beam across a horizontal plane. A transit also mounts on a tripod, but instead of casting a laser beam, you sight the elevation reference you need. Both will help you determine distant elevation changes. We primarily use a laser level to determine elevation changes for retaining walls and patios.

A transit sits atop a tripod and has a lens through which to sight a reference point; a laser level has no lens but emits a light beam.
  and has a lens through which to sight a reference point; a laser level has no lens but emits a light beam.


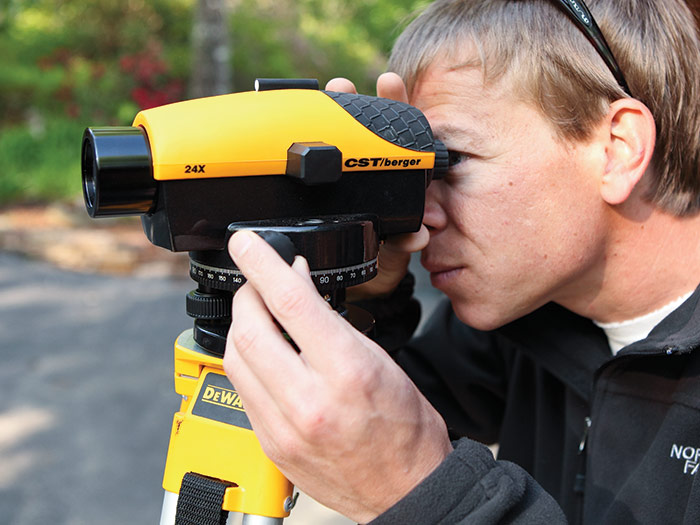
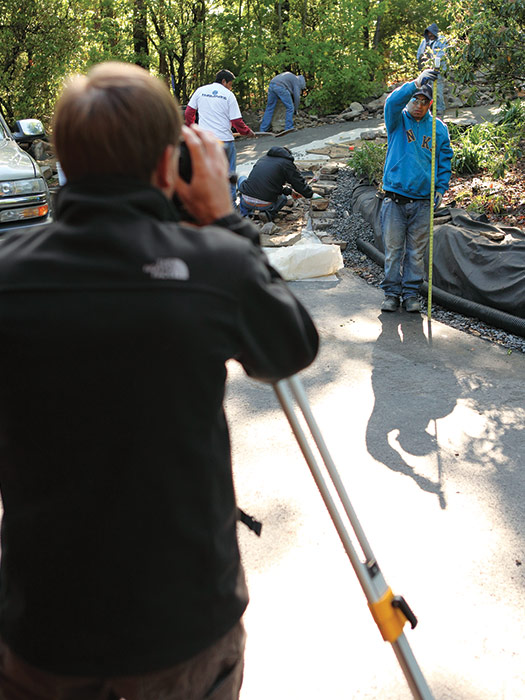
Using a transit when installing a drain line

When installing a drain line, the easiest and most accurate way to make sure you have the slope you need for drainage is to use a transit. First, set up the tripod outside the work zone so you can view the entire project when panning across the area 1. Adjust the tripod to the desired height and adjust the transit on the tripod to a level reading 2; failing to do so will compromise your readings. Have a helper hold an extended tape measure on the slope at the drain-line location. You will be able to read the tape measure through the lens 3. Move the tape to several locations. The longest (highest) reading will indicate the lowest spot.

1—Set the tripod on a stable surface outside the work zone.


2—Level the transit on the tripod head.


3—Focus the lens, as you would a telescope, on a tape measure or measuring stick. Read the height at the cross hairs.


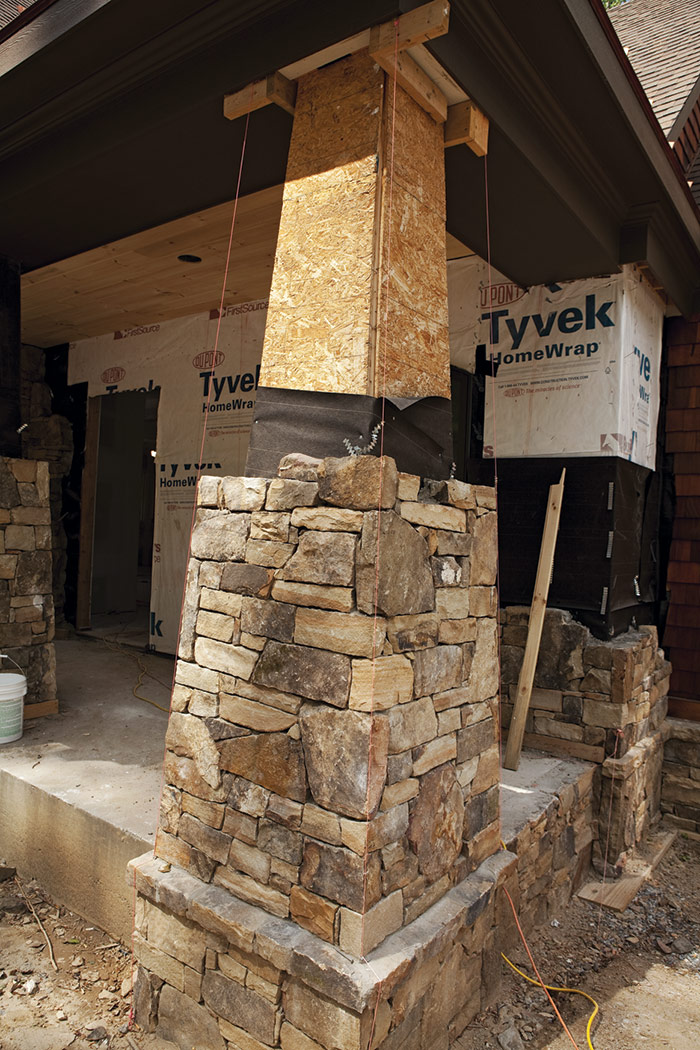
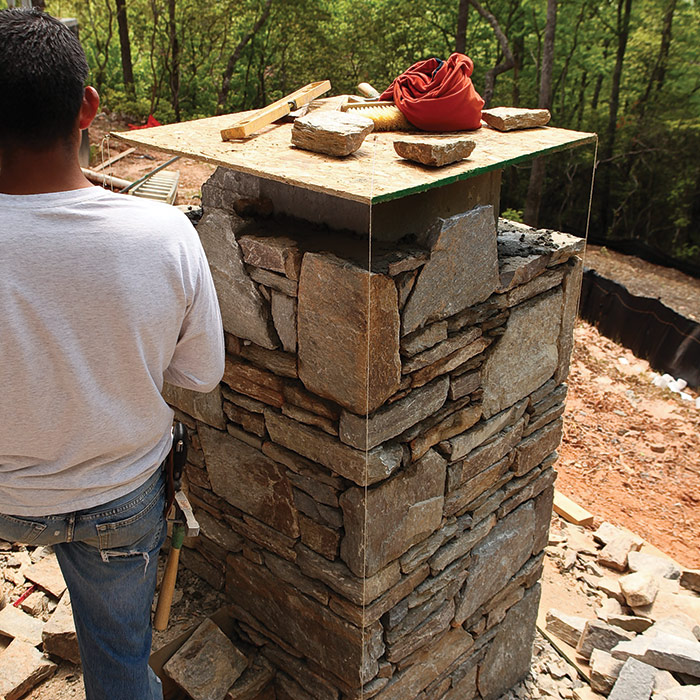
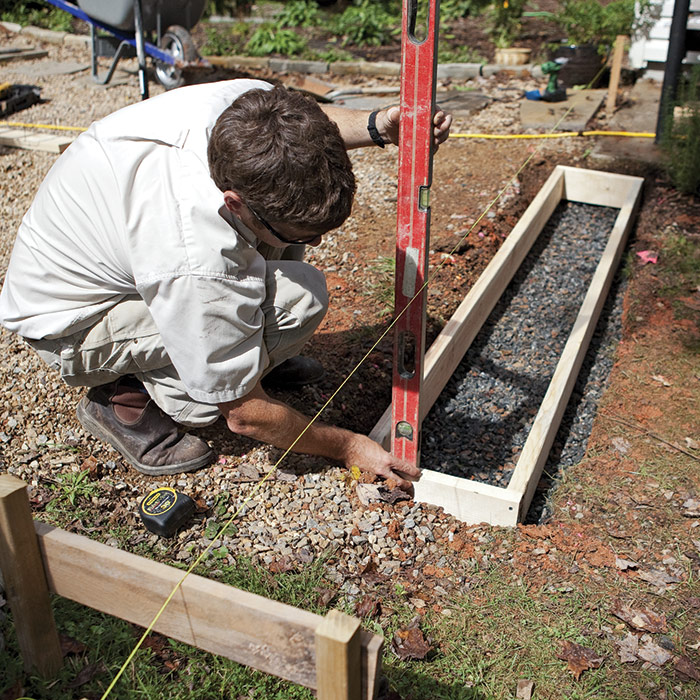
Building a Tapered Column

Building-a-Tapered-Column

Building a tapered column is almost as easy as building a plumb column. For the column shown here, the taper was 4 in. from the bottom to the top as measured from the faces. When setting your stringline, mark the perimeter of the column on the ceiling (or as in this case, on the framing). At each corner, drop a plumb bob to the floor and mark the point. Connect the marks to form a square. Then measure out (4 in. in this case) to mark the column’s base. Run stringlines from the perimeter corners at the ceiling to the corners of the base.
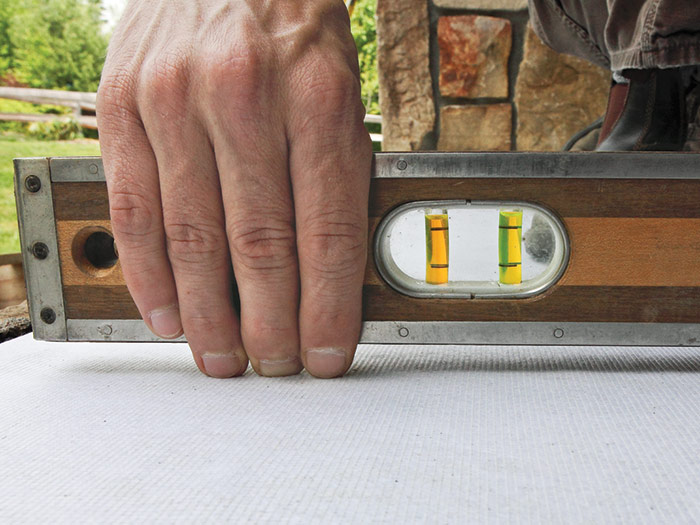
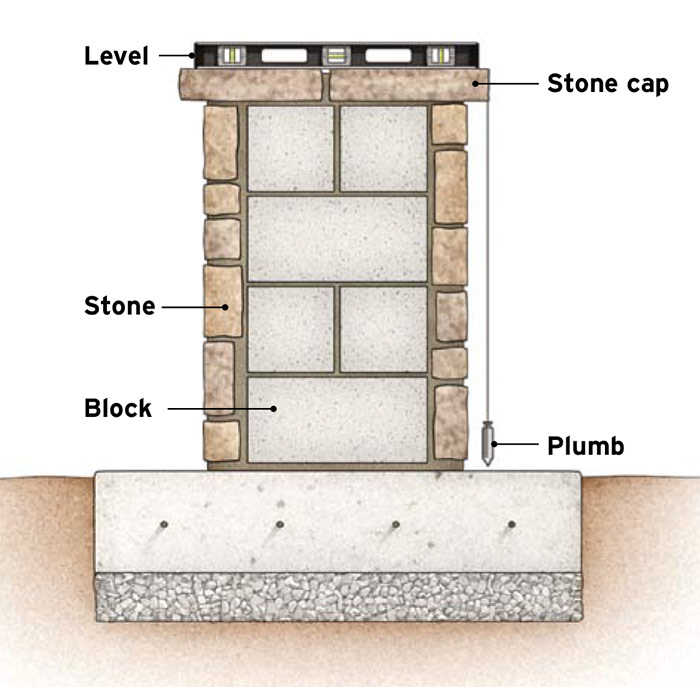


Plumb vs. Level

Plumb vs. Level

Plumb means exactly vertical in two planes. A plumb bob, used by masons and carpenters to establish a plumb line, is a pointed weight attached to a string.

Level can refer to either a horizontal line, such as the leading edge of a wall, or to a two-dimensional horizontal surface. In the case of the latter, the surface is level only when it is perfectly horizontal in two directions. A level is a tool that consists of a straightedge in which there is an encased, liquid-filled tube that contains an air bubble. When a level rests on a surface, the surface is said to be level only when the bubble is in the center of the tube. Depending upon the orientation of the tube, the level may be used to check for levelness or for verticalness. By checking a post or wall for vertical on at least two faces, a level may be used to check for plumb.


Seven Ways to Use Stringlines

Setting and using stringlines is integral to masonry. The more comfortable you are using stringlines, the faster and better you will work. On the job, stringlines directly reference a stone’s edge as when setting bricks, columns, and patio edge stones. Stringlines can also be used as general reference to set stone elevations and wall thicknesses, and to form locations.

1—Set brick and block coursework level and to the correct height.


2—Build plumb column corners. For best results, accurately cut and fasten a plywood top to which stringlines can be attached.


3—Align the level edge of stair treads (or the edge of a patio).


4—Create a grid from which you can set the height of patio stones.


5—Establish the location and dimensions of a wall. Even the roughest field wall will look better set to a stringline.


6—Tie to batter boards to provide guides throughout the construction process.


7—Transform twine and a line level into a long level. For best results, place the line level in the middle of the span.


The easiest way to secure the stringline is to pass the loose end under the taut line.


Masonry Complete

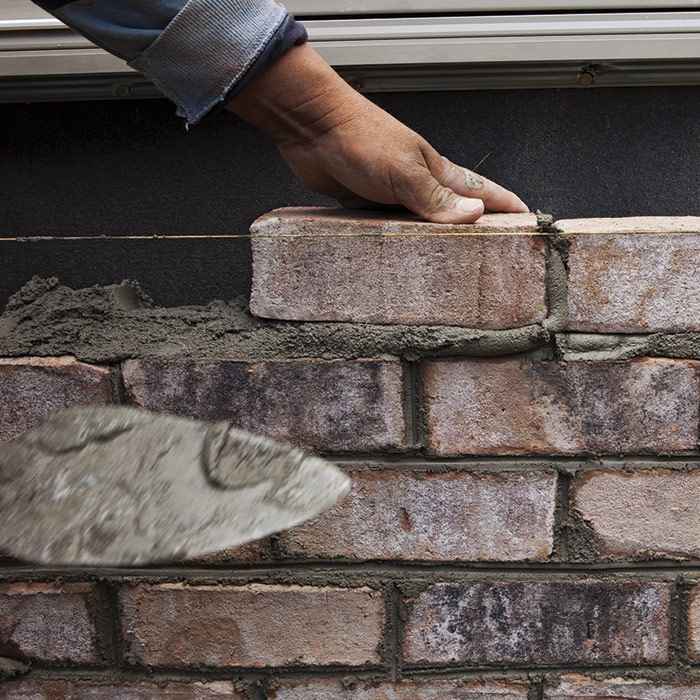
Excerpted from Masonry Complete (The Taunton Press, 2012) by Cody Macfie

Available at Amazon.com.

Previous: Choosing and Using Masonry Trowels Next: Cutting Tools for Stone, Brick, and Concrete

Guide

Foundations and Masonry Work

Chapter

Concrete & Masonry Basics

Sign up for eletters today and get the latest how-to from Fine Homebuilding, plus special offers.

Signing you up...

This site is protected by reCAPTCHA and the Google Privacy Policy and Terms of Service apply.
See all newsletters
See all newsletters

Log in or create an account to post a comment.

Sign up Log in

Become a member and get full access to FineHomebuilding.com

Foundations and Masonry Work

Foundations and Masonry Work

Trusted, comprehensive guidance from the pros for working with concrete and masonry

View Project Guide

View All Project Guides »

Become a member and get unlimited site access, including the Foundations and Masonry Work Project Guide.

Start Free Trial

Concrete & Masonry Basics
  • Choosing & Mixing Concrete
  • Concrete & Masonry Tools & Techniques
Building Foundations
  • Foundation Basics
  • Foundation Footings
  • Insulated Concrete Forms (ICFs)
Waterproofing Foundations
  • Waterproofing Strategies
  • Foundation Drains
Retrofits and Add-ons
Masonry in the Landscape
  • Patios, Walkways, and Driveways
  • Retaining Walls
  • Dry Stone Walls
  • Fire Pits
Brick

Fine Home Building

Newsletter Sign-up

  • Fine Homebuilding

    Home building tips, offers, and expert advice in your inbox.

  • Green Building Advisor

    Building science and energy efficiency advice, plus special offers, in your inbox.

  • Old House Journal

    Repair, renovation, and restoration tips, plus special offers, in your inbox.

Signing you up...

This site is protected by reCAPTCHA and the Google Privacy Policy and Terms of Service apply.
See all newsletters

Follow

  • Fine Homebuilding

    Dig into cutting-edge approaches and decades of proven solutions with total access to our experts and tradespeople.

    Start Free Trial Now
    • Facebook
    • Instagram
    • X
    • LinkedIn
  • GBA Prime

    Get instant access to the latest developments in green building, research, and reports from the field.

    Start Free Trial Now
    • Facebook
    • YouTube
  • Old House Journal

    Learn how to restore, repair, update, and decorate your home.

    Subscribe Now
    • Facebook
    • Instagram
    • X

Membership & Magazine

  • Online Archive
  • Start Free Trial
  • Magazine Subscription
  • Magazine Renewal
  • Gift a Subscription
  • Customer Support
  • Privacy Preferences
  • About
  • Contact
  • Advertise
  • Careers
  • Terms of Use
  • Site Map
  • Do not sell or share my information
  • Privacy Policy
  • Accessibility
  • California Privacy Rights

© 2025 Active Interest Media. All rights reserved.

Fine Homebuilding receives a commission for items purchased through links on this site, including Amazon Associates and other affiliate advertising programs.

  • Home Group
  • Antique Trader
  • Arts & Crafts Homes
  • Bank Note Reporter
  • Cabin Life
  • Cuisine at Home
  • Fine Gardening
  • Fine Woodworking
  • Green Building Advisor
  • Garden Gate
  • Horticulture
  • Keep Craft Alive
  • Log Home Living
  • Military Trader/Vehicles
  • Numismatic News
  • Numismaster
  • Old Cars Weekly
  • Old House Journal
  • Period Homes
  • Popular Woodworking
  • Script
  • ShopNotes
  • Sports Collectors Digest
  • Threads
  • Timber Home Living
  • Traditional Building
  • Woodsmith
  • World Coin News
  • Writer's Digest
Active Interest Media logo
X
X
This is a dialog window which overlays the main content of the page. The modal window is a 'site map' of the most critical areas of the site. Pressing the Escape (ESC) button will close the modal and bring you back to where you were on the page.

Main Menu

  • How-To
  • Design
  • Tools & Materials
  • Video
  • Blogs
  • Forum
  • Project Guides
  • Reader Projects
  • Magazine
  • Members
  • FHB House

Podcasts

  • FHB Podcast
  • ProTalk

Webinars

  • Upcoming and On-Demand

Podcasts

  • FHB Podcast
  • ProTalk

Webinars

  • Upcoming and On-Demand

Popular Topics

  • Kitchens
  • Business
  • Bedrooms
  • Roofs
  • Architecture and Design
  • Green Building
  • Decks
  • Framing
  • Safety
  • Remodeling
  • Bathrooms
  • Windows
  • Tilework
  • Ceilings
  • HVAC

Magazine

  • Current Issue
  • Past Issues
  • Magazine Index
  • Subscribe
  • Online Archive
  • Author Guidelines

All Access

  • Member Home
  • Start Free Trial
  • Gift Membership

Online Learning

  • Courses
  • Project Guides
  • Reader Projects
  • Podcast

More

  • FHB Ambassadors
  • FHB House
  • Customer Support

Account

  • Log In
  • Join

Newsletter

Get home building tips, offers, and expert advice in your inbox

Signing you up...

This site is protected by reCAPTCHA and the Google Privacy Policy and Terms of Service apply.
See all newsletters
See all newsletters

Follow

  • X
  • YouTube
  • instagram
  • facebook
  • pinterest
  • Tiktok

Join All Access

Become a member and get instant access to thousands of videos, how-tos, tool reviews, and design features.

Start Your Free Trial

Subscribe

FHB Magazine

Start your subscription today and save up to 70%

Subscribe

We hope you’ve enjoyed your free articles. To keep reading, become a member today.

Get complete site access to expert advice, how-to videos, Code Check, and more, plus the print magazine.

Start your FREE trial

Already a member? Log in

Privacy Policy Update

We use cookies, pixels, script and other tracking technologies to analyze and improve our service, to improve and personalize content, and for advertising to you. We also share information about your use of our site with third-party social media, advertising and analytics partners. You can view our Privacy Policy here and our Terms of Use here.

Cookies

Analytics

These cookies help us track site metrics to improve our sites and provide a better user experience.

Advertising/Social Media

These cookies are used to serve advertisements aligned with your interests.

Essential

These cookies are required to provide basic functions like page navigation and access to secure areas of the website.

Delete My Data

Delete all cookies and associated data