Placing a Small Concrete Slab
Learn how to excavate, form, pour, and hand-finish a small slab.
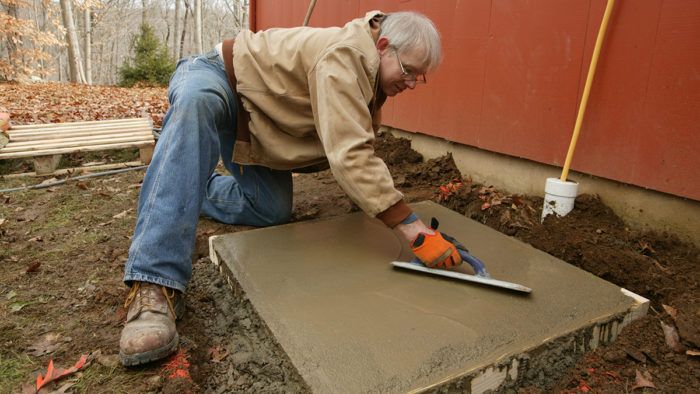
Although the amount of concrete that’s required is small, a landing for a deck stairway or, in this case, a pad for a propane tank requires nearly the same forming and finishing techniques as a full-size slab. First and foremost is subgrade preparation. Get that wrong, and the slab will crack. In most cases, slabs shouldn’t be placed next to new buildings until the backfill around them has settled for several years.
After digging out the area where the slab will be located, compact the soil. When prepping a large area—for a patio, for example, or a larger concrete slab—renting a mechanical compactor is a good idea. That would be overkill on a small area like this. A simple tamper is all you’ll need. Just make sure the area is well packed and there’s no loose soil.
Use a gravel base
One step that’s called for but rarely done on small jobs is to place gravel between the slab and the subgrade. This step is often skipped, but there are two reasons to use gravel even on a small concrete pad. First, concrete moves because of thermal expansion and contraction. Restricting this movement will lead to cracks in the concrete. A gravel base allows the slab to move freely. Second, slabs need a flat base to ensure uniform thickness, and gravel is easier to grade than many soils.
Choosing concrete
For a slab that’s 40 sq. ft. or more (about 1/2 cu. yd. of concrete for a typical 4-in.-thick slab), it’s easiest to order truck-mixed concrete. This 3-ft.-sq. slab was small enough that mixing bagged concrete by hand made sense. At 9 sq. ft. and 4 in. thick, the project called for 3 cu. ft. of concrete. An 80-lb. bag of concrete mix makes 3/5 cu. ft., so this slab took five bags.
I used a crack-control concrete, which includes reinforcing fibers. The slab was small enough that no steel reinforcement was needed, but that little extra strength from the fibers only cost me $5. Larger slabs, say 5×5 and up, will benefit from reinforcement with rebar or wire mesh to control cracking.
Concrete needs moisture to cure. After finishing the slab, cover it with plastic and keep it damp for at least a day. A week is better, and 28 days ensures the best cure.
1) Prepare the subgrade. Dig 6 in. beyond where you want the slab edges and 8 in. deeper than where you want the top of the slab. Make sure the subgrade pitches away from the building, and tamp down loose soil.
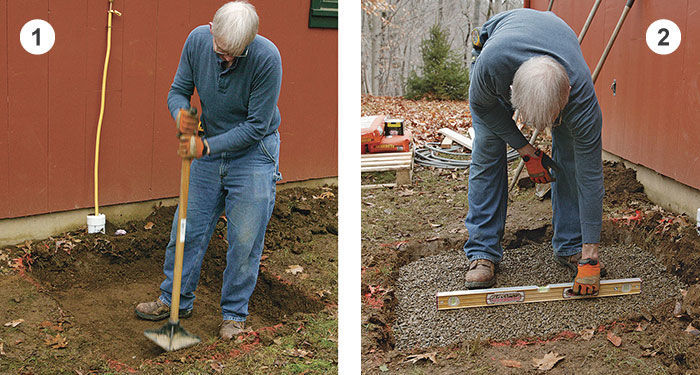
2) Grade the gravel. Fill the excavation with 4 in. of gravel. Rake it flat, and use a level to make sure it’s pitched about 1/4 in. per ft. so that the slab, which will parallel the base, drains water.
3) Make and set the form. Most 4-in. slabs are actually the 3-1/2-in. depth of standard 2x4s. Nail the corners together, and place the form on the graded gravel, making sure it doesn’t rock. Drive 12-in. lengths of rebar to just below the top of the form to keep it from moving.
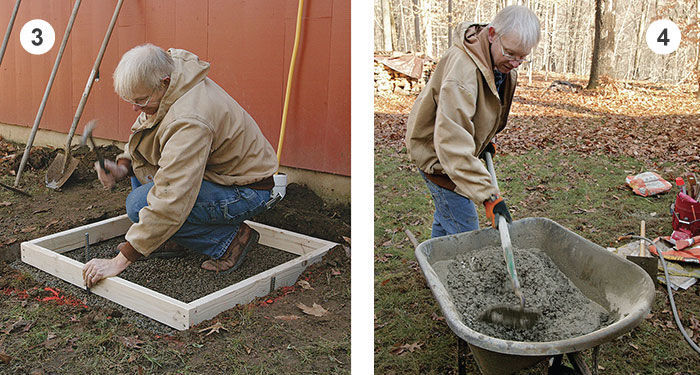
4) Mix the concrete. Dump two 80-lb. bags of mix in a wheelbarrow for each batch. Add 3 qt. of water per bag, and mix thoroughly with a hoe. Add small amounts of additional water if necessary to bring the concrete to a consistency that’s about the same as thick cake batter.
5) Settle the concrete. After dumping the mixed concrete in the form, jab into it all along the edges with a shovel. This helps to ensure that the mix fills the form without leaving voids.
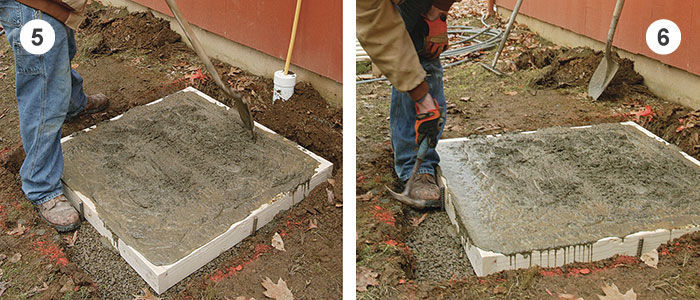
6) Tap the sides of the form. Lightly hammer the form all around the slab until you see bubbles rising from the concrete. This step makes for a smoother slab edge that won’t collect water, which can freeze and spall the concrete.
7) Screed the slab. Flatten the concrete using a straight 2×4 that’s about 1 ft. longer than the form width. Move the board forward with a back-and-forth sawing motion while keeping it on the form.
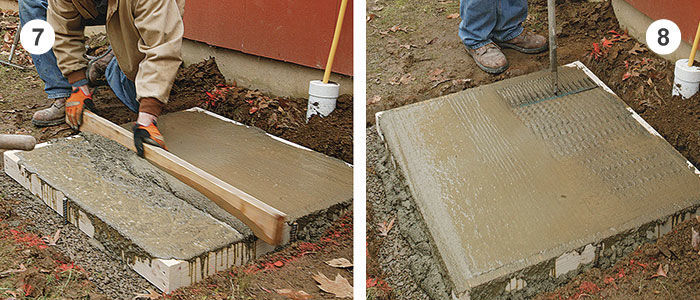
8) Tamp the surface with a rake. Gently tamp the entire surface of the slab. The rake pushes down the gravel that’s part of the concrete mix, and brings up a mixture of cement and sand that’s easier to smooth.
9) Smooth the rake marks with a mag float. Keep the leading edge of the float up. When the surface water dissipates, float the slab again. This is the final finish for exterior slabs. For a smooth interior slab, work it again with a steel float when the surface begins to lose its wet sheen.
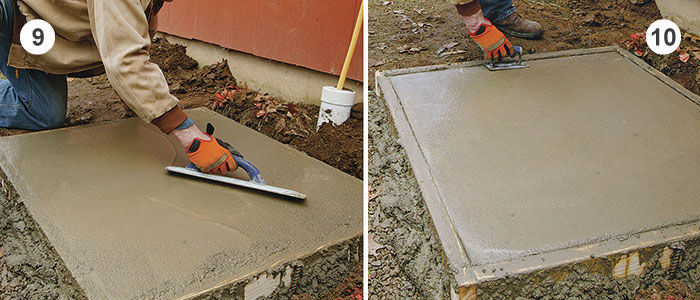
10) Round the corners. This leaves smooth, friendly edges that are less likely to chip. Use an edger once after each mag floating; on interior slabs with exposed edges, use it after the steel float. After the slab hardens for a day or more, pry the joints apart and remove the form.
Concrete tools
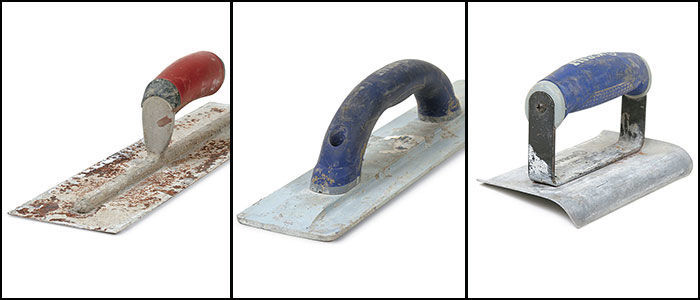
Steel float – A finishing tool that leaves a smooth, compacted surface that repels water but that also can be slippery when wet.
Mag float – Used in the initial tooling to bring up a creamy mix that’s easy to finish. As a final finishing tool, it leaves a coarse, slip-resistant surface that’s good for exterior slabs.
Edger – Rounds over the exposed edges of slabs, leaving a surface that’s more resistant to chipping than a simple square edge would be.
—Andy Engel is a senior editor.
Photos by Patrick McCombe, except where noted.
Tool photos: Rodney Diaz.
From Fine Homebuilding #258
More on working with concrete:
Mastered in a Minute: Concrete Slabs — Here’s a video version of this article with a discussion of how to create a base, hand-mixing concrete, and placing and finishing the slab.
How to Finish a Concrete Patio Slab — Concrete can be finished in one of several ways. Here, Mike Guertin discusses several approaches, including brushing, troweling, and edging.
Reducing the Risk of Cracks in Concrete Slabs — Whether the slab is free-standing or tied into an existing structure, taking a few precautions will help prevent problems later.
Pouring Concrete Slabs — This is how a truckload of wet concrete is transformed into a smooth, flat slab. Less than ideal weather coming up? There are ways to handle that, too.
Fixing Concrete Cracks: Basement Slab Repair — Cracks in concrete basement slabs aren’t uncommon. Matt Risinger explains how to fix cosmetic defects with a two-part filler called RS-88.


View Comments
Use a vibrating tool (i.e. palm sander) without any sand paper on it to vibrate the edge of the form. You sort of let the 'edge' of the sander (vs. the face) rattle along the form. You'll get tons of bubbles that come up and leaves you with a nice clean edge.