Cutting with a Worm-Drive Saw
The secret to making accurate cuts while preventing kickback is letting the saw do half the work.
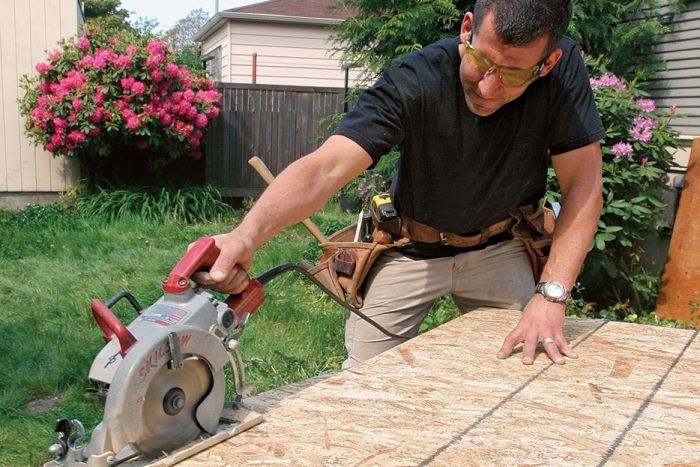
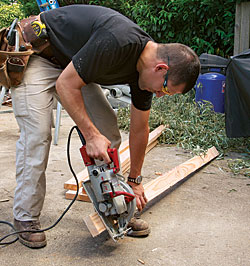
Because I live and work on the West Coast, I have never used anything but a worm-drive circular saw for framing. Early on, I learned that a worm-drive saw is much easier to handle if I let the saw do half the work. That means cutting on a decline and allowing the saw’s weight to help push the blade through the cut. This position also can protect me from kickback. The saw’s weight is already running downhill, and my arm and body weight are behind the saw to prevent it from coming back in my direction.
The elongated body of the worm drive enables me to use both hands comfortably to control the saw while I’m making plunge cuts and difficult bevel cuts. My rear hand controls the trigger and the speed of the cut, and my front hand adds stability to the cut.
For sheet goods, I typically use only one hand—on the trigger handle—to control the saw. For these cuts, the left-side blade allows me to stand behind the saw and sight down my arm to the line that is being cut in the plywood.
Adjust the bevel angle and blade depth
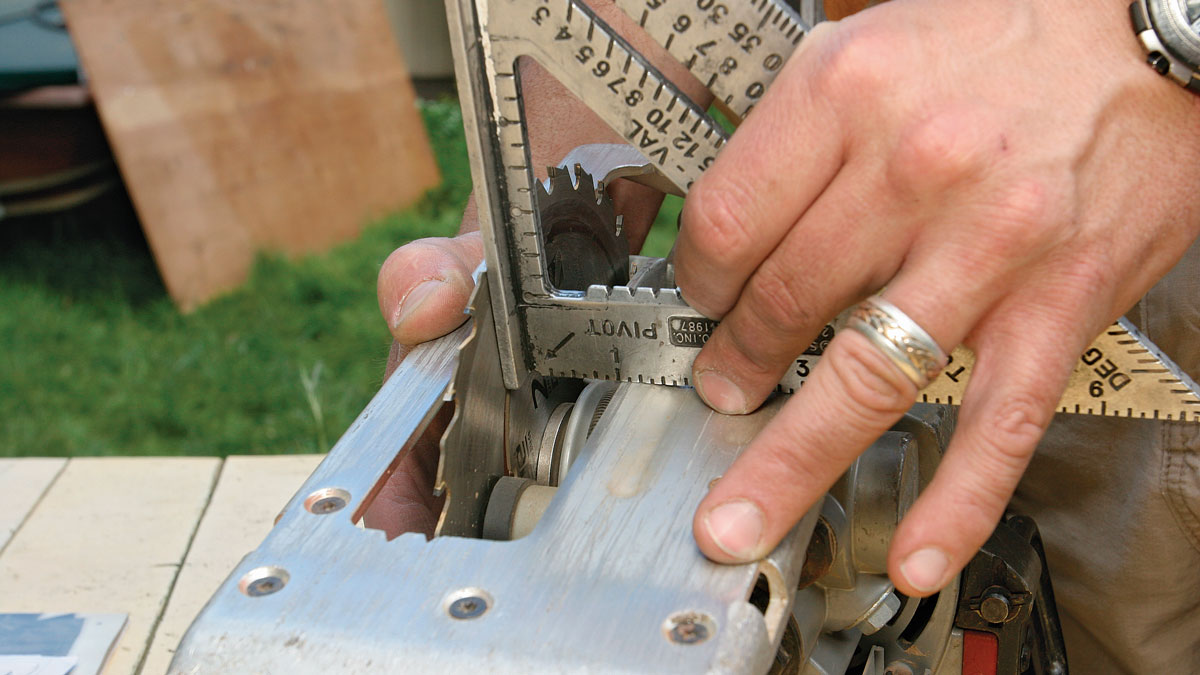
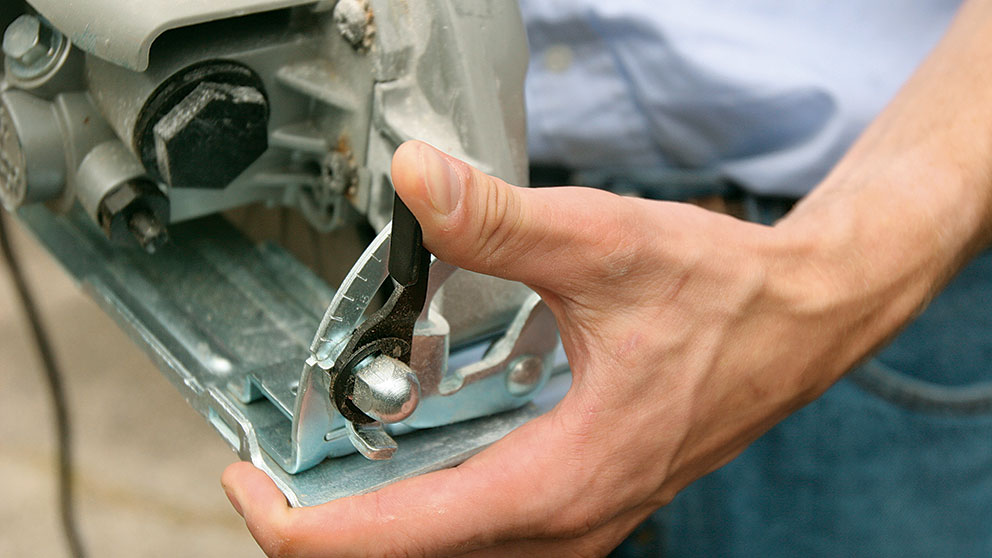
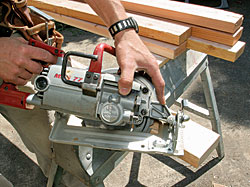
1. Check for square, and calibrate the bevel scale. With the saw unplugged, I hold my square against the baseplate and use it to check the blade angle. If the blade is not square to the baseplate but the bevel gauge reads square, I adjust the blade to square and identify a new 0° location on the scale with a permanent marker. To release the bevel lock with one hand, I use the opposing force of my thumb and fingers (photo right). In this instance, my hand can do more than my arms and back combined.
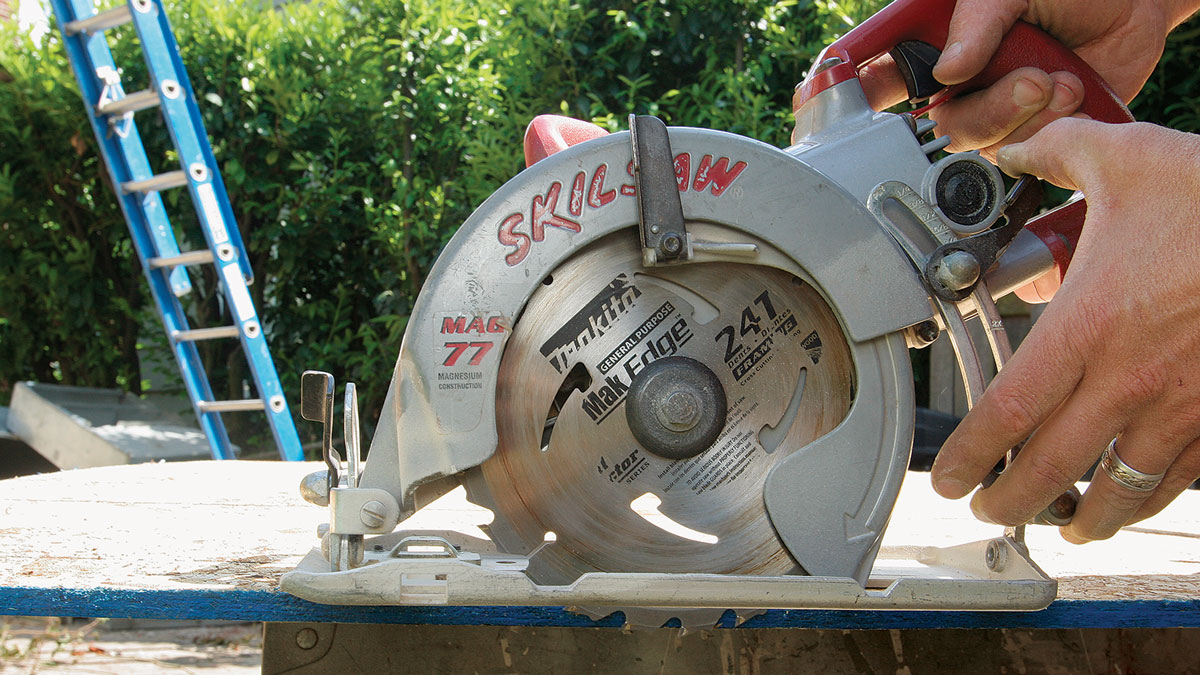
2. Set the depth of the blade for the material. After releasing the depthadjustment lever lock (again using the opposing muscles in my hand), I lower the blade just enough that it clears the underside of the material. Lowering the blade more than necessary increases the chance of kickback, creates excess heat that can burn the work, and leaves a large portion of the blade unguarded.
Stay connected
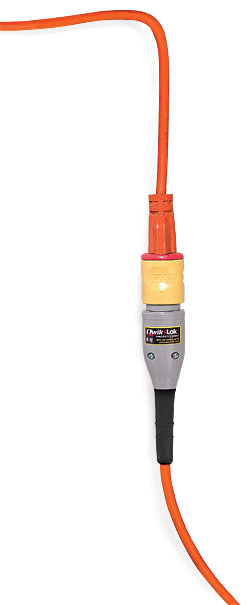 Keeping a saw’s electrical cord connected to the extension cord can be a big problem. Plugging the cords together sometimes isn’t enough. You can tie a knot in the cords where they connect, but this knot can hang up on ladder rungs or become wedged behind lumber. Another solution is to lash together the ends with a piece of electrical wire; however, the wire end tends to be sharp and can scratch you or your work.
Fortunately, there is the Qwik-Lok (www.qwiklok.com), a secure, streamlined device to keep cords mated together. Unlike other locking connections for electrical cords, the Qwik-Lok doesn’t rely on external levers or snaps. Instead, a mechanism inside the Qwik-Lok grips the holes at the end of any straight-bladed plug.
In a test, the connection was almost impossible to pull apart. Yet to disconnect the cords, a simple twist allows the two ends to unplug easily. The Qwik-Lok attaches to typical extension cords like any replacement plug. Although it’s pricey at $20, the Qwik-Lok will pay you back in timed saved chasing your tail.
—John Ross, associate Web editor
Let the saw’s weight do the work
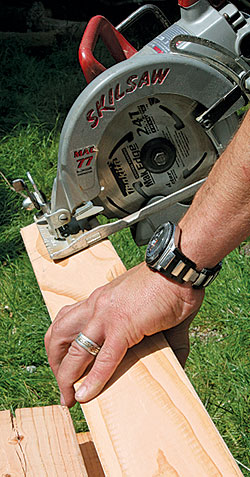
Tilt the studs for easier cutting. I hold the stud with my hand a safe distance from the saw, and I tilt the stud away from my body. This technique promotes a smooth, steady progression of the cut, and allowing the saw to run downhill eases stress on my arm.
Cut from the ground to save effort. Cutting directly off the stack of lumber or from the ground can save time spent lifting lumber to a set of sawhorses. With the work braced against my ankle, I use my free hand to hold the stud at an angle. Again, the saw is running downhill, and I can let gravity do most of the work.
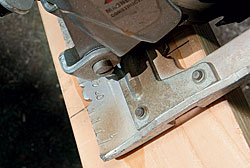
Use the saw’s baseplate to align the cut. The indents on the saw’s baseplate show where the blade will cut. For the most-accurate cut, I account for the blade’s thickness and cut to the waste side of the line. To ensure that I’m square to the board, I check that the front edge of the baseplate is parallel to the edge of the workpiece.
Lift the blade guard for plunge and bevel cuts
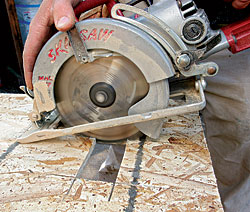
Brace the baseplate for plunge cuts. Before beginning the cut, I brace the full length of the front edge of the baseplate against the worksurface. To make the cut, retract the blade guard, pull the trigger, and with even pressure, lower the blade.
Make bevel cuts with two hands. As with any cut, my trigger hand is my main control. My front hand has two jobs. It retracts the blade guard for smoother cutting, and it steadies and guides the front of the saw.
Photos by: John Ross, except where noted
Fine Homebuilding Recommended Products
Fine Homebuilding receives a commission for items purchased through links on this site, including Amazon Associates and other affiliate advertising programs.
Guardian Fall Protection Pee Vee

Magoog Tall Stair Gauges
Sledge Hammer

