Rotten-Sill Repair
Old-house experts share a safe, conservative approach to fixing a failing timber-frame sill beam.

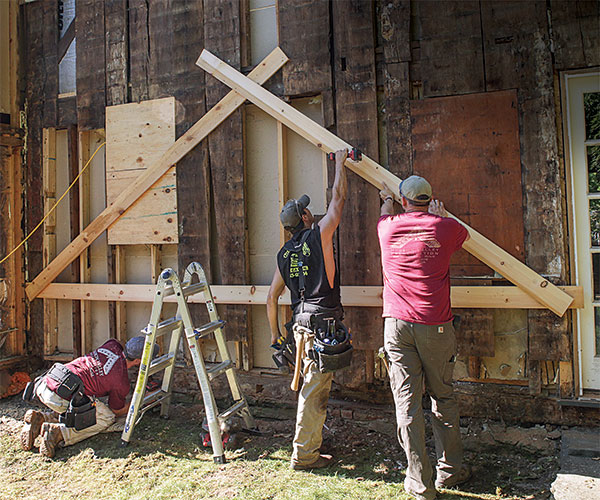
Synopsis: Ian Schwandt, a carpenter specializing in the restoration of centuries-old homes, describes a particular project of removing rot from the exterior of a 1750s timber-frame farmhouse. His team began by adding stability to the structure with three boards in a triangle shape, and then began the process of cutting away the rotten areas of the sill with a host of tools. After the damaged sill was removed, two-part epoxy was used to stabilize the remaining wood. The team then fit and fastened a new sill, along with new lumber to support the existing framing where the damaged areas were cut away.
Most seasoned remodelers are used to structural repair work on platform-framed homes, whether it’s adding a window in a bearing wall, shoring up an overspan floor frame, or replacing a rotten sill plate. But the company I work for specializes in the restoration of centuries-old homes, which means we mostly deal with timber-frame construction—many times built by the original inhabitant of the house—and that’s a different ball game. Material species and sizes vary from one old house to the next, as does construction method, and there’s almost always been some remodeling work over the years that adds to the fun. So in our line of work, you have to carry a big bag of tricks.

On this particular project, a 1750s timber-frame farmhouse, the sill beam had sustained significant water damage from failed roof gutters and a grade that was actually above the foundation. In our experience, sills rot from the exterior side on the bottom, and this project was no exception. So rather than removing the entire 6×8 oak sill, we decided to cut away the rotten area on the outside of the beam and sister in a new 16-ft. pressure-treated 4×6 to handle forces from above and resist rolling or twisting. This allowed us to effectively fix the problem without disturbing the floor joists or inside of the house, or blowing the budget.
Remove the rot
Sills tend to rot from the outside in, so repair work starts by removing any and all damaged wood, and then stabilizing the wood that will remain.
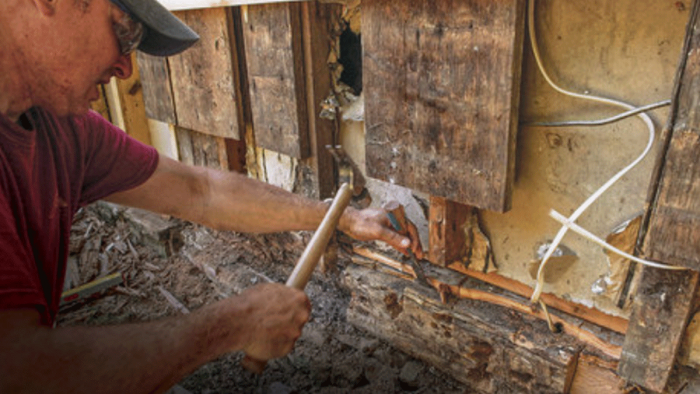
Excavate for nails – Hand-forged nails and other embedded metal will wreak havoc on sawblades and hand tools, and must all be removed. For large nails, we drill out the area around the nail shank, allowing room to get a good grip with pliers.
Kerf the sill – Making a series of parallel cuts with a circular saw, we increase the depth of cut incrementally to match the extent of the rot. A note of caution: Old-growth wood is very dense, so choose a high-amperage saw to avoid burning out the motor.
Clear way the waste – The bulk of the waste is removed using the claw of a hammer, chisels, pry bars, and a reciprocating saw.
Aim for flat and plumb – We use a drill and Forstner bit to fine-tune the surface of the cut-back sill beam, checking the surface for flat and plumb using a level.
Smooth and consolidate – After a quick pass using an angle grinder equipped with a sanding disc, the surface of the remaining wood is treated with Abatron LiquidWood, a two-part epoxy consolidant that penetrates and solidifies any remaining decay…
(To view the entire article, please click the View PDF button below.)
Related:
How it Works: Wood Rot – No wood is completely immune to rot, so it’s important to know how it works.
Repairing Rot With Epoxy – Use these versatile materials, simple tools, and straightforward steps to revive damaged exterior trim details.
Preventing Cedar-Post Rot – You can’t completely stop wood from rotting, but you can delay the decay.

To view the entire article, please click the View PDF button below.


