
Safe Beam Replacement
Personal protection, sturdy shoring, professional engineering, and careful planning mitigate the hazards when replacing overhead structural beams.
Construction project manager Jake Lewandowski gives an overview of all the steps you need to take when removing and replacing beams in a house, from the initial assessment of the existing conditions to final placement of the new structural members. Jake shares tips for working with an engineer, choosing personal protection gear, setting up shoring, safely removing the old beam, and working in tight spaces.
Most humans battle gravity as a daily routine, whether it’s lifting our bodies out of bed or stepping on that dreaded bathroom scale. But for a home, that battle is waged in the structure—the framework that keeps the building upright in spite of (and because of) gravity. The structure of a properly built home holds gravity and other forces at bay, but once the structure is compromised, gravity can get the upper hand. If not fixed, this can ultimately spell the building’s demise.
Implementing a safe structural repair first requires an understanding of how the whole structure functions, and how any failed structural element relates to the structure as a whole. Our company, Great Lakes Builders, specializes in structural repairs, and doing those repairs safely is of primary importance both for the health and well-being of ourselves and our customers, and for the homes we work on.
Assessing structural problems
Implementing a structural repair begins with determining the extent of the damage or deterioration, and no two situations are exactly the same. Usually a homeowner or contractor calls us to check out an apparent problem, such as a sagging floor or ceiling. The first thing we must do is determine what materials had been used to support the structure, the dimensions of those failed members, and all the critical connections. Then we must follow the load paths down to the foundation.
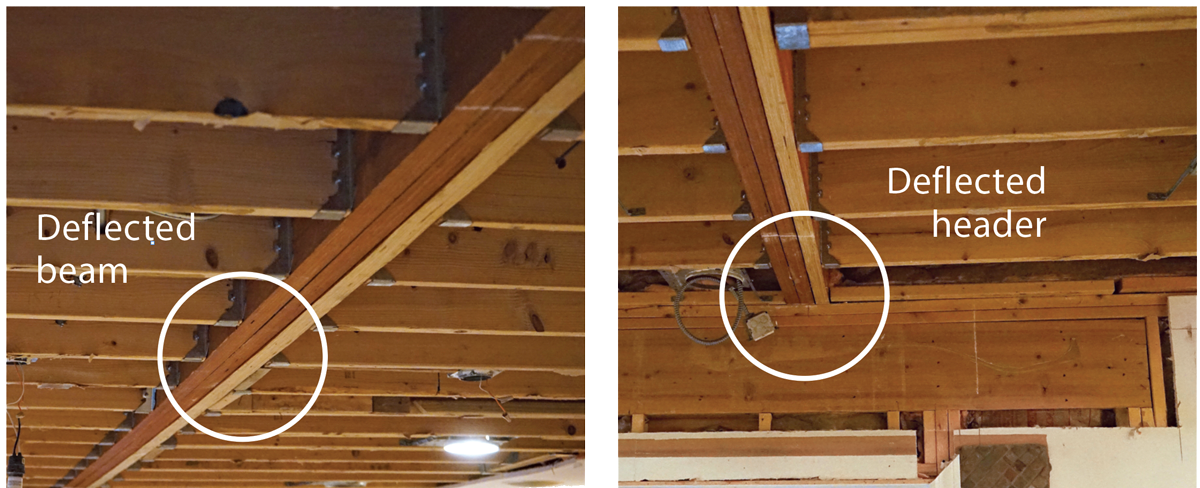
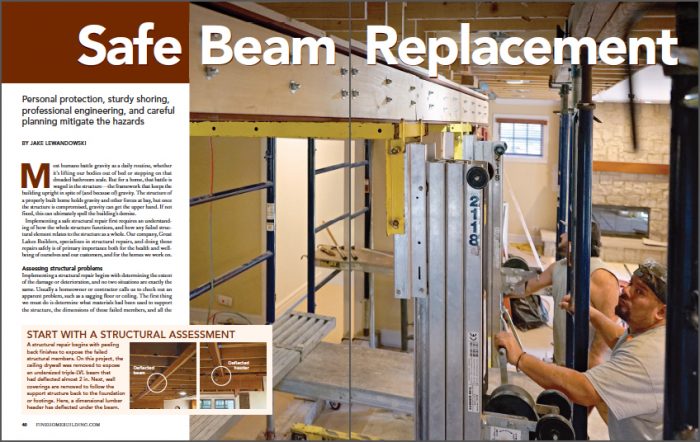
For this project, the ceiling over a large open kitchen and dining area had dropped more than 2 in. at its lowest point. To find the cause of the problem, we first cut back the ceiling drywall to inspect the floor system above. We found a triple-LVL flush beam that was undersized for its span. Joist hangers held the 2×10 joists in place on either side. To trace the load paths from a beam down to the foundation, we remove drywall from critical areas in the wall to see what the beam is bearing on—in this case, a dimensional lumber header that had deflected under the load transferred to it by the LVL (see inset photos, p. 40).
Start with a structural assessmentA structural repair begins with peeling back finishes to expose the failed structural members. On this project, the ceiling drywall was removed to expose an undersized triple-LVL beam that had deflected almost 2 in. Next, wall coverings are removed to follow the support structure back to the foundation or footings. Here, a dimensional lumber header has deflected under the beam.
|
The jack studs supporting the header were adequate to transfer the load down, but the header had to be reinforced and the beam replaced with one sized for the span. While the span tables in the code can be useful for sizing new members in some cases, seeking professional help is typically the better bet.
An engineered solution
With the structure exposed, the next step is getting an assessment from a licensed structural engineer. The engineer’s job is to verify the problems and then to design a solution. A structural engineer makes all the necessary load calculations to ensure that the building is fixed properly. That person sizes the structural members based on whatever prescribed load is being carried or transferred by each member.
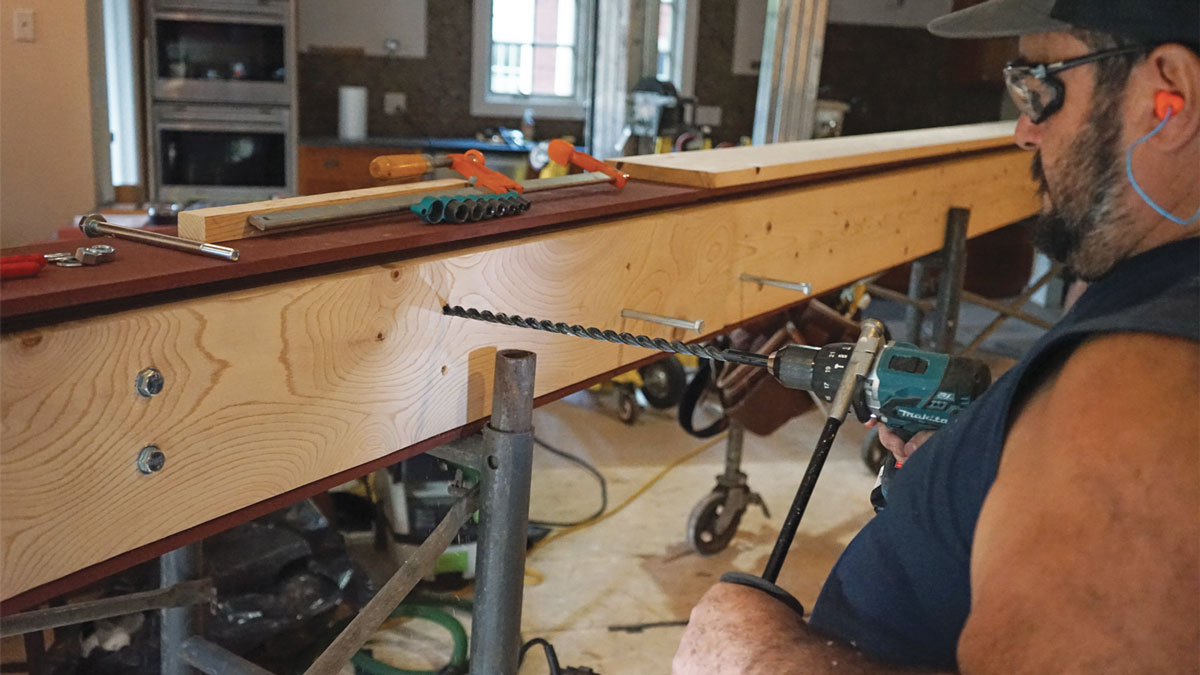
Once the structural issues are evaluated, the engineer provides a comprehensive and detailed set of plans and specifications, which a structural subcontractor can use to bid the repair if necessary. If you or your contractor are unsure about the proper shoring strategies, the engineer can also recommend an approach for shoring or supporting the structure during the repair. That plan includes proper sizing and placement of shoring towers, as well as the sizing for any temporary support beams. If you plan to do the work yourself, always keep an open line of communication with the engineer to iron out specifics, such as bolt selection or plate sizes and thicknesses. I also consult with my engineer if a specified material is not available and I need to substitute with something that my local supplier has in stock.
Protect yourself Our crews work with heavy-duty tools every day, so protective gear is part of our standard tool kit. When using tools such as drills and jack hammers that can produce eye-damaging projectiles, crew members always wear safety glasses with high-impact lenses that meet ANSI Z87 requirements. Crew members also wear safety glasses when working with wet concrete to protect against errant splashes. Hearing protection is another must, as every project we tackle involves cutting metal and concrete, which is typically very noisy. Crew members use either ear plugs that insert into the ear canal, or ear muffs that clamp over the head and cover the entire ear, and sometimes both. You might think we wear hard hats all the time to protect from something giving way and crushing a person, but falling objects are a much greater concern. Our work in Chicago means that we are often working on tall buildings. If work is being done above the crew, a tool such as a wrench or even a nut or bolt accidentally knocked off of staging can be deadly. Hard hats are the single best way to prevent those injuries. Our projects involve sawing all the typical building products commonly found on job sites. The only thing we try to avoid is cutting lead. We typically use N95 masks for general-purpose tasks, but due to the pandemic and supply-chain disruptions, we have been using disposable surgical masks instead. When it comes to cutting and breaking concrete, N100 masks or half-masks that cover the nose and mouth are better choices. We use P100 filters in our half-masks. All of our concrete saws and breakers run with dust collectors, and we also use a portable air scrubber to remove any ambient dust. |

Support for repair
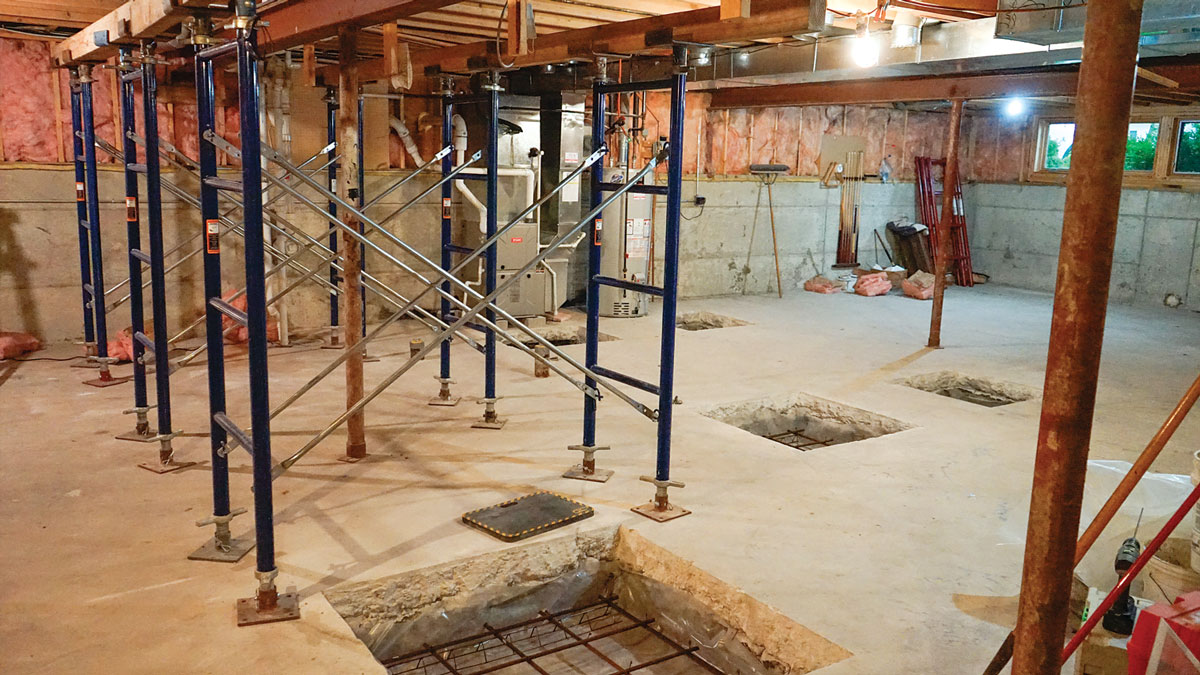
With an engineered plan in hand, we’re ready to start the shoring process. The purpose of the shoring is to take the load off of the area being repaired or upgraded, and doing this safely requires transferring that load all the way down to solid ground. Typically this requires creating new, temporary load paths down to the foundation, footings, or basement slab if it’s capable of handling the load.
No phase of the repair should take place until all of the shoring is in place, although it may make logistical sense to bring in new structural members and equipment before shoring is complete if it would be difficult or impossible with shoring in place. For this project, the engineer specified a wide-flange steel beam, which we had delivered and moved into the kitchen before setting up the shoring in that space. At this point we also prepped the beam, which went much more quickly without the shoring in the way.
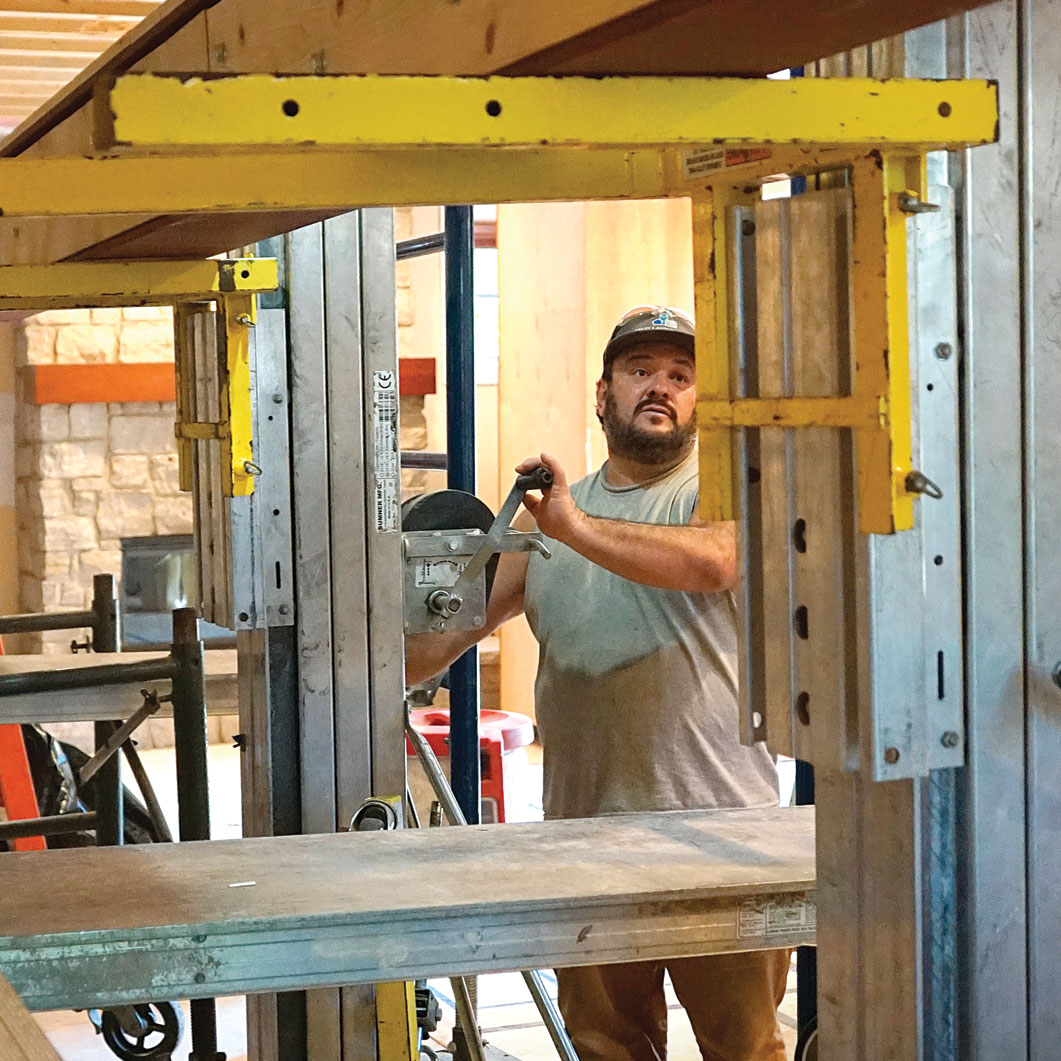
Contractors often use temporary stick-built walls as shoring for smaller repairs such as replacing a window header. But designing and building your own shoring can have dire consequences if done improperly. By comparison, we can adapt our heavy-duty shoring system to support just about any structure, including a whole house. This system consists of heavy-duty frame sections with adjustable-length base plates and adjustable-length U-shaped heads. If possible, we connect the frames with diagonal braces for added stability (once the shoring in the kitchen was secured and loaded, we removed the braces in preparation for lifting the beam). We also use shoring posts with the same bases and heads. The components of this system set up very quickly, and each has a documented load capacity, which lets us create shoring at or above what the engineer recommends for the repair.
Our company specializes in structural repair, so we keep a large inventory of shoring equipment. If you don’t do structural repairs on a regular basis, heavy-duty shoring equipment might not be worth the investment. In these instances, consider renting. If you feel uneasy about the process, consider hiring a shoring contractor.
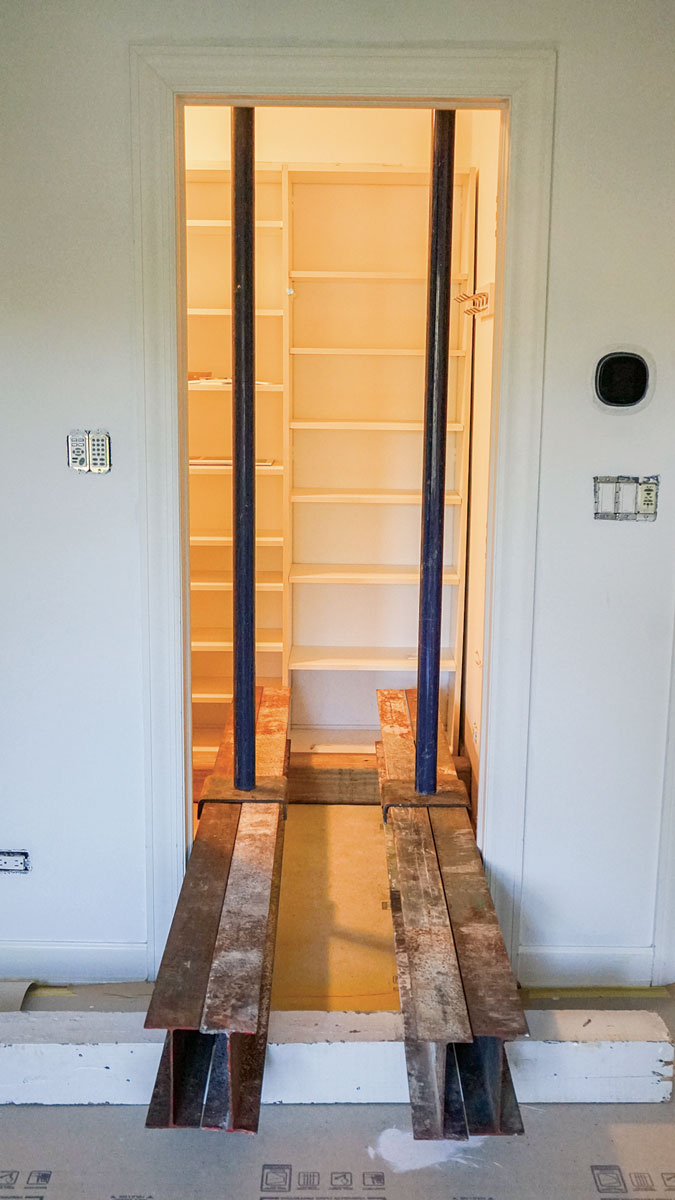
Shoring goes up the same way you build a house—from the bottom up. We start in the basement and work up to the area requiring support. Here we started by installing shoring from the basement slab to the kitchen floor joists, then from the kitchen floor to the kitchen ceiling to take on all the loads from the joists on both sides of the undersized LVL beam.
If shoring is to rest on a slab, evaluating its strength is critical. Part of our investigation for this project involved cutting out a section of the slab, which was over 6 in. thick—strong enough to support the shoring towers’ 8-in.-square base plates.
Shoring SetupShoring frames with documented load capacity form the basic component of this shoring system. Adjustable bases and U-shaped heads fit around beams that spread out the load. For added stability, shoring frames can be joined with a variety of different components to create a shoring tower. Diagonal bracing is the easiest and most common way of joining the frames.
Shoring frames with documented load capacity form the basic component of this shoring system. Adjustable bases and U-shaped heads fit around beams that spread out the load. For added stability, shoring frames can be joined with a variety of different components to create a shoring tower. Diagonal bracing is the easiest and most common way of joining the frames.
Bottom up. Shoring installation starts in the basement and continues upward to support the structure around the failed member. After standing up the shores and before raising their screwheads to the floor or ceiling above, we place beams on top of them to spread the weight among multiple joists.
Tight quarters. When there isn’t enough room to spread the load in a tight space, crisscrossed layers extending to larger spaces can be used to support the loads. |

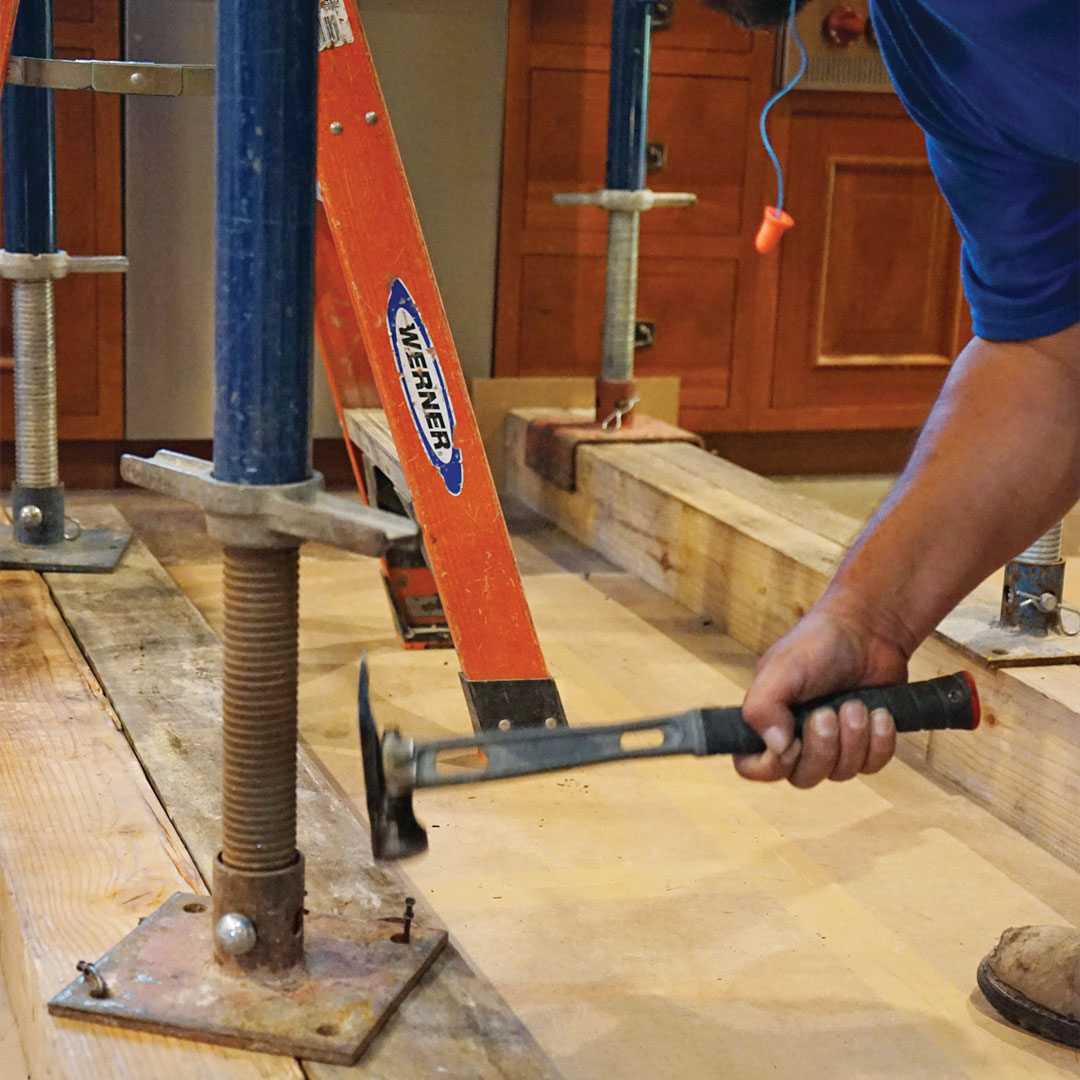
The shoring frames and towers we use transfer the loads to the points below the base plates. Concentrating those loads in small areas (such as individual joists) can be dangerous, so we typically set them on top of two rows of 4×6 timbers that distribute the load over a larger area. We also use wood beams above the shoring towers to distribute the load from the floor or ceiling above. In confined areas it may be necessary to use perpendicular layers of beams to support the shoring adequately.
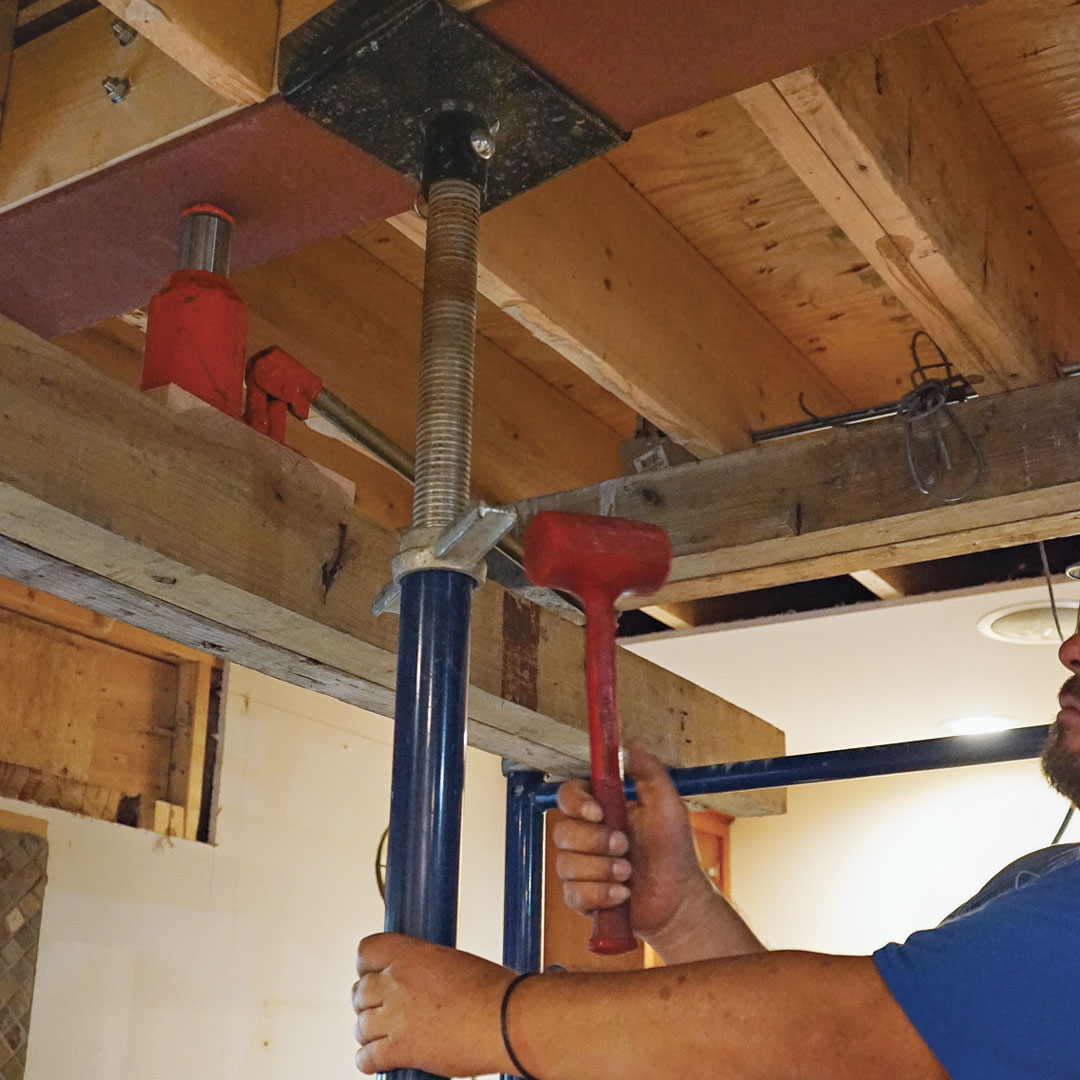
After screwing the U-heads to hold the temporary support beam against the joists, we check to make sure the shoring towers are perfectly plumb. Then we snug the U-head screws using either a mallet or a pipe.
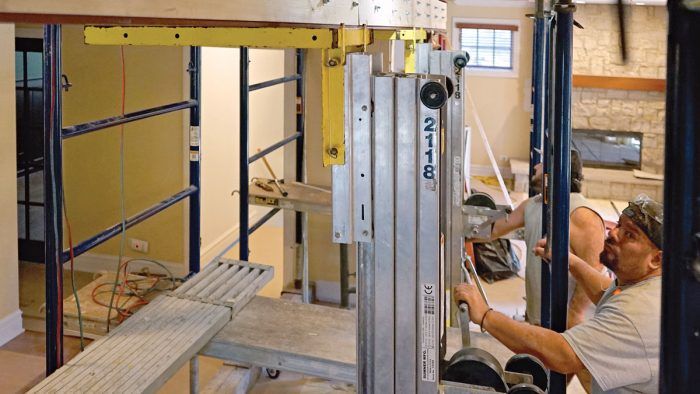
In work areas with limited space, we have to think ahead. Here, we wouldn’t have been able to get the new beam and material lifts into the space once the shoring was in place. So we positioned the new beam on roller staging roughly below its final destination and set up the material lifts we were using to raise it before erecting rows of shoring frames on either side of the old beam. Because the kitchen ceiling had dropped considerably, we raised the U-heads by turning the adjustment screws on the shoring frames, which unloaded the LVL beam and allowed us to safely remove it.
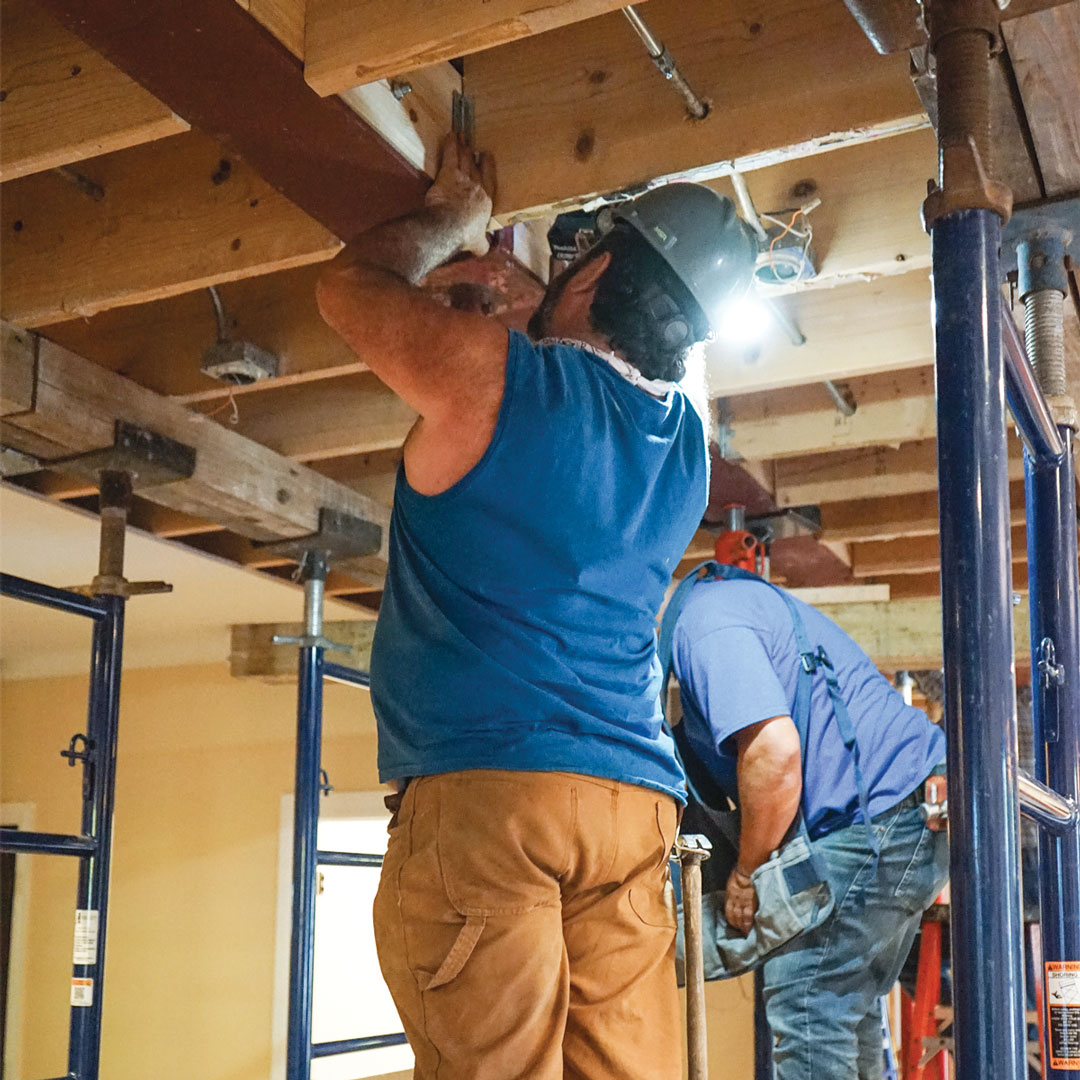
Safe RepairWith the structure safely supported down to solid ground, we carefully remove the failed beam, using platforms between the beams as a work surface. Once the beam is out and the nails that held the subfloor to it are cut back, we raise the new structural elements into place and use temporary supports to hold them until everything’s fastened.
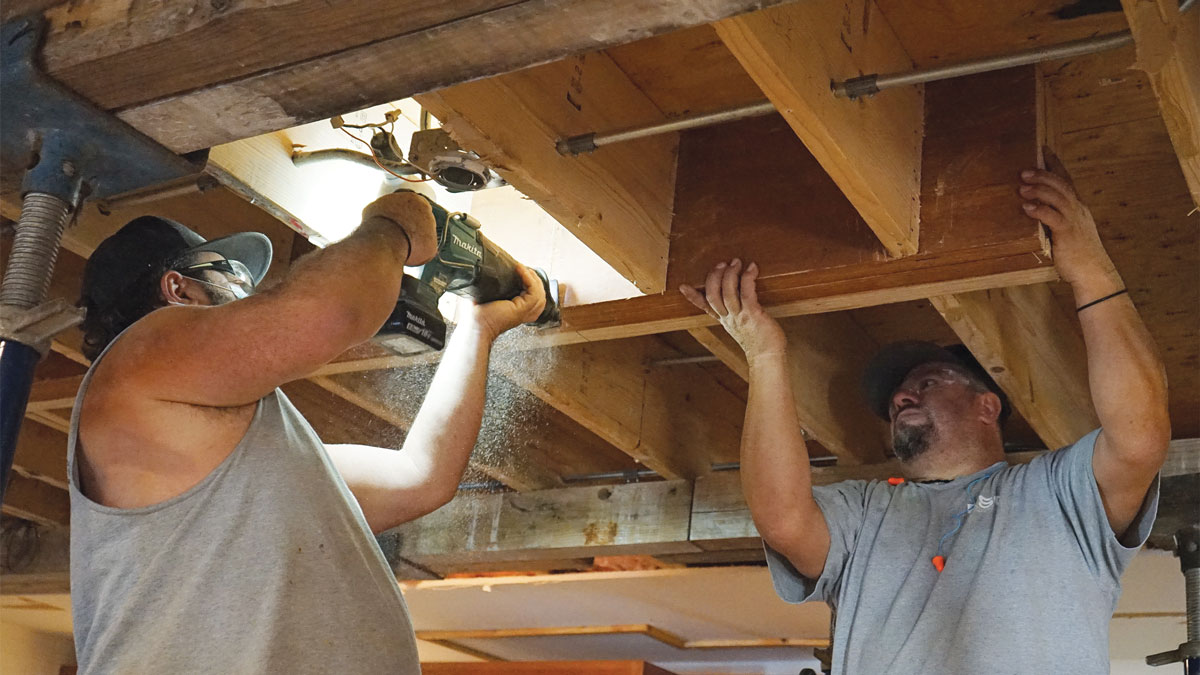
Failed-member removal. With the shoring in place and all the loads supported, the crew cuts the LVL beam into small pieces that are safer and easier to remove.
|
Making safe repairs
Structural repairs often involve demo—especially when removing existing structural members, which can be quite heavy. With the floor structure supported and the joist hangers removed, the safest way to proceed is to cut what’s being removed into easy-to-handle pieces.
Two crew members crank the lifts to raise the new beam up toward its final position, being careful to keep the beam level. Here the versatility of our shoring system shines through. We place temporary timbers between the shoring frames that are already in place, supporting the framing above, and ease the beam down onto them. After aligning the beam with the joist pocket in the ceiling, we raise it to the underside of the subfloor above the ceiling joists. Material lifts should not be trusted as shoring, so after supporting the beam with hydraulic jacks, we erect shoring posts with U-heads under the beam approximately every 4 ft. We make sure the posts are plumb and secure them with duplex nails before they take the strain of
the beam.
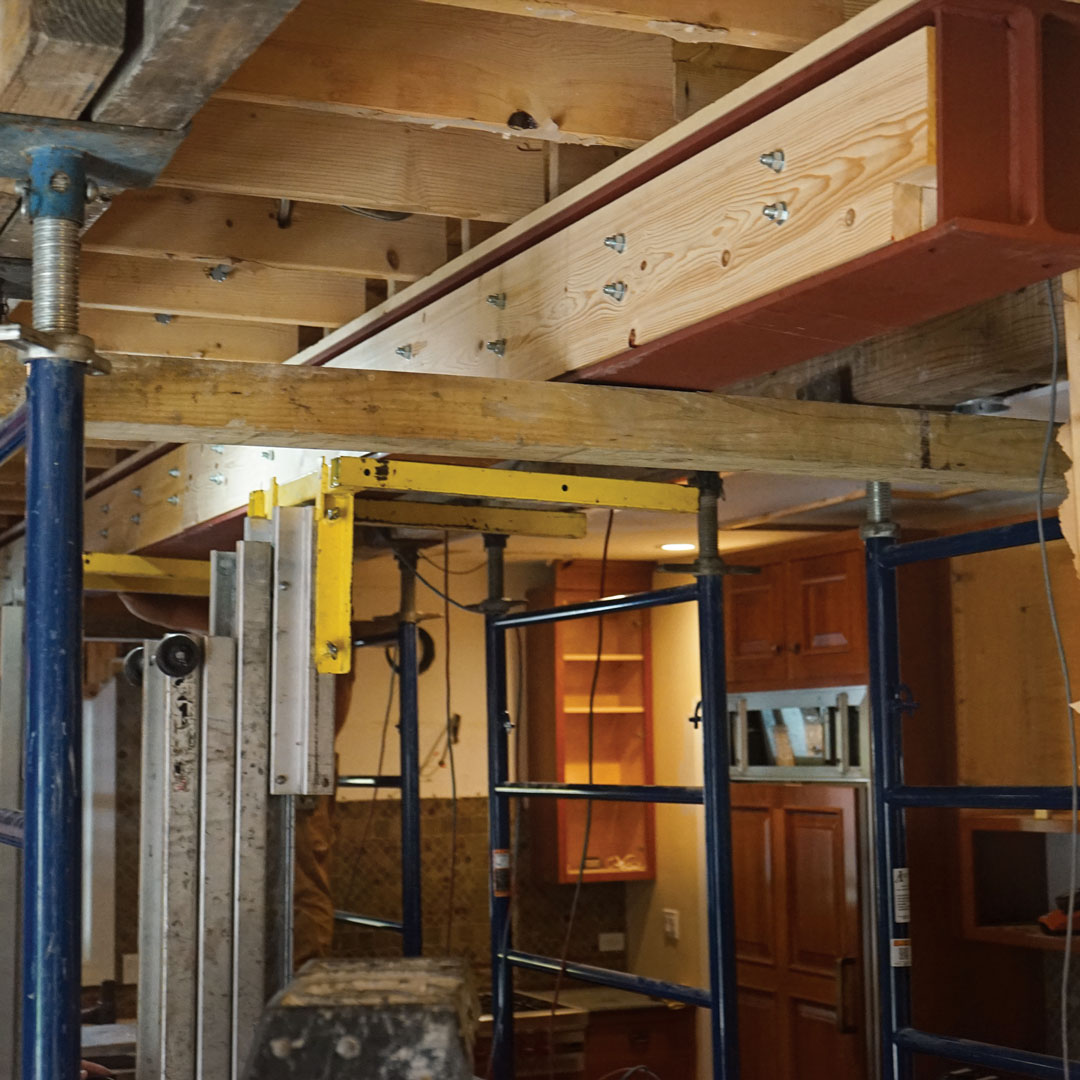
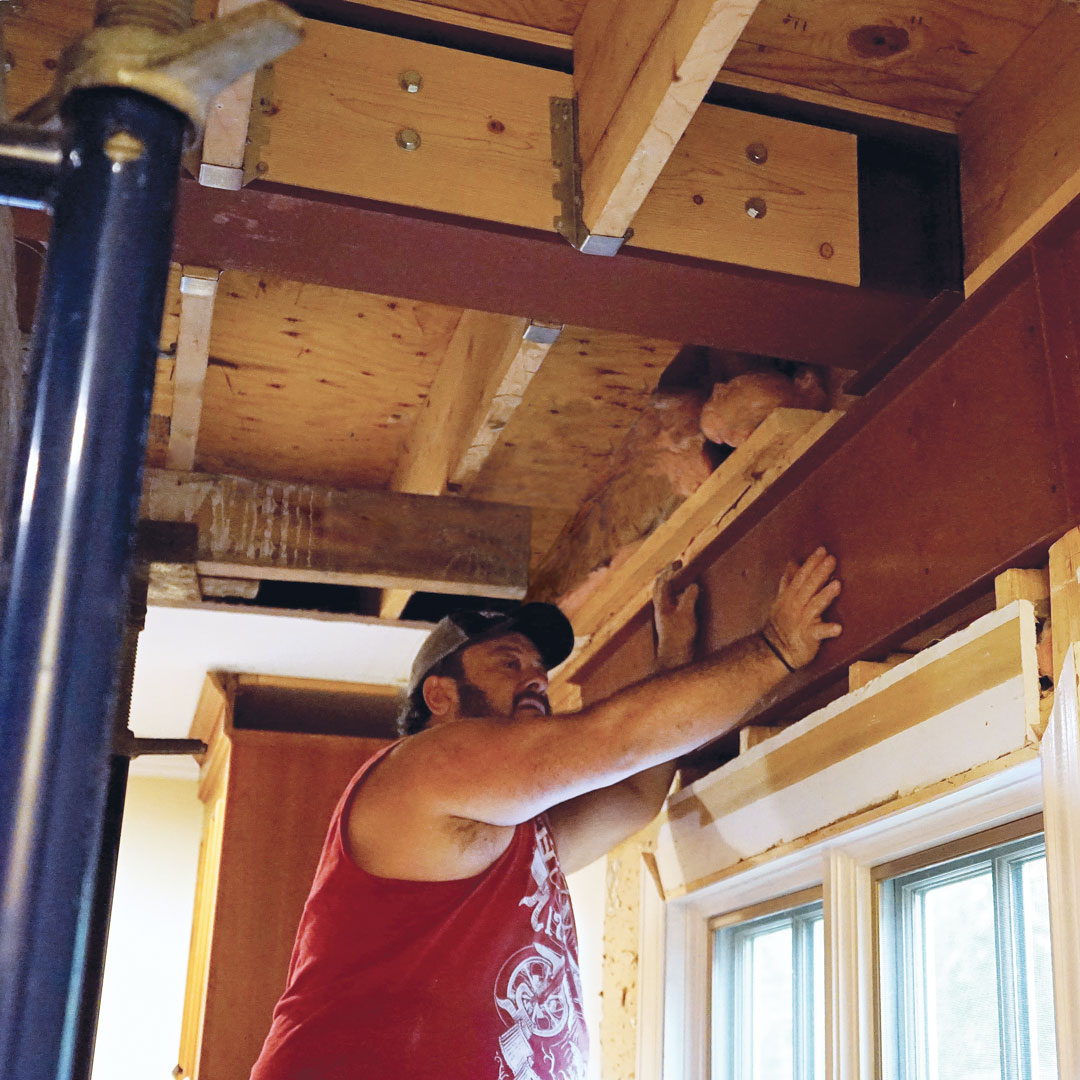
As a final bonus, we span between the shoring frames with scaffolding planks, which allow easy access for the crew to install a joist hanger at each of the ceiling joists. The final step in this part of the repair is securing a gusseted steel C-channel to the partial existing header to support the end of the beam. Once all of the new members are fastened, we can remove our shoring in the reverse order we installed it, clear out our gear, and make way for the finishing contractor.
From Fine Homebuilding #300
To read the entire article, please click the View PDF button below.
RELATED LINKS
Fine Homebuilding Recommended Products
Fine Homebuilding receives a commission for items purchased through links on this site, including Amazon Associates and other affiliate advertising programs.

Guardian Fall Protection Pee Vee

Magoog Tall Stair Gauges

Speed Square
