
Is Your Exterior Rigid Foam Too Thin?
Adding a layer of rigid-foam insulation on the outside of a home makes sense, as long as it's done correctly.
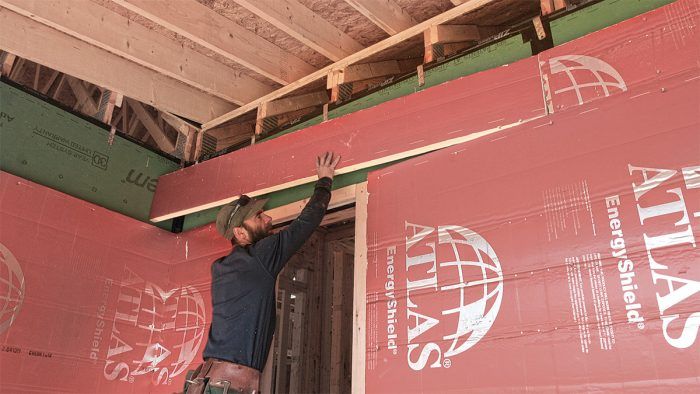
Whether it’s to meet code or to adhere to a “green” target, more and more builders are adding a layer of rigid foam insulation on the outside of homes. The idea makes sense, if it’s done correctly.
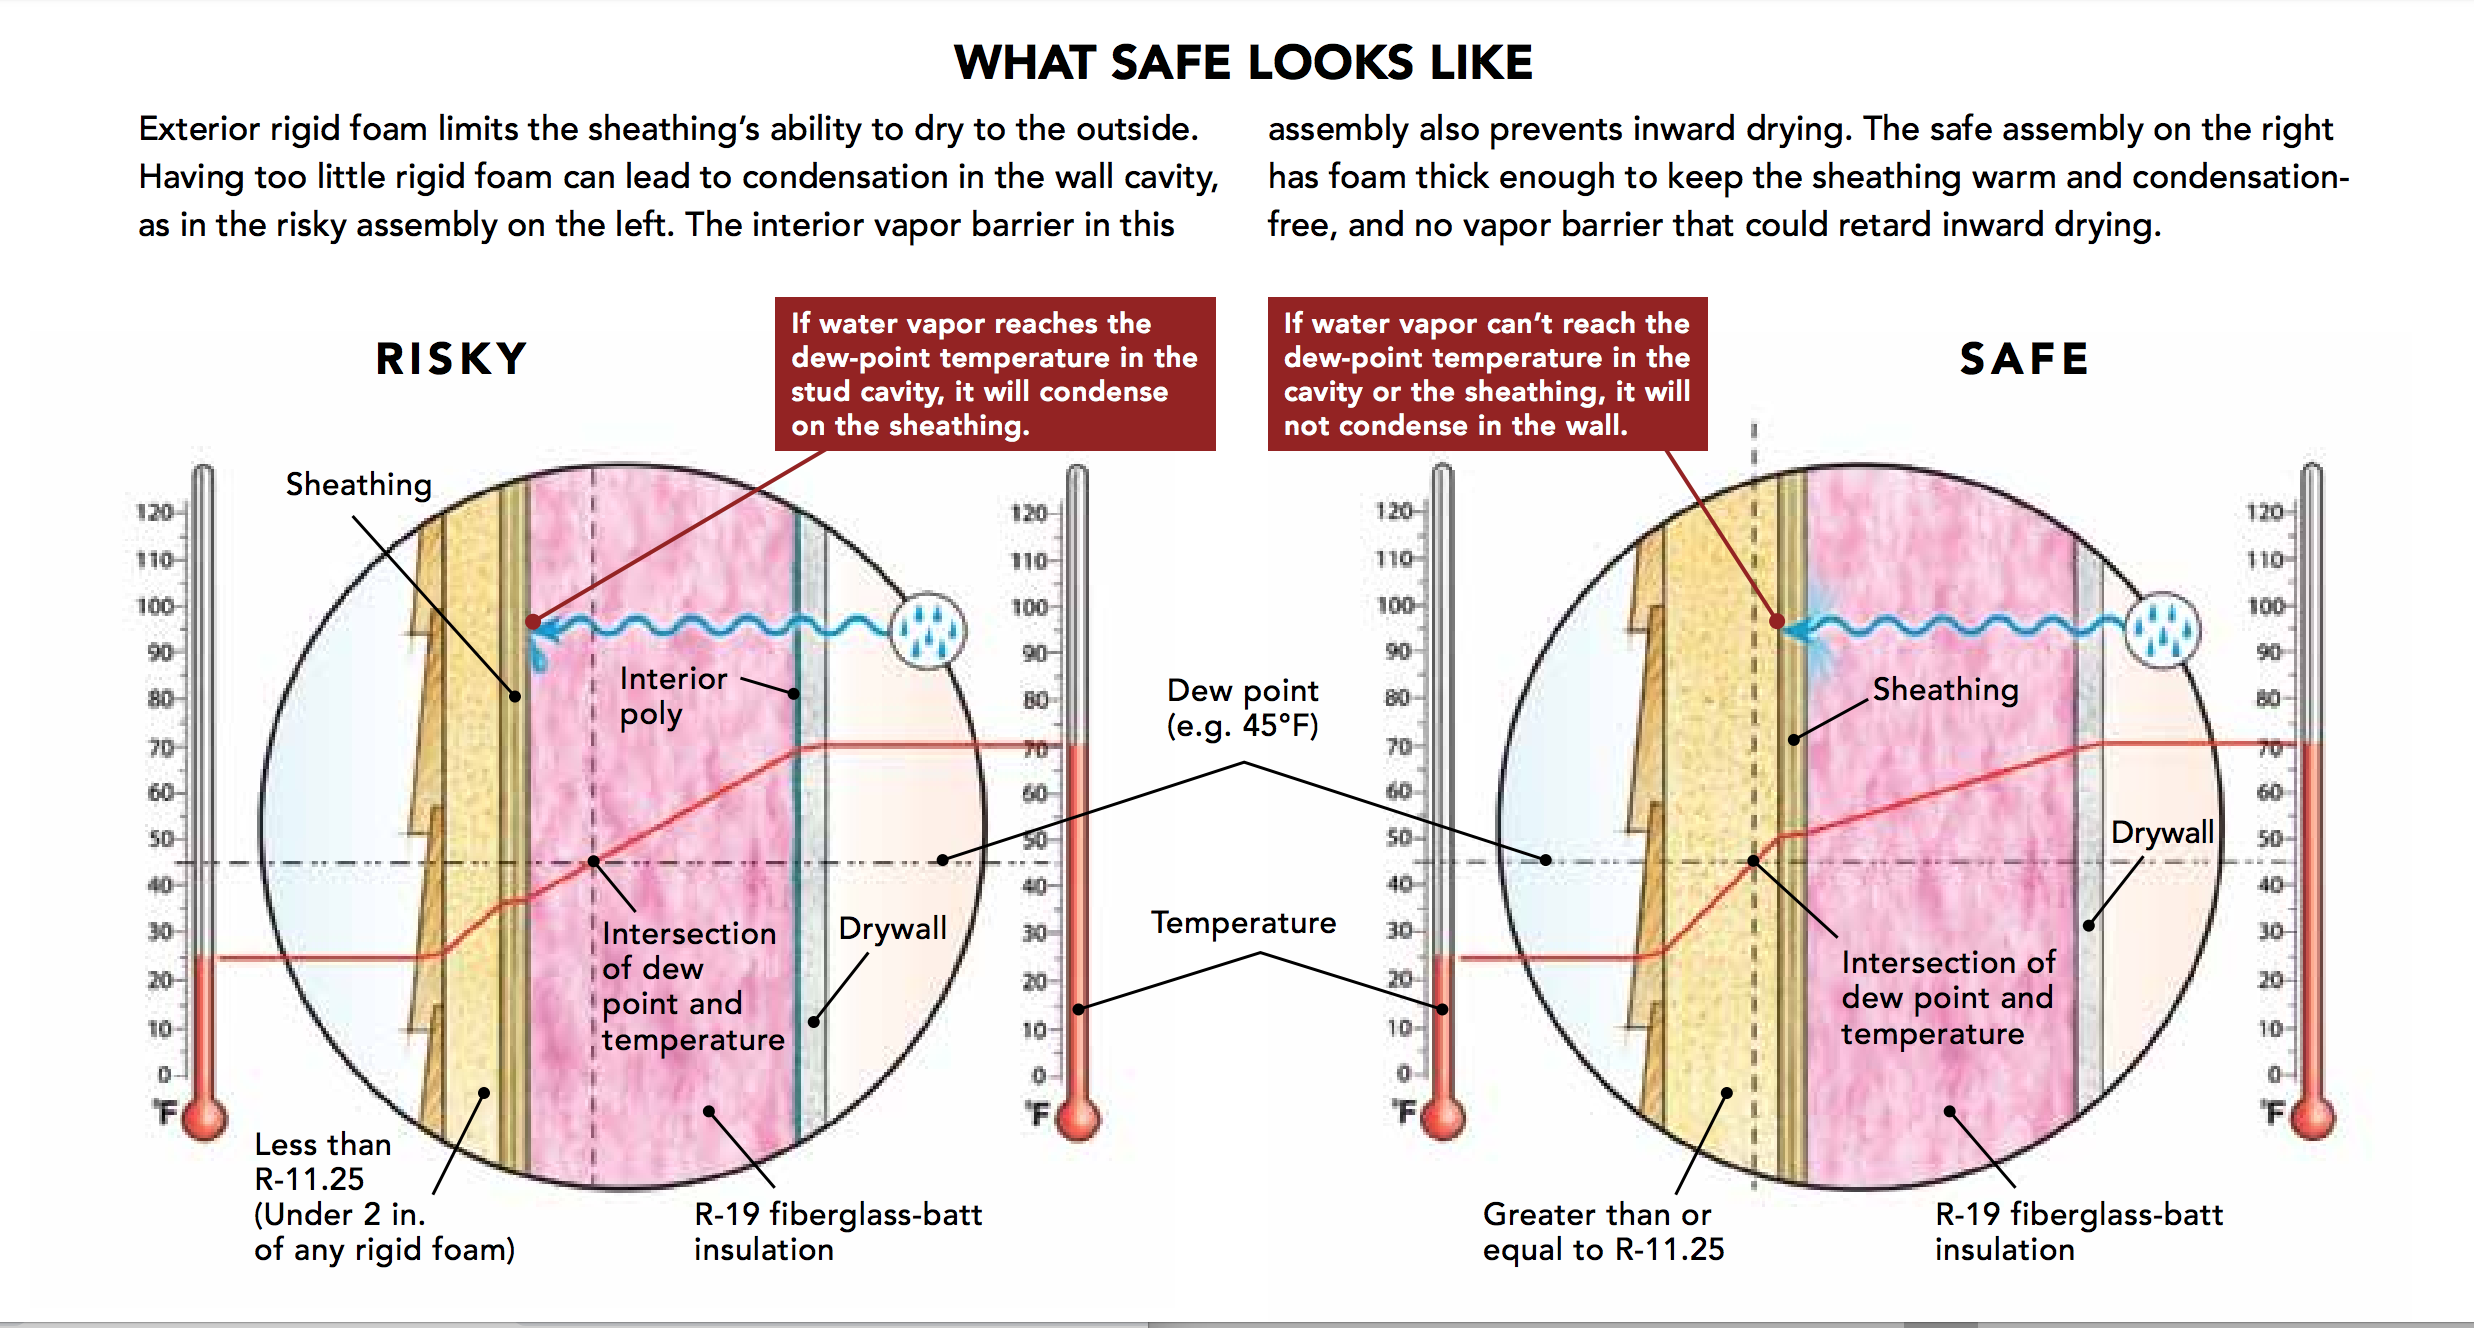
While cavity insulation provides a thermal break in stud bays between the inside and outside of a house, studs themselves provide a relatively easy path for heat to flow through a wall assembly. Continuous insulation on the outside of a wall is a good way to break this thermal bridge, and using rigid foam in this application works—but it needs to be thick enough to keep the sheathing above the dew point in winter and there should be no polyethylene on the interior, which can prevent inward drying.
You may read this and think to yourself, “That’s interesting. I wonder if the walls of my house have any exterior foam?” So you poke around. Maybe you lift some vinyl siding, or make an inspection hole in a closet wall. In doing so, you discover that your walls have R-5 exterior foam, even though you need at least R-11.25 foam for your Zone 6 walls, and a layer of interior polyethylene. Now what?
Three possible approaches
In colder climate zones, thin foam is risky because it won’t keep sheathing warm enough in winter to prevent it from taking on water through “condensation” (or, more accurately, sorption). Plus, even thin foam limits the sheathing’s ability to dry to the outside. (Note that these issues are not simultaneous; moisture accumulation peaks in February, while drying occurs mostly in April and May.) If the wall includes an interior layer of polyethylene, there’s no clear path for moisture that accumulates in the sheathing to dry. If you’ve inherited or purchased a house with this wall assembly, the fix isn’t easy.
You can take one of three approaches: fix everything, add more rigid foam, or adopt an approach I call “harm reduction.”
Option 1: Fix everything
The “fix everything” approach is so expensive that few homeowners will go this route unless they are already planning a gut rehab job and new siding.
To fix the polyethylene problem, you have to remove the drywall, rip out the polyethylene, and install new drywall. That’s a lot of work.
To fix the problem of too-thin exterior rigid foam, you have to remove the siding. In most cases, you’ll have to put the siding in a dumpster (although some types can be recycled or reinstalled). Once the siding is off, another layer of rigid foam can be installed over the existing rigid foam—staggering the seams, of course. Make sure that the total R-value of the two rigid foam layers is enough to keep your wall out of trouble. How much extra foam to add is relatively easy to figure out for conventional 2×4 and 2×6 stud walls; recent versions of the International Residential Code have a table that tells you the minimum R-value for the rigid foam layer.
It’s worth noting that exterior rigid foam isn’t a good idea on double-stud walls. Because there’s typically a lot of insulation inside of these walls, the amount of heat that makes it to the sheathing is so minimal that you’d have to add a lot of exterior foam to keep the sheathing warm.
Adding extra foam will probably require new exterior jamb and sill extensions for the windows and doors, along with new head flashing to limit water entry. Once the new rigid foam is installed, you can install new vertical furring strips and new siding.
All of this work is possible, but will probably cost tens of thousands of dollars, and isn’t the choice I’d recommend.
Option 2: New foam without removing the polyethylene
Most people don’t want to open up their walls from the inside just to remove a layer of poly. But it’s possible that you are planning to replace your siding. If so, it’s a good opportunity to add enough extra rigid foam to make your wall safer.
As noted above, you’ll also need to install new jamb and sill extensions for the windows and doors, new window and door flashing, and new furring strips.
Once your siding job is complete, you then have to consider whether the polyethylene is a problem. First, it’s worth noting that if you did a good job with the exterior work you just performed—installing new window and door flashing, creating a ventilated rainscreen gap, and putting on new siding—it should ensure that wind-driven rain won’t enter the wall. That greatly reduces the chance that the sheathing will get damp from the outside.
While the interior polyethylene layer stops inward drying during the summer, it’s helpful in the winter, reducing outward vapor diffusion. In any case, the thick rigid foam will keep the sheathing warm, and therefore dry, all winter long. So the risk of moisture problems in this case is fairly low.
Although it would be better if the polyethylene weren’t there, the fact is that tens of thousands of Canadian homes with interior poly have been retrofitted with exterior rigid foam, and there haven’t been any reports of widespread problems. According to building scientist John Straube, all signs indicate that these foam retrofit jobs are “not so risky as most people think. These homes will probably be fine.”
Option 3: Harm reduction
What if you are forced by economic circumstances to take the third approach: leaving the walls as they are? If the too-thin foam and the interior polyethylene have to stay in place for the next few years, there are some things you can do to lower the risk. Here are a few steps that are worth considering:
• Keep the interior relative humidity (RH) low during the winter. The lower the interior humidity, the lower the chance that exfiltrating air (interior air that escapes through cracks in your wall) or outward vapor diffusion will introduce dangerous quantities of moisture to your wall cavities. If you have a humidifier, unplug or disable it. Install a few hygrometers around your house and check them regularly. During the winter, strive to keep your indoor RH at 30% or less. If it creeps above that, operate your bathroom exhaust fans for 24 hours a day (or turn up your HRV) until the indoor RH drops to 30% or below.
• Seal obvious air leaks in your walls. The most likely way for interior moisture to contribute to damp wall sheathing is via exfiltration. Exfiltrating air carries interior moisture that can condense on cold surfaces in your wall cavity. It’s a good idea to caulk the joint between your subfloor or finish flooring and your drywall. (In some cases, it makes sense to remove your baseboards for this work.) It also makes sense to seal air leaks at your electrical boxes. (Needless to say, turn off the circuit breaker before performing this work.)
• Inspect your exterior window sills for signs of water damage, and correct any flaws you discover. Most wet-wall problems involve water entry from the exterior—in other words, rain. To keep rain out of your wall cavities, you need good roof overhangs and proper flashing. A regular inspection of your home’s exterior might allow you to nip some of these problems in the bud.
Will my walls start to rot?
The guidelines for minimum rigid-foam thickness make sense, and builders who ignore them are taking a risk. That said, a wet-wall disaster usually takes more than one mistake. In addition to too-thin foam, sheathing rot usually requires high indoor humidity as well as walls with air leaks.
Unless your house has all of these problems, your walls will probably survive. So if you follow the advice I’ve outlined here, there’s no reason to panic.
Fine Homebuilding Recommended Products
Fine Homebuilding receives a commission for items purchased through links on this site, including Amazon Associates and other affiliate advertising programs.

Staple Gun

Disposable Suit

Loctite Foamboard Adhesive


View Comments
How does this problem compare to the flash & batt method?
Link to research by the Cold Climate Housing Research Center for options for retrofitting walls. Very helpful especially if you have polyethylene under the drywall.
http://www.cchrc.org/sites/default/files/docs/SafeAffordableRetrofits.pdf
Karnerjon, Splash and batt method places foam in the cavity between studs. It does not stop the thermal transfer through the studs. It is effective at keeping the sheathing colder than the dew point so moisture does not condense in the sheathing. But this means the sheathing must then dry to the exterior. This effectively moves the vapor retarder to the 'splashed' foam so the batt insulation must dry to the inside. The studs and plates are still penetrating the vapor retarder so they may have problems if there is a lot of moisture to leak through the cavity. Use of Mike Holmes' favorite blue anti-mold treated wood is a good idea in this case.
Thanks much saminak!
ktkcad,
You say, "Splash and batt method ... is effective at keeping the sheathing colder than the dew point so moisture does not condense in the sheathing."
I think that should be "warmer than the dew point."
BobboMax,
Only in the summer.. ;)
I did mean colder than the dew point. The sheathing is outside the insulation not inside and therefore colder. This moves the dew point into the cavity, into the rigid closed cell 'splash' insulation. No surface for the moisture to condense on so no liquid present. This is the same dew point positioning science as putting the sheathing on the outside of the rigid foam boards.
How does the moisture get in? If it gets in can it not get out the same way? Let's assume the outside is well built so it is not getting in from out there. If it is, then fix that problem (and all this assumes cold climates). Where is the dew point before adding exterior insulation? Answer: It depends on the temperature differential at any given point in time. Could be half way into the wall cavity, or 1/3rd. And it varies depending on real R values at any point in the wall. Adding exterior insulation simply moves the dew point more to the exterior. Adding most anything to the exterior moves the dew point further out. If you want to move it out of the framing and sheathing everywhere, you have to add enough foam insulation everywhere to get it into the foam, all the time, regardless the temperature. The main points are in existing conditions, the dew point is somewhere in the existing framing (again depending on the temperature differentials at any point in time). Adding exterior insulation simply moves it. Building science research suggests if moisture is getting in (from the inside), it can also escape to the inside, as the interior warmth also helps to dry the cavity as the next day warms things up and moves the dew point further out.
Don't panic. Think about what is before negating something that might be better.
Yeah, one size does not fit all. One has to realize the dew point in a wall moves, and is different depending on even micro climates, with north walls different than south walls. The solutions depend on your specific circumstances, but complex answers are not a good read, and can't be addressed easily in a brief 1300 word article.
Utilizing a vapor open product on the exterior is also a good start! There are some foam free options out there too that will allow your wall assembly to dry-also use a rainscreen to increase drying potential that much more. Great article here!
Hello,
I am new to this forum, and also a neophyte - so please bear with me.
I have read the excellent "Musing of an Energy Nerd" book. I'd like some clarification regarding the question below.
I am going to build in a cold, dry ("semi-arid"), high elevation region of Wyoming, a climate zone 7 place. I am reluctant to place the required amount of rigid foam on the exterior (required to keep sheathing "warm" above dew point). What is wrong with placing the rigid foam on the inside (on the inside of the studs), thus providing a block to studs thermal bridging. Moisture from the inside would not (should not?) make it past the rigid foam toward the sheathing. Moisture from the outside that makes it to the sheathing would be able to dry to the outside? Would this design require a "rain screen" spacing, even in a "semi-arid" climate? For clarification: the area gets 11 inches of rain on average per year; 59 inches of snow per year.
Thank you for your help and comments!
Guy