7 Ways to Save on a Kitchen or Bathroom Remodel
Interior designer Melissa Prevost shares some straightforward alternatives to traditional budget busters.

I’ve been a fan of Melissa Prevost’s work since I came across it about a year ago. After featuring one of her projects, “Beams on a Budget,” it occurred to me that she’d make a great guest blogger, so I invited her to contribute some ideas for ways to save when doing kitchen and bathroom remodels, which is what follows:
As an interior designer, I’ve been a part of more than 200 remodeling projects—on both the low and luxe ends of the spectrum. At my firm, M Prevost Design, we believe everyone is entitled good design, and that it is about more than aesthetics. When thoughtfully executed, good design is long-lasting and sustainable. It can also be transformative and enhance one’s wellbeing. Over the years, I’ve become practiced in the art of creating feel-good, functional spaces on any budget. By gathering information from clients to lay the groundwork for design solutions that consider long-term needs and potential changes, I’ve found ways to avoid costly mistakes down the line. And I’ve learned a few little tricks for keeping the budget in check on the front end, too.
Maintain The Same Footprint
I often have clients who want to gut their kitchen or bathroom and redesign the whole space, which, as an interior designer, is my general preference, but moving plumbing and electrical systems is expensive. So when the budget won’t cover that, I advise maintaining the same footprint. Keeping the sink, refrigerator, range, shower valves, and the like in the same (or a nearby) location and designing around them is an immediate savings, and the results can be just as impactful. If the floor plan is problematic and functionality is an issue, I look for opportunities to improve the situation that don’t involve knocking down walls. For instance, I might swap out a vanity in favor of a pedestal sink, and handle storage with a tall rather than wide shelving unit and/or floating shelves. This creates more floor room and often has the effect of making the space feel bigger. Similarly, I might remove an outdated drop-in tub in favor of a freestanding style. In a kitchen, just adding organizational elements like a pantry, pull-out trash unit, designated pots/pans drawers, a place for spices, and a drop-zone can be hugely beneficial without breaking the bank.
Be Flexible On Flooring
This is a big line-item number on nearly every project, but it doesn’t need to be. There was a time when I would spec only engineered wood or hardwood, and while they are still my go-to, if I’m trying to keep costs down, I go with luxury vinyl planks (LVP). Products such as Cortona 12 from the Mission Collection and Del Mar Heights from the Kingsmen Collection do a great job of replicating the look of engineered wood, and the warranty offerings are excellent. LVP can be close to half the cost of engineered wood; I have saved thousands of dollars for clients by using it. There’s a wide variety of styles on the market, and the majority of products are low-maintenance, antimicrobial, and water-resistant or even waterproof. Additionally, unlike wood or tile, LVP is soft and warm underfoot, making it ideal for cold climates.
Get Creative With Cabinetry
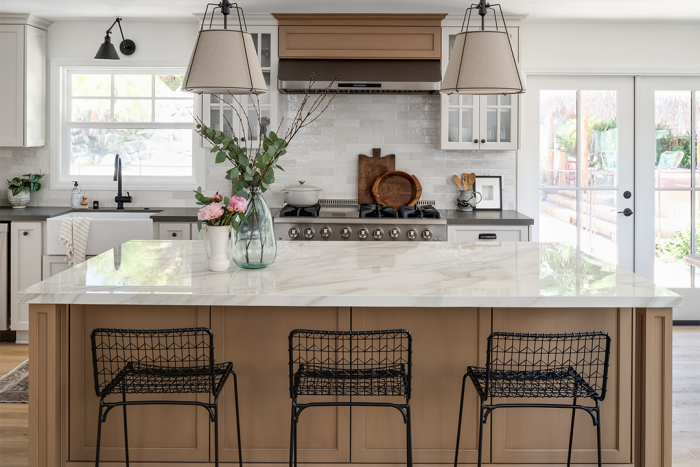
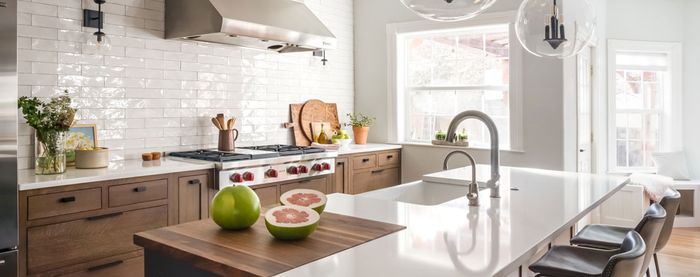
No doubt about it, custom cabinets are expensive. And, of course, cabinetry is key to a well-designed room—especially a kitchen. I regularly reface existing cabinets. Doing so hides all traces of the previous facades and allows you to change the door style, hardware, and finish, resulting in a whole new look. Swapping out existing cabinet fronts for glass inserts is another option. If all of the cabinetry needs replacing, Semihandmade’s line of door fronts on Ikea cabinet boxes is an economical yet tasteful option. If going the route of custom cabinets, it’s important to know the price differences between wood species, as well as the construction method of the cabinets and boxes. A cabinetmaker’s bid for flush inset cabinets is going to be about 30% more than full overlay cabinets. With paint-grade cabinets, I use poplar instead of maple wood, which saves up to $1000. There’s also the option of omitting cabinets altogether in favor of open shelves.
Make Inexpensive Look High End
I find ways to give less costly materials an expensive feel. For instance, I love to use marble for its natural veining but a Calacatta slab is not only pricy it also requires regular maintenance. As an alternative, I’ll use a sintered stone, such as Ascale in Ducal Gold, which comes in porcelain slabs. It’s nonporous, thermal-resistant, and easy to maintain. I also work with a contractor who can mimic the look of a $1600 concrete sink for a third of the cost, and I have sources I regularly turn to for lighting and tile knock-offs, vanity reproductions, and budget fixtures in luxe-looking finishes.
Create A Custom Look
There are many small but significant add-ons and swap-outs that can transform a room. In the kitchen: replace a standard microwave oven vent with a custom hood; remove a solid-surface backsplash for a full-height, pattern-tiled backsplash; add simple crown molding; replace a dated island with a vintage furniture-style piece; add wall sconces; introduce a new color or stain; mix finishes between the perimeter cabinetry and the island cabinetry; and look for opportunities to expose brick, stone, and beams. In bathrooms, use freestanding vanities like the one shown here, which I sourced from Restoration Hardware for $800. Signature Hardware and Fairmont Designs are other places I go to for reasonably priced vanities. Also, don’t underestimate the value of recycled materials. Antique lighting fixtures, furniture, and decorative pieces from places like salvage yards and flea markets give a space an eclectic feel for little investment.
Go Faux
I once worked with a client who really wanted the warmth that exposed beams lend to a room but the budget didn’t allow for expensive wood or custom post-to-beam structural connectors. So, I used dimensional lumber with off-the-shelf connectors. The beams were clad in pine, mitered at the edges to create the appearance of real beams, and finished in a custom-blended warm-brown stain. Another idea is to use wallpaper that imitates brick or concrete/plaster finish or peel-and-stick applications to give the illusion of wood-plank shiplap. And you can enrich architectural details like crown molding by stacking it with basic trim wood.
Reface A Fireplace
Though this is a less common aspect of remodeling projects, it’s a terrific opportunity—one that recently came up when my clients opened up their floor plan to accommodate a new kitchen and dining area. I was able to include the fireplace as part of the scope of the work because it was going to be an eyesore. Doing a tile surround or any kind of custom trim work was not an option, given the associated materials and labor costs. Instead, I used a remnant slab of quartz leftover from the kitchen island top for the hearth, and did a smooth concrete finish. The results elevated the entire space—for just under $2000, we were able to replace the facing, add a new hearth, and a install a custom-built wood mantle.
Photos courtesy of Melissa Prevost
If you have a kitchen project that might be of interest to our readers, please send a short description and images to kjacques@taunton.com.
For more kitchen on a budget:


