Build a Custom Rollout Cabinet
Pushed beneath the counter, it’s a kitchen cabinet with an adjustable shelf. Pulled out, it’s an extra work surface with a butcher-block top.

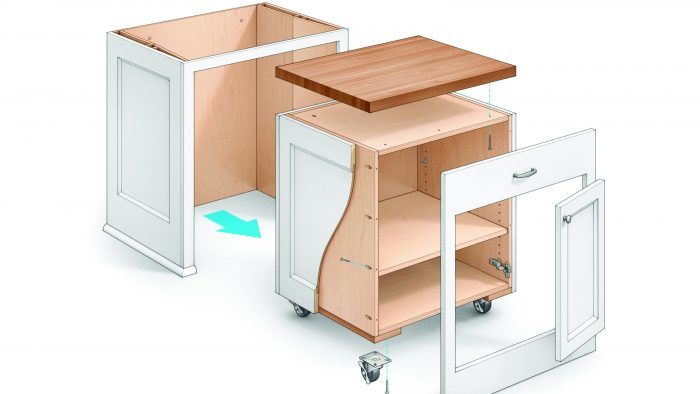
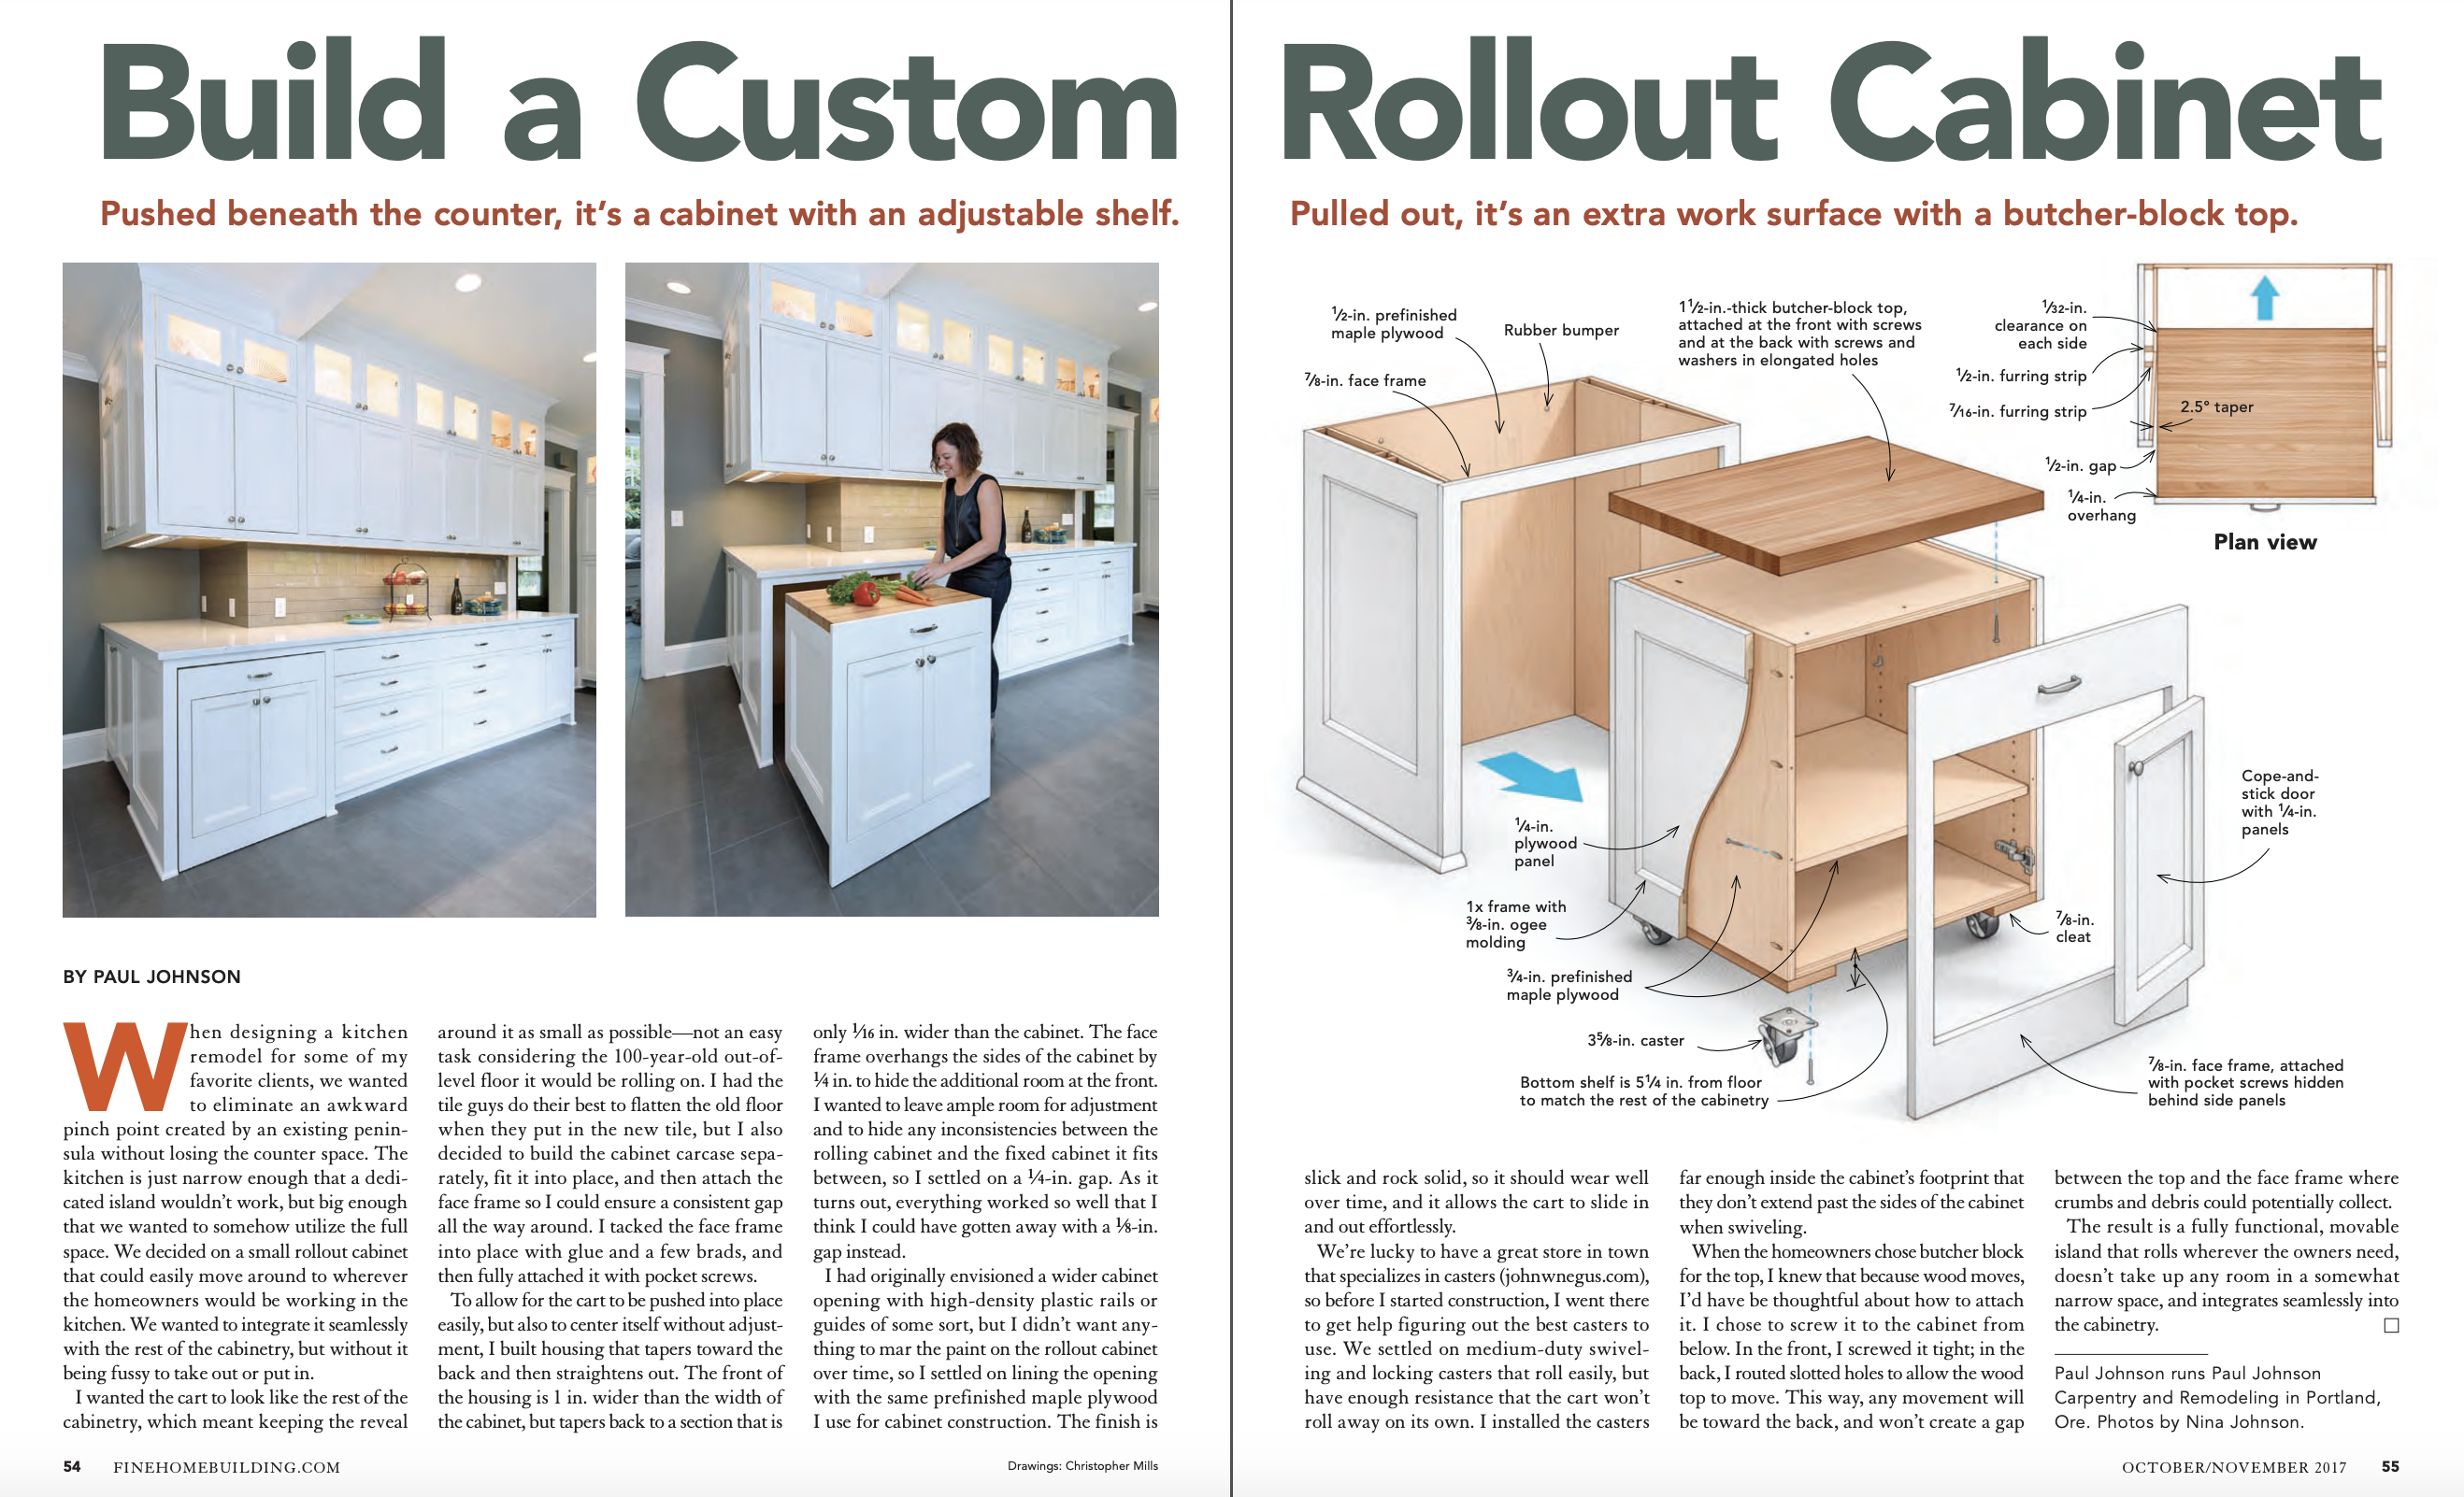
Synopsis: Carpenter Paul Johnson details the custom rollout cabinet he built to act as an island that also integrates with the cabinetry in his client’s kitchen. The cabinet is made from prefinished maple plywood with swiveling casters that roll easily, and has a 7/8-in.-thick face frame attached with pocket screws. It also has a paneled door designed to look like the rest of the cabinets, as well as a butcher-block top. In order to guide the cabinet into it’s housing easily, Johnson tapered the housing to have a 1/32-in. clearance on each side in the back, with a 1/2-in. gap in the front. The face frame has a 1/4-in. overhang, allowing a 1/4-in. gap on each side. The article includes a detailed drawing of the cabinet construction.
When designing a kitchen remodel for some of my favorite clients, we wanted to eliminate an awkward pinch point created by an existing peninsula without losing the counter space. The kitchen is just narrow enough that a dedicated island wouldn’t work, but big enough that we wanted to somehow utilize the full space. We decided on a small rollout cabinet that could easily move around to wherever the homeowners would be working in the kitchen. We wanted to integrate it seamlessly with the rest of the cabinetry, but without it being fussy to take out or put in.
I wanted the cart to look like the rest of the cabinetry, which meant keeping the reveal around it as small as possible—not an easy task considering the 100-year-old out-of-level floor it would be rolling on. I had the tile guys do their best to flatten the old floor when they put in the new tile, but I also decided to build the cabinet carcase separately, fit it into place, and then attach the face frame so I could ensure a consistent gap all the way around. I tacked the face frame into place with glue and a few brads, and then fully attached it with pocket screws.
To allow for the cart to be pushed into place easily, but also to center itself without adjustment, I built housing that tapers toward the back and then straightens out. The front of the housing is 1 in. wider than the width of the cabinet, but tapers back to a section that is only 1⁄16 in. wider than the cabinet. The face frame overhangs the sides of the cabinet by 1⁄4 in. to hide the additional room at the front. I wanted to leave ample room for adjustment and to hide any inconsistencies between the rolling cabinet and the fixed cabinet it fits between, so I settled on a 1⁄4-in. gap. As it turns out, everything worked so well that I think I could have gotten away with a 1⁄8-in. gap instead.
I had originally envisioned a wider cabinet opening with high-density plastic rails or guides of some sort, but I didn’t want anything to mar the paint on the rollout cabinet over time, so I settled on lining the opening with the same prefinished maple plywood I use for cabinet construction. The finish is slick and rock solid, so it should wear well over time, and it allows the cart to slide in and out effortlessly.
For more photos, drawings, and details, click the View PDF button below:


