Building Concrete Countertops
A carefully constructed mold is the key to creating a beautiful kitchen counter from everyday materials.

Synopsis: Famed California designer Fu-Tung Cheng explains how he makes cast concrete countertops for the kitchen, with tips on building accurate molds with sink and faucet knockouts and integral drain boards. He includes his successful recipe for concrete.
Concrete is a wondrous material. It has substance and mass, permanence and warmth. It assumes forms that irrevocably touch our daily lives: bridges, floors, walls, and now even countertops. I built my first concrete countertop with a friend in 1985 and was so encouraged that I began to design and build more of these “working sculptures.” After learning to control the process, I’ve made concrete my design material of choice in kitchens and baths.
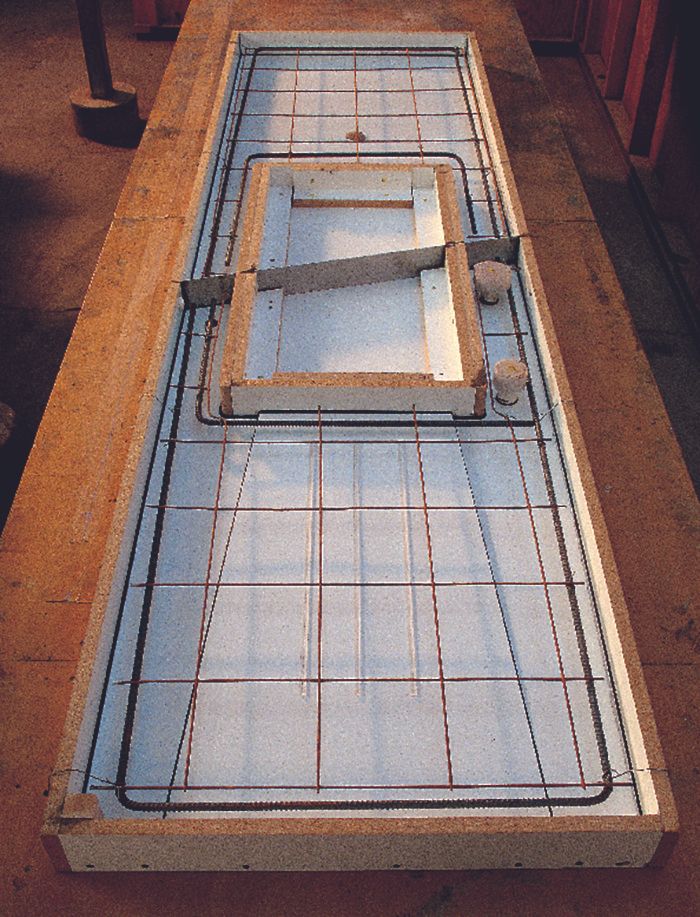
The first step in building a concrete countertop is making the mold, a task that offers opportunities for creativity, but one that demands lots of attention to detail. A mold doesn’t require sophisticated materials or techniques, but the process can be conceptually challenging because the mold is a mirror image of the finished piece. When you construct a mold, you’re essentially building what is not in the countertop.
For my crew and me, a common project is a mold for a simple rectangular kitchen countertop that includes an undermounted sink, a faucet, a dishwasher air gap, and an integral drain board. As for any project of this sort, mixing and pouring the concrete are vital processes for a durable countertop.
The template comes first
Countertop layout begins with the template, which defines the size and shape of the countertop. It also records details such as walls that are out of square and becomes the notebook on which to write essential information such as the location of cabinet bays, plumbing, and appliances.
For template material, we use 3-in.- or 4-in.-wide strips of hollow-core door skins, but lauan plywood, foam board, or even stiff cardboard works, too. The template begins with one long strip placed along the back of the cabinets. A second strip establishes the front edge, overhanging the cabinet. After checking that the front piece is parallel with the face of the cabinets, we tack the strips in place temporarily with a couple of small finish nails.
Two crosspieces define the counter’s ends and are cut short so that they fit in the outer edges of the back and front strips. More crosspieces define the sink bay. Once all the pieces are in place and the template is square, we use hot-melt glue to attach the crosspieces to the front and back strips. We hold or clamp each glued joint until the glue has hardened.
Before removing the template from the cabinets, we note pertinent information on it, such as the position of the faucet. It’s a good idea to note on the template which side is the top, along with the front and back edges, especially if you’re making the mold off site. This all may seem obvious, but we’ve learned the hard way that such details aren’t always so clear once we’ve returned to the shop.
For more photos and details, click the View PDF button below:


