How to Build a Kitchen Island
Learn how to assemble semicustom cabinets and off-the-shelf parts for a hardworking island.

Synopsis: Given that the kitchen nowadays is viewed as the center of the house, remodels are an opportunity to enhance that space with an island, a great place for working and eating. In this article, kitchen-design master Rick Gedney describes his process for building a kitchen island. Gedney says to start with a focal point and to follow the designer’s plans. For the project featured in the article, the island’s construction started by siting it properly under an overhead light fixture. With that point established, measure out the location of the island, based on the designer’s plans. Gedney says it’s best to place cabinet boxes based on middle ground, then to shim or plane other cabinets accordingly. The island in this project features an eating area defined with a plywood panel that matches the cabinets. Finishing touches include drawer and cabinet pulls, appliances, fixtures, and the countertop.
The function of a modern kitchen island can be traced to the familiar kitchen worktable that’s been helping families to run the household and prepare meals for generations. An island’s job is even tougher, though: A table from the 18th or 19th century didn’t need to be a space for making pizza, checking email, or stir-frying. It also didn’t have to integrate pipes, ducts, and wires.
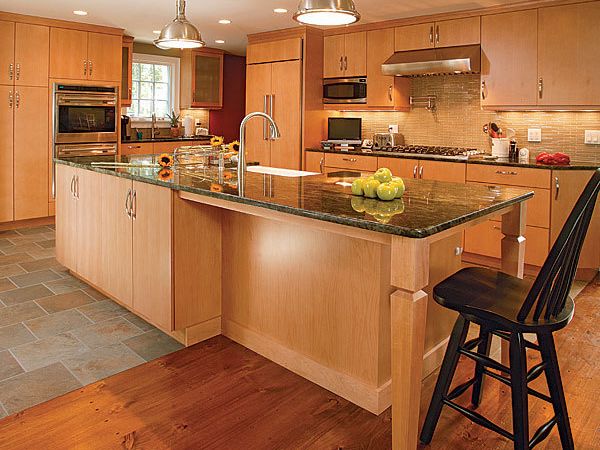
I was recently called to a client’s house for a full kitchen remodel. The young family wanted to renovate their existing, space-challenged galley kitchen, turning it into a wide-open room with an eat-at island. We looked at the available space and decided a single-level island with a farm sink made the most sense.
One often-overlooked item with island installations is how different floor coverings transition around the cabinets. On this project, we had to make an attractive transition between the wide pine floors in the adjacent living areas and the new kitchen’s tile floor. We opted to make the transition at the end of the island and run the wide pine under the eating area. This seemed like the most logical spot to transition between the two types of flooring.
The installation of this island was pretty typical, although the open ceiling in the basement made running pipes and wires to the island a little easier. In this case, the plumber and electrician decided it would be best to do their rough-ins after the cabinets were installed, although such a process varies from one job to the next. When I’m designing a kitchen island, I always get the general contractor and the subcontractors involved as soon as we have preliminary drawings because plumbing, ventilation, and electrical requirements can make some designs unworkable with a typical budget.
Start with a focal point, then follow the plans
Light fixtures are typically centered over sinks and appliances, so this is a logical starting point for establishing the cabinet layout. From there, move left and right according to the plans, accounting for discrepancies in floor height as you move. With the cabinets aligned, screwed together, and at a consistent height, they can be fastened to the floor.
Center the sink: Using a pair of levels, transfer to the floor the location of the light fixture centered over the sink. This becomes the starting point for the layout.
Work from the end: With the position of the sink’s overhead light as a starting point, use the kitchen designer’s measured drawings to determine the end of the island. Measure from the wall cabinets to create a parallel line that the island will follow.
Find middle ground: Many installers find the highest point of the floor to reference cabinet height, and then shim up the cabinets that sit on low spots. A better option is to find a cabinet at average height and then shim the low cabinets up and plane the high cabinets down. Shimming and planing should be minimal.
For more photos and details, click the View PDF button below:


