Taming an Outdated Pantry
Clever design ideas and construction techniques for outfitting an awkward space with useful kitchen storage.

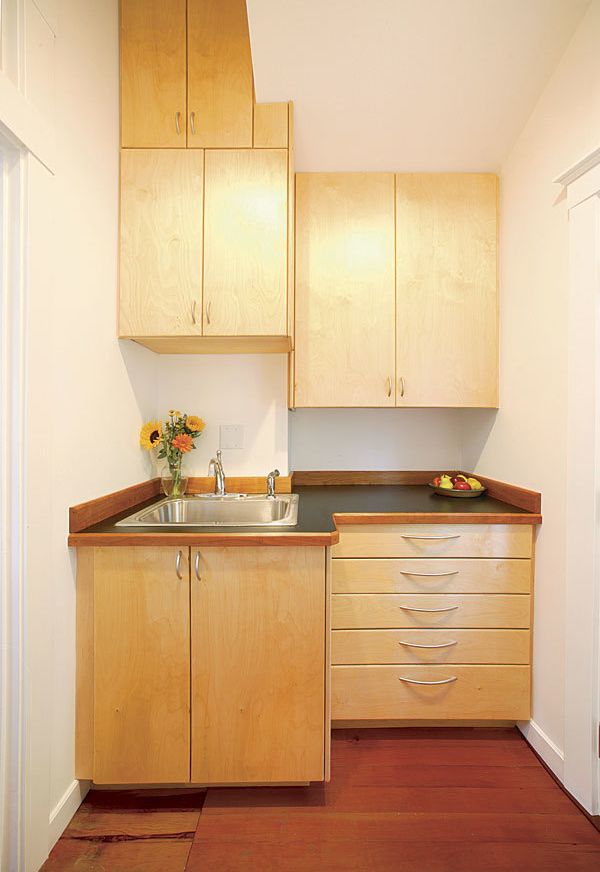
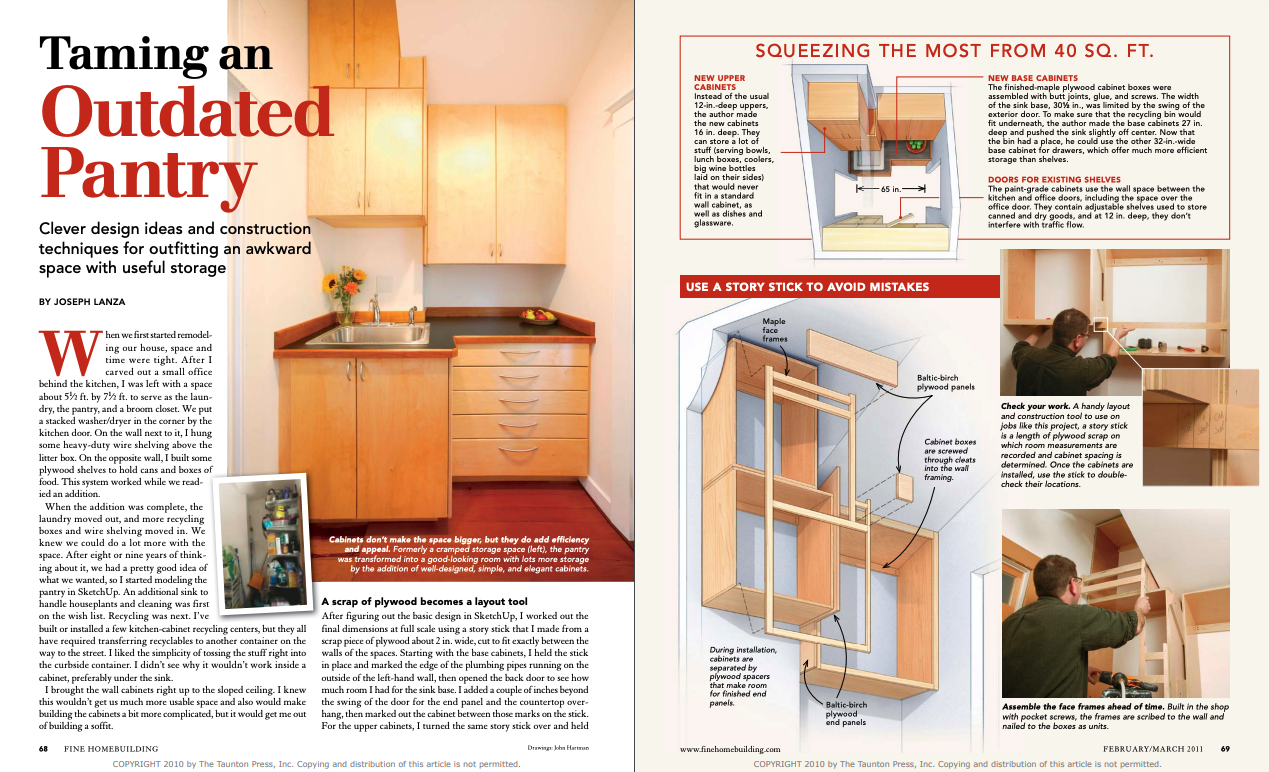
Synopsis: Builder Joseph Lanza had lived with a cramped pantry off his kitchen for years. In this article, he shows how he transformed this 40-ft. space into a good-looking room with lots more storage. First on his list was a sink to handle houseplants and cleaning. Next was a recycling center, then upper and base cabinets, and finally doors to cover existing shelves. He built the cabinets without backs, which made construction and installation easier and, in the case of the base cabinets, made the integration of plumbing and other obstacles simpler. To avoid mistakes, he used a story stick, a length of plywood scrap on which room measurements are recorded and cabinet spacing is determined.
When we first started remodeling our house, space and time were tight. After I carved out a small office behind the kitchen, I was left with a space about 5 1⁄2 ft. by 7 1⁄2 ft. to serve as the laundry, the pantry, and a broom closet. We put a stacked washer/dryer in the corner by the kitchen door. On the wall next to it, I hung some heavy-duty wire shelving above the litter box. On the opposite wall, I built some plywood shelves to hold cans and boxes of food. This system worked while we readied an addition.
When the addition was complete, the laundry moved out, and more recycling boxes and wire shelving moved in. We knew we could do a lot more with the space. After eight or nine years of thinking about it, we had a pretty good idea of what we wanted, so I started modeling the pantry in SketchUp. An additional sink to handle houseplants and cleaning was first on the wish list. Recycling was next. I’ve built or installed a few kitchen-cabinet recycling centers, but they all have required transferring recyclables to another container on the way to the street. I liked the simplicity of tossing the stuff right into the curbside container. I didn’t see why it wouldn’t work inside a cabinet, preferably under the sink.
I brought the wall cabinets right up to the sloped ceiling. I knew this wouldn’t get us much more usable space and also would make building the cabinets a bit more complicated, but it would get me out of building a soffit.
A scrap of plywood becomes a layout tool
After figuring out the basic design in SketchUp, I worked out the final dimensions at full scale using a story stick that I made from a scrap piece of plywood about 2 in. wide, cut to fit exactly between the walls of the spaces. Starting with the base cabinets, I held the stick in place and marked the edge of the plumbing pipes running on the outside of the left-hand wall, then opened the back door to see how much room I had for the sink base. I added a couple of inches beyond the swing of the door for the end panel and the countertop overhang, then marked out the cabinet between those marks on the stick. For the upper cabinets, I turned the same story stick over and held it against the back wall. I marked the corner where the wall jogs, then laid out the cabinets to the left and right. I drew all the components — cabinet sides, spacers, blocks, and scribe strips — on the story stick, then used the story stick (instead of my tape measure) to mark the plywood when I cut out the cabinet parts.
For more photos, drawings, and details, click the View PDF button below:


