
Basic Wallpapering Techniques
Wallcoverings aren't hard to apply as long as you follow these steps carefully.
| SAFETY TIP: Before you start hanging wallpaper, turn off the electricity to affected outlets, switches, and fixtures, and check with a voltage tester to be sure the power is off. |
When you’re ready to start hanging paper, measure out from a corner or a jamb casing, if that’s where you’ll begin, and draw a plumb line that will become the leading edge of the first strip. If the casing is out of plumb, allow the trailing edge of the strip to overlap the casing enough to be trimmed with a razor knife without creating a space along the casing. If the casing is plumb, simply butt the trailing edge to the casing. As you proceed around the room, continually check for plumb.
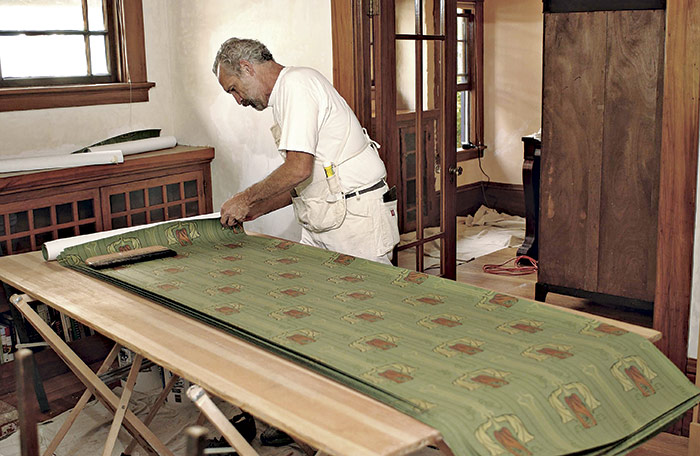
Cutting strips to length
Measure the height of the wall and cut several strips to length, leaving an extra inch or two at each end to allow for vertically matching patterns and trimming to edges. Cut the first two strips extra long. Slide the first strip up or down the wall until most (or all) of its pattern shows near the ceiling line. Don’t show less than half the pattern. The pattern along the baseboard will be less visible and less important.
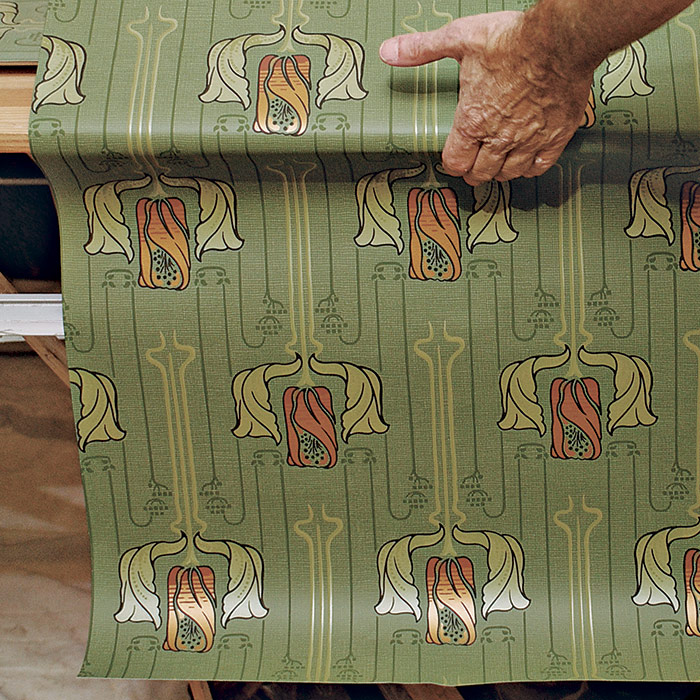
On your cutting table, place the second strip next to the first, and align the patterns along their edges with two strips side by side. You’ll have a sense of how much waste to allow for pattern matching. (A pattern-repeat interval is often printed on the label packaged with the wallpaper.) Depending on the size of the patterns, each succeeding strip can usually be rough-cut with an inch or two extra at each end and then trimmed after being pasted.
Do the rough-cutting at the table using shears. Do the trimming on the wall using a razor knife. Patterns that run horizontally across the face of a covering are called straight match. Patterns that run diagonally are called drop match and waste somewhat more material during alignment.
Unless you are working with a delicate covering, cut several strips at a time. But be careful not to crease them. Flop the entire pile of strips facedown on the table so the piece cut first will be the first pasted and hung. The table must be perfectly clean; otherwise, the face of the bottom strip could become soiled.
Pasting
Unless you’re experienced, buy premixed adhesive. But if mix you must, try to achieve a mixture that’s slightly tacky to the touch. Add paste powder or water slowly: Even small increments can change the consistency radically. Finally, mix thoroughly to remove lumps.
As you work, keep the pasting table clean, quickly sponging up stray paste so it won’t get on strip faces. Some coverings, such as vinyl, are not marred by stray paste on the face, but many -others could be. Although the batch of paste you mix should last a working day, keep an eye on the consistency. Paste should glide on, never drag. Rinse the paste brush or roller when you break for lunch and when you quit for the day.
| PRO TIP: Be as neat as possible when applying paste. Keep wiping the tabletop clean so paste doesn’t get onto strip faces. Removing stray paste from wallcovering faces is a nuisance and, in the case of some of the more delicate coverings, a disaster. |
Until you become familiar with papering, apply paste to only one strip at a time. In other words, hang each strip before pasting another one. Using a roller, apply paste in the middle of the strip, toward the top. Spread the paste to the far edge and then to the near edge. For good measure, run the roller over strip edges twice because it’s often hard to see if the paste along the edges is evenly spread.
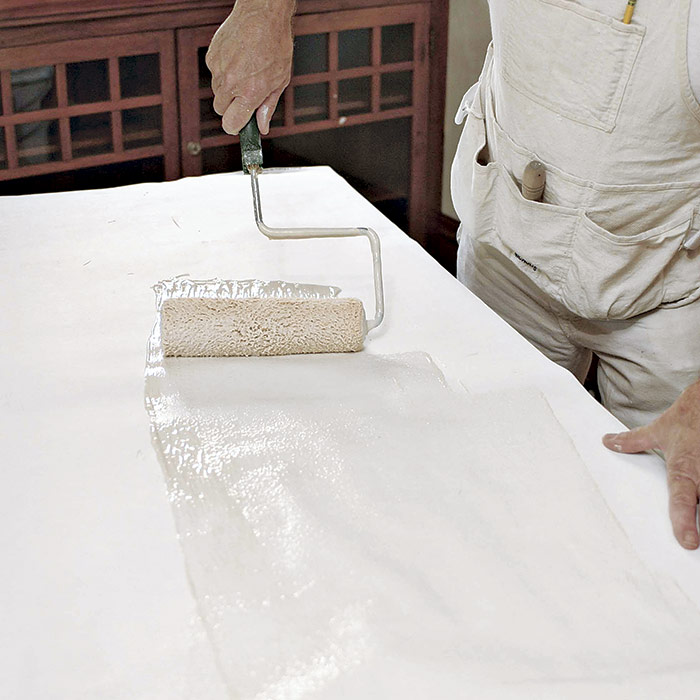
Prepasted Papers and WaterMany wallcoverings come prepasted. Typically, manufacturers specify that individual strips be soaked for 30 seconds in a tray filled with lukewarm water. But follow the directions printed on the back or supplied by the retailer. After soaking, pull each strip out of the tray and onto the worktable, book (fold) it, and allow it to expand before hanging it on the wall. Precut the pieces before placing them in the water tray. Otherwise, if you try to trim soaked strips, they’ll snag or tear. Many professional paperhangers will hang prepasted wallcoverings but hate water trays because (1) water and diluted paste drips everywhere; (2) the water in the tray must be changed often; (3) a thin film of paste also ends up on the front of the wallcovering; and (4) if the strips are soaked too long, they may not adhere well. Instead, these pros roll prepaste activator onto the back of strips, just as you’d apply standard paste. Rolling on an activator reduces mess and ensures good adherence to the wall. Last, pros sometimes roll thinned-down paste instead of activator. That may be OK, but first ask the supplier if the two pastes will be compatible. |
“Booking” strips
For convenient handling, create loose folds of pasted covering that you can carry to the wall, unfold without mess, hang, and smooth. The most practical folding method is known as booking, perhaps because the folds resemble the folds of a book dust jacket. When folding strips, do so loosely; avoid creasing them.
Booking a strip (typically, for five minutes) also allows it to absorb the moisture in the paste, expand, and contract slightly to its final width. If you do not allow the wallcovering time to expand and contract before hanging it, it will do so on the wall, either buckling or gapping at the seams. Booking times vary: Pros who know their pastes and papers will sometimes cut, paste, and book several strips at once, placing them into a plastic trash bag so the paste doesn’t dry out.
However, if you paste several strips at once, keep track of the order in which you pasted them. And hang them in the same order.
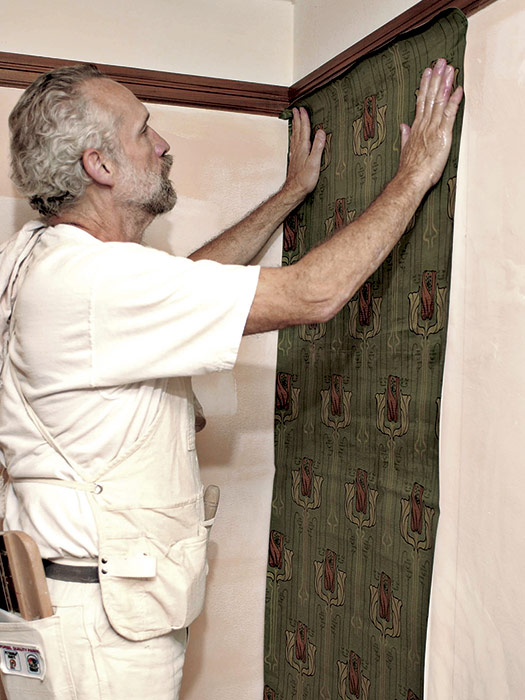
Hanging pasted strips
To hang a strip of wallcovering, unfold the booked upper fold (leaving the lower one folded) and align the edge of the strip to your plumb line. Position the upper end of the strip an inch or so above the ceiling line. Smooth the upper end of the strip first by running a smoothing brush down the middle of the strip and out toward the edges. Working from the center outward, brush air bubbles, wrinkles, and excess paste from the middle to the edges. Align subsequent pieces to the leading edge of each preceding strip, checking periodically to make sure the strips are plumb.
 |
 |
 |
 |
 |
 |
If the upper half of the strip is adhering well, simply unfold the lower fold and smooth the paper down, again brushing down the center and out toward the edges with small strokes.
If a butt seam doesn’t meet exactly, you have three choices:
• Move a strip slightly by raising one of its edges and—palm on paper—using your other hand to slide the strip toward or away from the seam. Raising one edge of the strip reduces the grip between paper and wall.
• Pull the strip off the wall, realign its patterns along the seam, and brush it down. But you’ve got to move quickly: Don’t wait much more than a minute to pull the strip off.
• Pull off the strip, quickly sponge-clean the wall, and hang a new strip. Don’t try pulling just one edge of the strip, however. At best, it will stretch, draw back when it dries, and open the seam. At worst, you’ll pucker or rip the strip.
Dry-HangingIf handled too much, many fabrics, foils, Mylar, and grasses will separate from their backing once they absorb the paste. For that reason, pros often dry-hang them. Here’s how: They roll paste onto the wall and smooth the dry covering onto it. However, leave this job to a pro because the paste must be applied impeccably even and the strips placed exactly—there’s little chance to adjust them. Likewise, these materials can’t tolerate sponging, rubbing, or seam rolling. Pros sweep them on with a soft-bristle smoothing brush and let them be. |
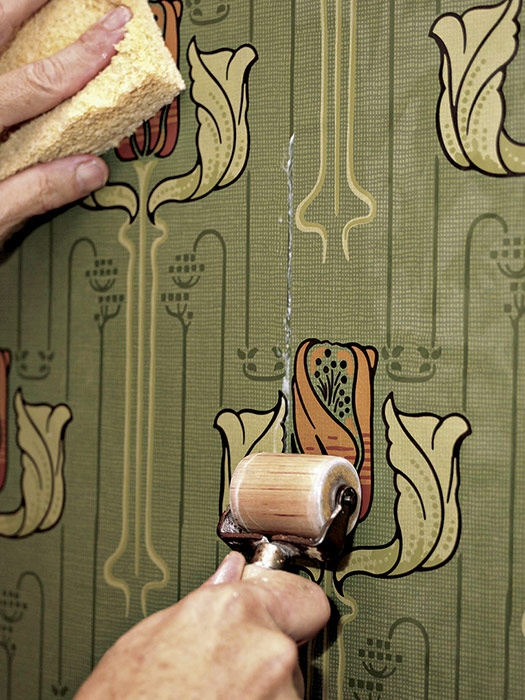
Sponging
It’s impossible to overstate the importance of gently wiping paste off wallcovering faces and adjacent surfaces. If paste dries on a painted ceiling, it can pull the paint off. (If you see a brown crust along a ceiling–wall intersection, that’s dried paste.) Paste will even pull the finish off wood trim. Vinyl-on-vinyl and clay adhesives are especially tenacious, so sponge off the excess immediately.
Equally important: Change your sponge water often so diluted paste doesn’t accumulate. Warm water is best. And wring the sponge almost dry before wiping. When you’ve wiped the surfaces clean, come back with a soft, dry rag. But apply only light pressure so you don’t move the wallcovering, disturbing the seams.
Don’t rub delicate wallpapers. Instead, blot them clean with a just-damp sponge. Before you commit to any wallcovering, ask your supplier if it can be wiped (or blotted clean) with a sponge. If not, consider other materials.
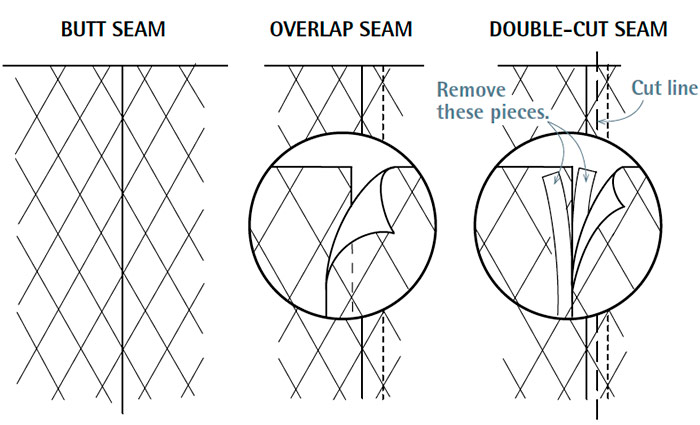
Three Types of SeamsYou can join strip edges in three ways: butt seam, overlap seam, or double-cut seams. • The butt seam is the most common. Its edges are simply butted together and rolled with a seam roller. • An overlap seam is better where corners are out of square or when a butt seam might occur in a corner and not cover well. Keep the overlap as narrow as possible, thereby avoiding a noticeable welt and patterns that are grossly mismatched. • Double-cut seams (also called through-cut seams) are the most complex of the three. They are used primarily where patterns are tough to match or surfaces are irregular; for example, where the walls of an alcove aren’t square. How to Cut Seams
|
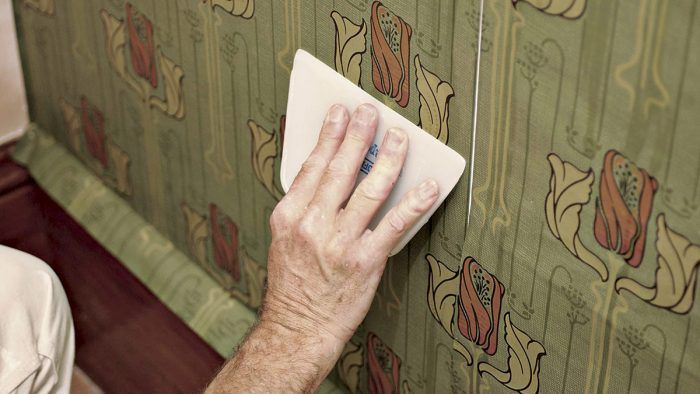
Trimming and rolling
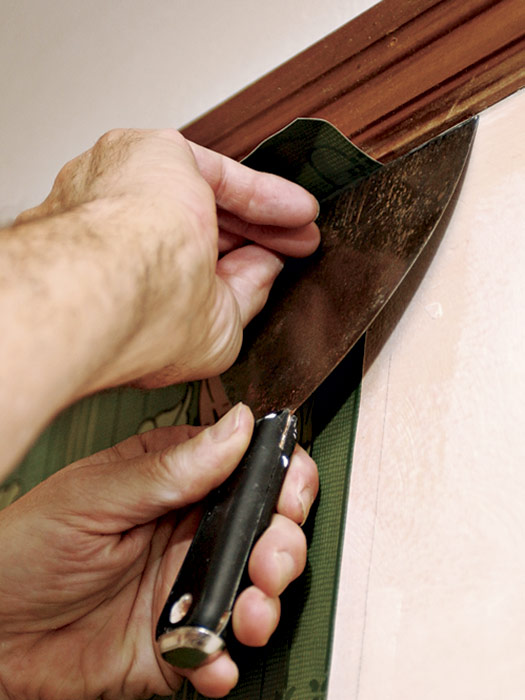
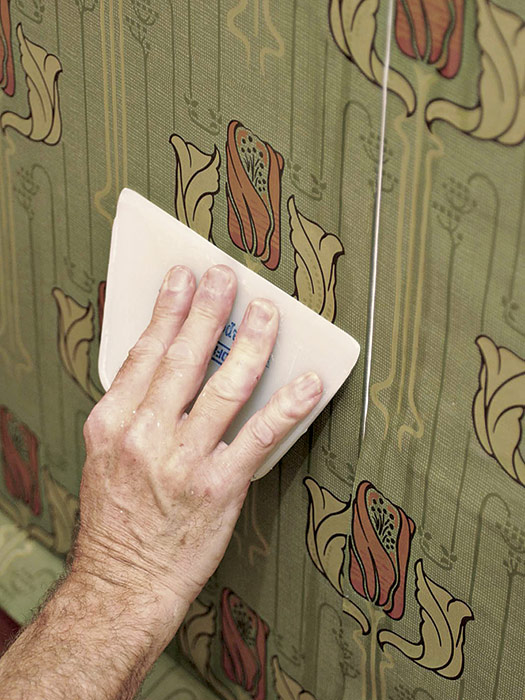
Where a strip of wallcovering meets a border, such as woodwork, a ceiling line, or a baseboard, use a 6-in. taping knife to press the edges of the covering snug. Cut off the excess by running a razor knife along the blade of the taping knife. To ensure that strips fit tightly against a door or window casing, rough-cut them a little long. Then, using your taping knife, tuck the wallcovering snugly against the casing and trim it more precisely. For clean cuts, razor blades must be sharp.
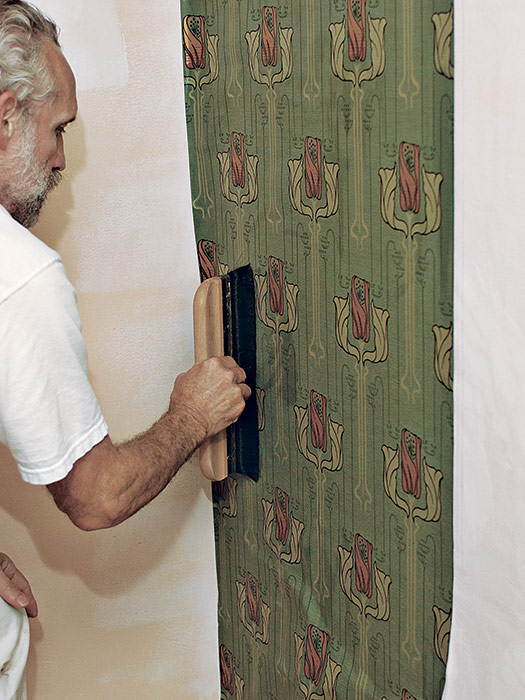
Conventional wisdom suggests rolling seams 10 to 15 minutes after the strips are in place—that is, after the paste has set somewhat. But the master craftsman shown hanging wallpaper in the photos here prefers to roll the seams before he brushes out the paper. If you position the strips correctly, roll the seams, and then smooth the covering, he asserts, you’ll be less likely to stretch the wallpaper. Also, if seams don’t align correctly, you want to know that sooner rather than later so you can adjust or remove the strip before the paste sets up.
In any case, rolling may cause paste to ooze from the seams. So be sure to sponge wallcovering clean as you work, unless you’re installing delicate or embossed wallcovering, which shouldn’t be rolled or wiped at all. Finally, use a moderate pressure when rolling. After all, you’re trying to embed the wallcovering in the paste, not crush it.
Touch-Ups and Repairs• Smudges and stains. Clean washable wallcoverings by rubbing them gently with soap and water. A commercial cleaning dough removes stains when rubbed lightly over a soiled spot. As the dough gathers grime, fold the dough in onto itself, exposing clean dough surfaces. You can blot (not rub) most nonwashable coverings with commercial, stain-removing solvents. Your wallcovering supplier can suggest one. • Gashes. First, try to repaste the torn flap. If that doesn’t look good, rip—don’t cut—a patch from a spare roll of the same covering. The ragged edge of a ripped piece will be less obvious than straight edges cut with shears or a razor knife. • Dents and cracks. Repair dents and cracks in the wall behind, and gently tear free any unpasted paper around the gash. Paste the back of the ragged-edge replacement, carefully aligning its pattern with that of the existing covering before smoothing down the patch. |
