Painting and Finishing: Preparing the Surfaces
Most paint problems can be prevented with good preparation. Here's how to get it done.

Synopsis: Painting and finishing tasks around the house often don’t turn out the way you expect. In Build Like a Pro: Painting and Finishing, Michael Dresdner takes you through each step of the process, giving you the tools to get great-looking results every time.
In this excerpt, Michael shows you how to prevent paint problems by correctly preparing the surface.
Preparing the surfaces
Good surface preparation makes the difference between a paint job that sticks around for a long time and one that takes a powder way too soon. In fact, the majority of paint problems can be prevented with good preparation. Paint doesn’t stick well to a dirty or an oxidized surface, and a job isn’t much fun without all the proper gear in place. Good preparation means the surface is clean, the seams and cracks are well caulked, there is no loose material, and all your gear is assembled.
Cleaning the surfaces
Occasionally, you’ll coat new wood for the first time. If the new wood has weathered and had a chance to oxidize (this can happen in as little as a couple of weeks), rough it up by sanding it with 80-grit paper to create a clean surface. Don’t go any finer than that, since a rough surface holds finish better. Brush the surface afterward with a bristle broom to remove the dust. Use paintable caulk to seal areas where the siding meets molding and windows, as well as other areas where water could enter. If you are planning to paint woods that tend to bleed into paint, such as cedar, redwood, mahogany, cypress, and fir, use a primer specifically designed to prevent bleeding.
More often than not, there is already paint, stain, or clear finish on the siding. You can’t really see what you are up against unless you clean the surface first. If you have a pressure washer, now is a great time to use it. Use a wide fan and the lowest power setting. A narrow or high-pressure stream can drill right through soft wood and peel off paint and layers of wood fiber. Be gentle with it. Otherwise, brush off what you can while the surface is dry, and then wash it off with a garden hose. Remember to aim downward when you wash so you don’t get water under the shingles or lapped siding. If a hose doesn’t take off the dirt, mix 1 cup of detergent with 2 gallons of water and have at it with a scrub brush. Rinse it off well with the hose when you are finished.
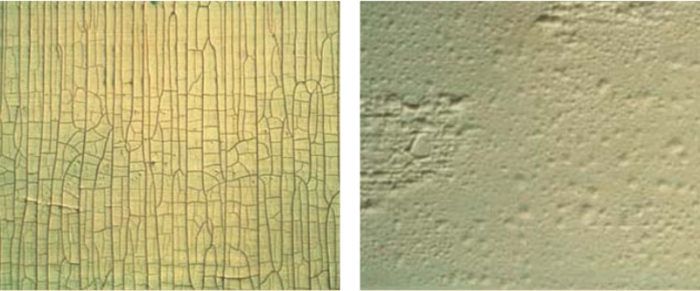
Use scrapers or a wire brush to dislodge loose paint, peeling sections, or blisters. What remains should be solidly attached to the wood. Wherever paint was removed, feather the edges with a sander so there are no steps or ridges where old paint meets raw wood. Ridges make new paint crack prematurely. If you’ve pressure washed first, let the wood dry for at least 24 hours before scraping so you don’t dig into soft, wet wood.
For diagrams and more information on how to prevent paint problems, click the View PDF button below.


View Comments
These paints likely have toxic lead. Powerwashing pushes water into wood and can lead to easy new paint failure later. And, how do you collect and contain the lead chips in the waste water from contaminating your ground where kids and dogs might play? Dry scraping or sanding big chips makes flying toxic lead dust, which also end up in your dirt. Check more modern and safter methods like low infrared heat.