Spray Everything
Careful preparation and a boatload of masking tape are the keys to high-quality, high-production interior painting.
Editor’s note: This article may be decades old, but paint preparation and spraying techniques have stayed basically the same over the years. For a more recent look at the process of interior spray painting, read Tyler Grace’s article Spray Finish On Site
Synopsis: A Seattle painting contractor makes the case for abandoning the paintbrush and roller. He explains his system of masking and spraying interior spaces, describing both the process and the equipment that allows him to paint walls and trim in a typical living room in just three hours.
A few years ago, as I was masking off a room prior to brushing and rolling, I became annoyed by the roller splatter that the previous painters had allowed to decorate the woodwork throughout the house. I intended to make my masking so tight that I could assure the homeowner that those decorations didn’t come from me. So not only did I tape around the windows, I also covered them with plastic sheeting; then I ran masking paper along the baseboards to protect the edges of the floor and overlapped the paper onto my dropcloths. When I was finished with my preparations, I stood back and realized that with masking this tight, it would be a waste of my time not to spray-paint the room. I haven’t rolled a single room since.
Better product, less time
Except for the masking and spraying, the procedure I follow is not all that much different than it would be for a conventional paint job: I prep, caulk and fully paint all the woodwork in the room first, saving the flatwork (walls and ceilings) for last. Even with all the masking that must be done, spray-painting is a much faster operation than brushing and rolling. A typical living room takes me two hours total for all the masking and 60 minutes tops to spray two coats on both walls and trim.
Speed is important to me but not as much as quality. I’ve learned that by using the proper materials, techniques and equipment, I can achieve a much finer finish with a spray gun. Partly, it’s because I don’t have to worry about lumps, fuzz, brushstrokes or roller marks; and partly, it’s because I can lay down a thicker coat of paint with a sprayer than I can with either a brush or a roller.
Using a sprayer also makes last-minute color changes much less of a hassle. I recently sprayed two bedrooms, each with different colored walls and ceilings, for one of my finickier clients. When she walked in, she immediately realized her choices had been too bold, and she begged me to repaint. Fortunately, I was able to complete all her changes within two hours — including a trip to the paint store.
An ounce of prevention is worth a ton of apologies
The biggest drawback to spray-painting is overspray and its villainous sidekick, the “dry fall” dust that sticks tenaciously to every unprotected surface. To make sure I paint only the surfaces I intend to paint, I must be meticulous with the protective measures I take.
As soon as I arrive on a job, I lay down clean drop cloths over the traffic areas between the service entrance and the rooms in which I’ll be working. Carpeting in the work areas gets covered with drop cloths, which are spread to within a few inches of the baseboards. The edge of the carpet is protected by 12-in. wide masking paper, which is sealed tightly along the edge of the baseboards, then lapped over the cloth and held down with masking tape.
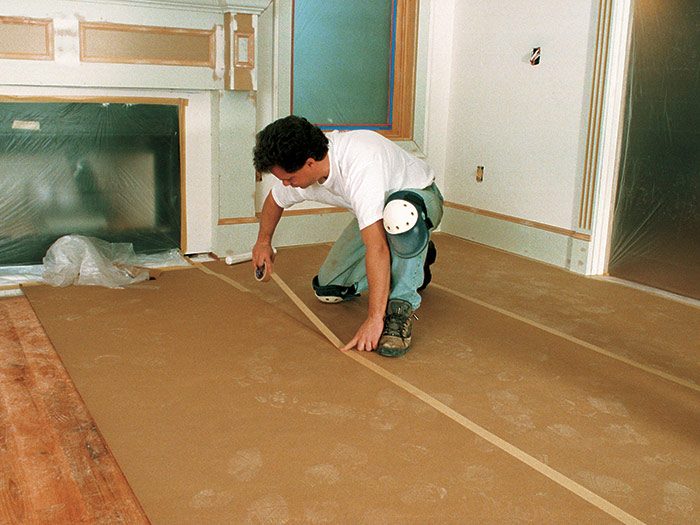
I never use drop cloths to protect hard-surface floors, however, because residual grit from previous paint jobs can make the drop cloths behave like giant sheets of sandpaper. Over hard surfaces, I roll out 3-ft. wide sheets of kraft paper, taking care to overlap and securely tape all the seams.
Any fixtures that can’t easily be removed are thoroughly masked. Large items such as chandeliers are draped with 0.4-mil plastic sheeting and securely sealed with tape; switches, receptacles and other small items are carefully taped over. Any furniture that can’t be hauled out is covered twice, first with plastic, then with a drop cloth. I make sure that the drop cloth extends all the way to the floor and then tape it down to lock out overspray.
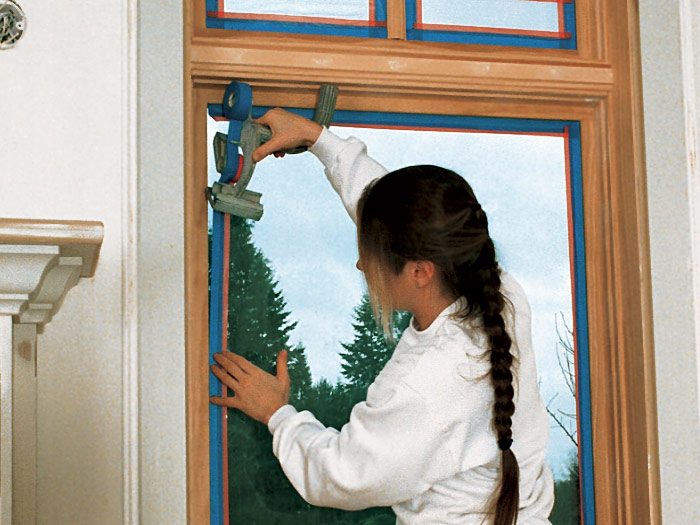
To allow me to spray an entire window at one time, each window pane is masked along the edge of the glass with double-sided tape, which is then covered with plastic sheeting (bottom below). A Dual-Tac tape dispenser (3M Co.; 800-480-1704) makes this job easy by automatically uniting two types of masking tape to create a double-sided tape that firmly grips the plastic sheeting. The plastic is carefully trimmed with a razor knife so that it doesn’t interfere with the spray pattern.
Thorough cleanup follows prep work
As soon as masking is complete, I begin prepping the trim. The prep work for spray-painting is no different than it is for any other type of interior painting. To make sure all the nail holes and imperfections disappear, I apply spackling in two thin coats. For the first “fill,” I use a standard resin-based spackling compound that dries quickly with minimal shrinkage (Sherwin-Williams Co.; 800-336-1110). After sanding the first coat with 80-grit paper, however, I apply a skim coat using 3M Red automotive putty, which is thinner than Spackle and much easier to sand. When it is dry, this coat is then sanded with 120-grit paper.
After the sanding, the trim is vacuumed and wiped down thoroughly with rags moistened with mineral spirits. The floors are also thoroughly swept and vacuumed. From this point, it’s critical to keep the floors clean because any loose dust will be stirred up and blown onto the walls along with the paint.
Minimal priming, maximum caulking
Most of my jobs are either repaints or new construction where the trim is pre-primed medium-density fiberboard, so I don’t have to do a lot of priming. When the amount of bare wood is minimal, I spot-prime it with a spray can. When I encounter a lot of raw wood, I set up the spray equipment and cover the woodwork with a light coating of fast-drying alkyd primer. Compared with less toxic latex products, this primer dries faster, sands more easily and doesn’t raise wood grain.
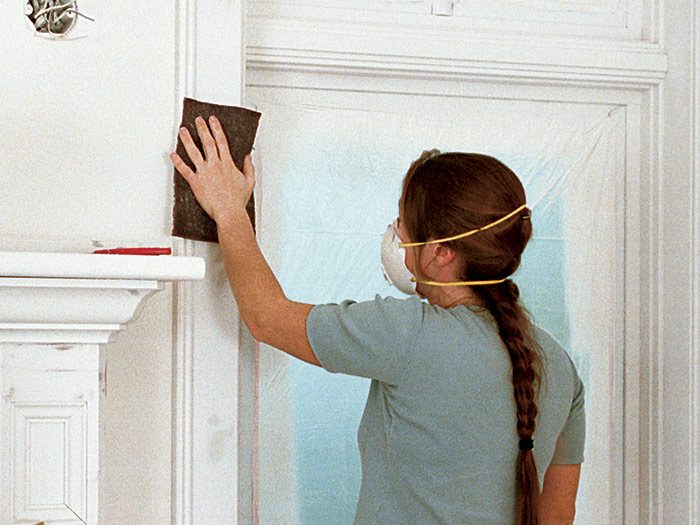
Following the prime coat, all the trim surfaces are scuffed using medium-grit Scotch-Brite pads (3M Co.; 800-480-1704) to knock down any rough spots (bottom photo). All surfaces are vacuumed and wiped down once again, and every joint in the trim is caulked using a high-quality acrylic latex caulk. Using a no-drip gun, the bead of caulk is run as long and continuous as possible, and is smoothed with a finger. It’s important to wipe away any caulk that smears beyond the joint with a moist rag, or it will become glaringly obvious once it’s painted.
As a last preparation before spray-painting, all horizontal trim surfaces are temporarily draped with masking paper to prevent dry fall from dusting the surface. The paper will be removed just before each piece is painted.
Hauling out the sprayers
Besides the respirator and the unflattering paper suit I’m forced to wear, the only downside to spray-painting is that I have to maintain a few pieces of equipment more complicated than a brush and a roller. Spray-painting requires a professional-quality
airless spray pump, plenty of hose and a spray gun to control how much paint goes where. My favorite airless pump is a Graco Nova (Graco Inc.; 800-367-4023). This model is light and portable; it has a wide range of infinitely adjustable pressure and has proved itself virtually indestructible.
My spray gun is a Graco two-finger Contractor Gun. To equip the gun for painting trim, I slip a 100-mesh (fine) filter into the gun’s handle and install a 511 reversible spray tip. (The first digit signifies half the width of the spray at a 12-in. distance; the second digit is the orifice diameter in hundredths of an inch. Therefore, this tip puts out a 10-in., highly atomized fan when used 1 ft. from the surface.)
After the equipment is set up and running, I take a few test sprays and adjust the sprayer’s pressure output until I can achieve the minimum volume of spray that still produces an even fan with steady pressure on the trigger. This setting will yield the most control over the application of paint with the least wear and tear on the equipment.
Spray-painting is a topdown process
When the caulk dries, the trim is ready for two coats of paint. Although I could speed up the drying time between coats by using latex or a fast-drying oil, I’ve always gotten the most consistent quality—under the widest variety of conditions—when I spray a slow-drying alkyd semigloss, such as Sherwin-Williams’s Proclassic. Any time I might lose waiting for the paint to dry is more than made up by the callback I don’t receive.
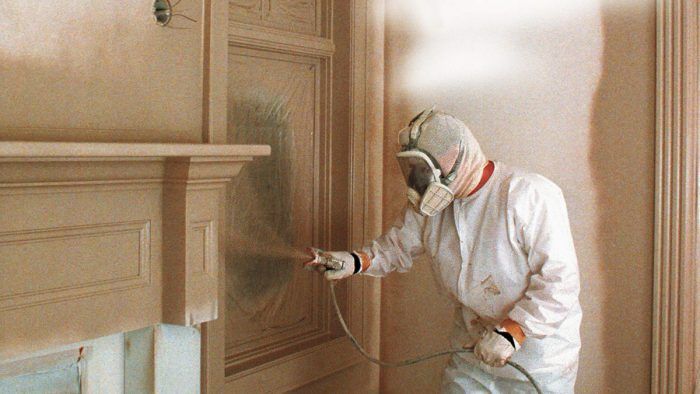
To keep my clothes and my lungs paint-free, my pre-spray ritual involves donning coveralls and securely taping the cuffs, putting on gloves, pulling a spray sock over my head and wearing a full-face respirator loaded with two organic-vapor filters. A filter tends to last about six to eight hours before it needs to be replaced; I know I need to change filters when I start to smell paint vapors.
Once the equipment is set up and working correctly, I pick out a high point to start painting the trim and work my way around the room in a circular pattern. To make sure the edges of trim are as evenly painted as the faces, I overlap 50% of the spray onto the wall surfaces. Wide surfaces such as doors, paneling and wainscoting are painted with multiple vertical strokes, each of which overlaps its predecessor by 50%.
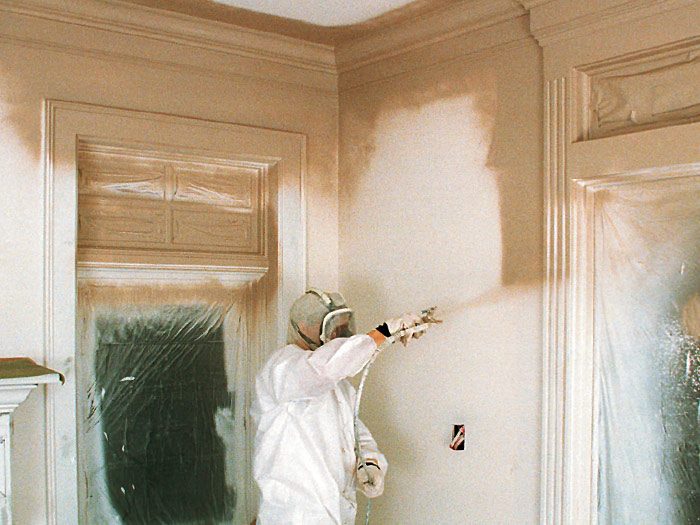
A good spray-painter has to develop a gimbal-wristed motion to ensure that the spray pattern, or fan, is kept perpendicular to the surface throughout the length of the stroke. When spraying trim, I hold the tip of the gun 12 in. to 18 in. above the surface and move across the surface at a steady pace just fast enough to produce a smooth, even coat. For spans that can be accomplished in a single stroke, such as the head casing of a door, I release the trigger at the end of every stroke, just after the fan moves beyond the surface. For long spans of crown, where I have to stop to move a ladder, I carefully roll the gun away from the surface at the end of the stroke, move the ladder, then overlap about 12 in. to 18 in. of the previous stroke as I roll the gun back onto the surface to begin the next pass. Whenever I’m spraying in a vertical motion, as for casings and jambs, I try to spray from top to bottom; this motion is to make sure any dust that might remain on the floor is not blown onto the wet paint.
Drying time varies
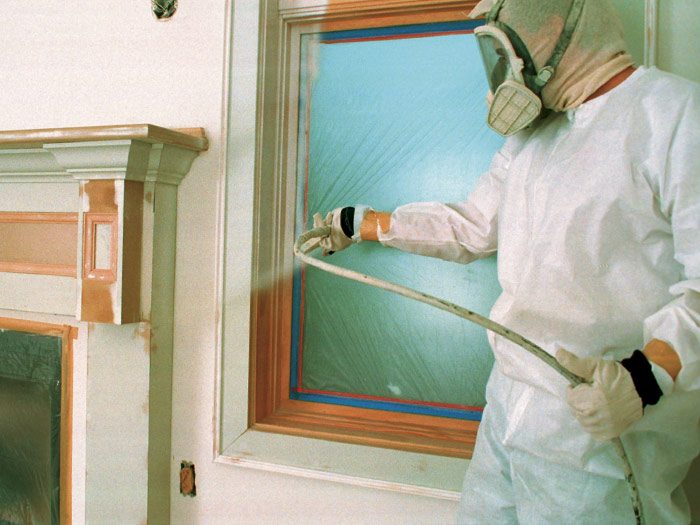
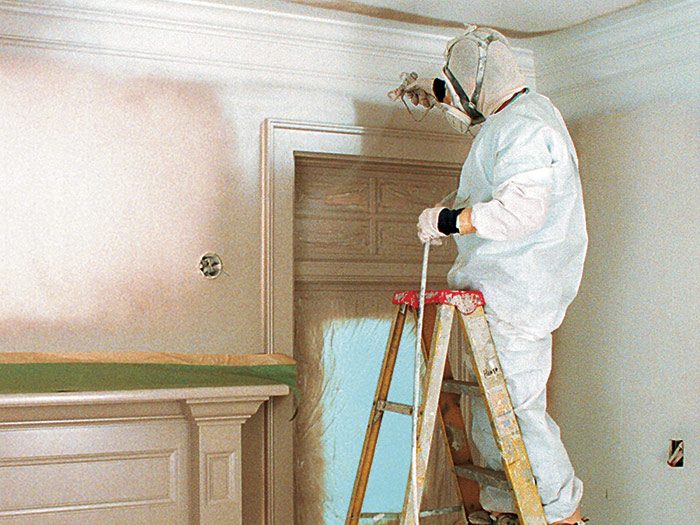
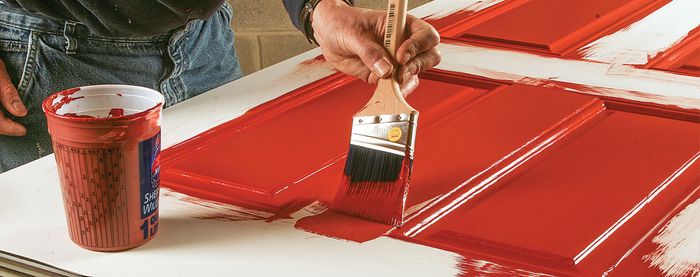
Depending on temperature and humidity, the first coat can take anywhere from one hour to 12 hours before it sets up enough to be recoated. It is then given a second coat as thorough as the first (photo below). To keep dust from being stirred up and embedded in wet paint, I plead with the owners to keep the furnace turned off and the room sealed off until the paint is absolutely dry. This precaution also keeps overspray from being picked up by the HVAC system and being deposited elsewhere.
When the second coat is dry to the touch, I make a final patrol for defects before moving on to the flat work. It’s difficult and time-consuming to match a sprayed surface with a brush or a roller, so I prefer to leave the gun set up and spray any touch-up with light coats. After any flaw has been repaired, the surface is masked to the nearest convenient edge and resprayed. For wainscoting or a mantel, that usually means repainting just one panel; for baseboard, it might be the entire run. If I do get called back for a touch-up after all the equipment has been moved out, I have achieved good results by reducing the paint 30% with Penetrol (The Flood Co; 800-321-3444) and using a 4-in. foam roller.
Finished trim is masked before walls are sprayed
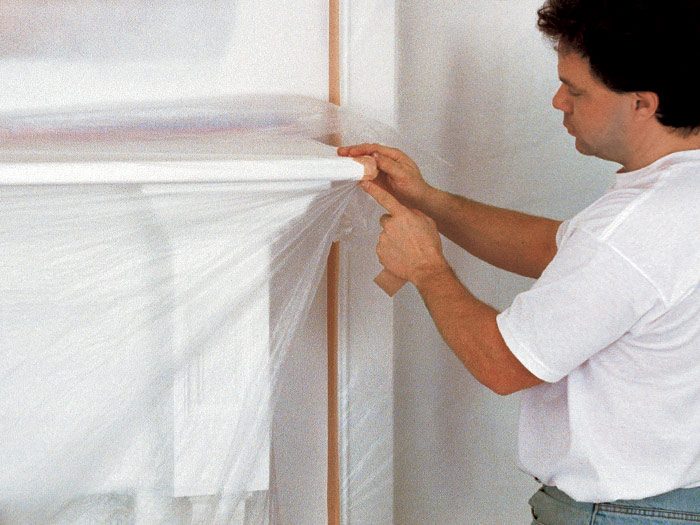
Once the paint is thoroughly cured, I start masking the trim to protect it from overspray. Doors and windows are covered in two quick operations: First, I wrap the edges of the casings with a high-quality (3M 2040) 1-1/2-in. masking tape; then I adhere plastic sheeting to the sticky edge of the tape, which extends beyond the face of the -in. thick casing. Rather than measure the plastic, I let the edges hang past the tape and trim off the excess.
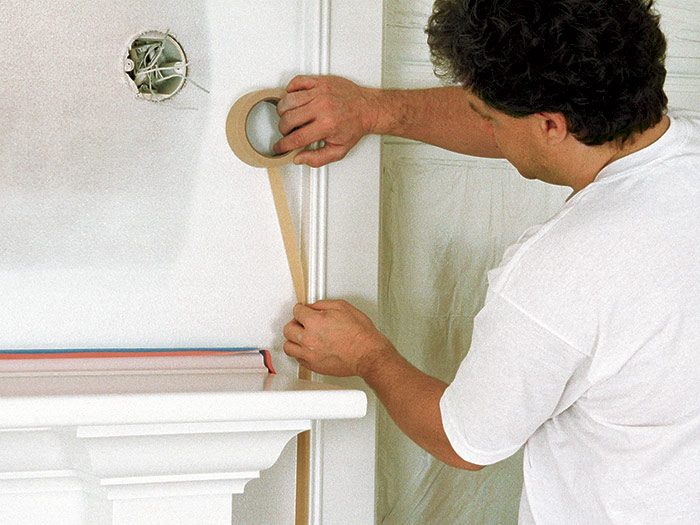
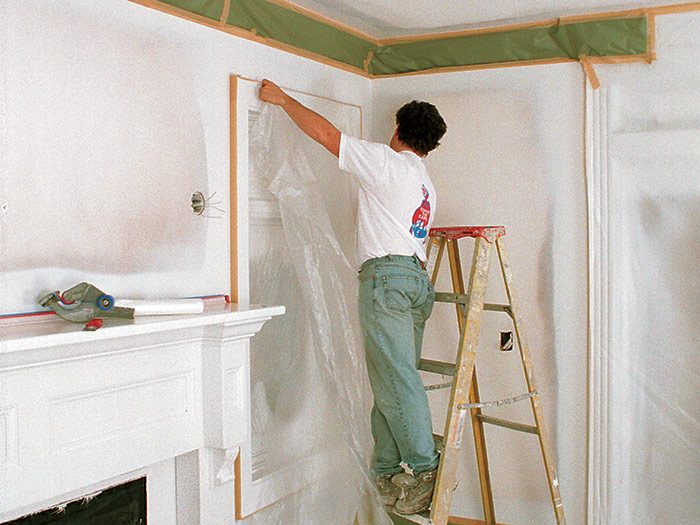
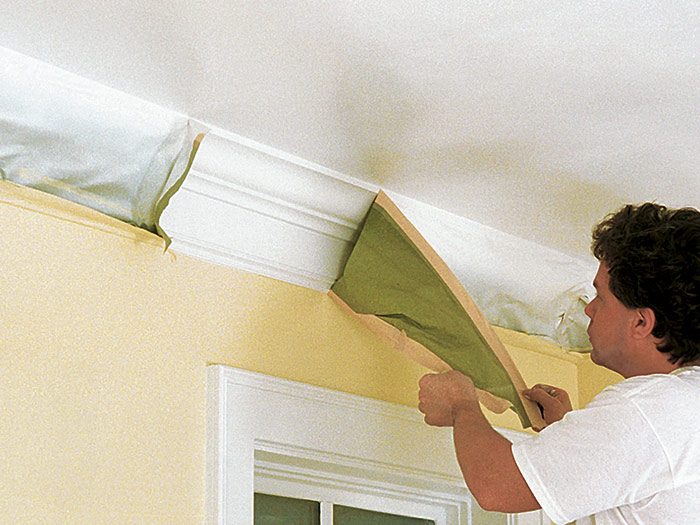
For cabinets, mantels and other large objects that don’t have a convenient edge to overhang the tape, I run double-sided tape along the edges that abut the walls and stick the plastic to the top the same way I do for the window panes. I cover baseboards, chair rail and crown molding with the appropriate width masking paper and tape the edges.
Before painting the walls, I wipe them down with dry rags to remove any dust that could prevent the paint from bonding. I also vacuum along all the junctures between flat work and trim where tape removal would pull any poorly bonded paint and leave ragged edges. During this cleanup, I usually find a few small dings in the drywall, which I fill with lightweight Spackle.
Switching from oil to latex
I use a 100% acrylic satin latex for both walls and ceilings; flat is more common in the industry, but the added sheen of satin paint gives the finish a richness that justifies the slight difficulty of touch-up. Other than thoroughly flushing out the lines—first with mineral spirits, then with water—the only changes I have to make to my equipment to spray latex are to put in a clean filter and to switch the spray tips. For latex paint, I install a 621 (or 617) tip, which puts out a wider fan; then I make a few test sprays and readjust the pressure until I can achieve the same spray volume with the new tip that I had with the old one.
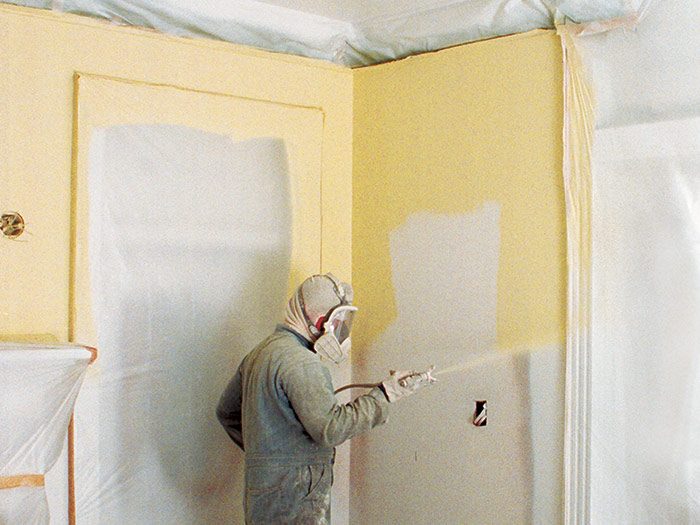
When I paint walls and ceilings, I hold the spray tip 18 in. to 24 in. away from the surface, and I begin by cutting in, spray ing all the corners and edges of the trim, and making sure I get a good overlap onto the masked surfaces. After the edges are cut in, the field is painted in long, straight strokes, each stroke overlapping its predecessor by 50%. When one wall or ceiling has been sprayed, I immediately give it a second coat perpendicular to the first one before moving on. After the paint is dry, it’s inspected and touched up, if necessary. Sprayed touch-ups on flat work blend as long as the gun is rolled onto and off the surface.
Which came first, the walls or the ceilings?
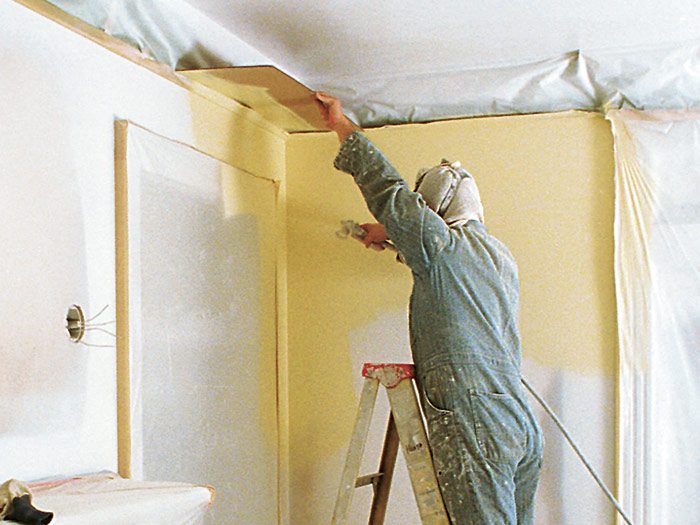
Whenever the walls and ceiling are to be the same color, I paint the ceiling first. The ceiling can also be done first—regardless of color—if there’s a wide crown molding in place, which lets me use a cardboard shield to protect the ceiling from overspray. Otherwise, the walls must be sprayed first and allowed to dry. Before the ceiling is painted, double-sided tape is run around the tops of all the walls, and plastic sheeting is draped to mask the walls.
When there is a significant color difference between walls and ceiling, I make a conscious effort while painting the walls to fade the overspray onto the ceiling. Then when the ceiling is shot, I spray a light coat to cover the overspray and let it dry before I paint the entire ceiling. Although it may seem like a lot of work, this method takes no more than 30 minutes and guarantees a crisp line between colors.
Pull the tape while the window is open
There is a right time and a wrong time to remove masking. If the tape is pulled too soon, the water in the paint reacts with the tape’s adhesive, leaving a gummy residue behind. But if you wait until the paint is dry, some of the paint may bond to the tape and be pulled off the wall surface, resulting in a jagged cutline. In a warm house, two hours to four hours of drying time is usually the optimal window of opportunity. But if I start pulling tape and see adhesive sticking to the painted surface, I wait another hour.
To ensure a crisp line between flat work and trim, I carefully peel the tape away from the painted edge. I drop all the masking onto the floor covering, where it is gathered up by a crew member for disposal. After all the masking has been removed, the floor covering is swept and vacuumed before it’s rolled up. This step ensures that no debris is left to be ground into the floor.


View Comments
Really a helpful article, thanks. I am a small general contractor/remodeler and have recently started doing some of my painting on my projects to help expedite things.