
3 Simple Ways to Connect New Water Fixtures
Consider one of these alternative methods for supplying water when adding new kitchen appliances in an existing home.
In order to install additional water fixtures in a kitchen—such as a water filter with its own spout, a hot-water dispenser, and a refrigerator’s icemaker—you will need to hook up a new water supply. If there are existing water supply lines nearby, you can often get by with one of these solutions.
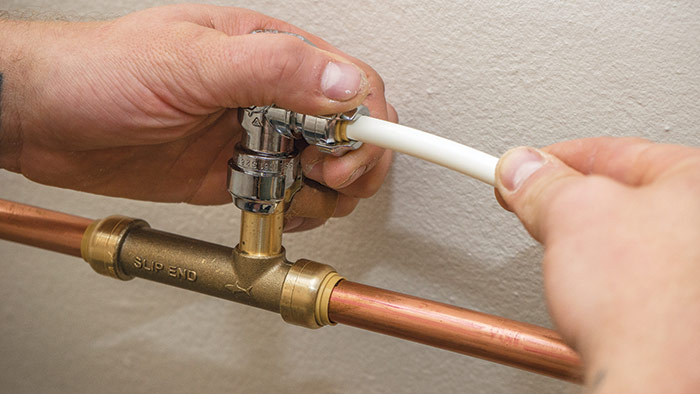
Be sure to attach your supply fitting to the correct pipe: cold water for a filter or icemaker and hot water for a hot-water dispenser.
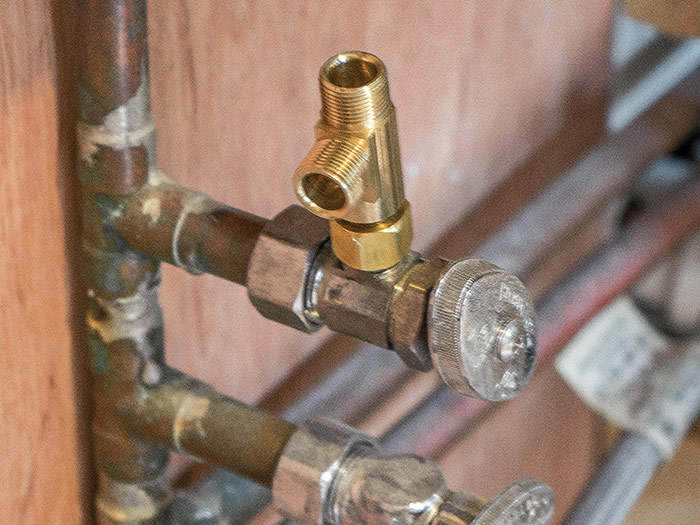

Saddle T Valve
Though many plumbers are suspicious of saddle T valves, and they are not as strong flowing or as reliable as re-piping, they can work fine if done right. And they are easy to install. There is no need to shut off the water to the pipe, though some people do so just to be safe.
| TIP: Saddle Ts work best on copper or CPVC pipe. If you want to install one on galvanized steel pipe, you will have to shut off the water and drill a hole first. However, because steel pipe often gets clogged with sediment, water flow may be restricted. If you have PEX tubing, a saddle T may not work well. Instead, shut off the water and install a T fitting, then a standard stop valve. |
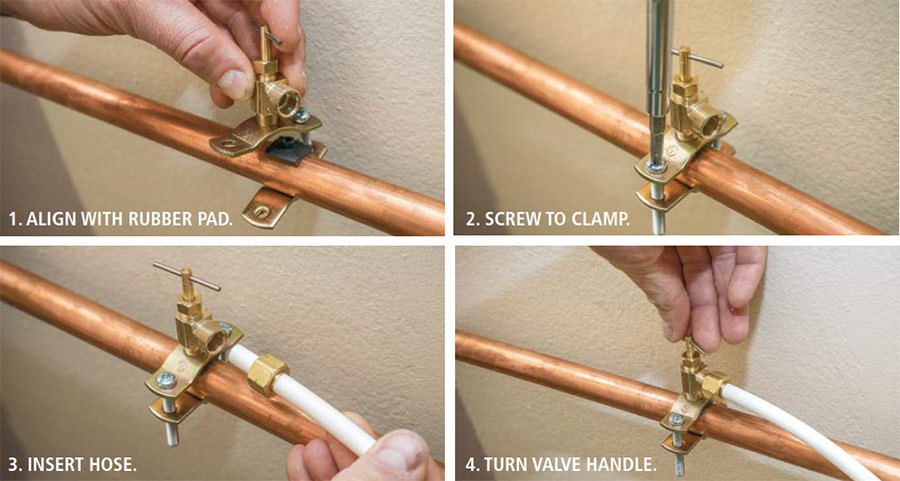
Find a nearby location on a pipe, and clean away any corrosion or gunk from where the valve will go. Turn the valve off (if it is not already off). Check that the packing nut is tightly screwed on. Partially assemble the valve with one screw. Place the rubber gasket on the pipe, and position the valve so its needle will pierce through the gasket. Use a screwdriver to tighten the two bolts evenly.
Place a nut and ferrule onto the tubing (which is plastic here; you may use copper instead), slide the ferrule into the valve’s opening, and tighten the nut. Turn the valve’s handle until it bottoms out; it has now pierced the pipe, and is in the “off” position. Hold a small container under the tubing’s end and turn the handle counterclockwise to open the valve. Let water run for a minute or so to flush any sediment, then turn the valve off and connect to the fixture at the other end.
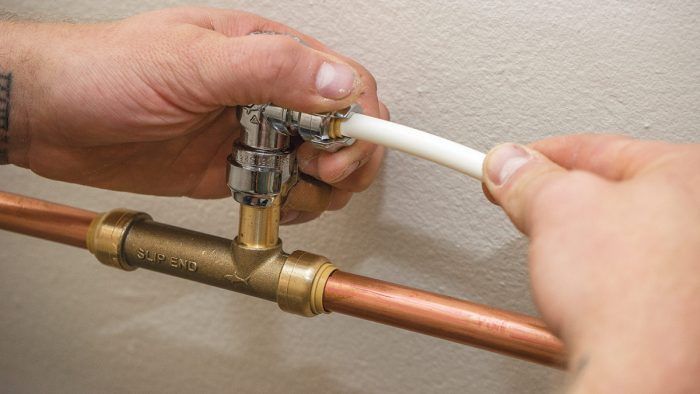
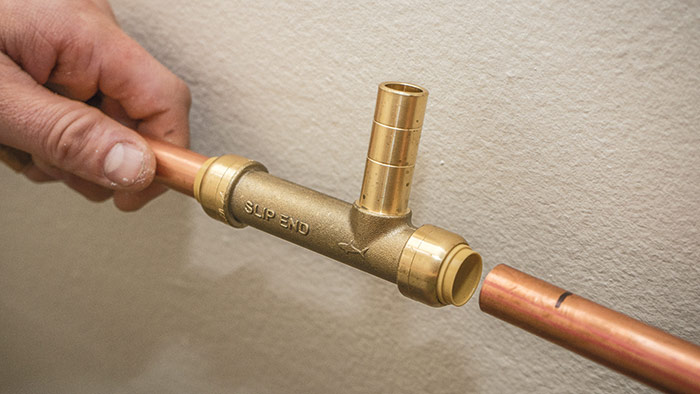
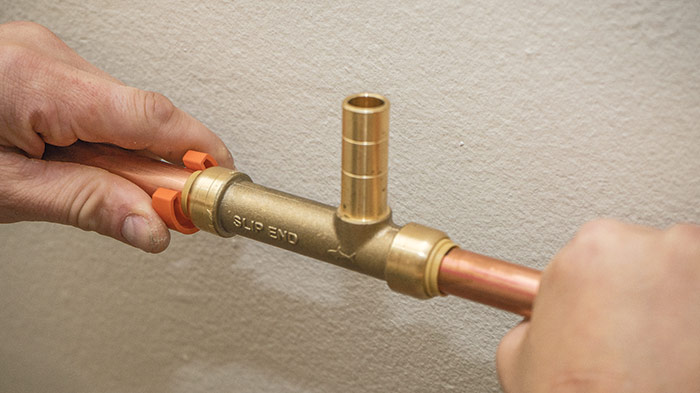
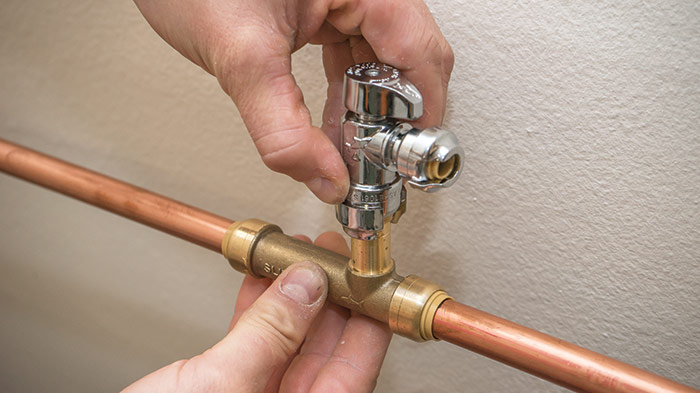
A Push-On Fitting
The push-on fitting with valve shown here may come in an icemaker hookup kit, or it may be purchased separately. It will require that you shut off water and drain the pipe, but you will not need to solder any joints. Here it is shown installed onto copper pipe, but you can also get versions made for PEX or CPVC as well.

Excerpted from Plumbing (The Taunton Press, 2016) by Steve Cory.


View Comments
I disagree with the advice "Be sure to attach your supply fitting to the correct pipe: cold water for a filter or icemaker and hot water for a hot-water dispenser."
Draws from the hot water dispenser will be small and infrequent, so the water in the supply line will cool off between draws and so the dispenser will almost always be getting cold water and will be drawing small amounts of hot water from the water heater, which will cool off in the line before the next draw.