Connecting and Insulating a Water Heater
Learn how a tank-style water heater works and how to install and insulate one.
The process of heating domestic water has evolved from pouring stove-heated water into a large tub to modern automatic temperature-controlled appliances. Today, we have hot water at the turn of a handle, but every component on a water heater can break down and interrupt your service. With today’s labor rates, you can exceed the cost of a water heater on a single service call. Finding out how a water heater works and how to repair it can take a little time but will prove to be a good investment in the long run.
How a Water Heater Works
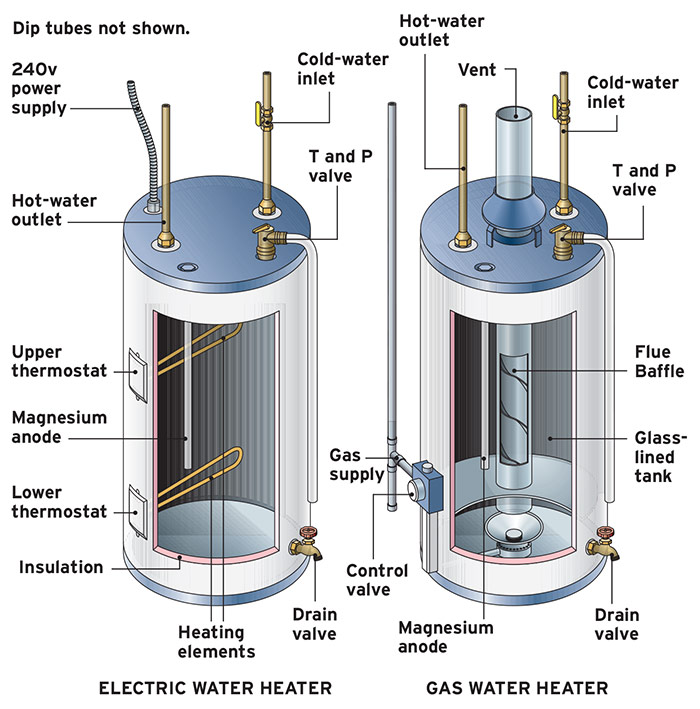
Although water heaters in some areas (particularly the northeast United States) are oil fired, most use electricity or gas (either natural gas or propane) to heat the water. But for the common tank-style heater, making hot water is not the end of its job. The unit also has to store the heated water until you use it. So in addition to having heating elements, the tank must be insulated.
Water enters a heater from the cold-water supply in your house. The inlet pipe is called a dip tube and allows water to fill the tank. In an electric heater, two heating elements (one in the upper third of the tank and one at the bottom), powered by your home 240v system, heat the water. In a gas unit, a gas-fired burner heats the water.
How a Hot-Water Heater Works
Because your domestic water is under pressure, hot water leaves the tank through the hot water supply pipes, flowing out at the faucet when you open it. At the same time, cold water enters the tank to keep its level constant. Both systems employ thermostats that sense the temperature of the water and call for heat when the temperature drops. Both systems also feature a temperature and pressure (T&P) relief valve, which opens if either the water temperature or the pressure exceeds a safe limit. The valve is connected to a pipe that runs down the outside of the tank, ending about 6 in. from the floor.
Because corrosion is the chief enemy of a water heater tank, a magnesium anode rod is inserted in the water. This rod is designed to corrode before the tank, extending the life of the unit. However, once the anode is completely used up, the water will go to work on the tank, and once a tank springs a leak, it’s pretty much a goner. Check the anode every five years and replace it if necessary.
Sizing a heaterAs a rule of thumb, a family of four will need a 50-gal. electric or 40-gal. gas water heater. A smaller unit may save you money, but it can also make the sale of your house less desirable, since prospective buyers won’t be satisfied with a less-than-standard water heater. Buy the most efficient water heater you can afford (it will have the thickest insulation). If you plan to live in your house forever, consider a lifetime warranty. |
| WHAT CAN GO WRONG: A 4,500w heater requires 10-gauge (with ground) cable. A 3,500w heater can get by with 12-gauge. Never run a 4,500w water heater on 12-gauge wire. |
Venting
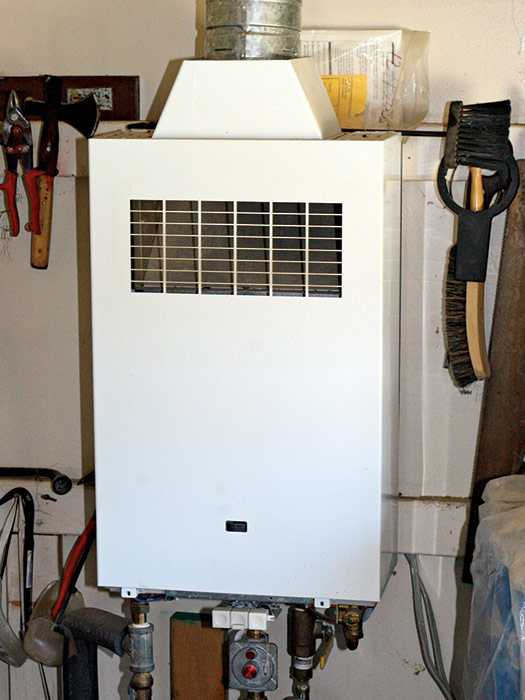
Electric water heaters do not require venting, but all gas water heaters must be vented to the outdoors to remove the by-products of combustion. The most common type of venting, atmosphere venting, sends the gasses vertically through the roof. Because the gases are warmer than the surrounding air, they rise naturally. Direct-vent or horizontally vented water heaters are designed for installation where vertical flues are not practical or too expensive to install. These vents go through an exterior wall. Power-vented gas water heaters use an electric fan or blower to send combustion gases to the outdoors.
An electric water heater can be installed almost anywhere, and a novice can do it. Not so with gas. Only a pro should install and maintain gas heaters because they require gas lines (which can explode), flues (which if improperly installed, can backdraft and kill you in your sleep), vent pipes, air resupply, condensation, makeup air, and enough codes to fill their own book. In addition, modern gas heaters have a sealed chamber, which prevents maintenance by homeowners.
Making the Connections
You can connect your water heater tank to the supply system with straight pipe, such as copper, but using flex pipe offers some advantages.
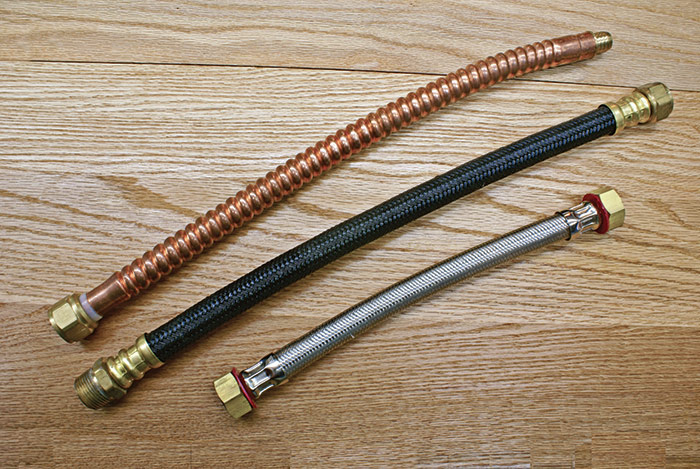
First, it allows location flexibility. That is, when the roughed-in water pipes are not placed exactly above the water heater location, flex pipes will allow you to make such out-of-line connections. Next, female flex lines provide unions at each end, making installation and repairs quicker. In earthquake-prone areas, codes may require them, and they keep plastic pipe away from the heater connections, as required by code.
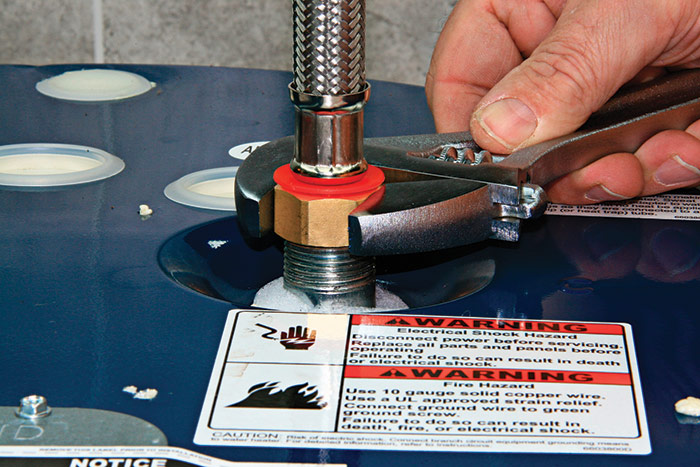
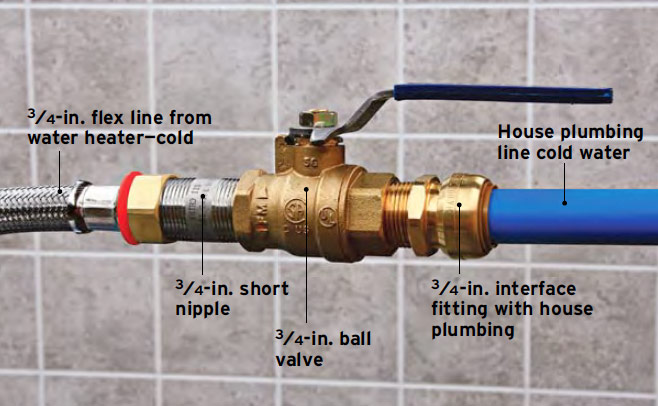
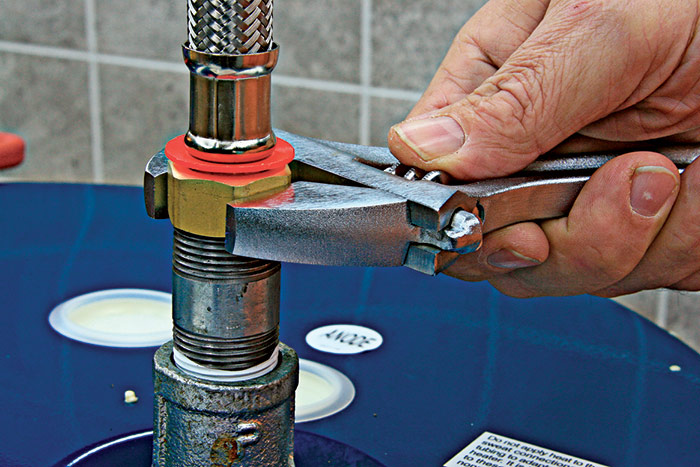
You’ll find two types of flexible pipe: corrugated copper and stainless braided. Both work fine. However, the copper pipe will kink easily, and active water will cause it to pinhole. Though end terminators may vary, it’s easiest to use female. Attach either end to the nipples coming out of the heater. Tighten the nut on the fitting with an adjustable wrench 1. The opposite end of one pipe should connect to the heater valve on the cold side and the end of the other, directly to the house water line on the hot side 2. Using closed-cell foam insulation, insulate the hot water pipe at least 3 ft. after it leaves the heater. You don’t need to insulate the cold water pipe, since you want that water to warm to ambient temperature before it enters the heater.
| WARNING: If a gas heater is placed in a garage, be sure it is raised off the floor by around 18 in. or more to prevent gasoline vapor from going into the heater and exploding. |
Installing Flex Lines on Plastic Insulating Nipples
Some water heaters use plastic inserts to insulate the pipe nipple from the inside. These inserts, however, have a rounded edge, which prohibits the flex-line internal gasket from sealing properly.
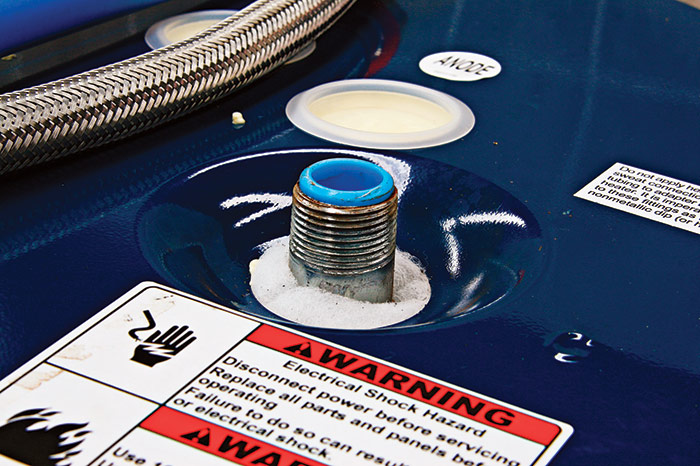
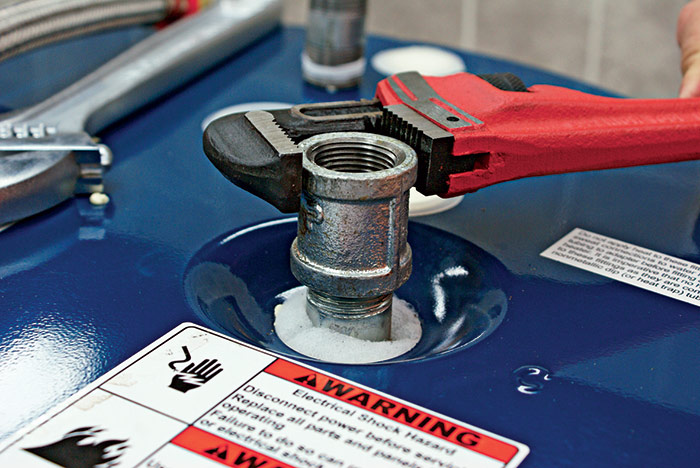
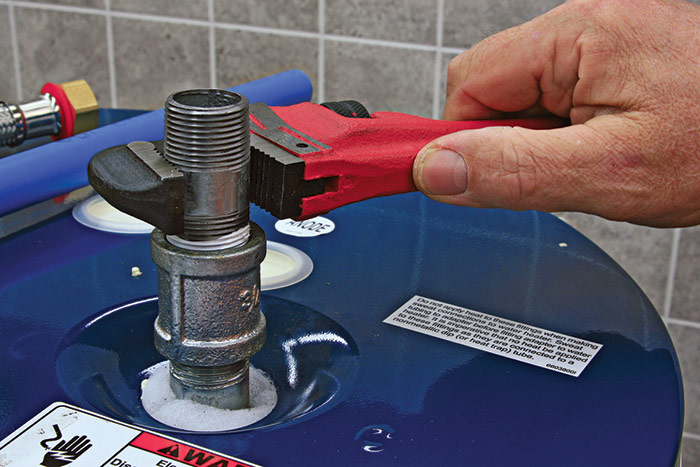
In these cases, use a 3⁄4-in. (brass or galvanized) metal coupling and nipple to create the alternate connection (the pipe threads will seal the union) 1,2,3. The female end of a flex line will create a union on the nipple allowing easy removal of the tank for future maintenance.
| WARNING: If the water heater is placed on a finished floor, such as a wood floor on the second story, a leak can produce thousands of dollars of damage. It would be prudent to place the water heater in a water heater pan and run the drain of the pan to a floor drain or outside. |
Insulating a Water Heater
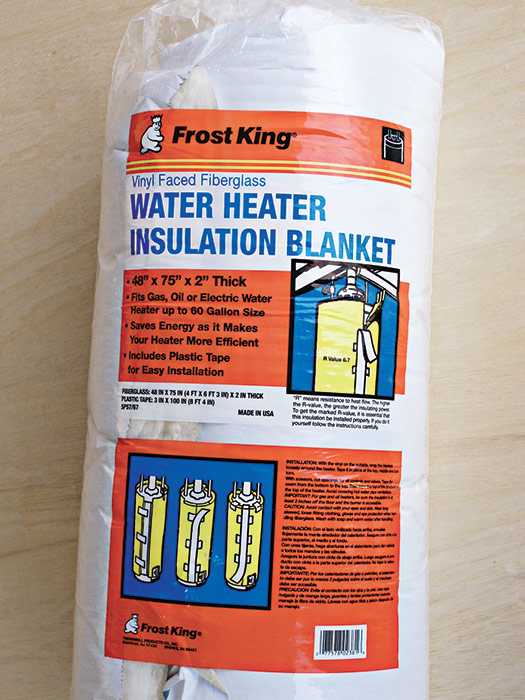
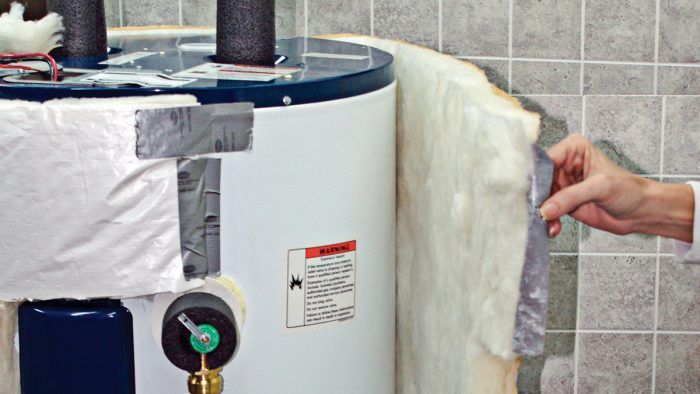
A water heater will start to lose heat the second the heat turns off. Tank insulation slows the heat loss, gives you more hot water to use, and saves you money. Although it’s best to buy a heavily insulated new heater, a thinly insulated model will benefit from a jacket.
A water heater loses most of its heat at the floor, which acts like a heat sink. To break this contact, elevate a new heater with a couple 2x4s or concrete blocks 1. If you want to raise an existing heater, you’ll have to cut the pipes and install couplings.
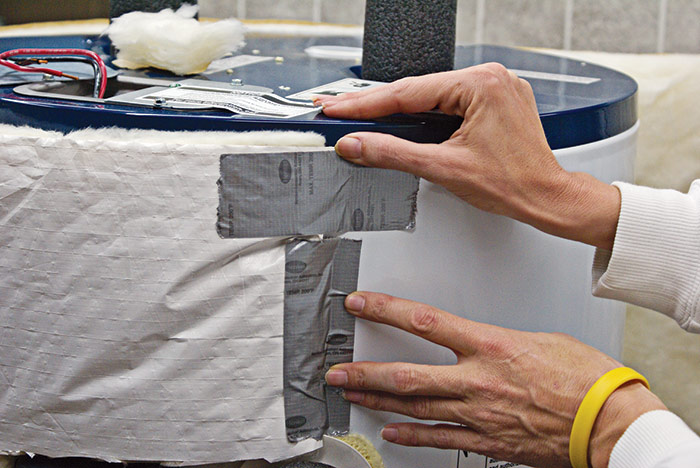
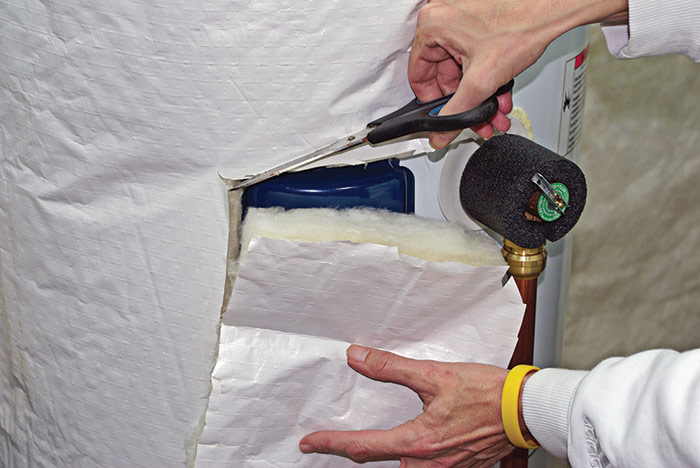
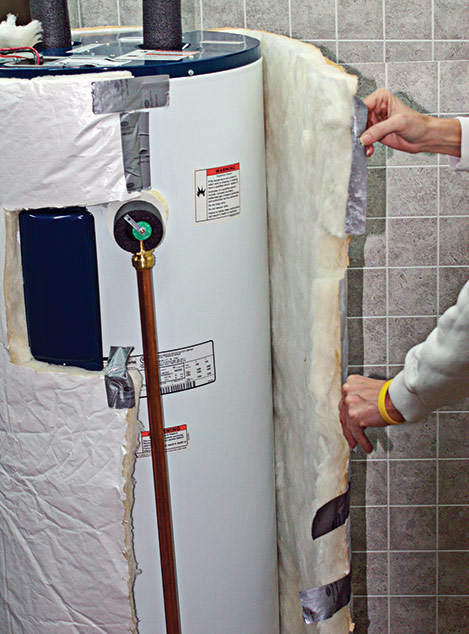
To install the jacket, start at the T&P valve or element cover, with the top corner of the blanket even with the top of the heater and tape one edge of the jacket to the heater on top and bottom using duct tape 2. Cut an opening to expose the element and thermostat covers 3. Then bring the other edge of the jacket around the tank, cut an opening for the T&P valve, and tape this edge of the jacket to the first edge 4,5. Don’t pull the jacket super tight. Fiberglass needs trapped air for insulation. Trim any excess jacket along the bottom of the tank. Then cut slits in the top piece for the water lines and the T&P valve (if it’s on top) 6. Tape the edges of the top piece to the side piece, cutting it in a circle or leaving it square 7. Tape across the slit on top to close it.
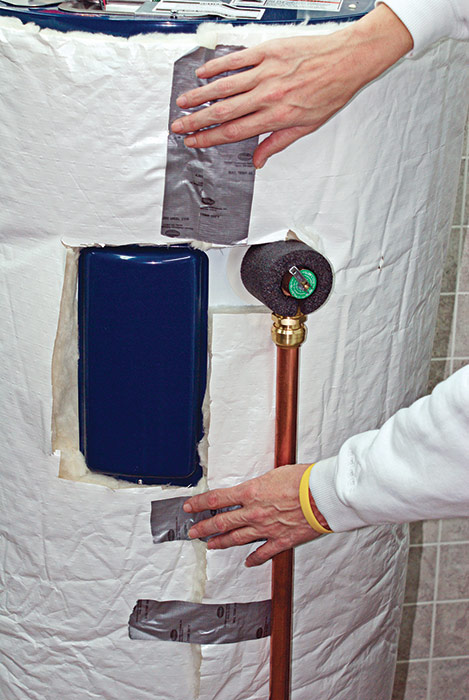
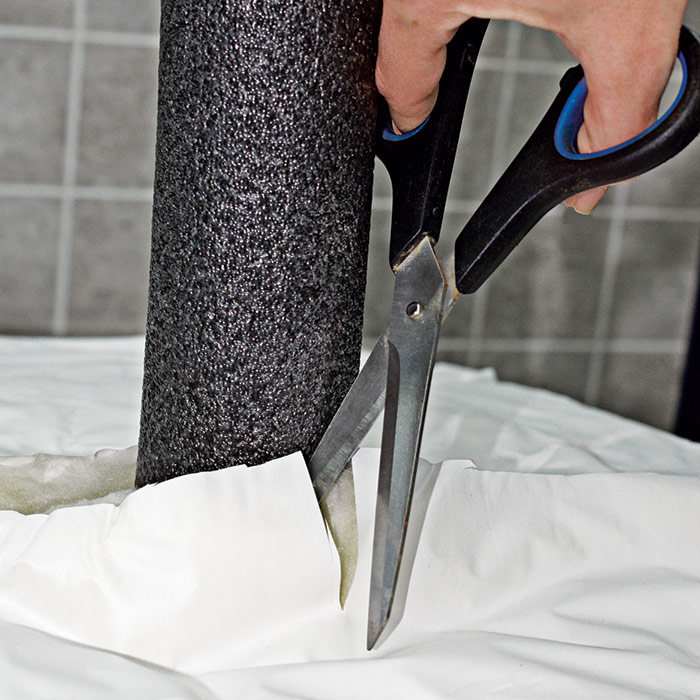
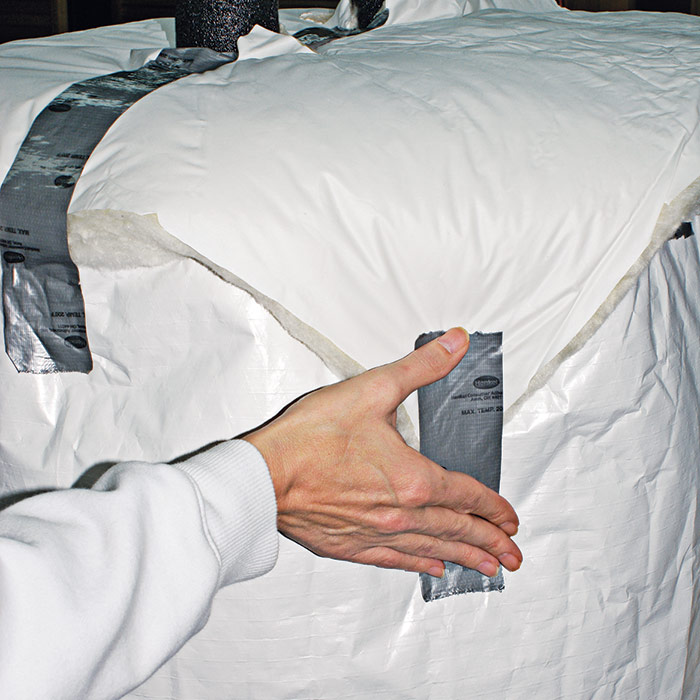
| WARNING: Do not cover the T&P valve or the element covers with an insulating jacket. Covering the valve may jam its lever, and you’ll need access to the element cover for maintenance. |
 Excerpted from Taunton’s Plumbing Complete by Rex Cauldwell.
Available at Amazon.com.


View Comments
Where is the expansion tank?