Enhance Your Life With an Outdoor Shower
Here’s what you need to know to get the plumbing and site work right, as well as some inspiration for your own outdoor shower.
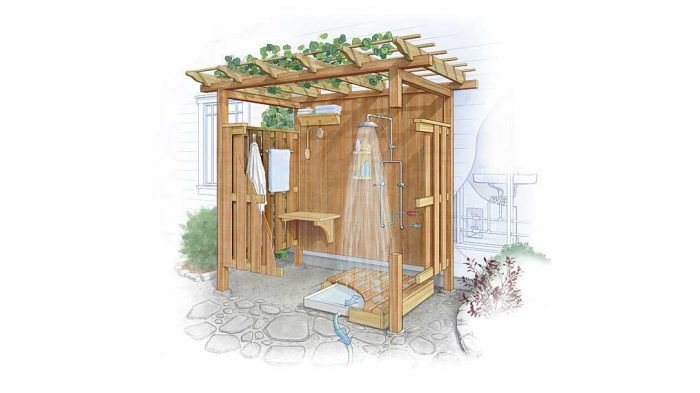
Synopsis: An outdoor shower not only lets you leave the dirt outside after a day’s work, but it can get your day off to a great start. For those reasons, editor Brian Pontolilo uses his own outdoor shower frequently. In this article, he introduces some factors to consider in designing an outdoor shower, and he discusses the plumbing essentials that every outdoor shower needs.
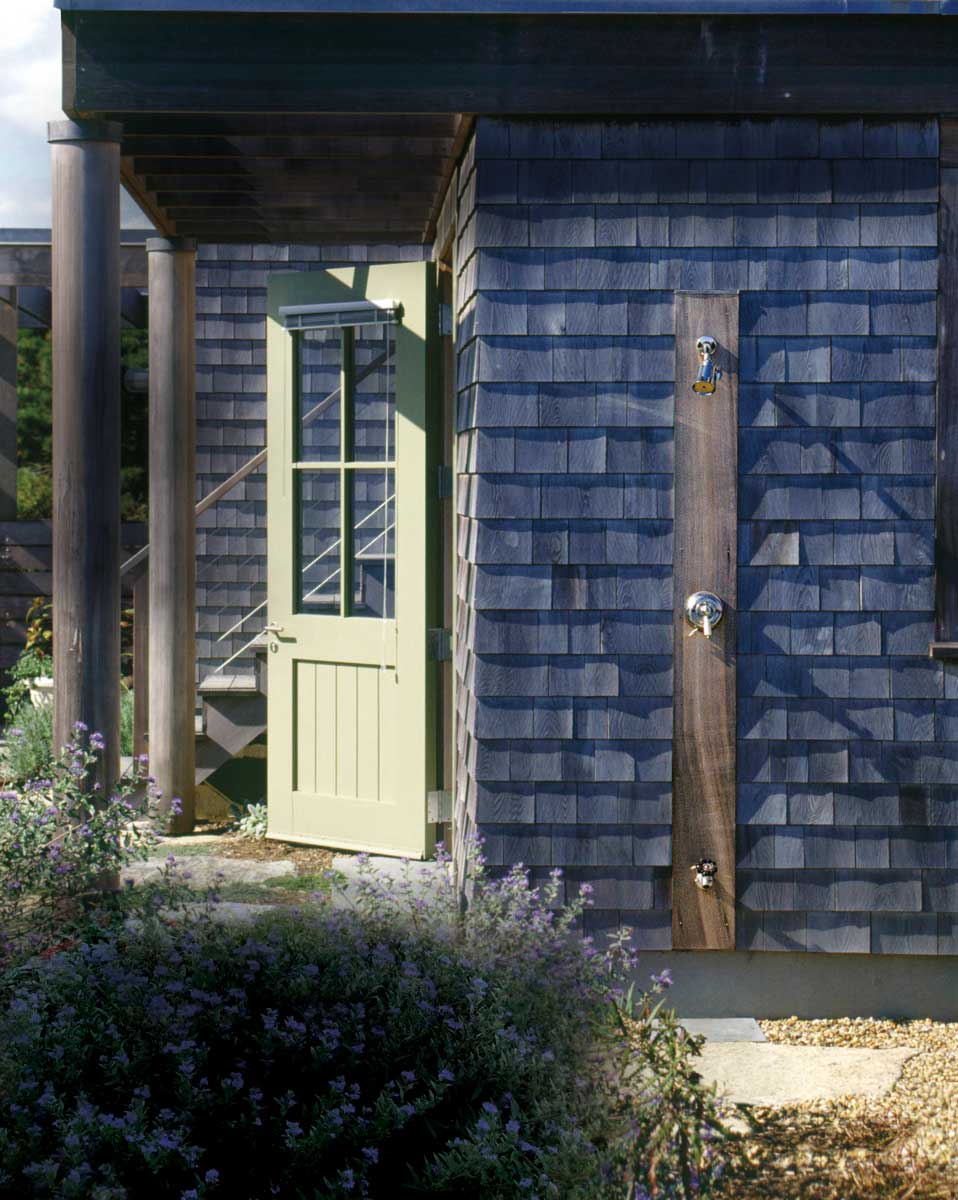
After four years of remodeling my house, I’m starting to tackle the punch list. It’s easy to look back and criticize my decisions, to wonder what I might do differently if I ever remodel a house again. One thing I’m certain I would not change is my outdoor shower. This project cost under $1000—which could have been less had I done the plumbing myself—and added invaluable convenience and joy to my life. When I’m covered in dirt after a long day of work, I can now leave it all outside. And walking out to shower in the morning, where I can hear songbirds and watch the sun rise, sets the right tone for my day.
Surrounded by style
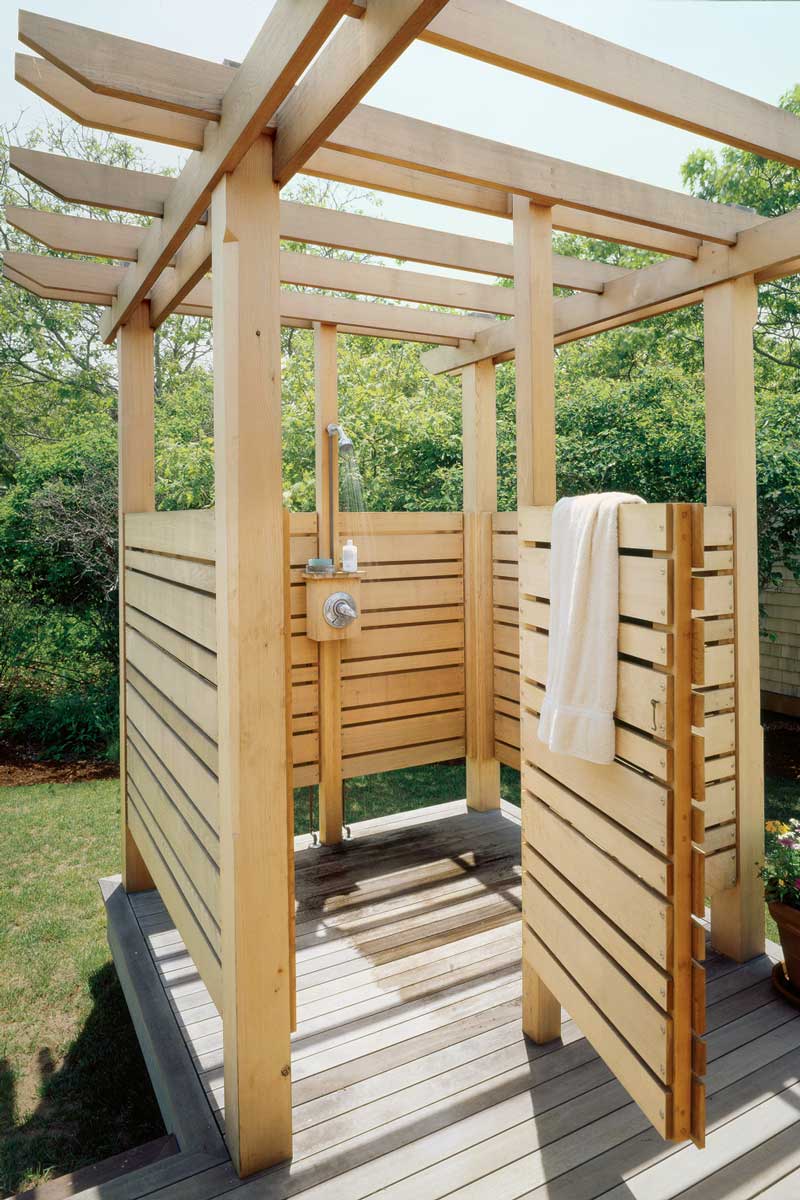
Captured on all sides by sandy beaches, and inhabited largely by vacationers, Cape Cod and Martha’s Vineyard have a high ratio of outdoor showers to households. Mark Hutker, FAIA, an architect with offices on the Vineyard and the Cape, has been designing outdoor showers as part of his homes for decades. His projects are not only inspired, but they offer practical lessons.
If the shower is to be placed against the house, Mark recommends a sunlit location and avoiding the house’s inside corners. This will provide plenty of open air around the shower for drying and minimize how much of the house gets wet.
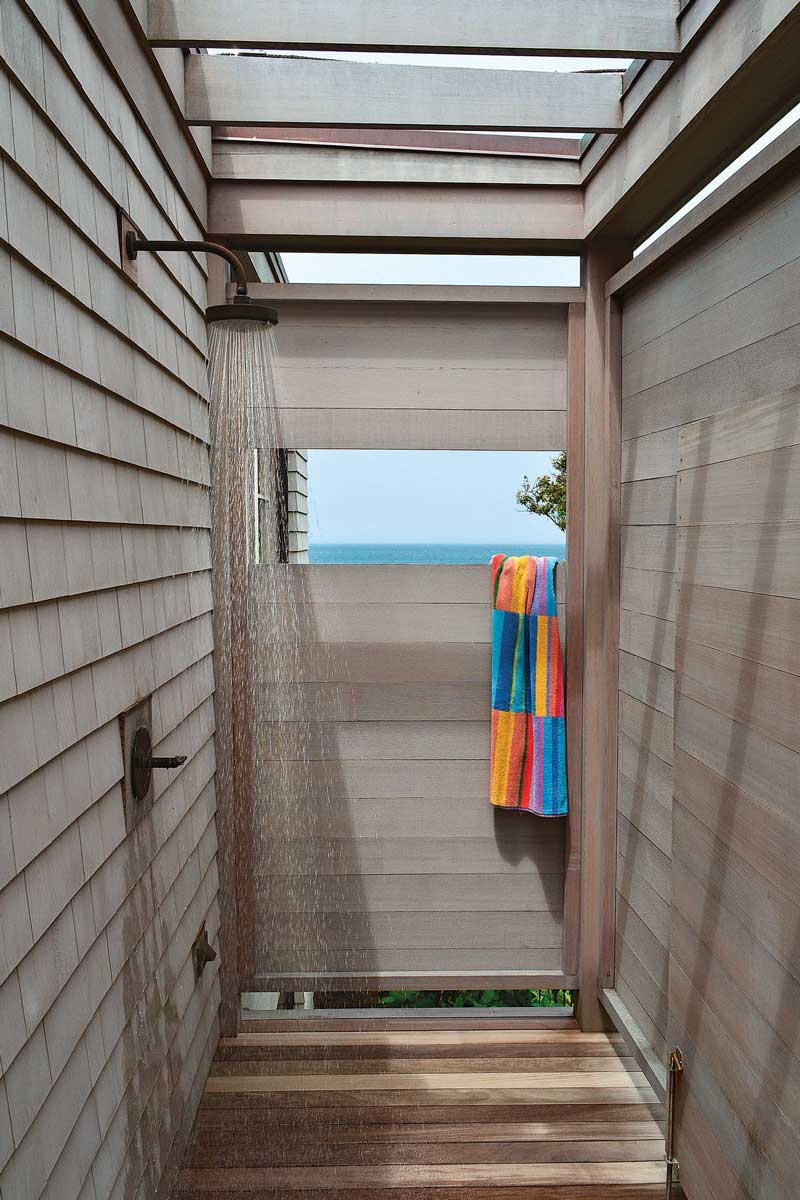
Next, consider the view from the shower. You may plan the shower to expose an open view to the natural landscape, a framed view of gardens, or a vast view to the sky. You may want to include some lighting for showering at night or early in the morning, but Mark suggests not placing the lighting too close to the shower because it will attract insects.
Choose durable materials, but keep in mind that even the most weather-resistant materials will patina faster and potentially richer than expected if the shower is used frequently. Include shelves and other conveniences to hold shampoo, combs, soap, towels, and the like.
Shower flooring can be wood (ipé and mahogany are Mark’s favorites), stone, or another slip- and rot-resistant material such as tile or synthetic decking. While Mark suggests avoiding fir or pressure-treated material for flooring because they splinter, PT is a good option for structural elements.
Remember that while the shower may be used only for a few months of the year, it will be part of the landscape year-round. Finally, says Mark, “because you will be naked outside, it’s worth taking the time to build something that you will feel comfortable in.”
Learn the basic details that define a good design
Forget about rinsing off with the garden hose. After a long day spent working outdoors under a hot sun, nothing beats an outdoor shower.
There are several different types of outdoor showers, but the most practical is an enclosed design attached to a house. It’s convenient, private, and the least expensive way to run hot water outdoors.
The minimum space that you need for an outdoor shower is 3 ft. sq., but go larger if you can. A shower enclosure measuring 4 ft. sq. offers a generous amount of elbow room. If an attached dressing area is in your plans, you’ll need a 7-ft.-long by 4-ft.-wide area for the entire enclosure.
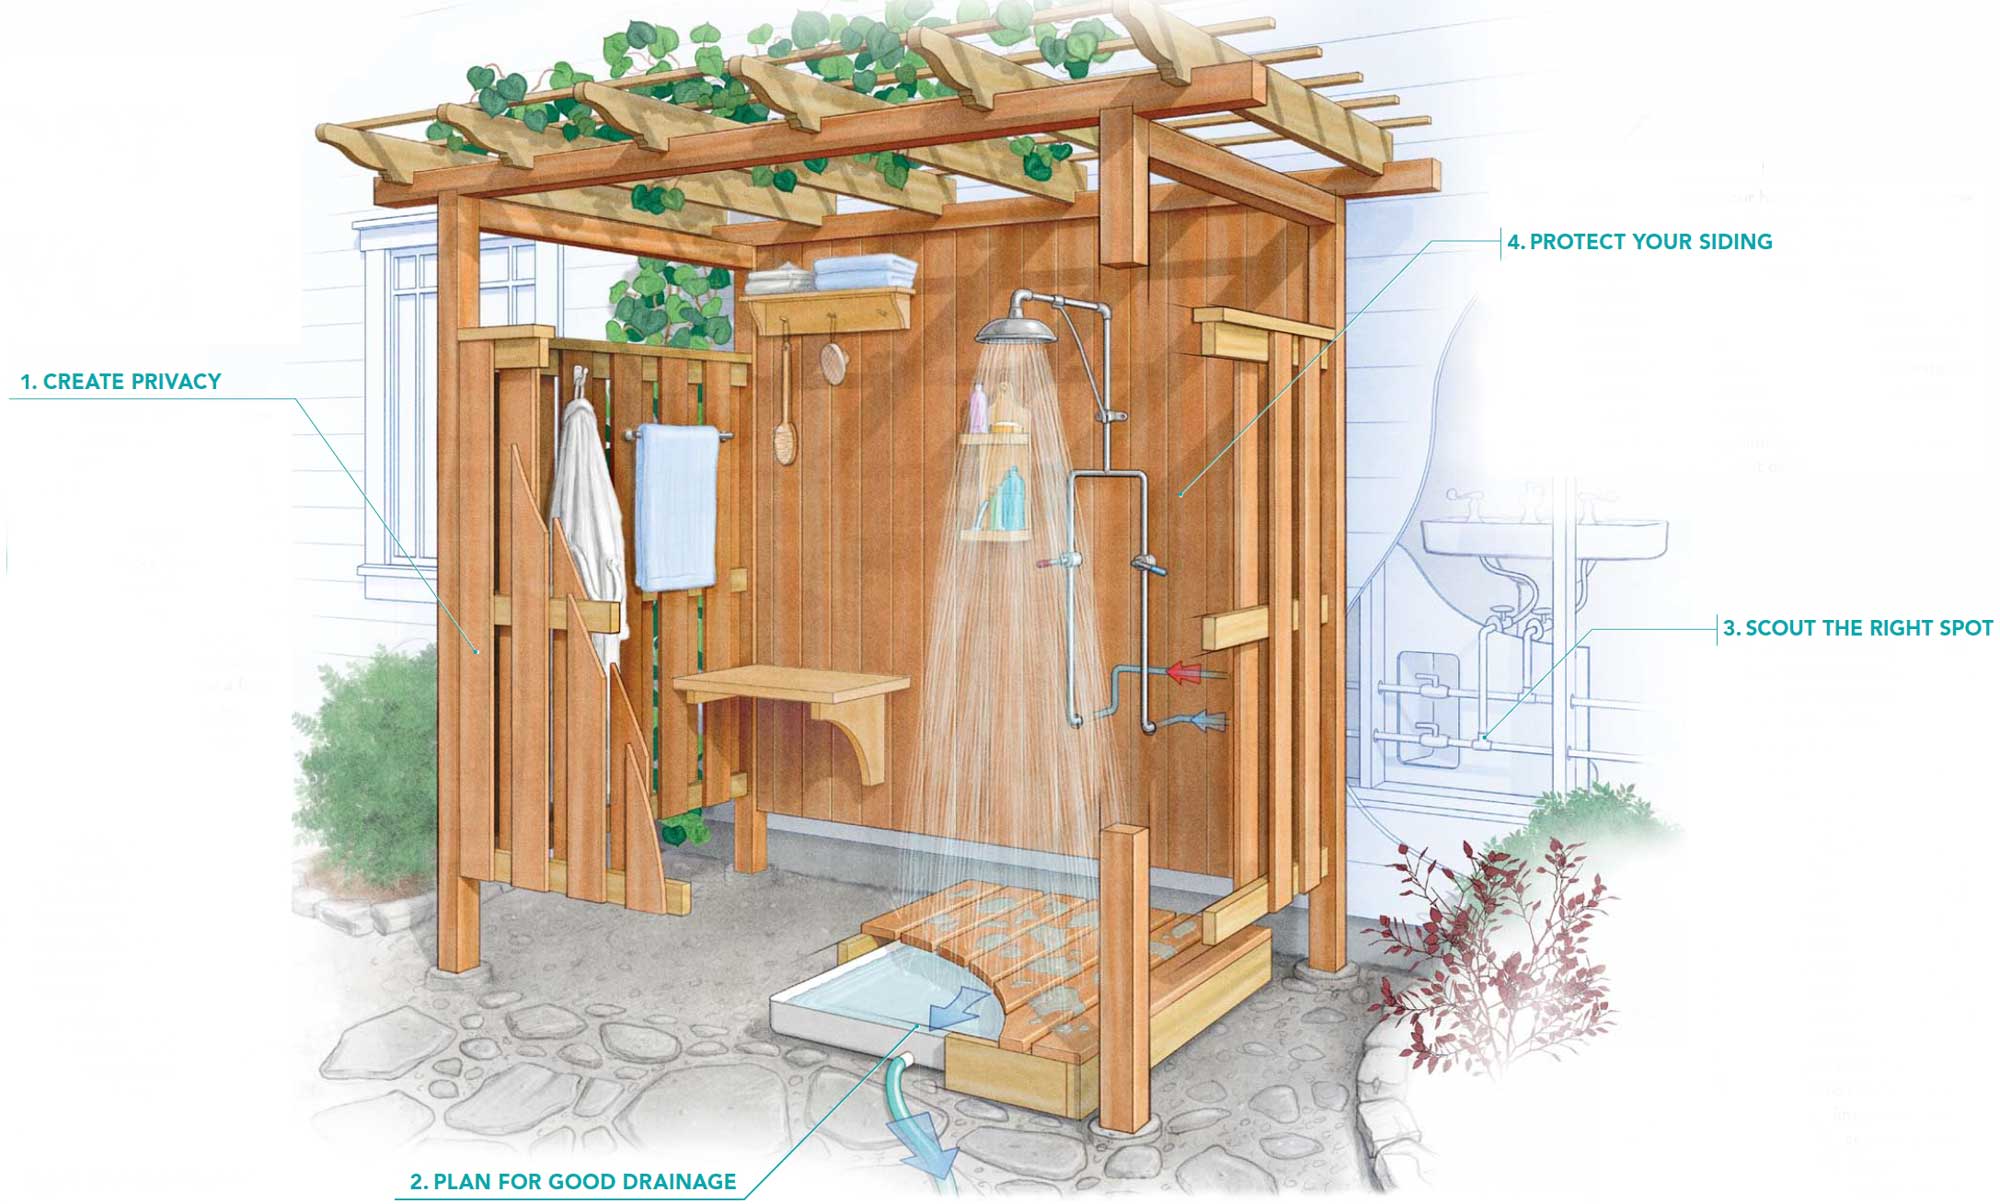
Creating a structure with roomy dimensions is, of course, just the first step. Smart design also requires paying attention to privacy, drainage, and weatherproofing. If you’re thinking about building an attached shower in your own backyard, follow these guidelines to ensure that you have a smart design.
1. Create privacy
Design your shower’s enclosure with the most demure bather in mind. Before breaking ground, stand in the spot where you’ve decided to build the shower and take note of all sightlines, including nearby decks, treehouses, and upper-story windows. There are clever ways to block all these views without sacrificing the breezy feeling of showering in the great outdoors. Here are a few:
- Install an overhead trellis. Fast-growing vines on a trellis or a grillwork of beams can shield you from bird’s-eye views.
- Construct slatted walls. To build a slatted wall, nail 1x6s side by side to three horizontal 2x4s, leaving a couple of inches between each board. Then nail a second row of 1x6s to the other side of the 2x4s to cover the gaps.
- Use offset partitions. This option is similar to the idea of constructing slatted walls, but it replaces 1×6 boards with 2-ft.-wide sections of fencing.
2. Plan for good drainage
When it comes to installing a drainage system for your shower water (also known as gray water), homeowners have several choices:
- Take advantage of the municipal grid. You can connect your shower to the same drainage pipe that carries away the rest of your household wastewater. This is standard practice in urban locales, and you will likely need a licensed plumber to perform the job. If possible, situate your outdoor shower near a household drainage pipe. It’s always easier and less expensive to build close to water and waste access.
- Use gravity-fed irrigation. If you want to reuse your shower’s gray water, consider fashioning a gravity-fed irrigation system. With this option, a tray beneath a permeable shower floor catches the gray water. A long, flexible hose attaches to the low point of the tray and routes the gray water into the garden. As with French drains, ecofriendly soaps are a must with this system. Also, never direct the hose toward a garden with edibles. It’s unsafe to ingest untreated gray water.
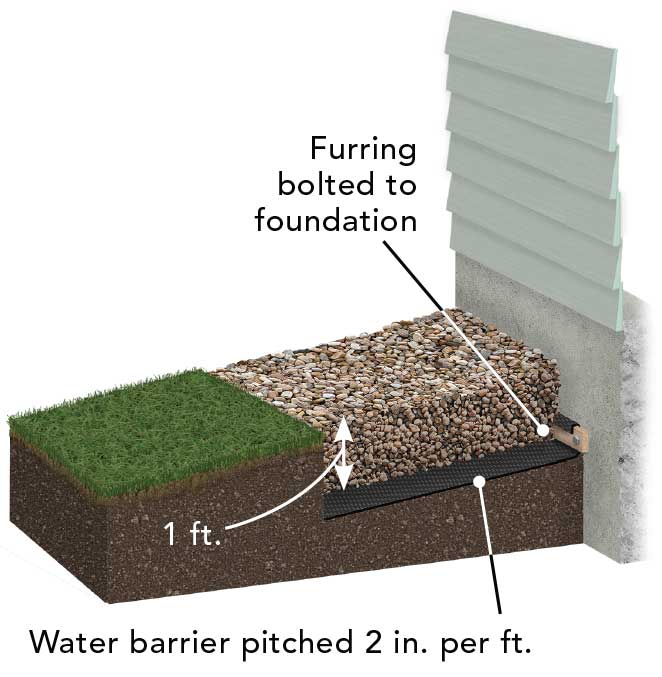
- Install a French drain. Basic by design, a French drain consists of a hole (at least 3 ft. deep) filled with crushed gravel (preferably ó in. to 1 in. dia.). This gravel bed provides a permeable shower floor and extends 1 ft. outside the structure’s perimeter. To make the floor kinder to bare feet, place a wooden grate or 1-ft.-sq. slabs of stone or tile over the gravel. Gray water drains into the gravel bed and is absorbed by the ground, so stock your shower with biodegradable soaps. Not surprisingly, this system won’t pass code in some towns, especially densely populated ones.
3. Scout the right spot
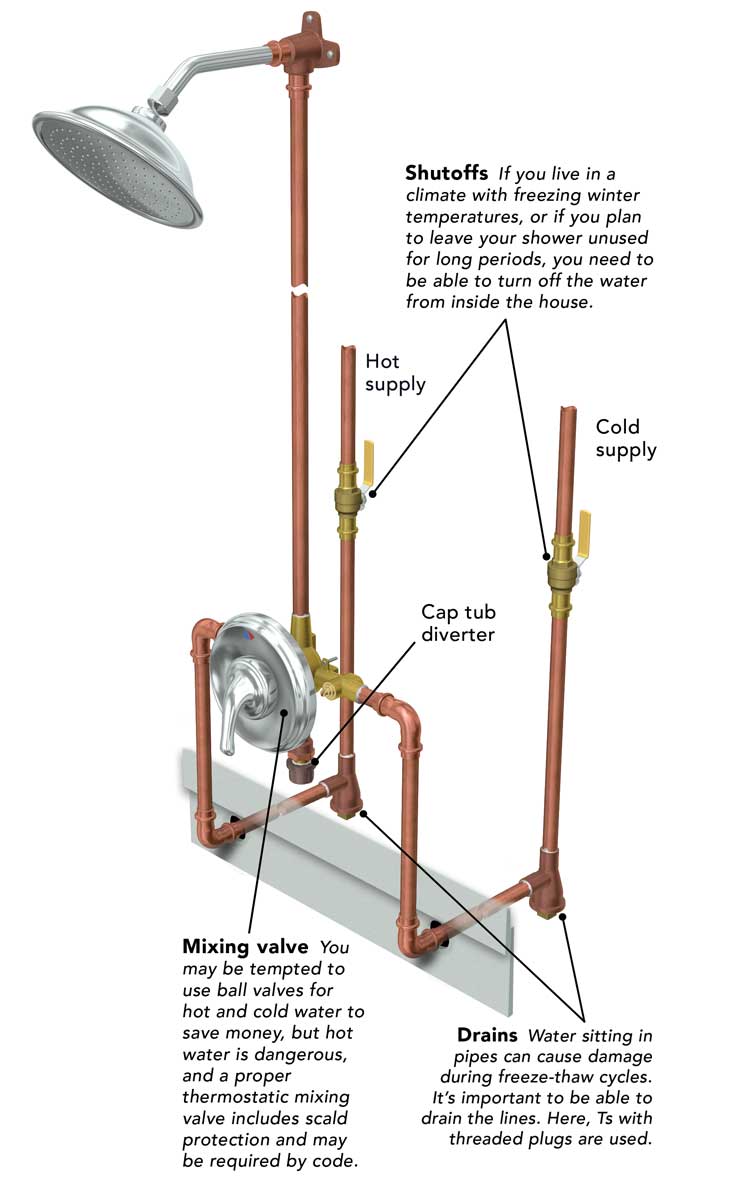
Exterior walls directly outside kitchens, bathrooms, and laundry rooms are prime locations for an outdoor shower. Having a clear path to interior hot- and cold-water lines means less work for the plumber and a less expensive price tag for you. Plan to have an access panel, similar to those used for tub decks, on the interior wall behind the outdoor-shower fixture. This removable panel allows you to maintain the shower’s plumbing easily and to drain its water lines annually to prevent frozen pipes. If you’re unable to tie into interior water lines, there is a second option. To access water lines in the basement, a licensed plumber can drill two side-byside, 1-in.-dia. holes through the house’s foundation and feed hot- and coldwater lines outside.
|
Tip Avoid frozen pipes. If you live in a climate where temperatures drop below freezing, you must drain your pipes before the first frost hits. Have your plumber show you how this easy chore is done. |
4. Protect your siding
If you’re planning to have your house’s siding serve as one wall of your outdoor shower, it’s important that that wall have adequate moisture protection. This includes housewrap or felt paper beneath the siding and at least three coats of a quality finish (paint or waterproof sealant) on the exterior surface. Another option is to build a separate shower wall of moisture-resistant wood, such as cedar or ipé, with an airspace between the shower and the exterior wall of the house. This shields the siding and allows the wet shower wall to dry thoroughly from both sides between uses. However, repainting the siding could be difficult if the shower wall is not easily removed.
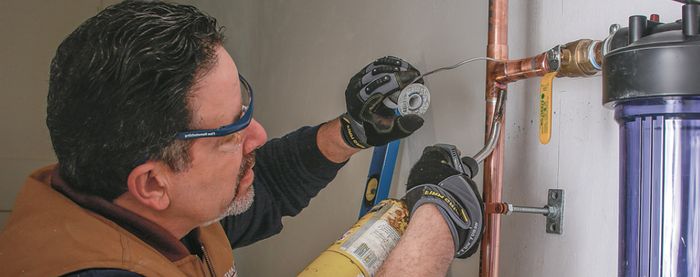
Plumbing essentialsYour plumbing may look different, depending on your house, the shower location, and the fittings you choose, but it should include these essentials. Gray water. Drainage is important, even if it’s just to prevent water from pooling at your feet. A few inches of gravel might be all that’s needed. If the house or basement is at risk of getting wet from the runoff, consider adding an underground gutter or a French drain that leads to daylight. Some jurisdictions require that you capture your gray water and direct it to a sewer or a septic tank. |


View Comments
Seems the capped off tub diverter would hold water after draining and therefore freeze.