
How to Install a New Toilet
Master plumber Mike Lombardi shows how to install a new toilet that won't leak, rock, or rust.
Installing a toilet seems pretty straightforward, but like any construction task, the pros have tricks to make the job go faster and easier. In this episode of Building Skills, we turn to master plumber Mike Lombardi for his tips for installing a toilet that won’t leak, rock, or rust.
In this video, plumber Mike Lombardi will:
- Inspect the new toilet for damage
- Test fit the toilet bowl
- Level and shim the bowl with rubber packing
- Set the wax ring and fasten the bowl to the flange
- Fasten the tank to the bowl
- Seal the bowl to the floor with clear caulk
- Connect the water hose to the toilet
- Install the seat
Ask a group of plumbers the proper way to install a toilet, and the conversation can get heated quickly. There are two major points of controversy: where to mount the flange and whether you should caulk the bottom of the toilet to the floor. When I install a toilet, I always make sure the closet flange is on top of the finished floor and anchored securely. This gives me the best chance for a sturdy, long lasting, leak-free installation because the weight of the toilet and any occupant is transferred to the floor, not the connected piping.
Equally important, when the flange is on top of the finished floor, the outlet on the bottom of the toilet (the horn) is positioned so that it’s below the top edge of the flange. This makes the wax seal last longer because the wax isn’t being worn away by the constant flow of water. It also better protects the soft wax from the spiral-shaped hook at the end of toilet and drain snakes.
When connecting a toilet to the closet flange, I use plastic closet bolts made by Sioux Chief. The bolts have chunky shoulders that help to hold them upright so that they’re ready to accept the toilet as it’s lowered into place. The bolts won’t rust and will break if overtightened, a safeguard against cracking the toilet’s base.
Caulking the bottom of the toilet to the floor is required by the International Plumbing Code and the International Residential Code. (To find out why, see “Should You Seal the Joint Where a Toilet Meets the Floor?” FHB #237)
Before you get started, you may want to click for advice on How to Remove a Toilet.
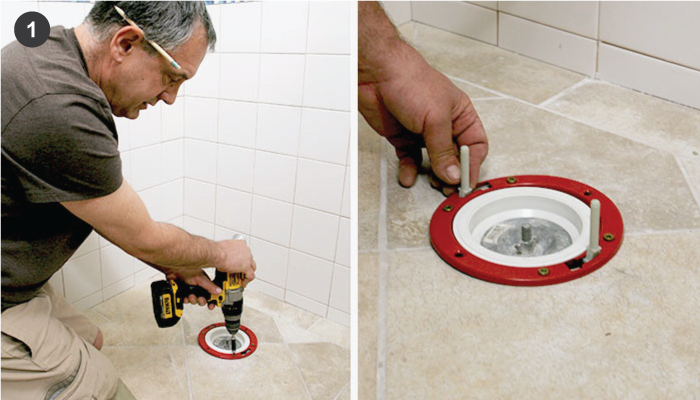
1. Secure the flange.
Dry-fit the flange so that when the closet bolts are at the end of the mounting slots, they will be 12 in. from the wall behind the toilet. When fitting is done, glue the parts together (see “Prep and Glue Plastic Fittings,” FHB #229). Screw the flange to the subfloor with zinc-coated screws, and install the closet bolts.
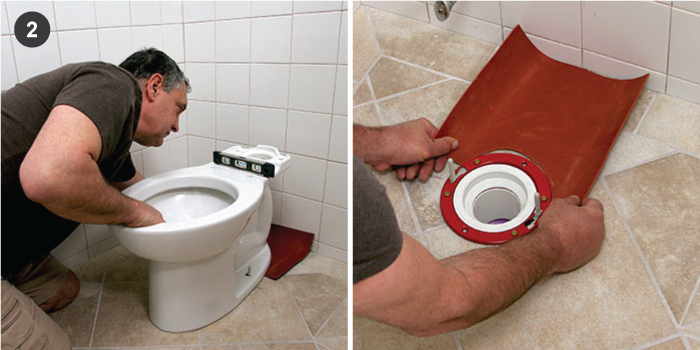
2. Dry-fit the bowl.
To identify installation problems early, always do a dry-fit. Because this bowl isn’t quite level and has a slight rock, the author uses rubber-gasket material as a shim. Once he’s satisfied, he removes the bowl and trims the rubber to fit around the flange.
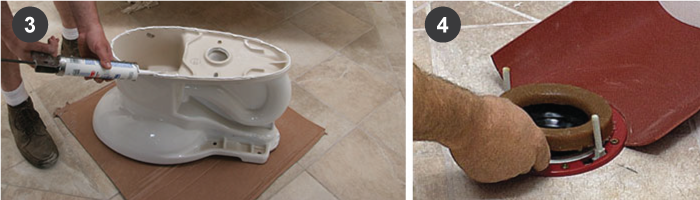
3. Caulk the bottom.
With the bowl upside down, apply a bead of translucent adhesive caulk around the entire outside edge. This important sanitary measure is required by the IRC and the plumbing code.
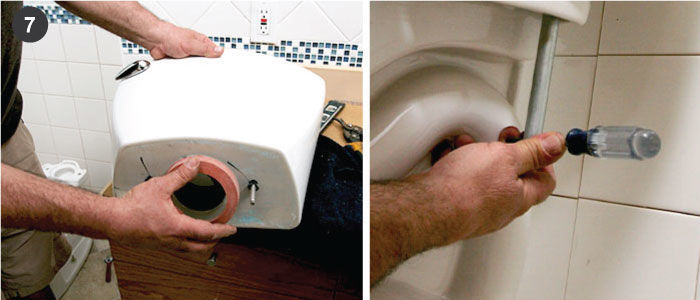
4. Install the wax ring.
After removing the plug, place the ring in the flange. This ensures that the wax seal is centered over the toilet outlet. The author prefers the plastic-horned Hercules Johni-Ring.
5. Fasten the bowl.
Carefully lower the bowl over the closet bolts. Lean on the bowl, compressing the wax seal until the bowl is in full contact with the floor. Then, with the cap bottoms in place, tighten the two bolts a little at a time.
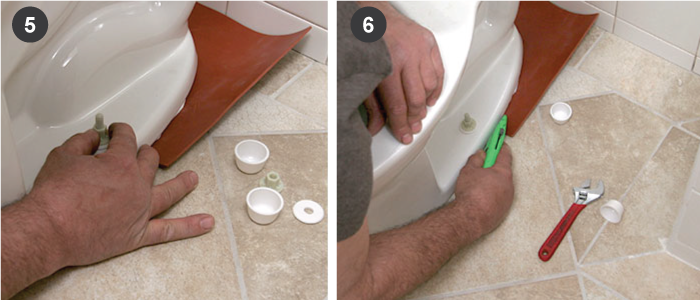
6. Trim the shim.
Holding a utility knife so that the blade angles in, trim the rubber gasket flush with the bottom of the toilet. Use a fresh blade and make the cut in several passes so that the blade doesn’t slip and scratch the floor.
7. Install the tank gasket.
In a conventional two-piece toilet, a soft rubber gasket seals the tank to the bowl. The brass bolts are tightened with a long socket provide by the toilet manufacturer. Go easy; over tightening can crack the tank.
8. Connect the supply.
The author likes to use braided supply lines with brass nuts at both ends. Choose one long enough to put a loop in the tubing. This puts less stress on the ends, which is where most leaks and breaks occur. Both ends have rubber washers, so the connections don’t have to be tightened excessively.
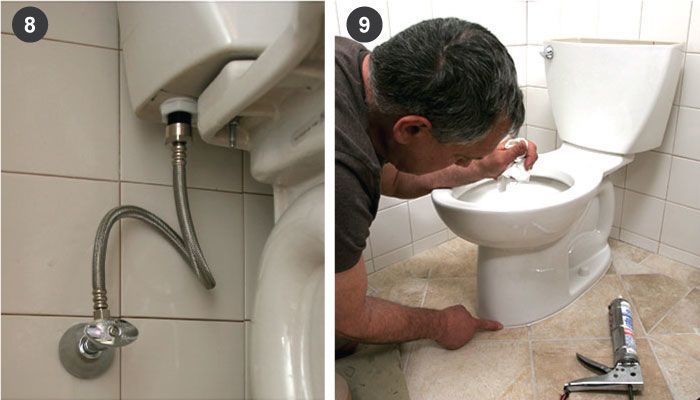
9. Caulk again.
Flush the toilet several times, inspecting the toilet and the basement for leaks. Once everything looks OK, apply another bead of caulk to seal the base to the floor, and smooth the joint with a moistened finger.
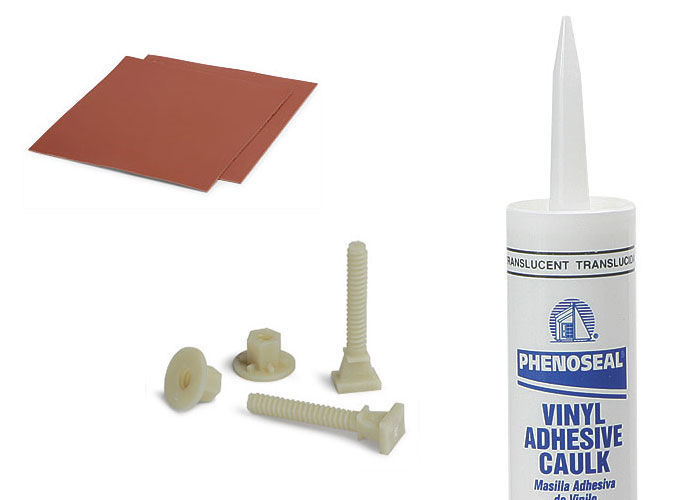
Problem-solving products
Shim stock Rubber gasket makes an excellent shim for rocking bowls. This long-lasting material, available in the plumbing section of home centers, is impervious to water, is easy to cut, and molds to uneven surfaces.
Best bolts Plastic closet bolts from Sioux Chief won’t rust, and they’ll break before they’re tight enough to crack the toilet. Square shoulders keep the bolts upright in the flange.
Superior seal The author likes translucent Phenoseal adhesive caulk for sealing the bottom of the bowl to the floor. The sealant prevents water from getting under the bowl.

View Comments
It is much easier to place the toilet on the flange if the flange bolts are held in place on the flange with a second nut or a plastic clip washer (which is often included in toilet kits). I'm surprised that this was not mentioned.
we also follow the initial recommendations.
but instead of the waxseal which is always quite messy (installing or removing) we use a waxless connection. This is a small 3" tube glued to the underside of the toilet; the tapered tube fits into the sewerdrainpipe. Clean, fast installation.
We do not seal the bottom of the toilet. IF there is a sealfailure water would be trapped and soaks the underlay. This type of failure is rarely detected in the beginning but is causing a lot of damage that is expensive to fix.
If the toilet leaks and you can see water on your floor around the toilet you can get at it right away.
Same goes if the water is yellow :=)
Plumber Mike's (video) method above is what would recommend following. The wax seal is also for inhibiting sewer gas from entering the room. Check your local codes first when tackling plumbing, electrical & structural carpentry projects.
Good video however, what is packing? I just use cedar shims. Also never ever caulk toilet to the floor.
The caulk on the floor is an effective way to prevent rocking. Some guys leave a gap in this caulk of several inches at the rear of the toilet so that a future leak can be spotted.
Thanks for the comments everyone.
EngrMike
The closet bolts Mike uses from Sioux Chief have chunky shoulders that hold them upright without a washer or additional nut. They're very cool. You can see them here by pasting this link in your browser.
http://www.siouxchief.com/Specialties/Toilet/Plumb-Perfect.VGC48
Leftturner
Rubber packing is gasket material used for flanged connections like those on some circulator pumps. You can find it at the home center or the plumbing supply house. Wood shims will get moldy in many climates as summertime condensation drips on them and eventually rot.
You can see the packing here.
http://www.amazon.com/Lavelle-Rubber-Sheet-Packing-Utility/dp/B000H5SMGM/ref=pd_sim_sbs_hi_1
Not caulking the toilet base is a code violation.
Patrick McCombe
Associate Editor FHB
This won't work with a new toilet but if you are reinstalling a toilet, you can use some of the old wax ring to hold your flange bolts upright. I also concur with the inspection of the toilet but it isn't always foolproof. I had a toilet that showed no visible signs of a crack but it leaked and continued to do so after several removals and reinstalls. In the end, it was an incomplete glazing that was weeping water out of the trap and could only be found by putting food coloring in the bowl and then not using the toilet for a couple of days. You could see the color stain where the water was weeping through the unglazed trap.
Please cite the code specifically that states one must caulk (or seal) the bowl to the floor. Not all inspectors and plumbers agree the bowl must be sealed and I have had inspectors FAIL a final because of the bowl being sealed. I like the idea of the "weep hole" being left if the bowl is sealed, however. Nice job on the video. Thanks, Mike
ps: I would LOVE to see a video demo of vinyl shower pan installation with particular attention being paid to outside corners, curbs and built-in seats. Please include the tile setters on this too. I want to see how tile backers are attached securely.
Hi MikeWise,
I have a 2006 and 2009 IRC here at my desk.
It's in section P2705.1 General
3. Where fixtures come in contact with walls and floors, the contact area shall be watertight.
Maybe others will weigh in with section numbers for 2012 and the Plumbing Code.
I don't like adding caulk. One, it won't allow leaks through and even if you leave a few spots open in the back, the leak could take a while to make it there. And who looks at the back of their toilet for water anyway. Two, the caulk will inevitably turn a rotten yellow/brown color, especially if there are more boys in the house than girls. I also don't like the use of full turn water valves. Quarter turns work better, quicker and look nicer. I wasn't aware of the rubber gasket materiel. Could be a nice alternative to plastic wedges.
Never use wood shims. And I don't like the square little toilet wedges most places carry.
I recommend JOHNNY SHIMS. They're made just for toilets. I think they're made by EZ-Shim. They have little cradles that keep them in place.
Thanks to all for your comments, sharing ideas always results in the opportunity for learning. I fully believe that a properly prepped floor and flange connection will result in a toilet install that will never leak. Sealing the toilets contact point at the floor is an important part of a plumbers main responsibility; to provide sanitation. We very carefully design & install sanitary DWV systems that protect health, caulking or sealing the base of all plumbing fixtures is a code requirement that helps maintain sanitary conditions. The most common mistakes I see with toilet installs include: stacked gaskets, below grade closet flanges, unsealed / exsposed wood, uneven / porous flooring, and unchecked condensation. A wax gasket should NEVER touch water unless there is a back up or blockage below the toilet horn, & a single wax gasket, installed on a properly anchored flange, can withstand the 1/2 lb of pressure exerted by an over flowing bowl. The value of caulking / sealing the base of any plumbing fixture is to prevent soiled water from wicking into those tight spaces & festering into nasty germs.
My opinion the rubber is not a good idea it rots and is still flexible. Also when you trim the rubber after installation what happens when a customer has linoleum flooring how do you prevent the knife from cutting the floor. I prefer plastic shims, they don't rot and are firm. I also use an extra set of closet bolts and washers to hold closet bolts in place. I also like to use plain wax rings, since some of the new toilets have a shallower bottom the ones with plastic inserts/reducers (used in the video) can push through the wax and seat against the bottom of the toilet thus no wax seal. Every inspected job I have done it was required to seal base with caulk. have used dap kitchen/ bath caulk for over 40 years,I have never seen it turn yellow.
install toilet
Nice install.
My pet peeve with one phase is not installing supply line to valve, then flushing the water into a bucket for a few seconds to flush out any debris possible stuck in the line. Any debris not flushed goes directly into the toilet valve corrupting the water flow and clogging the mechanism. I've learned this from countless service calls over the years to replace toilet valves within weeks of a new install.
This holds true for new faucet installs, too. Flux and solder debris clogged in aerators is just ridiculously careless and unnecessary.
FLUSH THEM LINES!! before final connection.