FHB Logo Facebook LinkedIn Email Pinterest Twitter X Instagram Tiktok YouTube Plus Icon Close Icon Navigation Search Icon Navigation Search Icon Arrow Down Icon Video Guide Icon Article Guide Icon Modal Close Icon Guide Search Icon Skip to content
Subscribe
Log In
  • How-To
  • Design
  • Tools & Materials
  • Restoration
  • Videos
  • Blogs
  • Forum
  • Magazine
  • Members
  • FHB House
  • Podcast
Log In

Fine Homebuilding Project Guides

Plumbing

Guide Home
  • Plumbing Basics
  • Bathrooms
  • Kitchens
  • Roughing In
  • Water Heaters, Washers, and More
  • Maintenance and Repair
How-To

Installing a Garbage Disposal

Follow these steps to hook up a standard household garbage disposal.

By Steve Cory
  • X
  • facebook
  • linkedin
  • pinterest
  • email
  • add to favorites Log in or Sign up to save your favorite articles

If you already have a garbage disposal, replacing it should take less than an hour, as long as the new one is the same size and has its outlet in the same position. (If you upgrade to a larger disposal you will probably need to cut a trap pipe or two to make it fit.) If you will put in a new disposal where there was none before, you will need to assemble a new trap along with the disposal.

You will also need an electrical receptacle that is controlled by a wall switch, which you will plug the disposal into. If you don’t have one, hire an electrician to install one, or consult a book such as Wiring Complete (The Taunton Press, 2017).

A 1⁄3-horsepower disposal does well for light duty; a 1⁄2-horsepower unit suits most household needs. If you often want to grind things like lemon rinds, it’s a good idea to install one that pulls 3⁄4 or even 1 horsepower.


KNOCK OUT THE DRAIN HOLE FOR THE DISHWASHER
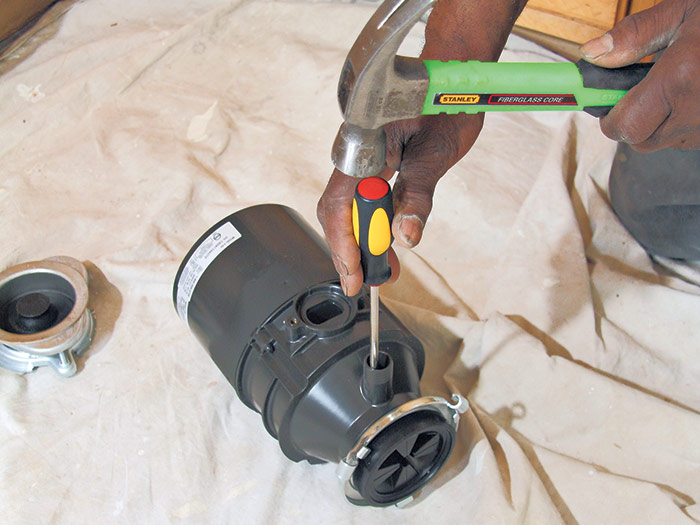
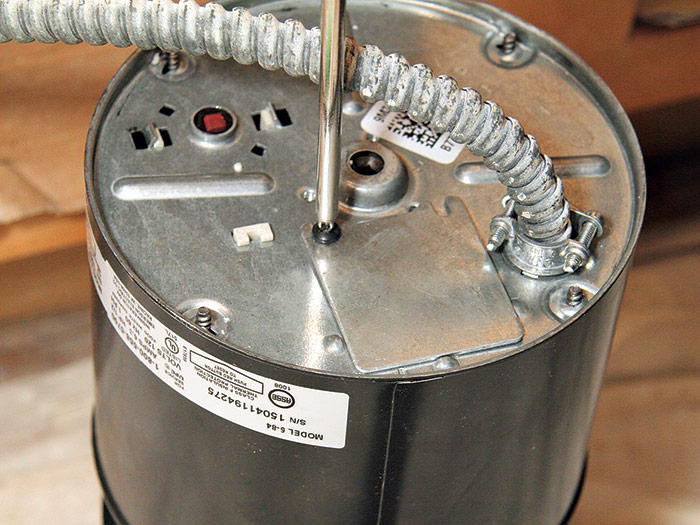
KNOCK OUT THE DRAIN HOLE FOR THE DISHWASHER. If you plan to run the dishwasher drain line through the disposal (which may or may not be up to code in your area), open the drain hole by tapping the knockout slug with a hammer and screwdriver. Be sure to remove the slug from the inside of the disposal.


ATTACH THE ELBOW
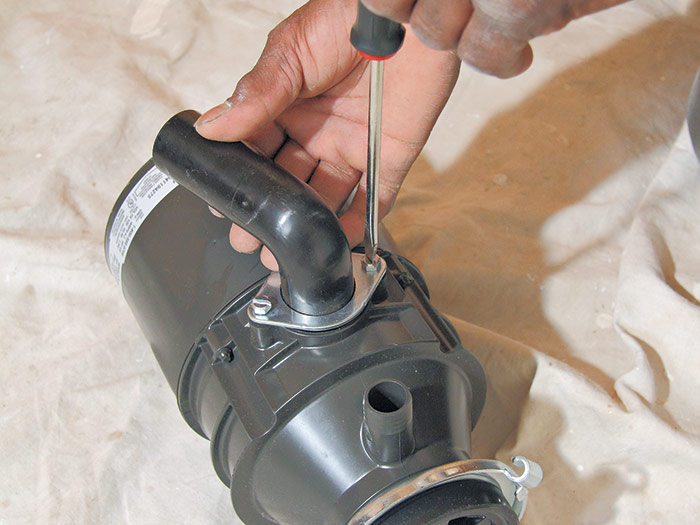
ATTACH THE ELBOW. Some trap setups call for an elbow coming out of the disposal. The elbow is usually provided along with the disposal. To install one, slip a rubber washer into the opening, set the elbow in place, and slide the mounting washer into place. Drive two bolts to attach the mounting washer, as shown.


TIP: If you are replacing a disposal with one of the same size, you can probably reuse the mounting bracket (the part that fits in the sink’s hole), which will spare you the most difficult part of the job.


unscrew the mounting nut
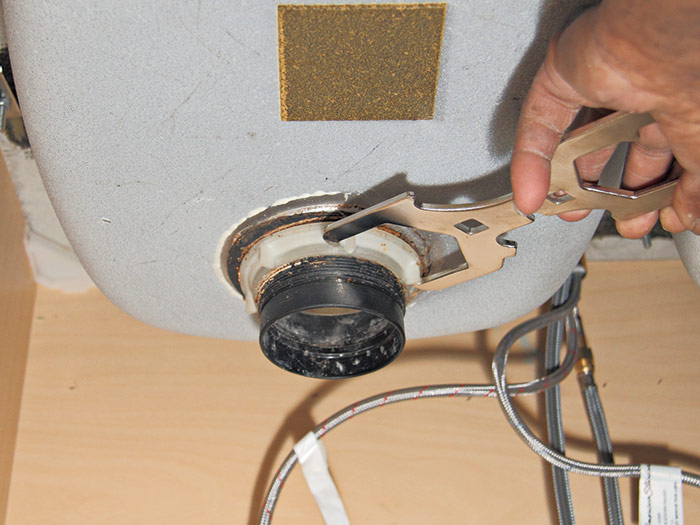
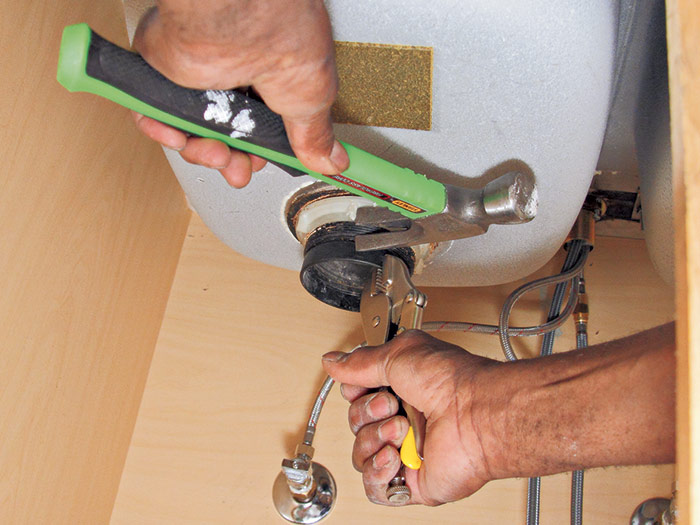
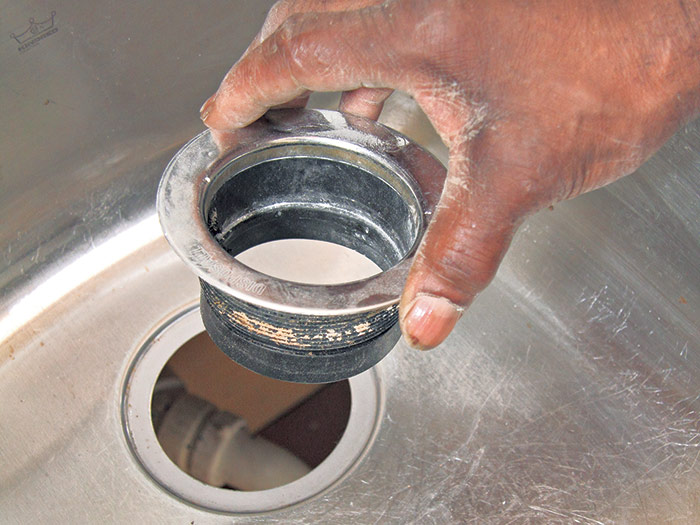
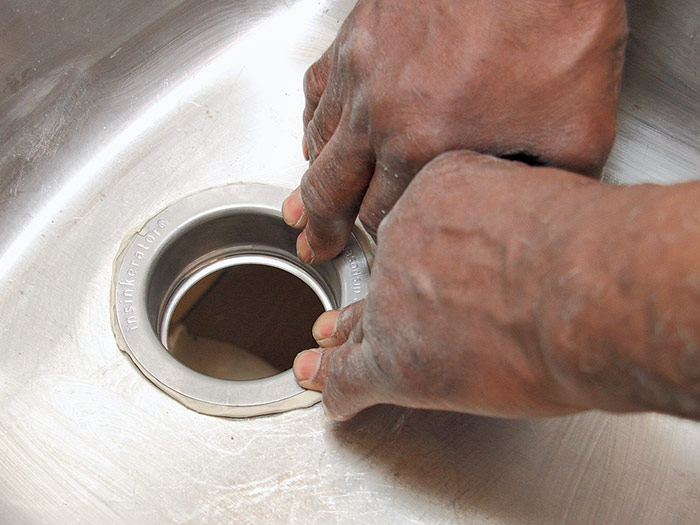
1. REMOVE THE OLD BASKET STRAINER. To remove the old basket-strainer mounting bracket, work from below and use a spud wrench to unscrew the mounting nut.
tap with the claws of a hammer
Or tap with the claws of a hammer or with a hammer and screwdriver.
pull the strainer out
Once the nut is off, pull the strainer out from above.


loosen the three screws
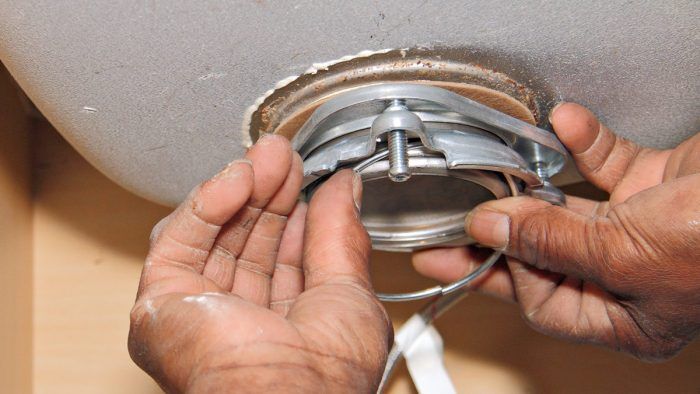
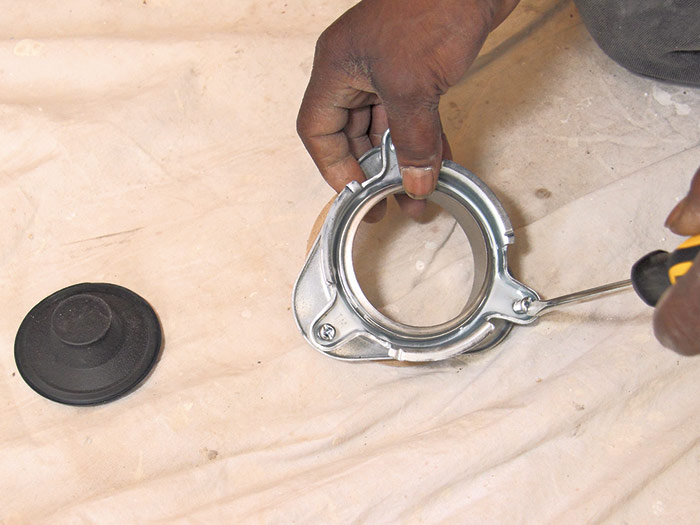
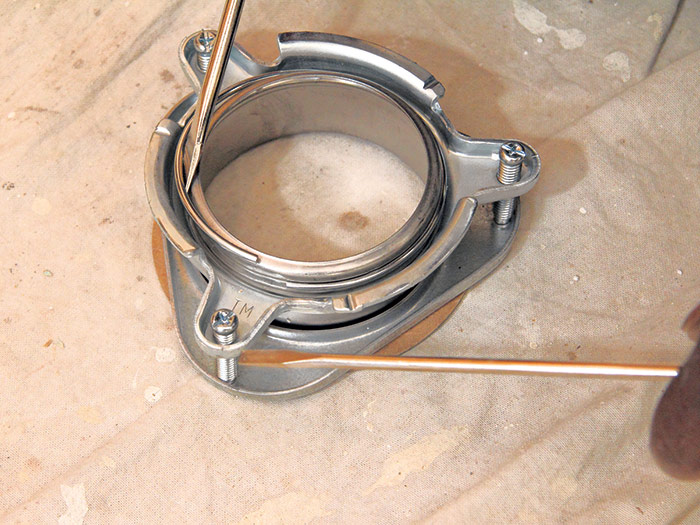
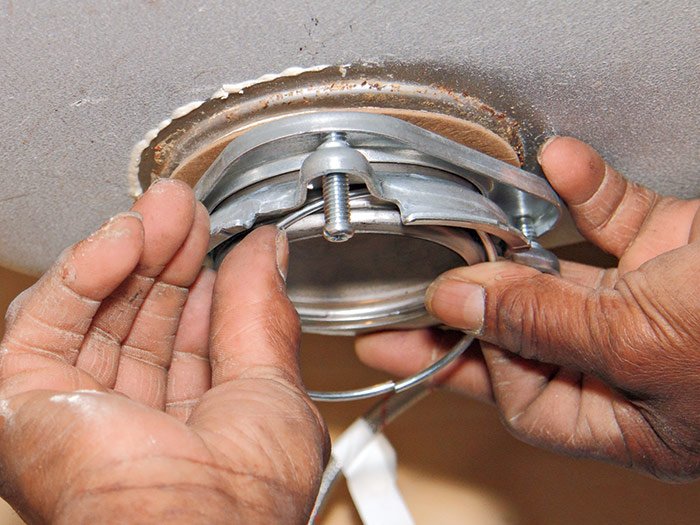
2. DISASSEMBLE THE MOUNTING RING. To disassemble the mounting bracket, loosen the three screws


pry off the ring
Use a small slot screwdriver or two to pry off the ring.


PROVIDE POWER
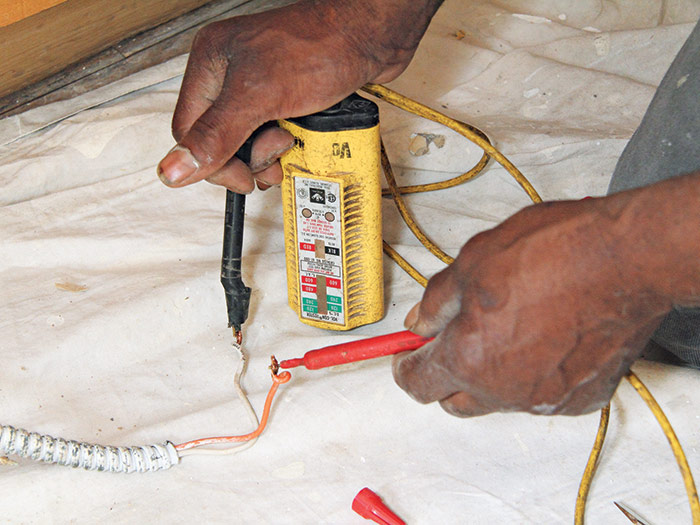
3. PROVIDE POWER. There should be a switched source of power. Test that it turns on with a switch. Before proceeding with the next steps, shut off power and test to verify that power is off.


Pull the black and white wires out
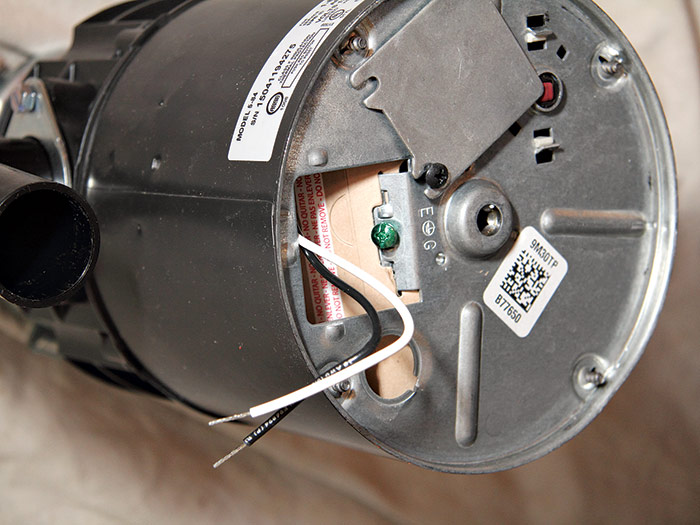
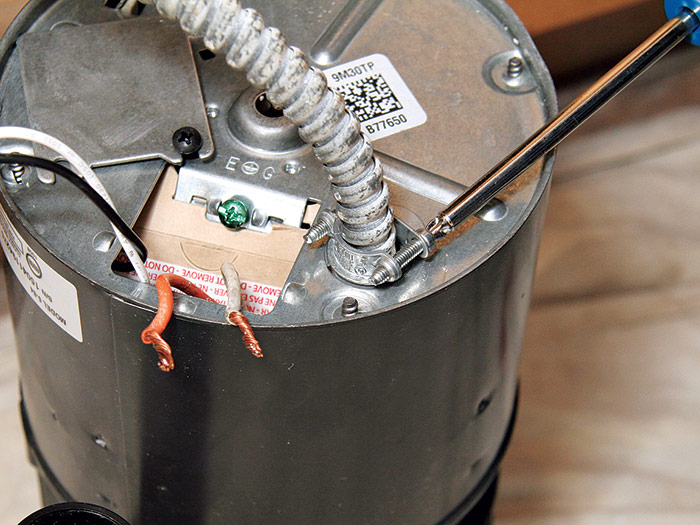
4. INSTALL THE CLAMP CONNECTOR. Loosen the screw that holds the electrical access cover and remove the cover. Pull the black and white wires out.
Remove the nut from a clamp connector
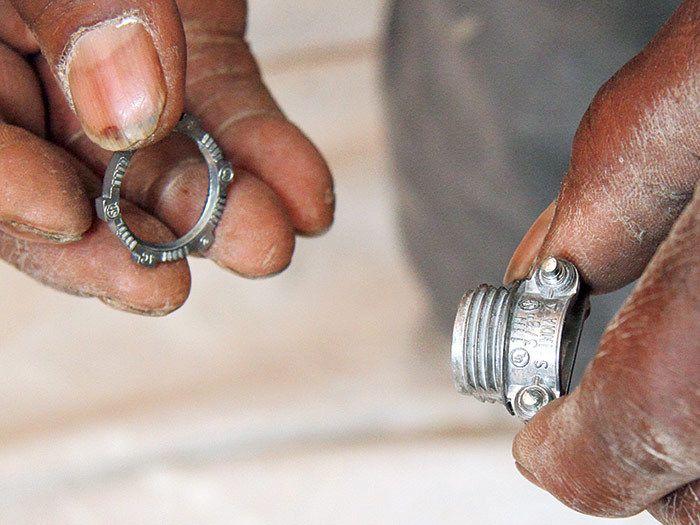
Remove the nut from a clamp connector.


Insert the connector’s threads into the hole
Insert the connector’s threads into the hole in the disposal, and thread the nut back on from inside the disposal. It’s usually easiest to hold the nut still while you turn the connector. Tighten the connector with pliers, but leave the clamping screws loose.


TIP: The cable shown here is metallic sheathed, but yours may be plastic sheathed. The type of cable clamp shown here works for both types of cable.


tighten the cable clamp
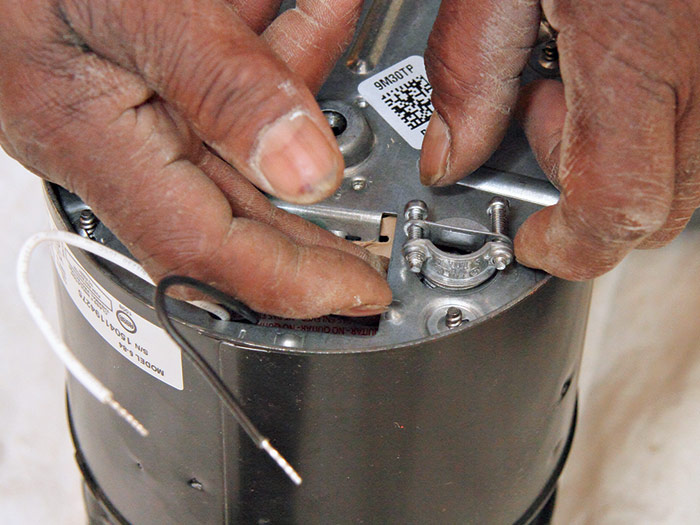
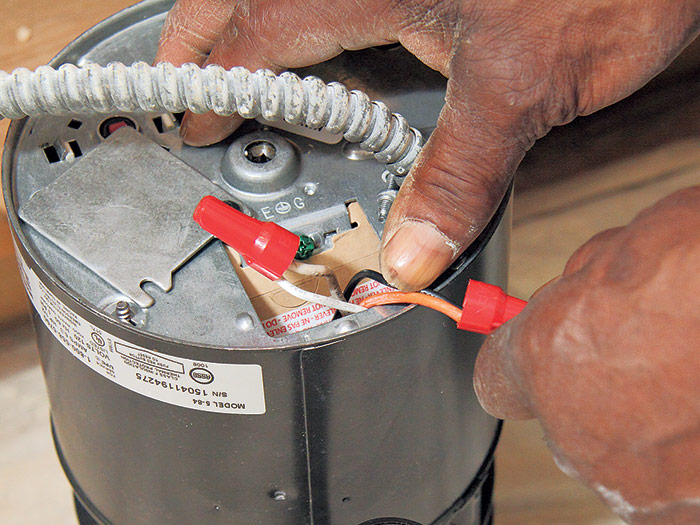
5. MAKE THE ELECTRICAL CONNECTIONS. Strip 3⁄4 in. to 1 in. of insulation from all the wires. Poke the cable into the disposal’s hole and pull its wires through the access opening. Tighten a 3⁄8-in. cable clamp to hold the cable securely (top).
Use wire nuts to make firm electrical connections
Use wire nuts to make firm electrical connections: black wire to black wire (or colored wire, in this case orange) and white wire to white wire. There should be no visible bare wire; wrap the connections with electrician’s tape to be sure.
replace the cover
If there is a third wire, green or bare, connect it to the green grounding screw. Push the wires back into the disposal, and replace the cover.


press putty all around to seal tight
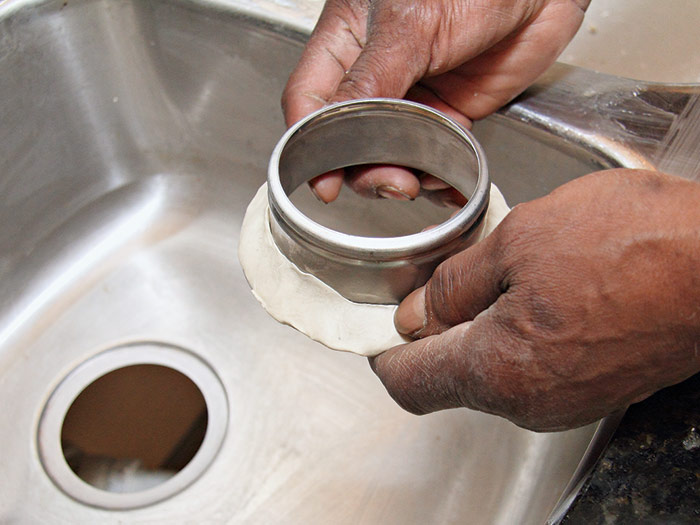
6. PRESS THE FLANGE WITH PUTTY. Roll out a rope of plumber’s putty with your hands, place it on the underside of the bracket’s flange, and press it all around to seal tight.
Press the flange into the sink’s hole
Press the flange into the sink’s hole. Have a helper hold the flange in place as you perform the next step.


slip the ring onto the groove
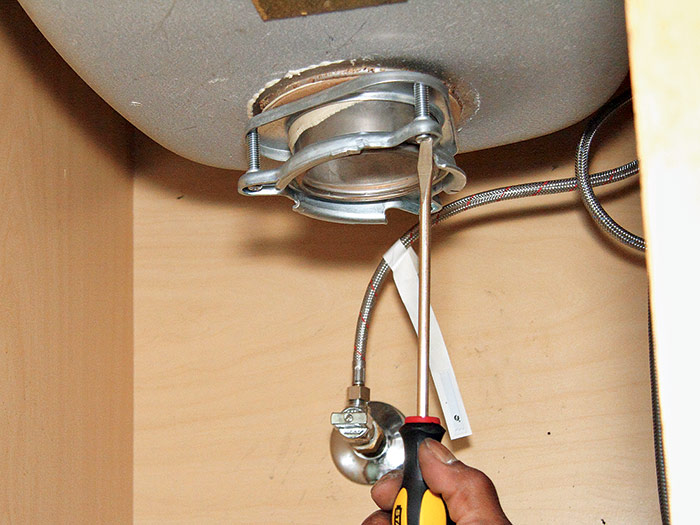
7. ASSEMBLE THE BRACKET. Working from below, slip on the cardboard washer, then the triangular washer, then the bracket with the screws. Now comes the first tricky part: Hold the ring in position, then use a screwdriver or two to slip the ring onto the groove in the bracket’s body. This may take several attempts, but be patient and you’ll get it.


TIGHTEN THE THREE SCREWS
8. TIGHTEN THE THREE SCREWS. Tighten the three screws, alternating so they all end up about the same length. That will ensure that the disposal hangs straight down. Have your helper check that the flange is centered on the sink’s hole. If not, loosen the screws, center it, and retighten.


TIP: Unscrew the three mounting screws nearly all the way; that will make it easier to mount the bracket.


MOUNT THE DISPOSAL
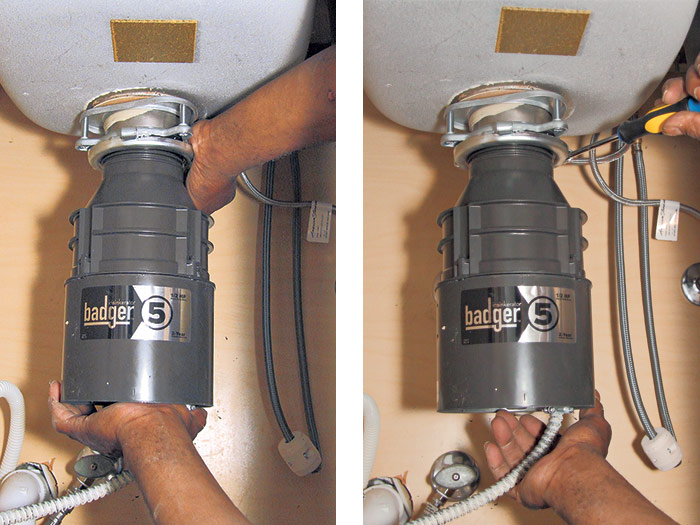
9. MOUNT THE DISPOSAL. And now, the second tricky part: Holding the disposal straight vertically, push it up onto the mounting bracket. When you feel it slide up a bit, turn the locking ring by hand to get it started. Then use a screwdriver to finish turning the locking nut. If you don’t succeed the first time, get yourself into a comfortable position and try again, taking care to keep the disposal plumb. Assemble the trap and perhaps the dishwasher hose, and test.


Excerpted from Plumbing (The Taunton Press, 2016) by Steve Cory.

Previous: Installing a Dishwasher Next: Replacing a Garbage Disposal

Guide

Plumbing

Chapter

Kitchens

Sign up for eletters today and get the latest how-to from Fine Homebuilding, plus special offers.

Signing you up...

This site is protected by reCAPTCHA and the Google Privacy Policy and Terms of Service apply.
See all newsletters
See all newsletters

Log in or create an account to post a comment.

Sign up Log in

Become a member and get full access to FineHomebuilding.com

Plumbing

Plumbing

Trusted, comprehensive guidance from the pros for tackling any plumbing project

View Project Guide

View All Project Guides »

Become a member and get unlimited site access, including the Plumbing Project Guide.

Start Free Trial

Plumbing Basics
  • Plumbing Systems
  • Materials
  • Plumbing Tools
Bathrooms
  • Sinks
  • Showers & Tubs
  • Toilets
Kitchens
  • Kitchen Sinks
  • Water Filtration
  • Appliances
Roughing In
  • Layout
  • Installation
  • Copper Pipe
  • PEX Tubing
  • PVC Drainpipe
Water Heaters, Washers, and More
  • Water Heaters
  • Whole-House Filters
  • Sump Pumps
  • Washers
  • Sprinkler Systems
Maintenance and Repair
  • Sinks
  • Toilets
  • Showers & Tubs
  • Systems

Fine Home Building

Newsletter Sign-up

  • Fine Homebuilding

    Home building tips, offers, and expert advice in your inbox.

  • Green Building Advisor

    Building science and energy efficiency advice, plus special offers, in your inbox.

  • Old House Journal

    Repair, renovation, and restoration tips, plus special offers, in your inbox.

Signing you up...

This site is protected by reCAPTCHA and the Google Privacy Policy and Terms of Service apply.
See all newsletters

Follow

  • Fine Homebuilding

    Dig into cutting-edge approaches and decades of proven solutions with total access to our experts and tradespeople.

    Start Free Trial Now
    • Facebook
    • Instagram
    • X
    • LinkedIn
  • GBA Prime

    Get instant access to the latest developments in green building, research, and reports from the field.

    Start Free Trial Now
    • Facebook
    • YouTube
  • Old House Journal

    Learn how to restore, repair, update, and decorate your home.

    Subscribe Now
    • Facebook
    • Instagram
    • X

Membership & Magazine

  • Online Archive
  • Start Free Trial
  • Magazine Subscription
  • Magazine Renewal
  • Gift a Subscription
  • Customer Support
  • Privacy Preferences
  • About
  • Contact
  • Advertise
  • Careers
  • Terms of Use
  • Site Map
  • Do not sell or share my information
  • Privacy Policy
  • Accessibility
  • California Privacy Rights

© 2025 Active Interest Media. All rights reserved.

Fine Homebuilding receives a commission for items purchased through links on this site, including Amazon Associates and other affiliate advertising programs.

  • Home Group
  • Antique Trader
  • Arts & Crafts Homes
  • Bank Note Reporter
  • Cabin Life
  • Cuisine at Home
  • Fine Gardening
  • Fine Woodworking
  • Green Building Advisor
  • Garden Gate
  • Horticulture
  • Keep Craft Alive
  • Log Home Living
  • Military Trader/Vehicles
  • Numismatic News
  • Numismaster
  • Old Cars Weekly
  • Old House Journal
  • Period Homes
  • Popular Woodworking
  • Script
  • ShopNotes
  • Sports Collectors Digest
  • Threads
  • Timber Home Living
  • Traditional Building
  • Woodsmith
  • World Coin News
  • Writer's Digest
Active Interest Media logo
X
X
This is a dialog window which overlays the main content of the page. The modal window is a 'site map' of the most critical areas of the site. Pressing the Escape (ESC) button will close the modal and bring you back to where you were on the page.

Main Menu

  • How-To
  • Design
  • Tools & Materials
  • Video
  • Blogs
  • Forum
  • Project Guides
  • Reader Projects
  • Magazine
  • Members
  • FHB House

Podcasts

  • FHB Podcast
  • ProTalk

Webinars

  • Upcoming and On-Demand

Podcasts

  • FHB Podcast
  • ProTalk

Webinars

  • Upcoming and On-Demand

Popular Topics

  • Kitchens
  • Business
  • Bedrooms
  • Roofs
  • Architecture and Design
  • Green Building
  • Decks
  • Framing
  • Safety
  • Remodeling
  • Bathrooms
  • Windows
  • Tilework
  • Ceilings
  • HVAC

Magazine

  • Current Issue
  • Past Issues
  • Magazine Index
  • Subscribe
  • Online Archive
  • Author Guidelines

All Access

  • Member Home
  • Start Free Trial
  • Gift Membership

Online Learning

  • Courses
  • Project Guides
  • Reader Projects
  • Podcast

More

  • FHB Ambassadors
  • FHB House
  • Customer Support

Account

  • Log In
  • Join

Newsletter

Get home building tips, offers, and expert advice in your inbox

Signing you up...

This site is protected by reCAPTCHA and the Google Privacy Policy and Terms of Service apply.
See all newsletters
See all newsletters

Follow

  • X
  • YouTube
  • instagram
  • facebook
  • pinterest
  • Tiktok

Join All Access

Become a member and get instant access to thousands of videos, how-tos, tool reviews, and design features.

Start Your Free Trial

Subscribe

FHB Magazine

Start your subscription today and save up to 81%

Subscribe

We hope you’ve enjoyed your free articles. To keep reading, become a member today.

Get complete site access to expert advice, how-to videos, Code Check, and more, plus the print magazine.

Start your FREE trial

Already a member? Log in

Privacy Policy Update

We use cookies, pixels, script and other tracking technologies to analyze and improve our service, to improve and personalize content, and for advertising to you. We also share information about your use of our site with third-party social media, advertising and analytics partners. You can view our Privacy Policy here and our Terms of Use here.

Cookies

Analytics

These cookies help us track site metrics to improve our sites and provide a better user experience.

Advertising/Social Media

These cookies are used to serve advertisements aligned with your interests.

Essential

These cookies are required to provide basic functions like page navigation and access to secure areas of the website.

Delete My Data

Delete all cookies and associated data