Plumbing a Washing Machine
Learn how to install the water valves and washer drain, then hook up the washer.
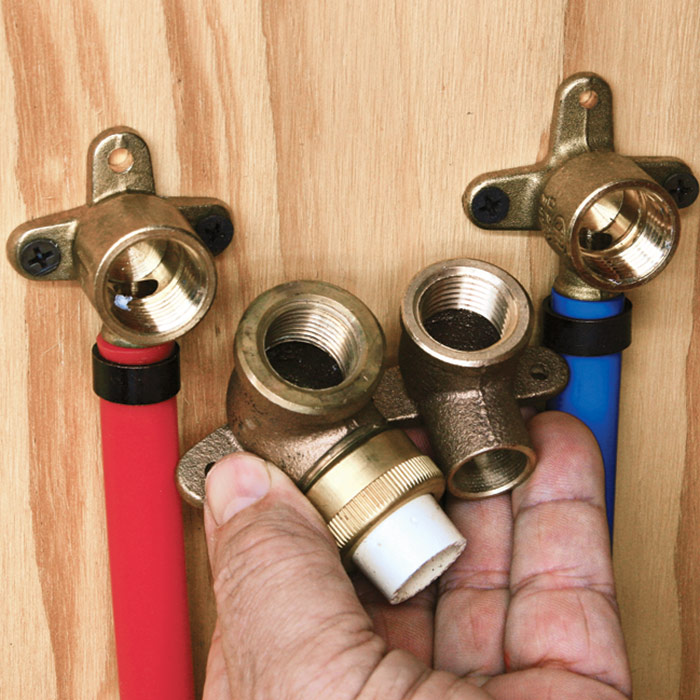
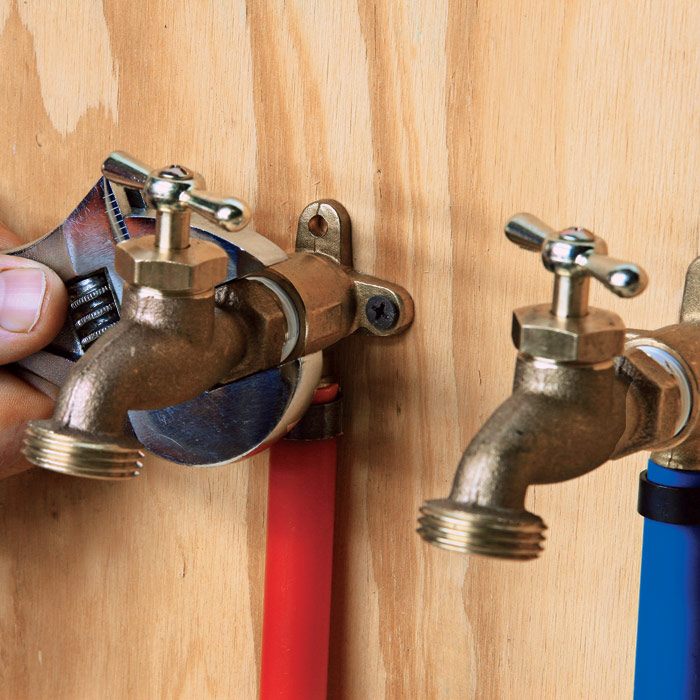
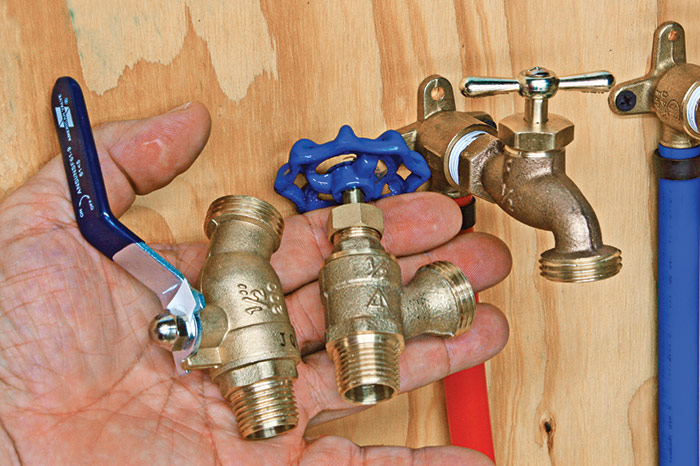
The simplest and least expensive method to connect water lines to a clothes washer is with hose bibbs screwed into drop-ear elbows. Drop-ear elbows are made for all pipes. Pick the elbow for the type of pipe you are using—PEX, CPVC, or copper—and secure it to the wall 1. Screw the hose bibb in the drop-ear elbow, first hand tight, then wrench tight, leaving the hose threads pointing straight down 2. You can also use a boiler drain or a ball-valve boiler drain. Basically any valve with 1⁄2-in. male threads and a hose bibb on the opposite end will work.
 |
 |
Picking a washer box
Washer boxes are typically designed to mount between studs (or on a stud) using supplied brackets. Don’t buy a washer-box-only kit. It’s cheap and not a true kit. This kind of box requires long-shanked valves (the 1⁄2-in. threaded ends must be long enough to fit through the box and still have enough length for the water line), and such valves generally have to be special ordered.
| WARNING: Avoid washer boxes with round-handled valves. In time, these valves corrode in place and become impossible to turn. |
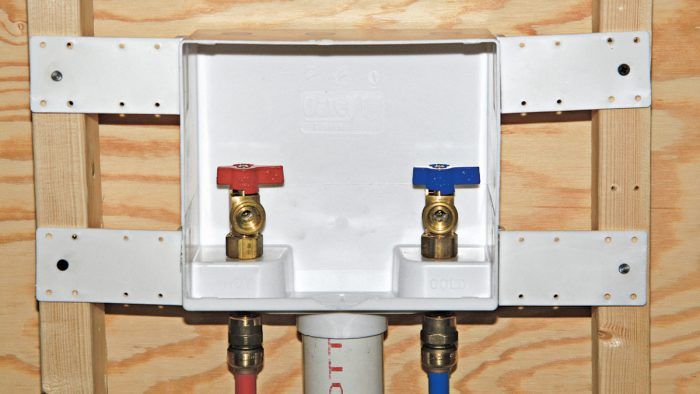
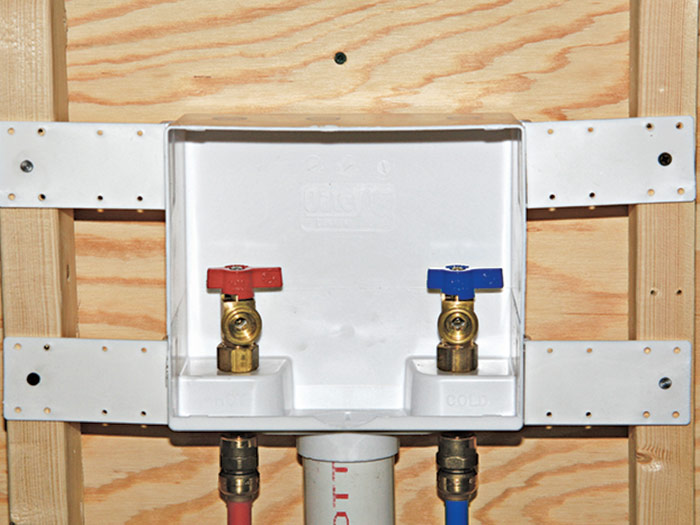
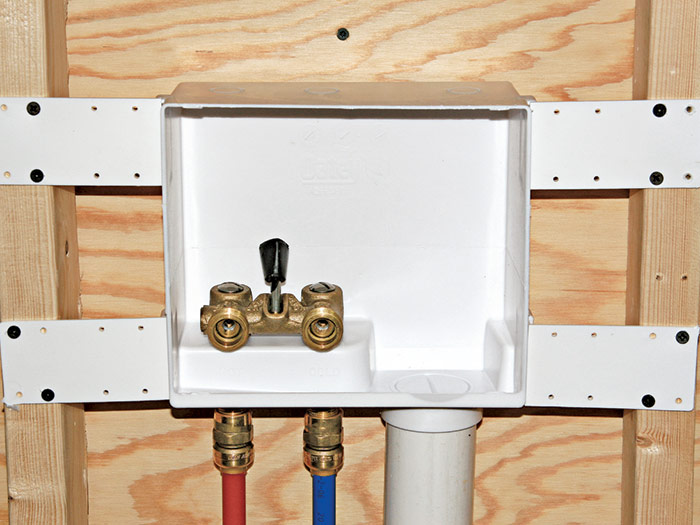
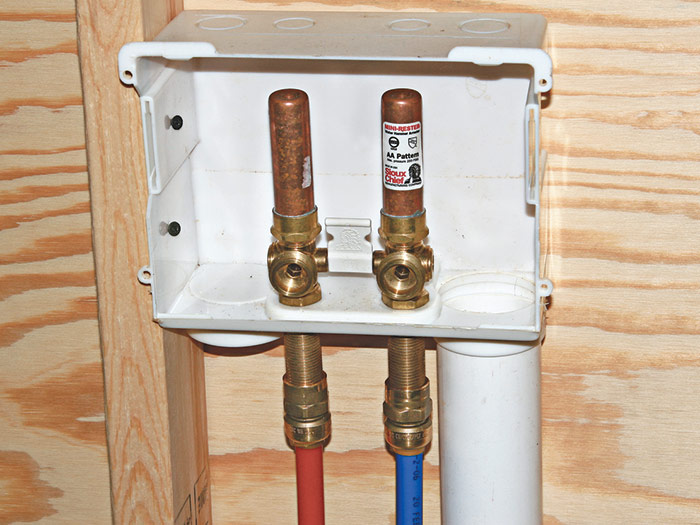
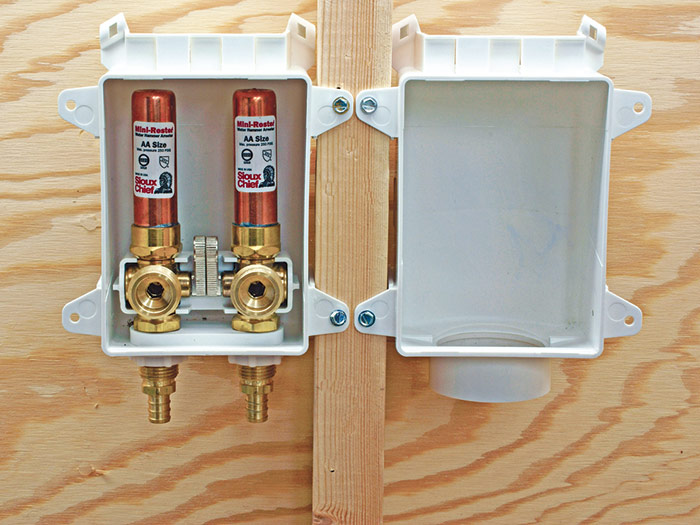
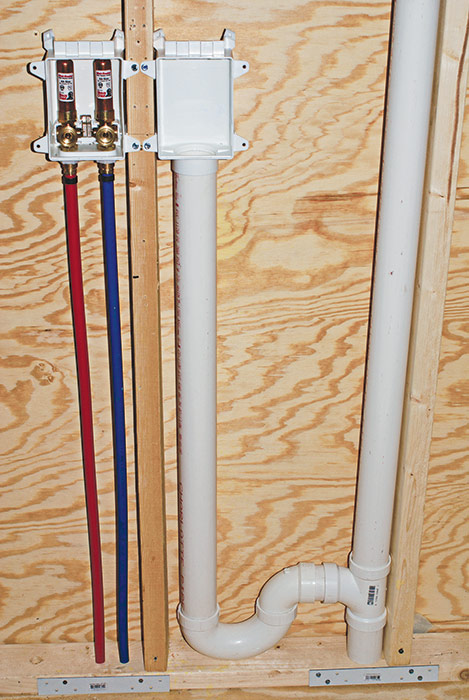
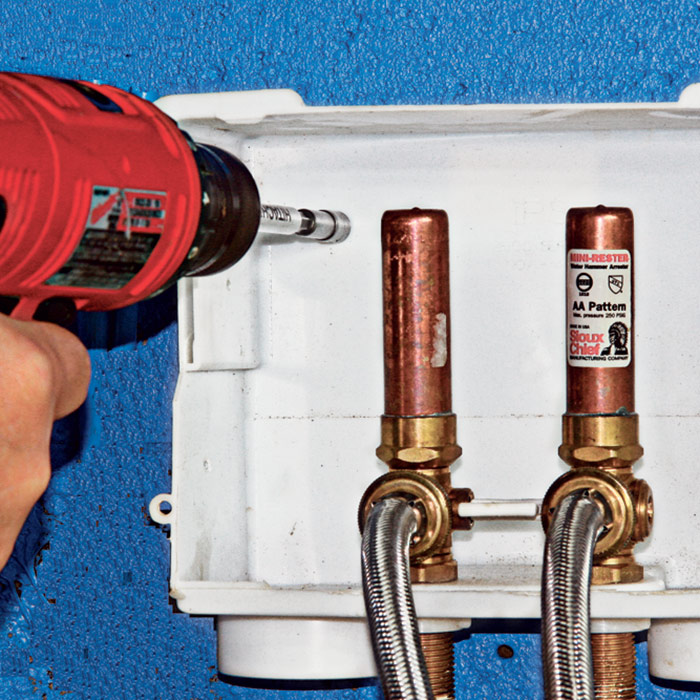
The valves within the boxes define the quality of the unit. A good box will have valves with lever handles A. A better box will feature a single easy-turn lever that closes and opens both valves at the same time B. The best box will use a single easy-turn lever but will also incorporate antishock valves to cushion the water hammer vibration that occurs when the washer solenoid turns on and off C. Installing the water lines and drains on either side of a stud offers you optional drain installations and a neater-looking setup D.
 |
 |
 |
 |
Installing a Washer Drain
WASHER DRAIN SPECIFICATIONS
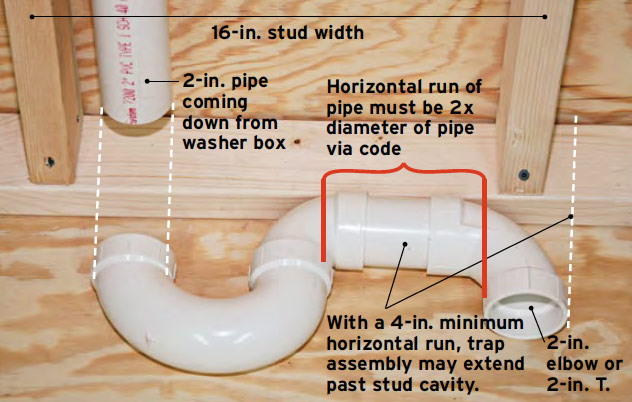
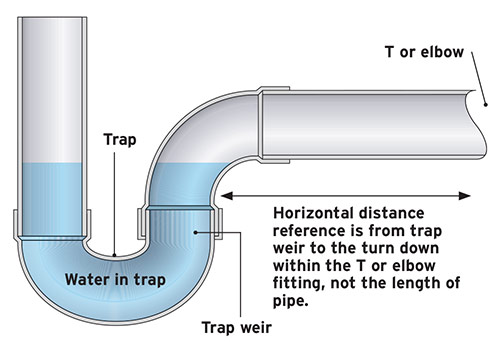
A washer drain consists of 2-in. drainpipe (typically schedule 40 PVC) with a stand pipe of around 36 in. that feeds into a 2-in. horizontal P-trap A,B,C.
 |
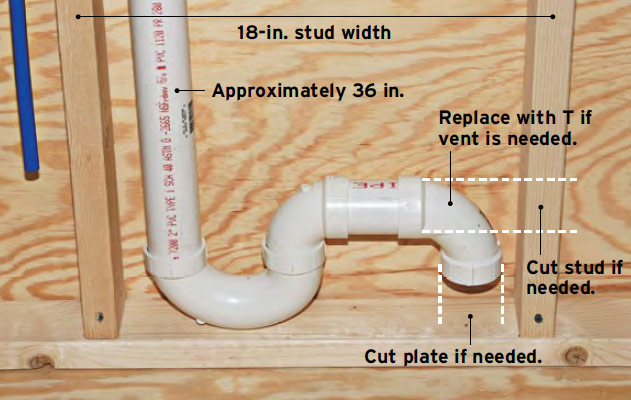 |
| WHAT CAN GO WRONG: Codes require a horizontal run after the trap of at least twice the pipe diameter, or 4 in. for a 2-in. drain. This horizontal run keeps the P-trap from functioning as an unintentional and illegal S-trap. The horizontal distance reference is from the trap weir (the water in the trap) to the bend of the elbow or T-fitting, not the length of horizontal pipe between the two. |
Hooking Up a Washer
Once the valves and drain are in place, it’s time to hook up the washer. This means connecting the washer hoses to the washer and the valves in the washer box as well as connecting the washer drain.
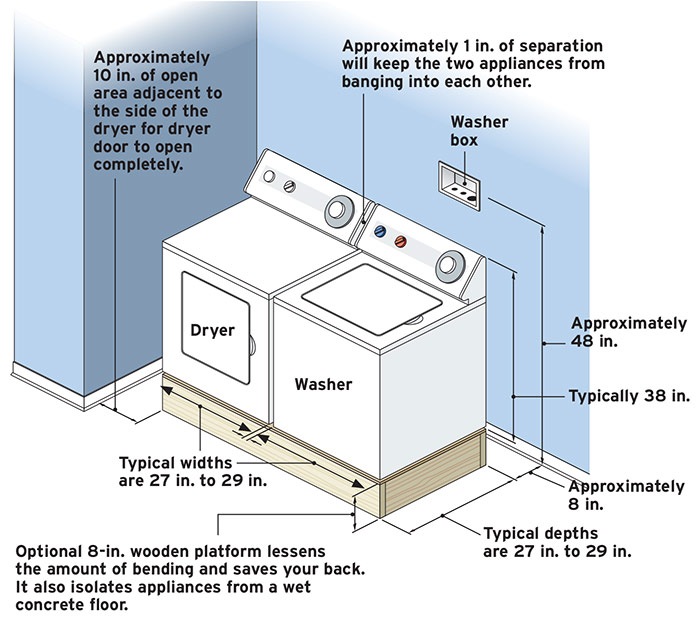
WASHER AND DRYER CLEARANCES
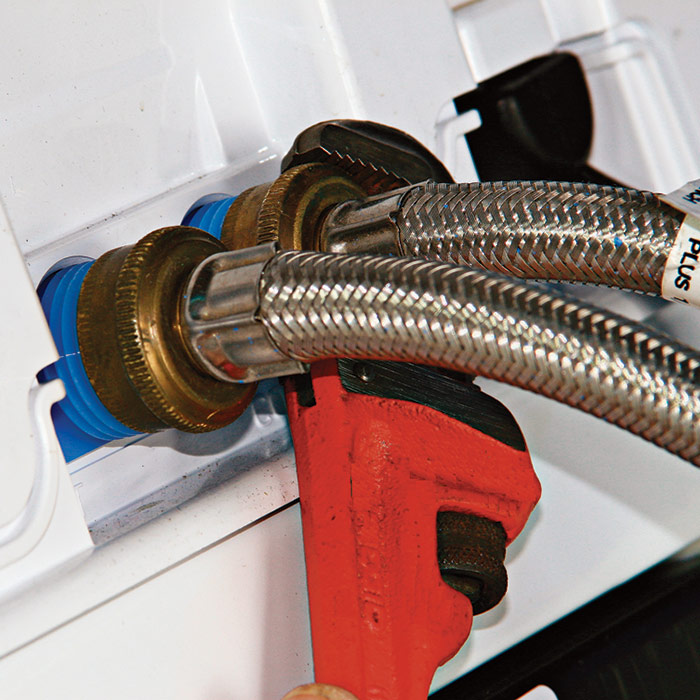
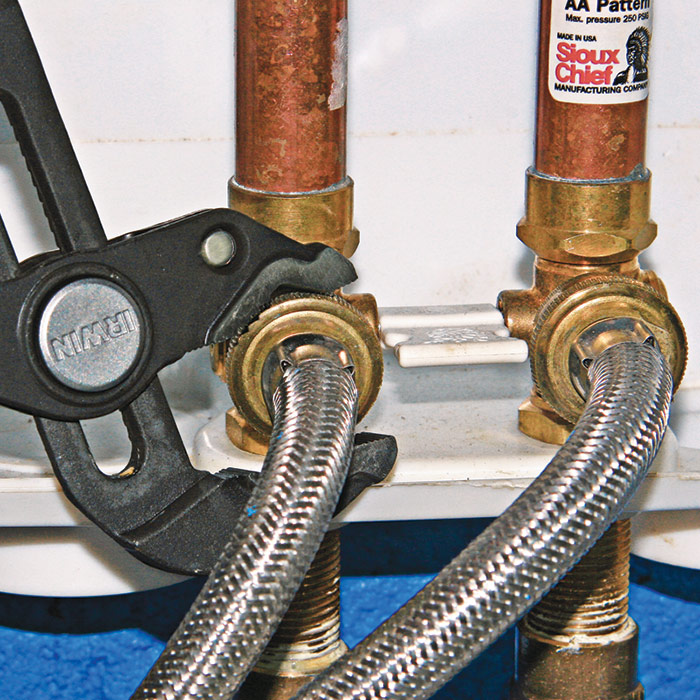
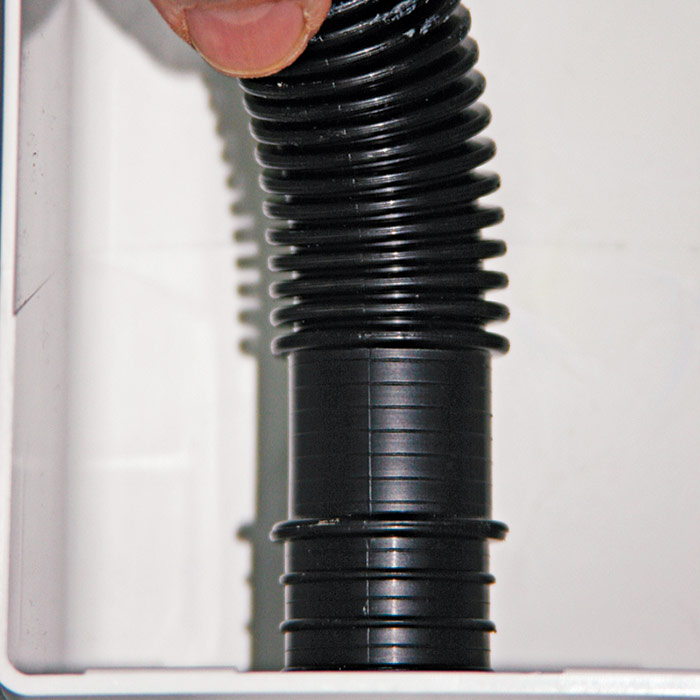
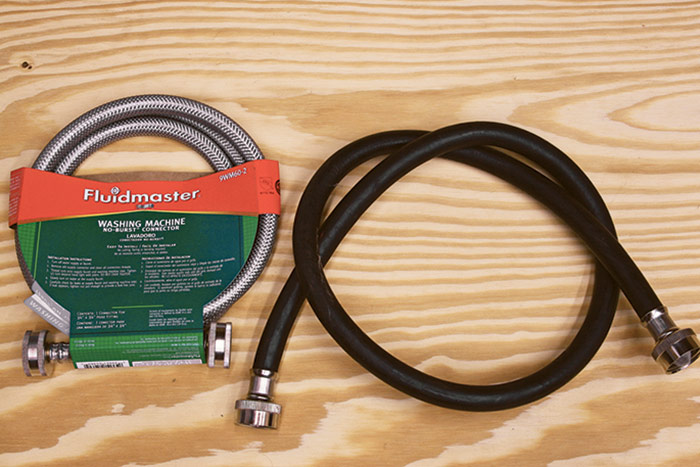
Just before you push the washer in place, tighten the washer hoses on the washer solenoid 1. Attach the opposite end of the washer hoses to the valves in the washer box 2. Be sure to keep hot to hot and cold to cold when you attach the hose ends to the valves in the box. Then insert the end of the washer drain hose into the drainpipe of the washer box 3. Turn the water on, and check for leaks. To verify hot is hot and cold is cold, turn the washer to cold wash and check that cold water is going into the tub.
| WHAT CAN GO WRONG: In new construction, most codes require washer outlets to be roughed in, even if the owner doesn’t want them. |
 |
 |
 |
 Excerpted from Taunton’s Plumbing Complete by Rex Cauldwell.
Available at Amazon.com.


View Comments
I have a Costway semi-automatic washing machine. How can I connect it with the water supply? Which hose and the other parts name to buy?
Thank you.