Replace a Sink Trap
Learn this simple and professional technique for replacing a sink trap along with tips for proper venting.
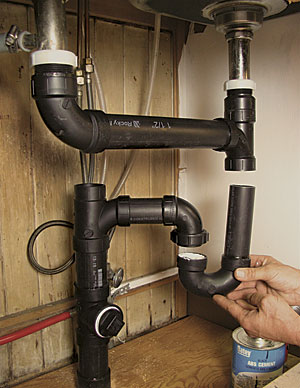
Sink traps may need replacement for a few different reasons. Because the undersink area is regularly used as storage, the exposed trap assembly is bumped and jostled, and can become damaged. Also, the trap assembly might not have been installed correctly, and its horizontal runs could be insufficiently pitched and not drain well. Finally, the trap could be an outdated configuration, such as an S-trap, which has been eliminated under most code jurisdictions. While some traps can be taken apart and cleaned to restore proper flow, I recommend rebuilding the entire trap assembly.
The two materials most often used for sink plumbing are PVC and ABS (acrylonitrile butadiene styrene). For the repair featured here, I used ABS because the joints are bonded with one-part glue as opposed to the two-part glue needed for PVC. I use glued joints wherever possible but incorporate threaded unions at the trap and tailpieces for serviceability. For this sink, I added a cleanout below the trap assembly, which is required by code. Then I added the sanitary tee to allow for venting.
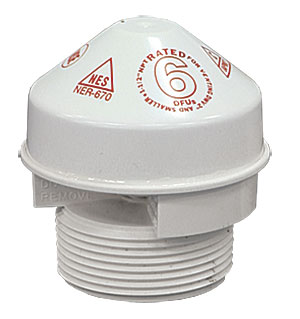
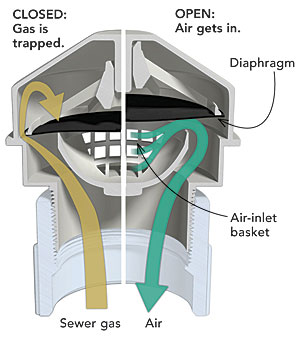
Originally, there was no vent to this old S-trap system, which is common for old plumbing. Most codes require the vent to be restored to allow liquid to drain quickly. In this case, I installed an air-admittance valve (AAV). Check with your local building department for any restrictions if you choose to use an AAV.
Watch the Video
Watch this technique start to finish on video as Bruce Norman goes step by step through the process in our Build Like a Pro video series. Watch the video…
Combine the tailpieces, then build from the bottom up
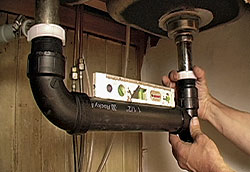
Connect the tailpieces. Use a 90° bend and a sanitary tee with slip-nut connections to draw the drain water into one tailpiece. The connection arm should slope down by 1/4 in. per ft. If needed, provide a stub for the dishwasher drain in the tailpiece.
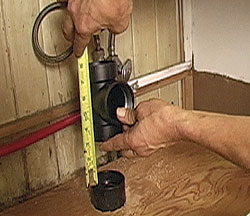
Measure to connect the cleanout. Hold the cleanout close to the floor but high enough to allow easy access to it. Measure between the hubs, and add 3/4 in. for each flange. In this case, a 3-1/4-in. clear distance plus 1-1/2 in. for the two flanges demands a 4-in. connector pipe.
Dry-fit the connections before gluing
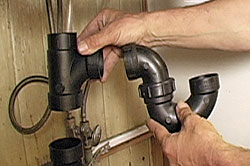
Work your way up. Hold the 2-in.-to-1-1/2-in. sanitary tee and the union P-trap in place. Measure the distance from the cleanout tee to the sanitary tee. Remember to add 3/4 in. for each hub flange.
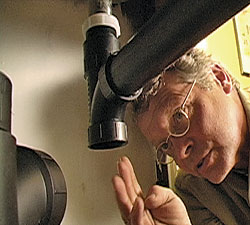
Aim the T toward the tailpiece. Sight from behind the tailpiece to align the sanitary tee. There is some room for error, but try to get it as close as possible.
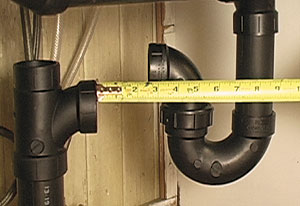
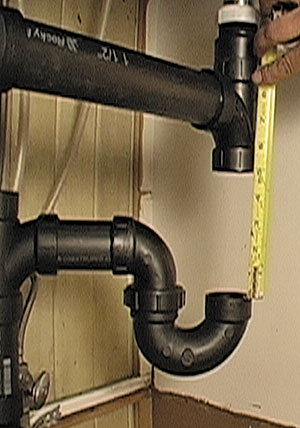
Measure for the trap arm. Dry-fit the P-trap with a scrap piece of pipe. Measure between the hub flanges, and add 1-1/2 in. (3/4 in. for each). Once the trap arm is cut, repeat the process to measure for the vertical tailpiece connection.
Glue everything but the threaded connections
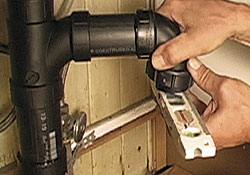
Level the threaded P-trap connection. Before the glue dries, level the threaded end of the union P-trap in both directions. This allows the rest of the connections to fit together squarely.
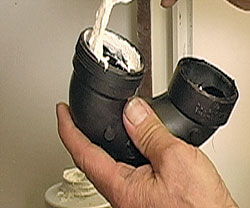
Use pipe dope on the P-trap threads. When gluing the P-trap into place, use pipe dope on the threaded portion that connects to the union elbow. Dope ensures that this vulnerable spot won’t leak over time.
Quiet the monsters in the pipes
Stories of monsters in drain lines originated with unvented plumbing. The simple act of dumping a big pot of spaghetti water down the drain can awaken the beast. As water drains, the pressure buildup causes a grumbled protest accompanied by an occasional clank in the pipes below. Once the flow gets going, though, suction takes hold, and the hot water is ingested through a plumbing system that probably has more turns in it than a giant-size Silly Straw. If you bend over and peer down the drain just as the slurping sound gets loudest, it will suddenly stop, and you’ll be welcomed by a belch of raw sewer gas that has come through the now-empty P-trap.
Quelling the monster is an easy fix. For less than $30, you can buy an air-admittance valve (AAV) at your local plumbing-supply store. For more on venting with an AAV, see FHB #174 and online at FineHomebuilding.com.
—John Ross, Web producer
Photos by John Ross, except where noted.
