Workspace under a bathroom sink is often very cramped. It may be worth the trouble to remove the sink from the wall (in the case of a wall-hung or pedestal sink) or lift it off the cabinet (in the case of a vanity sink) in order to remove the old faucet and install the new one. (In the steps on the following pages, we show installing with the sink removed.)
Most bathroom faucets cover three sink holes that are 4 in. apart. Often these faucets include a pop-up assembly, which raises and lowers the sink’s drain stopper when you operate a push rod that comes up through the faucet body. However, a bowl sink or certain other types of sinks have only one hole, and one-hole faucets are available. These often do not have pop-up assemblies.
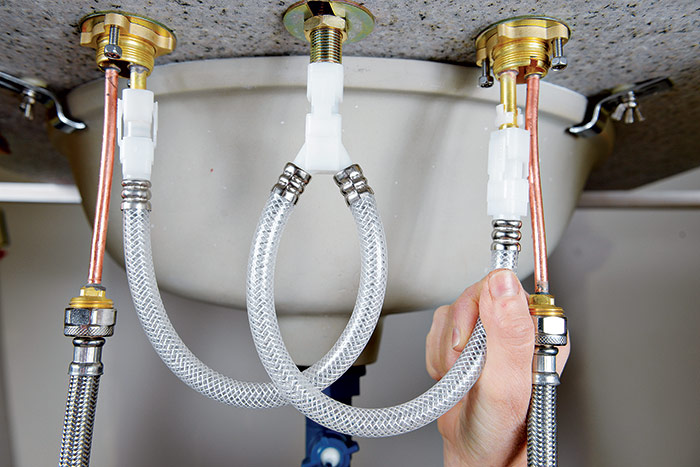
Make sure your supply tubes are long enough to reach the stop valves below; you may be able to reuse the old tubes.
Before you begin disassembly, shut off the water by turning off the stop valves under the sink. Open the hot and cold valves to ensure that the water is shut off.
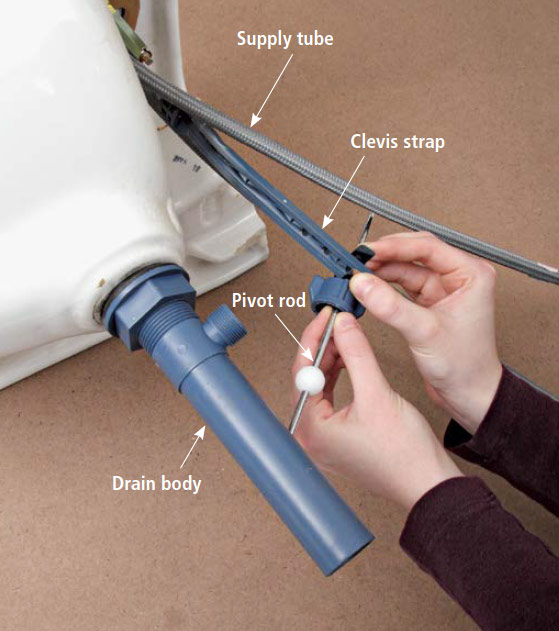
1. REMOVE THE DRAIN BODY. To remove the old faucet, disconnect the supply tubes from the stop valves. Disconnect the trap piece. Unscrew the pivot rod’s nut and remove the pivot rod.
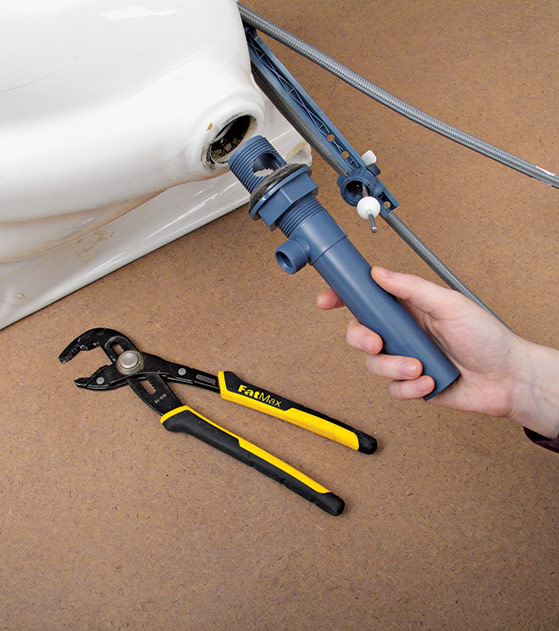
Use slip-joint pliers to loosen the drain body, then unscrew and remove it.
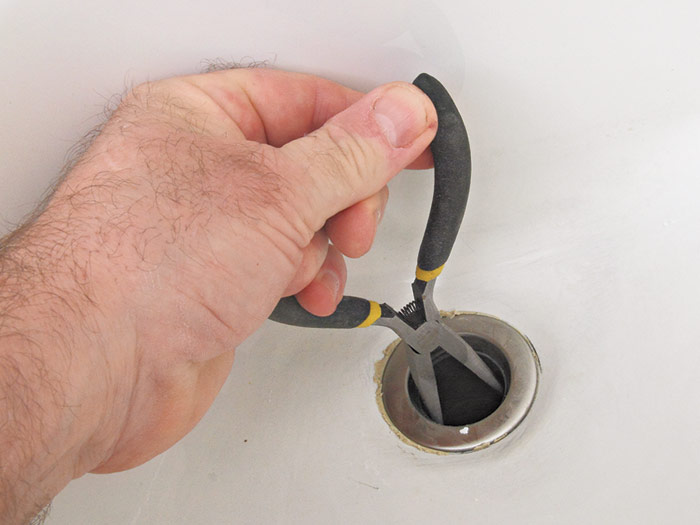
Stop the Spin: When you work to unscrew the drain body, the drain flange that it attaches to (at the bottom of the sink bowl) may spin, and you will make no progress at unscrewing. In that case, have a helper hold the flange still using the handles of a pair of pliers or the jaws of longnose pliers.
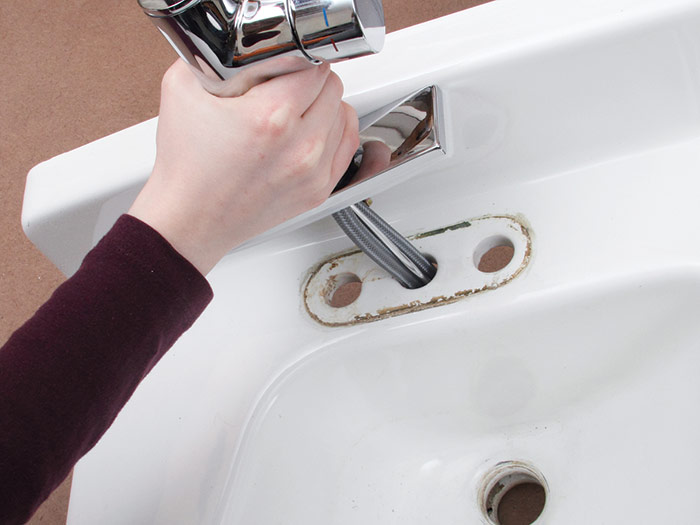
2. PULL THE FAUCET OUT. From above, pull the faucet out. Clean away any putty residue or debris from the sink’s deck. Disconnect the supply tubes if you will reuse them for the new faucet.
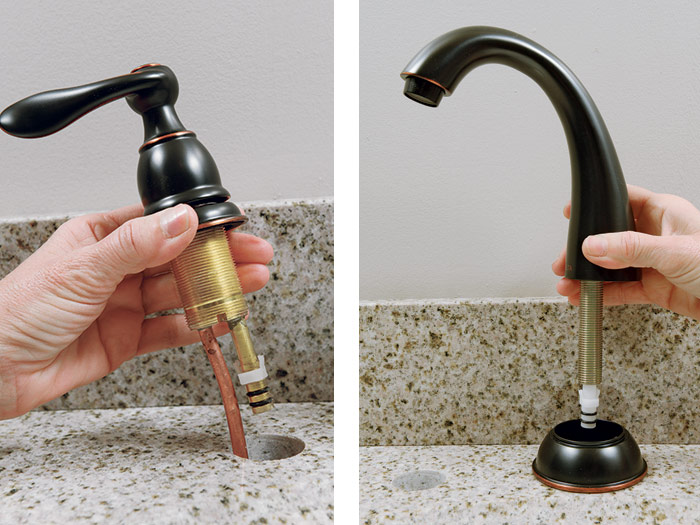
3. INSERT THE NEW FAUCET. Older faucets often called for a rope of plumber’s putty under the faucet’s baseplate, but most new faucets have a plastic gasket instead. Slip the faucet in place and have a helper hold it straight while you work from below.
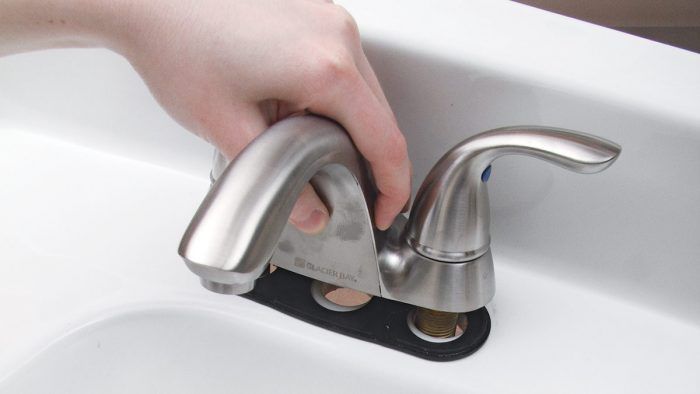
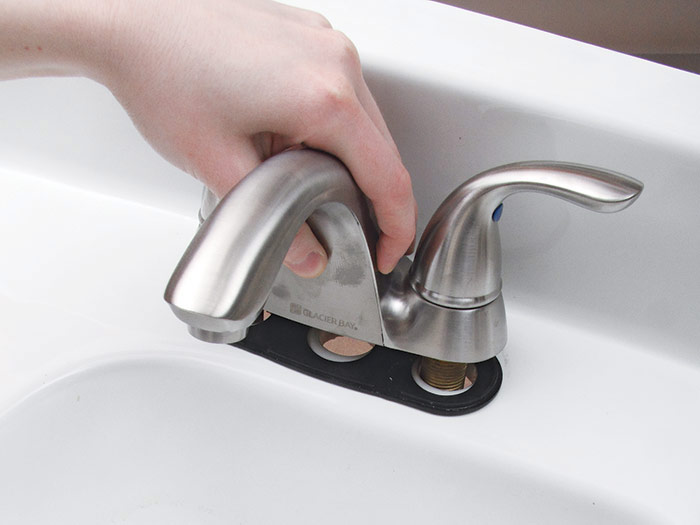
Single- and Two-Handle Faucets: A single-handle faucet typically has inlets in the center; mounting nuts may attach to each side, as with this model, or there may be a single mounting nut in the center. Sometimes the inlets are short and copper; in this case, they are long plastic supply tubes, so you probably won’t need to add separate supply tubes. (These tubes usually have 3⁄8-in. nuts, so they won’t fit if you have stop valves with 1⁄2-in. outlets.) A two-handle faucet usually has mounting nuts that screw onto plastic or brass inlets on each side.
If the sink is left in place, single-handle faucets are easier to install than two-handle models, because either they have supply tubes already or you can attach the supply tubes before mounting the faucet. With a two-handle model, you have to attach the supply tubes after the faucet is mounted.
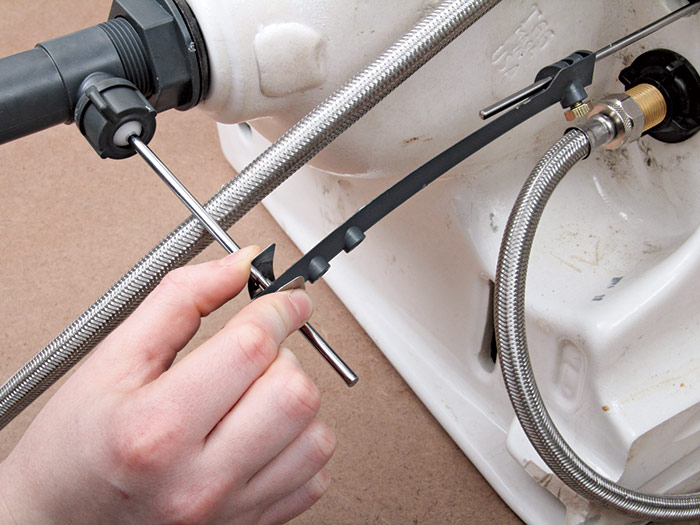
4. MOUNT WITH NUTS. From below, screw on and tighten the mounting nuts. These may be plastic nuts on each of the inlets for a two-handle faucet, metal nuts with washers on each side for a one-handle faucet, or another arrangement. If you cannot reach the nuts with a crescent wrench, use a basin wrench.
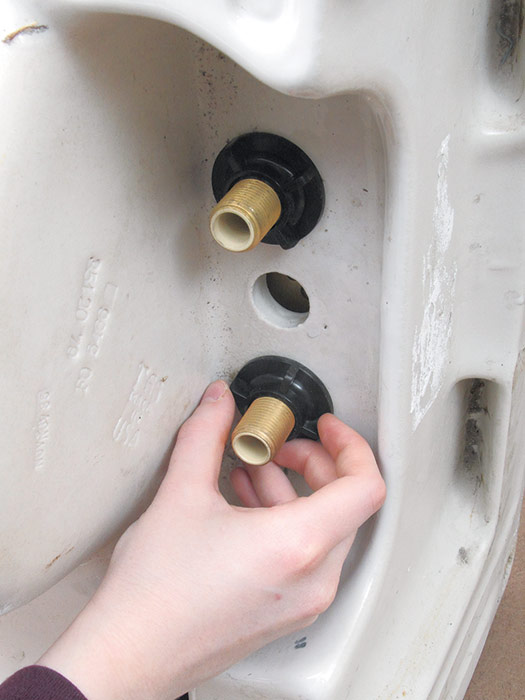
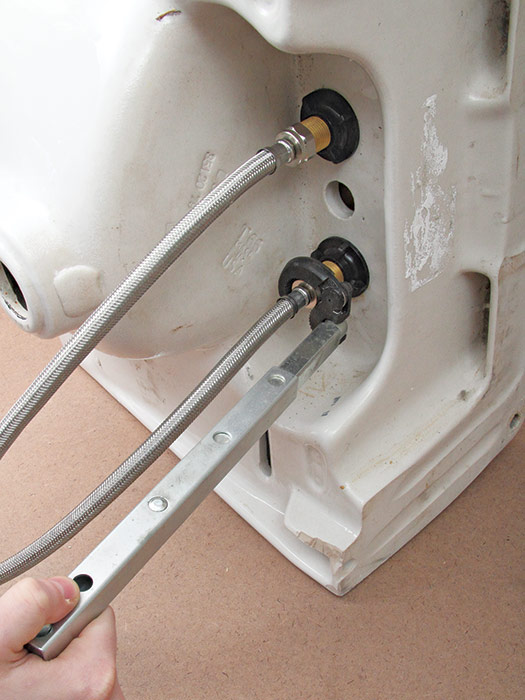
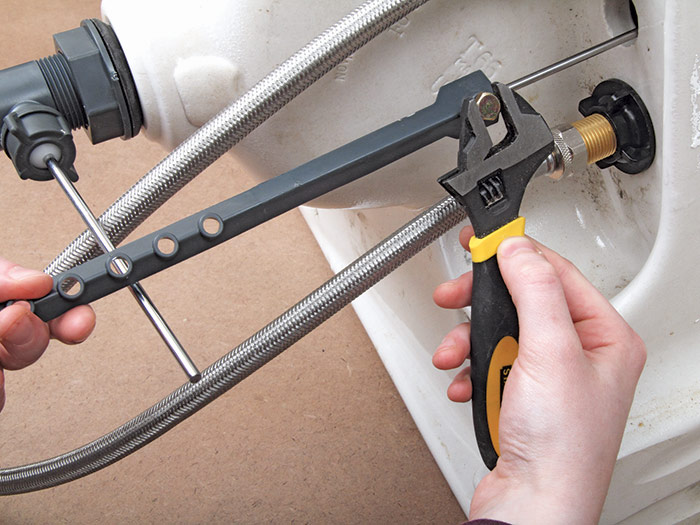
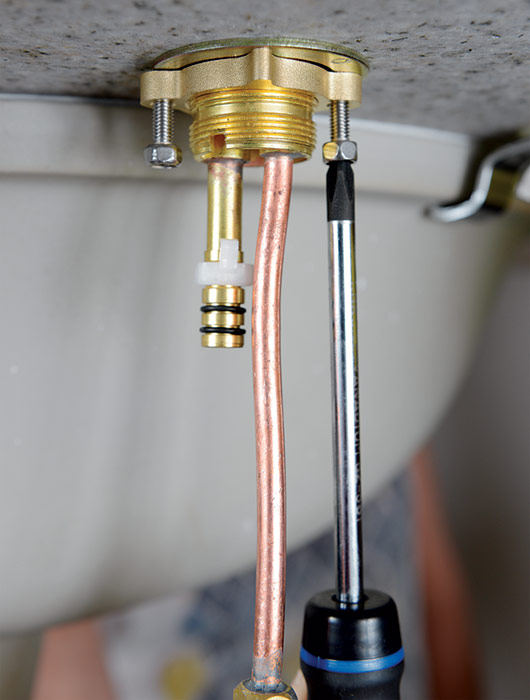
5. SUPPLY TUBES. If the supply tubes are not already connected to the faucet, connect them now, using a basin wrench if needed. Also connect them to the stop valves.
Tighten the Supply Tubes: If you have a single-handle faucet with copper inlets, tighten the supply tubes to them. Hold the inlets still with a small wrench as you tighten the supply tube’s nuts, to keep them from twisting and kinking. If you have a two-handle faucet, you cannot attach the supply tubes yet, because you have to attach the mounting nuts first (see Step 4).
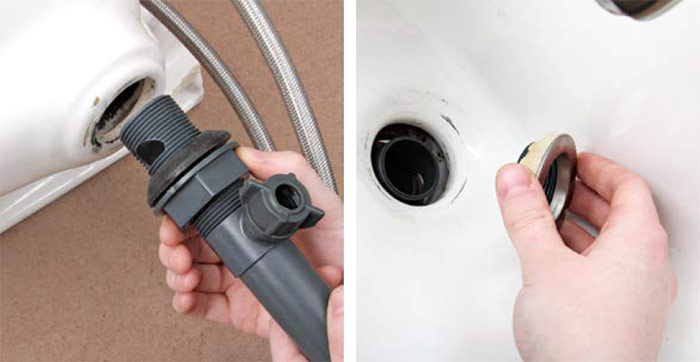
6. PREP THE DRAIN BODY AND FLANGE. Loosen the new drain body’s nut and slide the rubber gasket down (above left) far enough so that the side hole will end up on the inside of the sink and the threads can reach up to meet the drain flange. From above, apply a rope of plumber’s putty to the underside of the drain flange (above right).
7. SCREW ON THE DRAIN BODY. Poke the drain body up through the drain hole and hand-tighten it to the flange. Finish tightening with the drain body’s hole for the pivot rod facing back toward the wall. From below, use slip-joint pliers to tighten the drain body. Putty will squeeze out of the drain flange; clean it away.
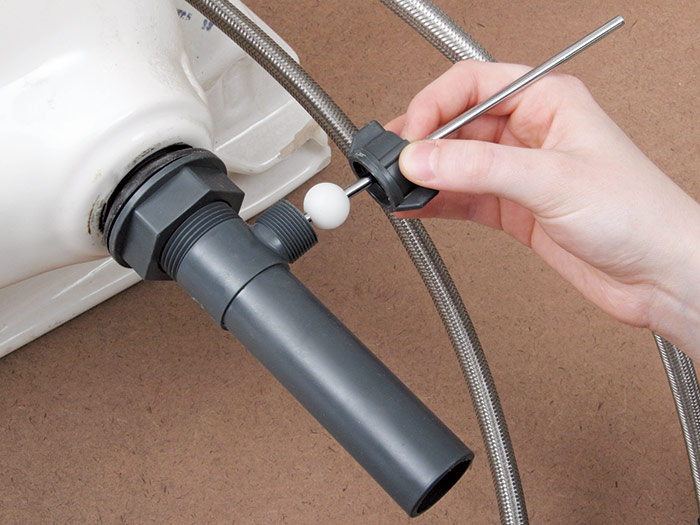
8. INSTALL THE PIVOT ROD. From above, insert the stopper into the drain hole. From below, insert the pivot rod into the drain body, so it slips into the hole in the stopper. Slide on the pivot rod’s mounting nut and tighten; it should be tight enough to seal, but not so tight that it’s difficult to move the rod up and down.
9. ATTACH THE CLEVIS STRAP. Slide the lift rod down through the hole in the faucet body, and attach the clevis strap to it. Tighten the nut to hold the strap to the rod.
10. ATTACH THE PIVOT ROD TO THE STRAP. With the stopper closed all the way, slide the pivot rod through a hole in the clevis strap, using the clip to hold it in place. Test that you can easily open and close the stopper using the lift rod; you may need to loosen the clevis strap’s nut and slide it up or down on the lift rod.
11. FINISH PLUMBING. Install the rest of the trap plumbing. You may need to cut a tailpiece or add an extension. Restore water pressure and test for leaks: Fill the sink bowl with water, then open the stopper and watch closely. If there are any drips, tighten nuts or replace washers as needed.
Installing a Widespread Faucet
A widespread faucet has three separate parts—two handles and one spout—that connect together via flexible tubes, so they can be arranged in a variety of configurations, with no baseplate. There are a variety of types with different sorts of connections, but many of them use connections similar to those shown here.
Remember, before you begin disassembly, shut off the water by turning off the stop valves under the sink. Open the hot and cold valves to ensure that the water is shut off.
1. INSERT THE HANDLES AND SPOUT. Slip the handles and spouts through their escutcheons and down through the sink’s holes.
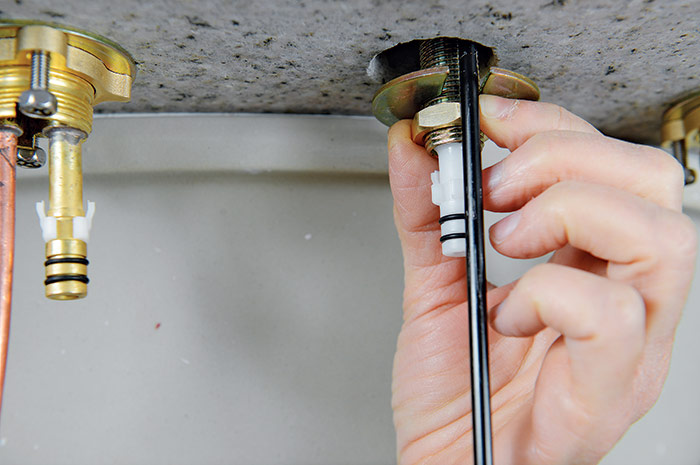
2. FASTEN THE HANDLES. You may need to apply a bead of silicone caulk under the escutcheons. While a helper holds the handles correctly positioned from above, work from below to tighten the nuts and screws.
3. ATTACH THE SPOUT AND LIFT ROD. Slip the lift rod through the back of the spout. Slide the mounting washer in place, with its slot positioned so the rod can slide through. Screw on the mounting nut by hand, then tighten it with a crescent wrench. Don’t overtighten, or you may crack the sink. Pull the lift rod out to make the next step easier to perform.
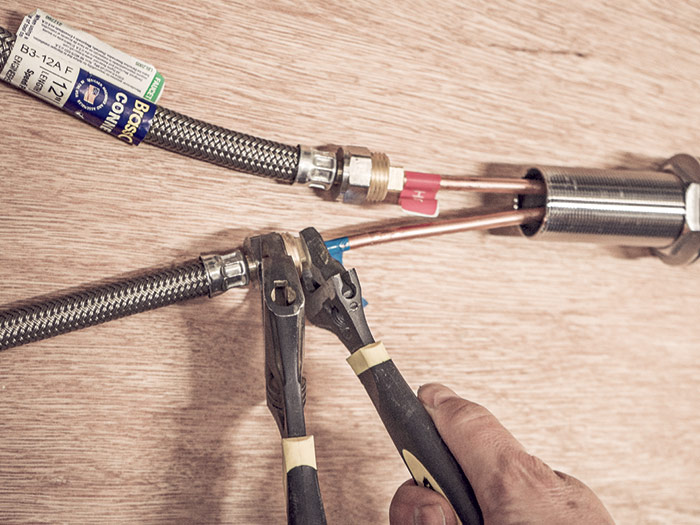
4. ATTACH THE SUPPLY TUBES TO THE HANDLES’ INLETS. Use two wrenches or pliers and a wrench, to hold the inlets still while you tighten the supply tube’s nuts. Connect the tubes that run from the handles to the spout. Slip the lift rod back down and connect it to a pop-up assembly. Restore water pressure and test for leaks.
Excerpted from Plumbing (The Taunton Press, 2016) by Steve Cory.
This is a dialog window which overlays the main content of the page. The modal window is a 'site map' of the most critical areas of the site. Pressing the Escape (ESC) button will close the modal and bring you back to where you were on the page.
We use cookies, pixels, script and other tracking technologies to analyze and improve our service, to improve and personalize content, and for advertising to you.
We also share information about your use of our site with third-party social media, advertising and analytics partners.
You can view our Privacy Policy
here and our Terms of Use here.