Tips for Faucet Repair
The parts may look different, but there are several general steps that apply to all faucet styles.
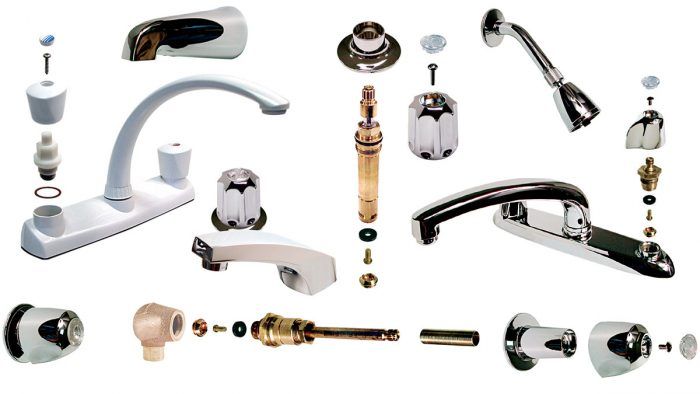
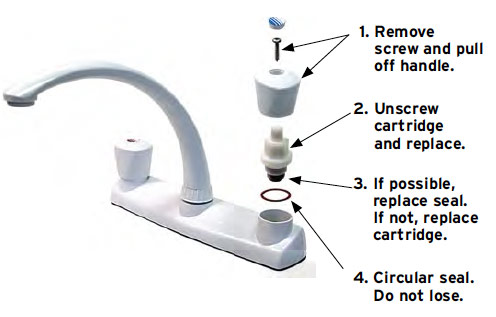
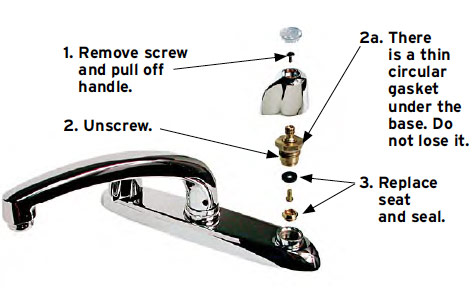
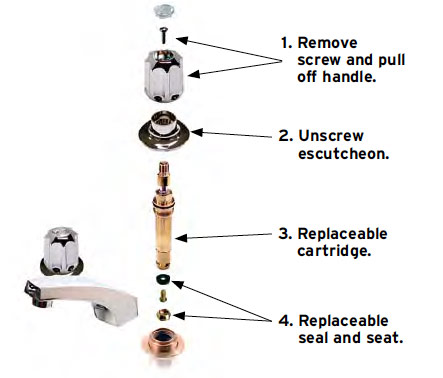
No matter how complicated a faucet looks in an illustration on the manufacturer’s spec sheet, repairing a faucet follows several general steps that apply to all. First you remove the cap and whatever kind of screw holds the handle on. Then comes some kind of retainer securing the valve parts inside the faucet body. After that and maybe some trim pieces, there is some kind of sealing device—springs and seals, O-rings, or button seals that press against a seating surface to regulate the water flow. The illustrations below will give you an idea how similar the process is for a few of the most common faucets.
Repairing Different Faucet Styles
|
TYPICAL CARTRIDGE FAUCET |
TYPICAL BUTTON-SEAT FAUCET |
| TYPICAL BUTTON-SEAT WIDESPREAD FAUCET | TYPICAL BUTTON-SEAT SHOWER FAUCET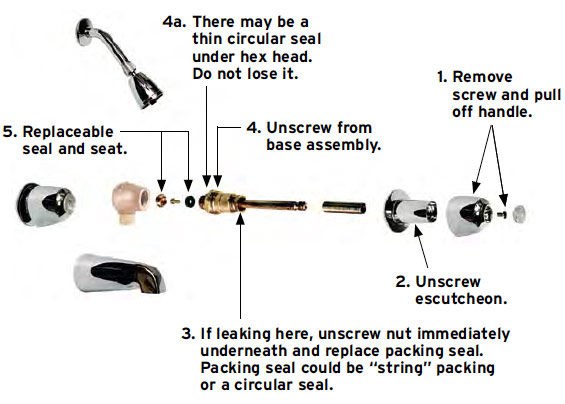 (Photos courtesy Danco) |
| TRADE SECRET: You paid a lot of money for the fancy finished surface even if it’s chrome, so take care when cleaning. Any white spots on the faucet are minerals from the water; they act like sandpaper on the finish. Thus, you want to lift them off, not rub them in. To keep the finish shining, use a very mild soap that doesn’t leave a residue. Even better, use a lens cloth to lift off the minerals. These cloths are sometimes free at outlets for eyeglasses. |
Faucet Repair Tools
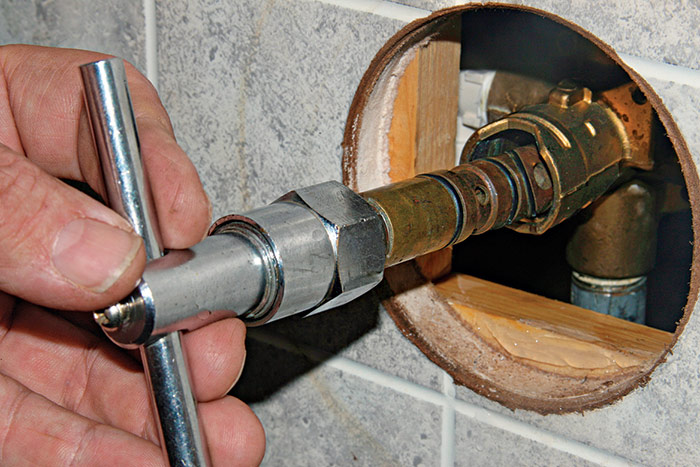
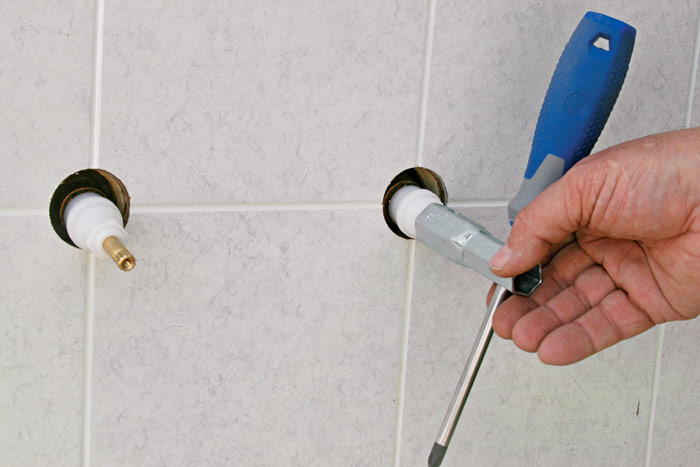
Although you can remove most cartridges with a pliers and take out springs and seals with a pencil, there are commercial tools made for maintenance problems household tools won’t fix.
In addition to the more common tools shown here, you may also need small Allen (hex-head) wrenches or Torx wrenches to loosen the set screws on faucet handles.
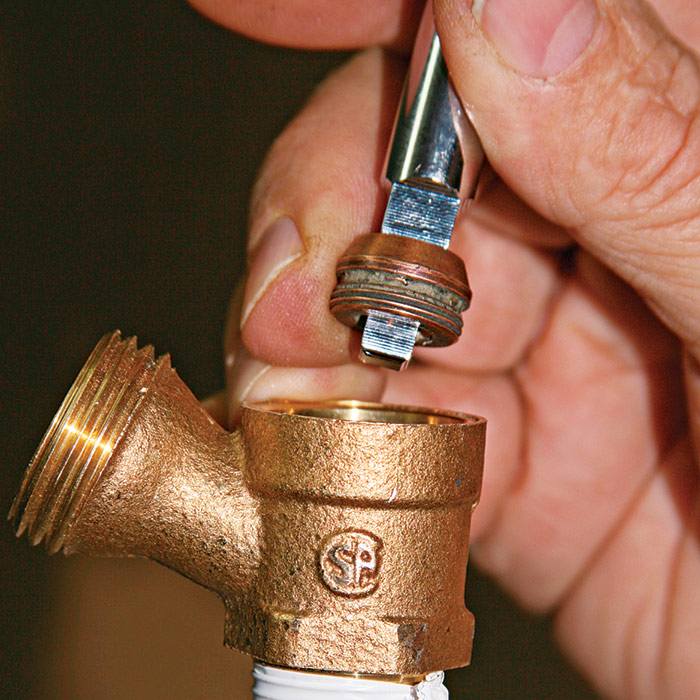
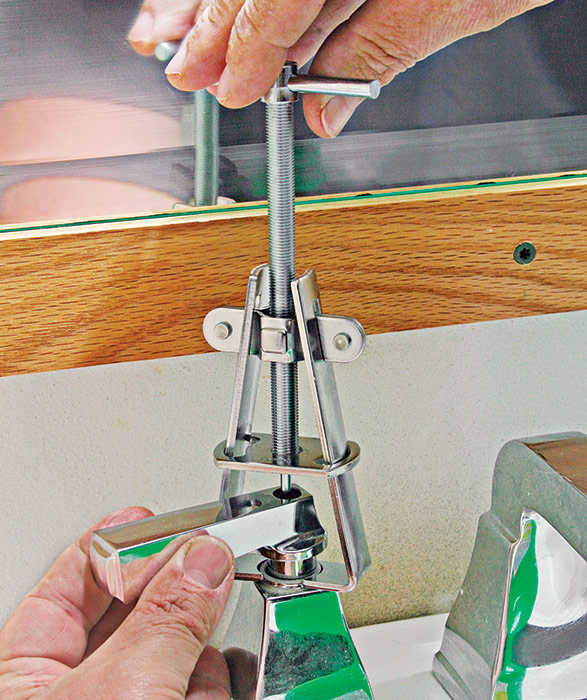
| TIP: Don’t lose the parts. There are few less frustrating things than losing a faucet part down the drain. To prevent this, pull the drain arm up to lower the seal in the drain. If the drain system doesn’t work, place a cloth over the hole. Then as you remove any parts, put them in a container on the sink next to your work. Remember, if you do lose a part down the drain, its not gone forever. It’s in the P-trap, and you can retrieve it by removing the trap. |
 Excerpted from Taunton’s Plumbing Complete by Rex Cauldwell.
Available at Amazon.com.
