Chainsaw Retrofit and Energy Performance
Cutting off the eaves to carry the air and thermal barriers from the wall sheathing to the roof plane is an effective performance upgrade for some old homes.
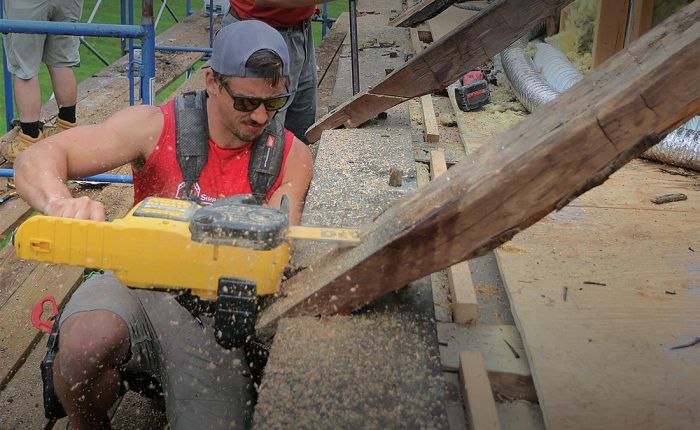
Synopsis: The renovation of an old timber-frame farmhouse in upstate New York was an opportunity for Josh Edmonds and his crew to upgrade the energy performance as well. A significant feature of this upgrade involved cutting off the rafter tails so that the wall and roof planes could create one continuous air barrier. In this artice, Josh details how he retained the home’s aesthetic charm with the benefits of a high-performance home in this chainsaw retrofit.
Our company is known for three unique traits. First, we have a fantastic 25-person team that includes all the trades we need except for excavation and concrete. Second, we try to operate with integrity and break many of the stereotypes that have labeled contractors for decades. We return phone calls, show up as scheduled, and honor our contracts. And finally, we continually hone our building science expertise. We have completed several certified Passive House projects and have finished numerous Passive House–level new homes and retrofits. Even our novice team members have a good understanding of the building science involved in making these homes work. We are blessed with exceptional clients and interesting work, including the farmhouse remodel we are working on here.
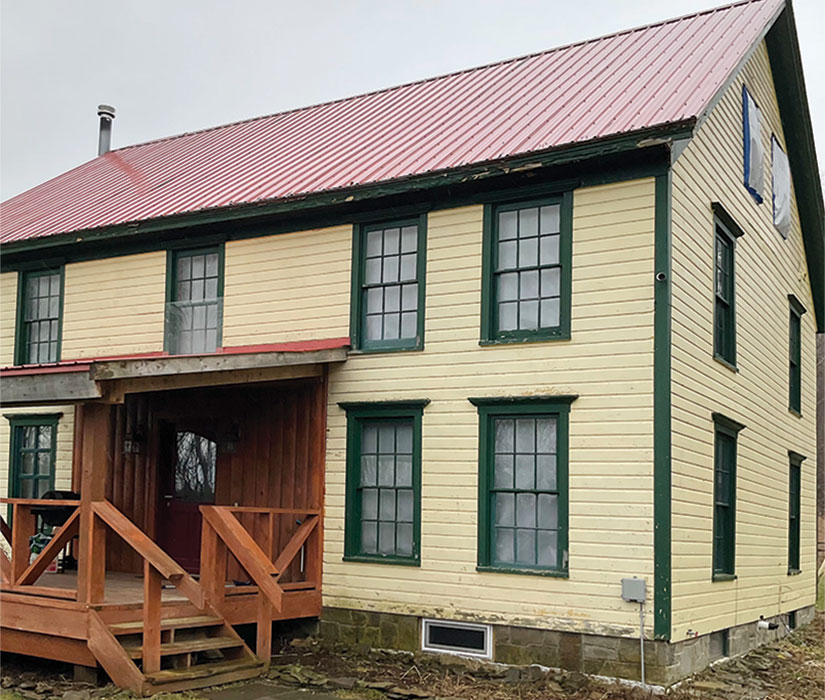
This old farmhouse is typical of our upstate New York area. It’s a timber-frame house with the siding nailed directly to the studs. There was no sheathing or water-resistive barrier (WRB). The roof had the original plank sheathing nailed to the rafters, and at some point a metal roof had been installed. The interior has original wide-plank wood floors and all the character you’d expect from a house of this age. The clients were looking to maintain that farmhouse charm inside, but the exterior needed new siding, new windows and doors, and a new roof. The results of a preliminary blower-door test easily exceeded 10 ACH50. This building clearly needed some air-sealing.
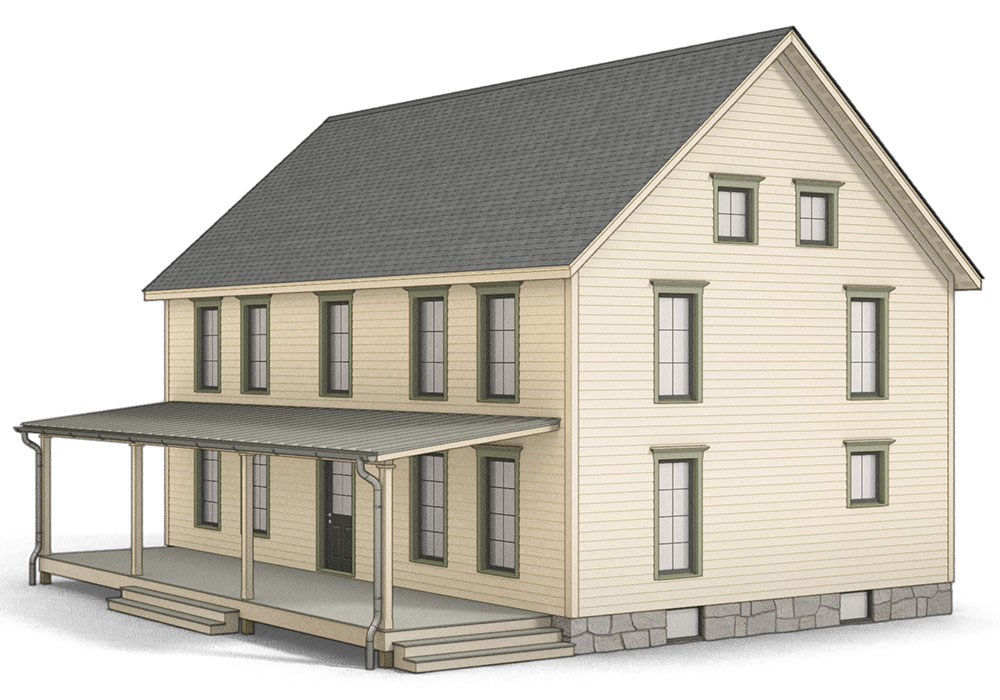
Farmhouse before, Farmhouse after
Adding thick exterior insulation can make for a roof with a thick fascia and awkward trim proportions. Cutting off the rafter tails helps in two ways. It makes it possible to have a continuous air barrier from the wall sheathing to the roof without finicky details, and it allows the builder to shift the entire cornice upward to maintain the correct proportions.
We love the idea of deep energy retrofits but are keenly aware that they do not typically pay for themselves in energy savings. We smile when a project comes across our desk that has a large enough scope of work that energy upgrades are easily implemented as part of the larger process. We have found that to be the sweet spot, allowing us to achieve big performance gains at a low cost. On this project, we had exactly that opportunity. As you will see, the work in the basement and on the walls was straightforward. Updating the roof was a bit more involved.
Envelope improvements start in the basement
Knowing that we’d be doing most of the work on this house from the exterior as we replaced the siding, windows, door, and roof, we had a clear path to upgrading the building enclosure with improved air-sealing and insulation. Because the air and thermal control layers need to be continuous, we had to deal with the basement too.
The farmhouse has a simple block foundation that is in good shape. It appears to have been replaced by previous owners. There are good reasons not to use spray-foam insulation, so we use it sparingly and typically only in situations like this—basements with masonry foundations. The basement is currently dry, but we always plan for the worst. Closed-cell spray foam is vapor-closed when installed at least 2 in. thick. The closed pores will handle water better than other insulation types, should it get wet. We also tend not to rely on spray foam for air-sealing except in basement retrofits.
This basement will have spray foam installed without stud walls because there is no plan to finish the space. On projects where a finished basement is in the cards, we build stud walls first, then install spray foam and drywall. When the foam is left exposed, the installers spray a fire-retardant paint over it to meet the fire code. We sprayed 3 in. (R-21) in the rim joist where the basement walls reach above grade. Where the basement walls are below grade, we installed 2 in. for R-14.
As I mentioned, when we removed the existing siding we were staring at the house’s framing because it had no sheathing whatsoever. To add structural sheathing, a water and air barrier, and a thermal break, we installed Zip System R-sheathing and taped the seams. Zip R-sheathing is OSB with an integral WRB on the outside and a layer of polyisocyanurate insulation on the inside. We used the 1-in. R-sheathing, which adds R-6 continuous insulation outside of the framing. The sheathing is easy to work with and is readily available in our area, so it was an easy decision. The upcharge from regular Zip sheathing to R-sheathing was only $3000. We had the empty wall cavities filled with dense-pack cellulose, bringing the wall R-value to R-19 in areas where the original framing was 3-1⁄2 in. and R-25 where it had been remodeled with 2×6 framing.
10 steps to a tight roof
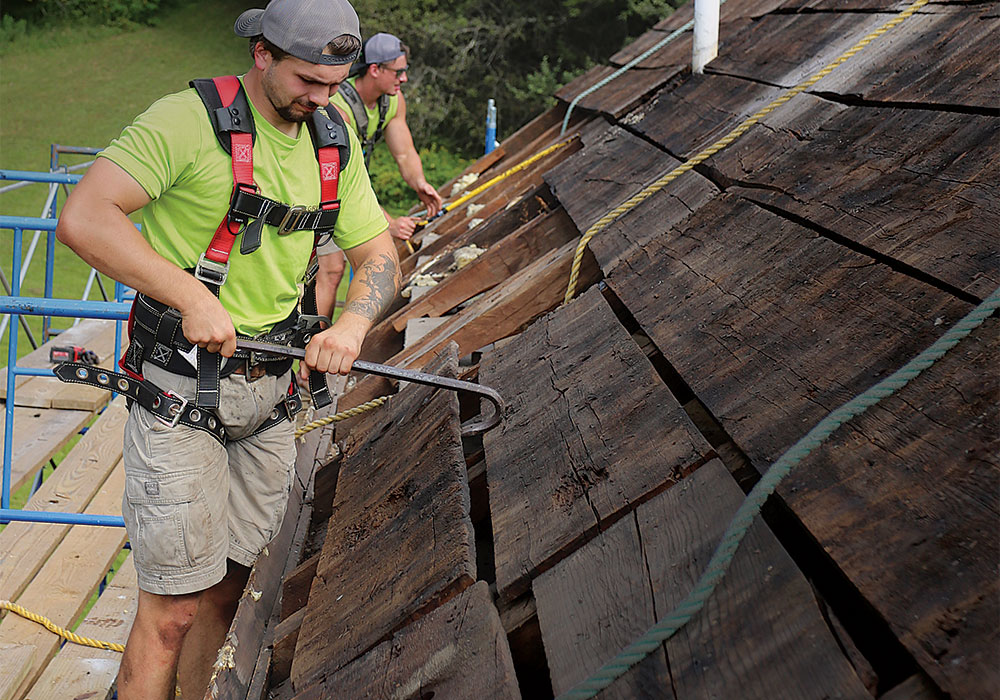
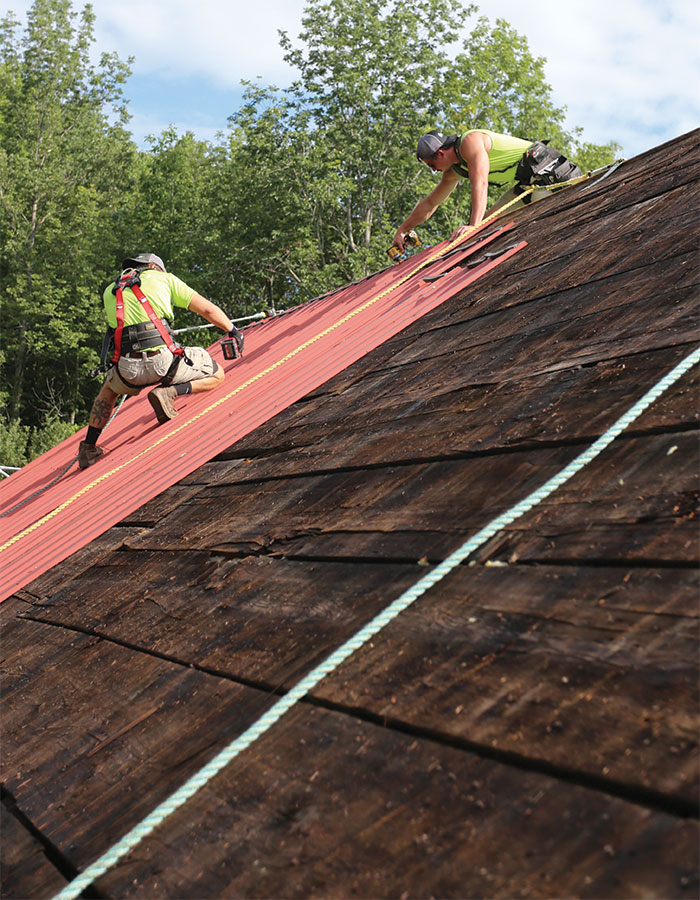
Step 1: Remove the old roof. The existing roof was metal fastened with gasketed roof screws. The crew unscrewed the panels and passed them down to the ground, where they could be sent for recycling.
Step 2: Demo as needed. The crew removed the lower few feet of roof boards to gain access to the top plate and rafter tails. Before cutting back the rafter tails, they removed the cornice details with pry bars.
 |
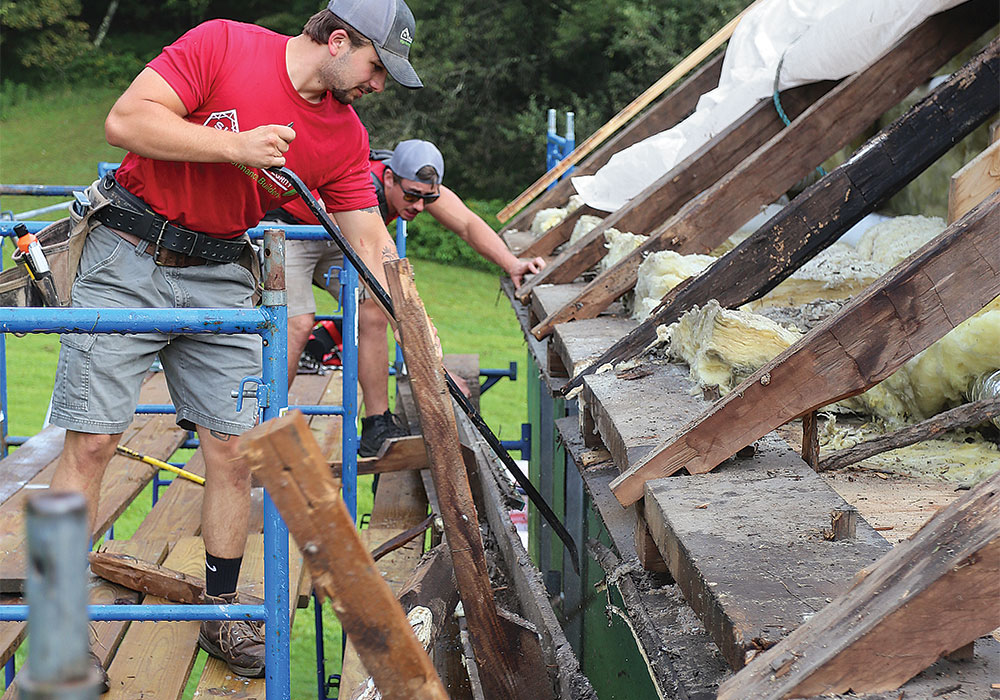 |
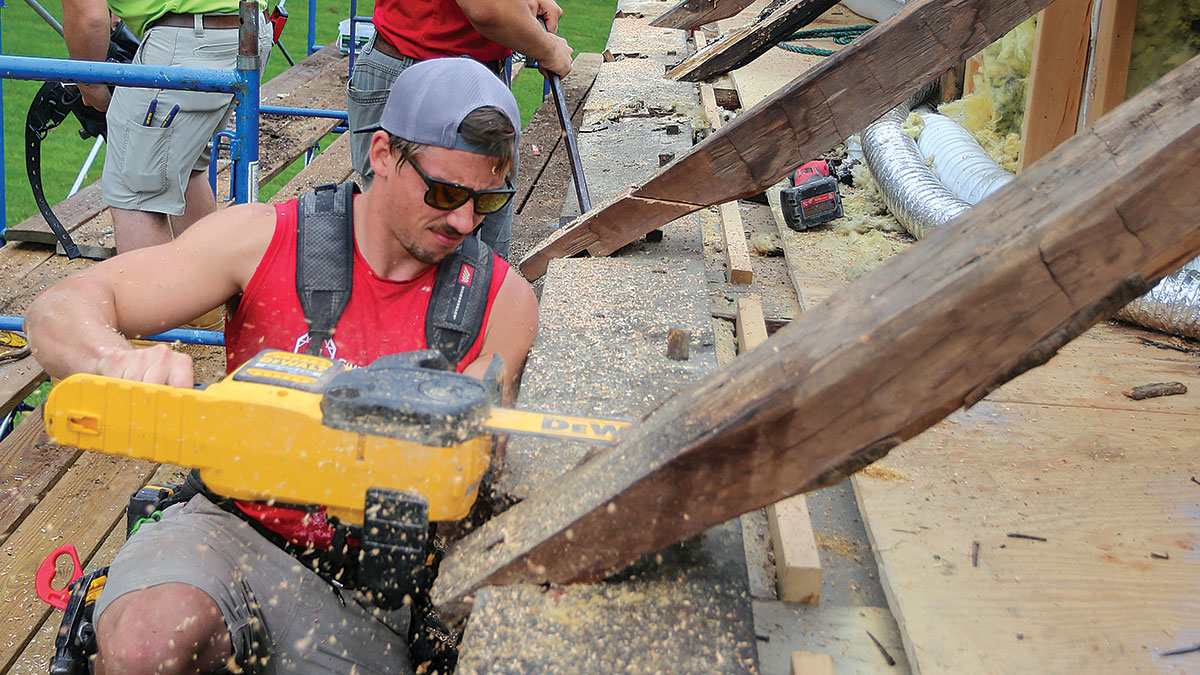
Step 3: Chainsaw time! When the first chainsaw retrofit was done, electric chainsaws didn’t exist, but one sure was handy for clipping off the rafter tails on this project. A reciprocating saw would also work, but it is much slower and not as fun. Existing attic kneewalls supported the rafters throughout this process. Otherwise, the crew would have built temporary walls. (Before attempting this yourself, remember to check for nails. And because chainsaws are dangerous tools, brush up on the latest safety guidelines at osha.gov.)
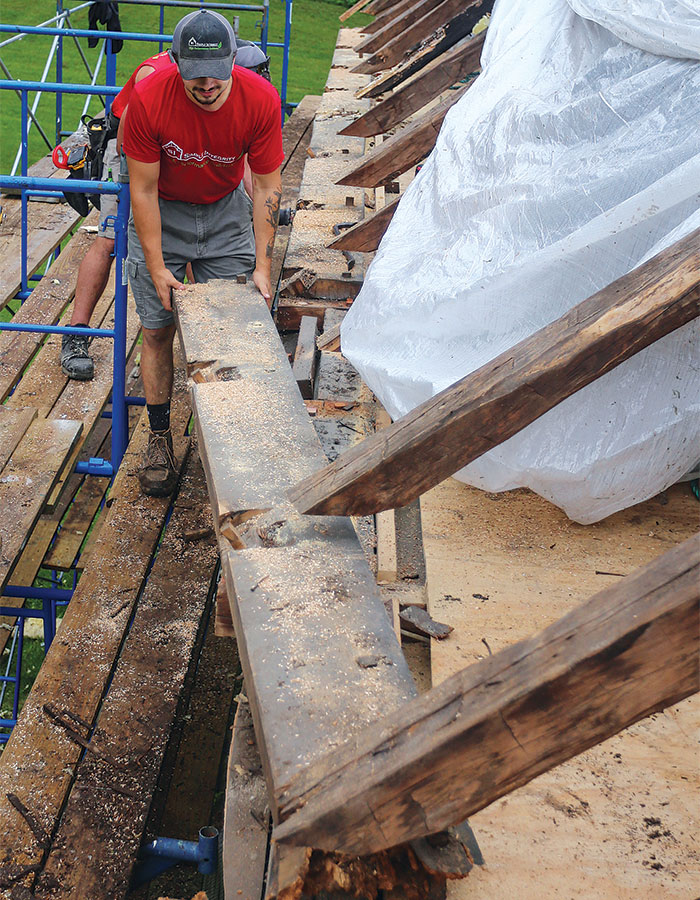
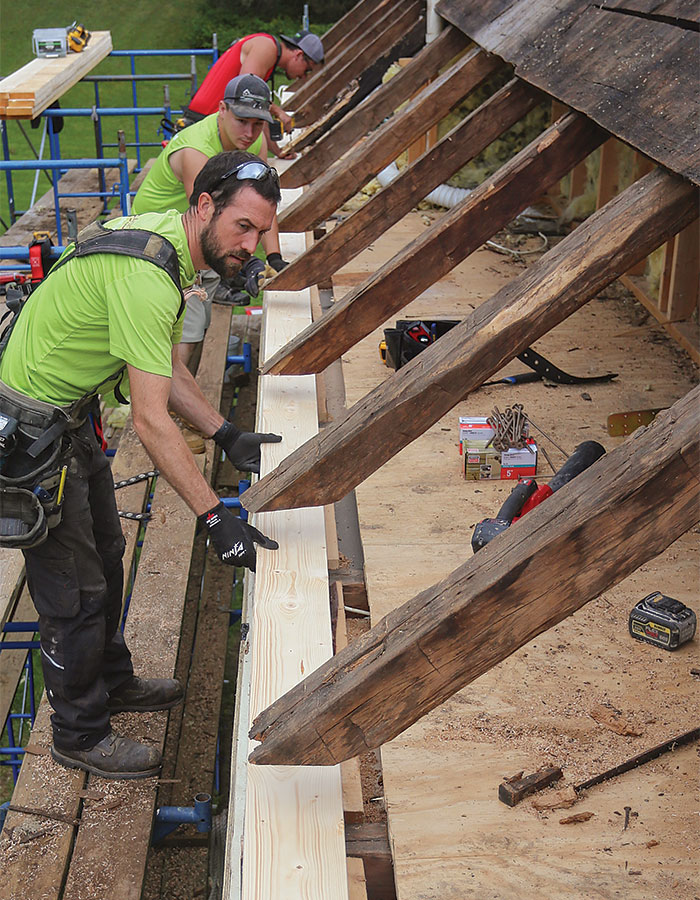
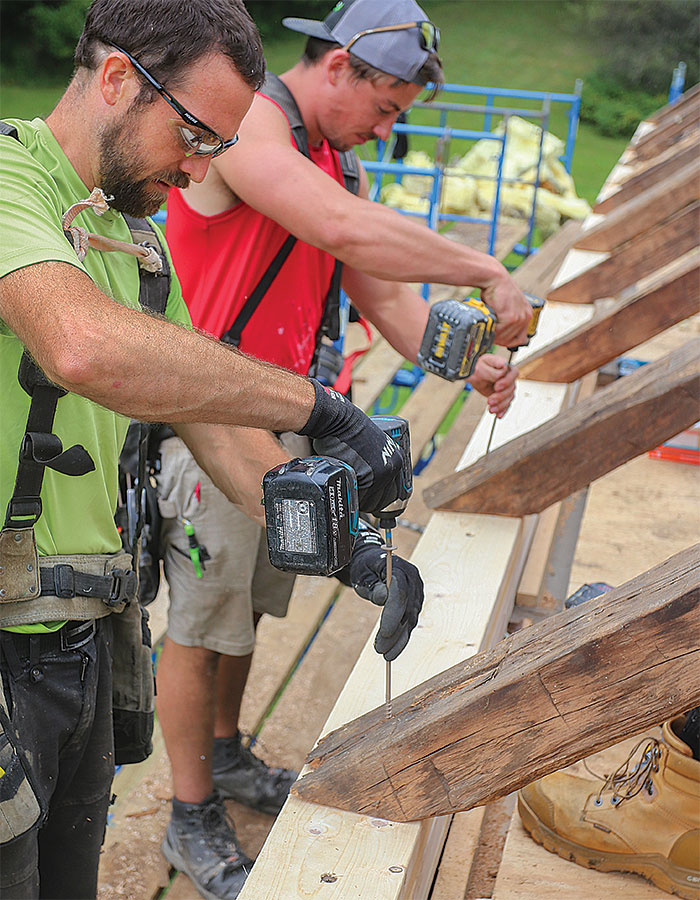
Step 4: Fasten the rafters. Whether it’s a timber-frame or stick-framed house, commonly the rafters bear on a top plate that is in plane with the exterior walls. This house had a second top plate that cantilevered out past the wall plane. The crew removed the extra top plate and made up the height difference with ripped 2x8s. After adjusting the rafters to a stringline to help remove some of the sags this building had developed over time, the crew fastened them with structural screws.
 |
 |
 |
The house had been uninhabited for a year or two before our clients purchased it, and it smelled badly of rodents. The existing fiberglass in the wall cavities was shredded and tainted by mice. The clients opted to remove the fiberglass when we were putting up the sheathing, and we installed the dense-pack cellulose from the exterior. This choice had more to do with odor than energy. It was a minor cost upgrade but a solid decision.
One of the more unique aspects of this project is the windows and doors. When the current homeowners bought the house, they found a basement full of very nice European tilt-turn windows and accompanying doors, which a previous homeowner had intended to install. We’re very familiar with the performance and installation details for these products, so we were happy to use them. We built window bucks with Zip sheathing and installed the new windows mid-wall with Siga air-sealing tapes.
That brings us to the roof. We have done several energy upgrades on houses where we put a lid on them by air-sealing the attic floor. That works when the house has an unconditioned attic with a flat floor. In situations like these, our usual method is to install a thin layer of spray foam on the attic floor, build and install an airtight and insulated attic hatch, and add a bunch of loose-fill cellulose insulation on top. This approach successfully air-seals the lid of the building and adds as much insulation as we can fit or determine is right for the project.
When we’re dealing with a finished attic space, like the one in this farmhouse, we need to take another approach. Here, there was unconditioned space behind the batt-insulated kneewalls. The sloped sections of ceiling and a small flat ceiling at the height of the space had fiberglass batts installed as well. There was no air barrier and no roof venting. Our goals were threefold: first, a roof that doesn’t leak; second, an air-sealed assembly; third, enough insulation to make the house comfortable and efficient.
Rafter tails needed to go
We knew that adding new roof sheathing would cover most of the roof air-sealing easily and effectively. But air barriers need to be continuous, and this house had timber rafter tails. Air-sealing around rafter tails is tedious and not very effective, and it makes connecting the air barrier from the walls to the roof difficult. Here is where the chainsaw retrofit gets its name. We used a chainsaw to clip off the rafters so that they would be even with the exterior wall plane. The air barrier now runs up the wall sheathing and, without skipping a beat, continues up the roof plane. We installed Zip sheathing with taped seams over the existing roof boards to create the barrier.
This style of framing makes the house look like a Monopoly house, which is why you may be hearing about “Monopoly framing” these days. It is being used on new homes as well as retrofits, and roof overhangs can be added in several different ways. On this project we installed the roof overhangs above the sheathing and integrated the process with the exterior insulation. You can apply overhangs to the actual eave, but there are good aesthetic reasons to take the approach we did here. Simply put, adding the rafter tails above the sheathing allows us to hide the exterior insulation behind trim that’s proportionate to the house.
10 steps to a tight roof (continued)
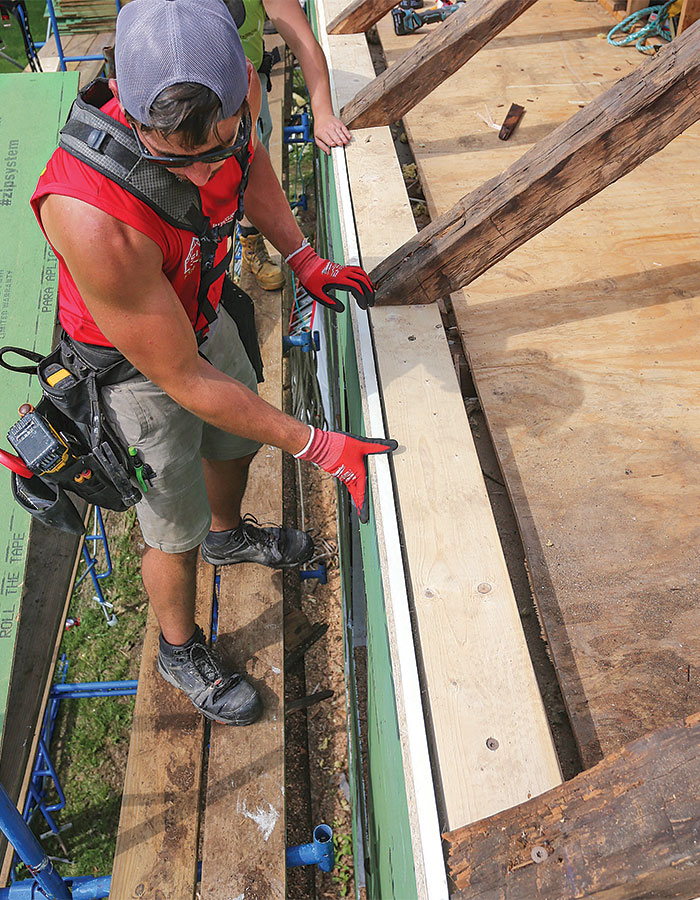
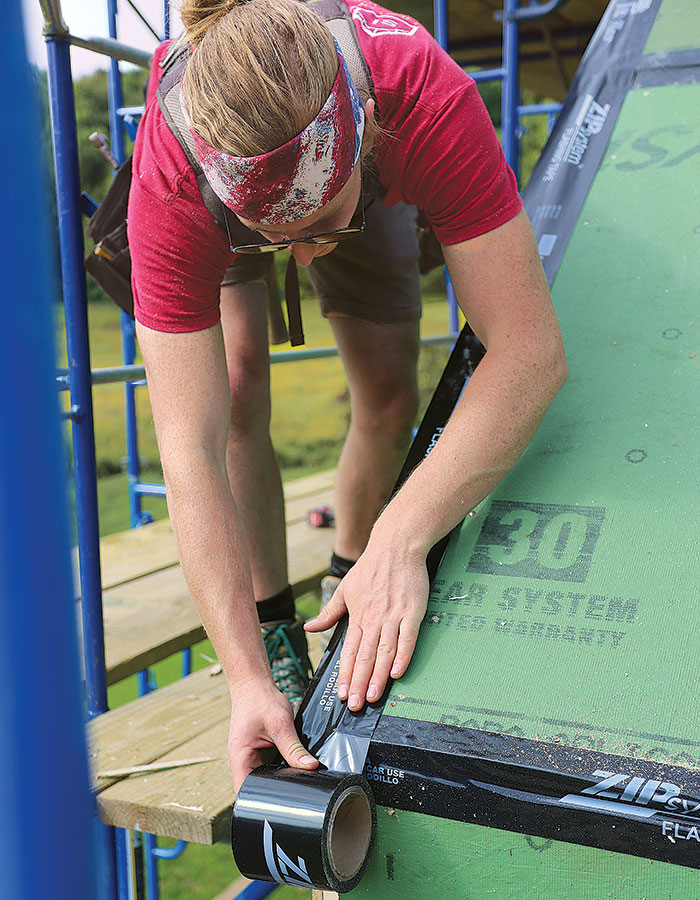
Step 5: Continue the air barrier. Once all the framing was done, the crew completed the Zip System R-sheathing on the wall, bringing it right up to the eave. To bring everything back into plane, they installed new sheathing where they had removed the old roof boards. Then they sheathed the entire roof with Zip sheathing, taping all seams for air-barrier continuity.
 |
 |
 |
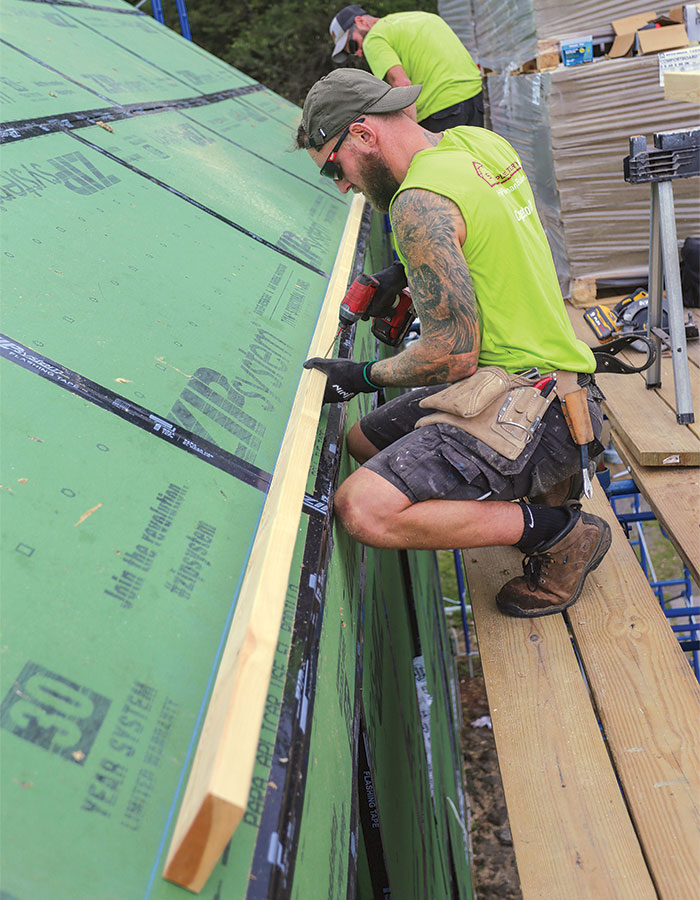
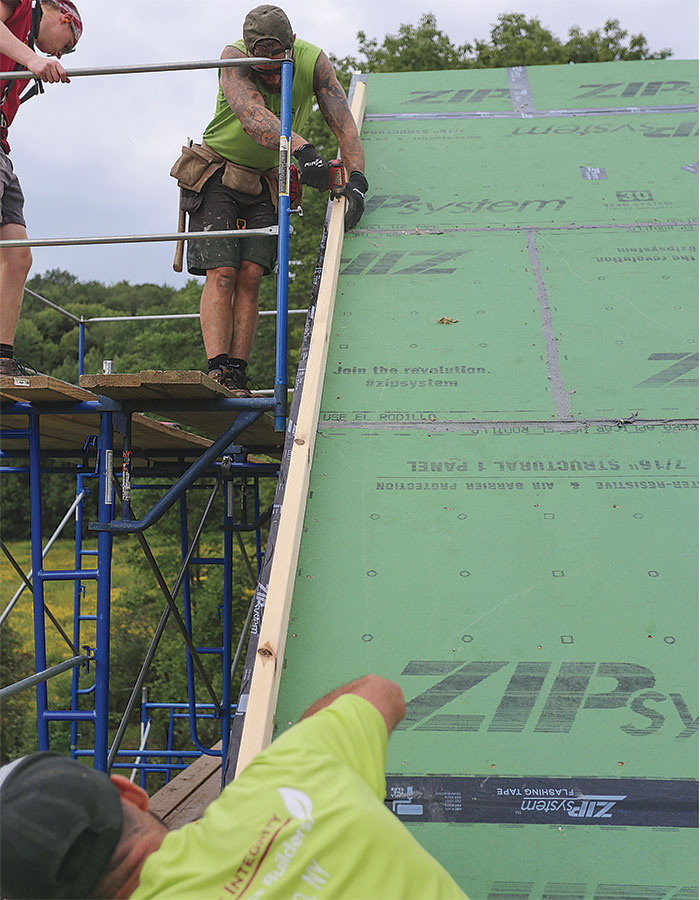
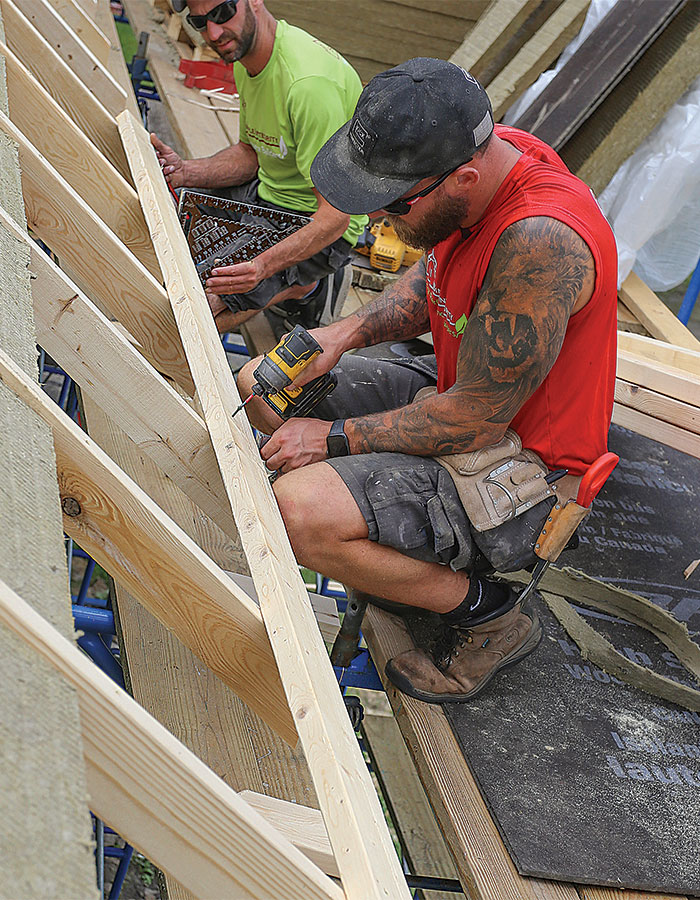
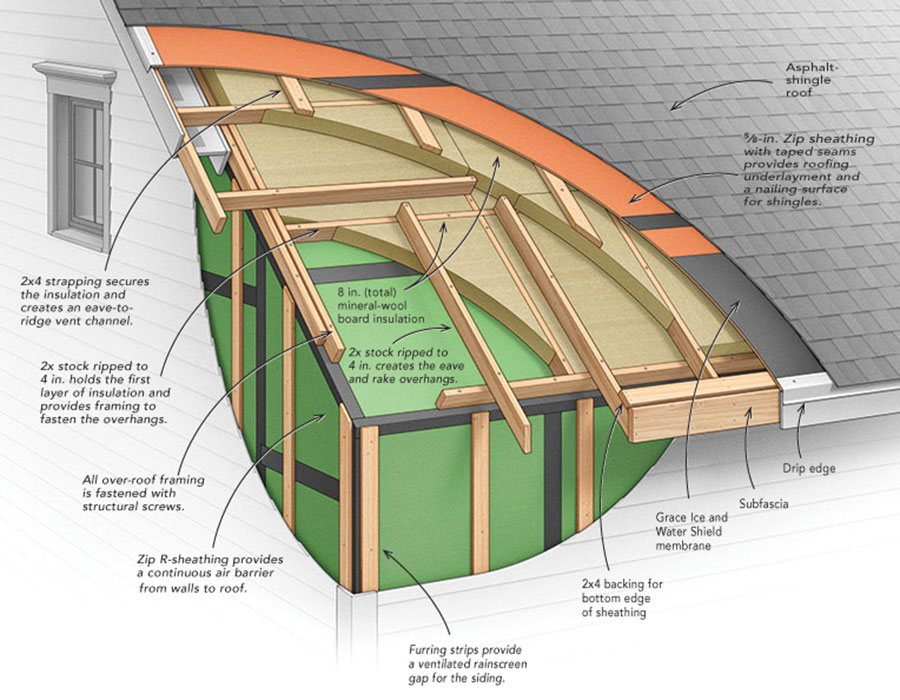
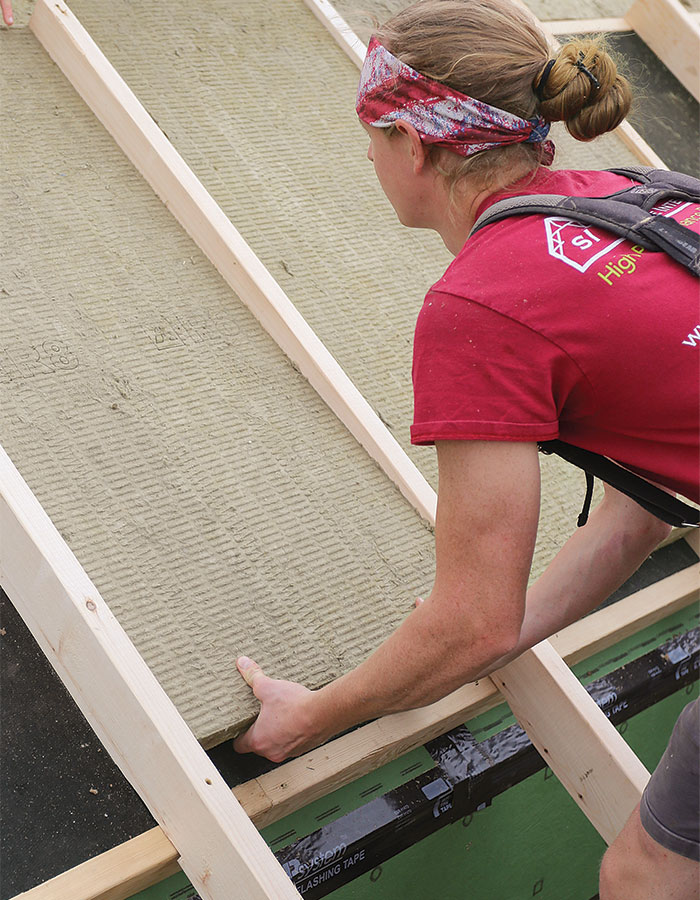
Step 6: Frame in the first layers of insulation. Before installing insulation, the crew needed to attach 4-in.-wide rips of 2x stock around the perimeter of the roof. This frame held the insulation in place until strapping was installed. Parallel 2xs were installed 4 ft. up from the eave and 4 ft. in from the rake. This distance allowed for a full sheet of mineral wool to be installed, and the parallel 2xs provided a structural surface to fasten the roof overhangs above the first 4 in. of insulation.
 |
 |
While we had the roof open from the exterior, we removed all the existing fiberglass batts in the roofline and kneewalls. We will be insulting the rafter cavities all the way from the eaves to the ridge with dense-pack cellulose. The rafter cavities are approximately 5 in. deep, which will give us R-18. The bulk of the roof insulation, approximately 8 in. of Rockwool Comfortboard 80, will be outboard of the sheathing. Comfortboard 80 is a rigid mineral-wool insulation that comes in sheets of various thicknesses and sizes. Installing 8 in. of it will give us an additional R-32, for a total roof R-value of R-50, which places the roof just over code minimum for a new house in our area.
While getting to code minimum on an insulated roof in an old house is a worthy goal, keep in mind that two building assemblies with the same R-values will not necessarily perform equally. This roof is airtight, and we have minimized thermal bridging with continuous exterior insulation. In other words, this R-50 roof will perform much better than a roof with an even higher R-value but poor air-sealing and a thermal bridge at each rafter.
It’s important to remember that even the best-laid plans have challenges. Builders know this well. For example, we found an additional plate above the top beam in the existing framing. We couldn’t simply cut the rafter tails flush with the wall plane as we had planned. Instead, we had to remove the double plate and build up ripped 2x8s to support the rafters. We also had to order two sizes of mineral-wool boards because of supply problems. We were able to get boards in 4-in. and 2-in. thicknesses, but two pallets of the 2-in. boards were actually only 1-3 ⁄ 4 in. thick. The workaround for us was to add a 1 ⁄ 2-in. layer of wood-fiberboard insulation to even out the thickness where needed.
You won’t regret venting
There are several ways to effectively insulate a roof, but filling shallow rafter cavities with fiberglass insulation and no venting is not one of them. For insulated roofs and cathedral ceilings we typically go with one of three assemblies. An unvented roof with closed-cell spray foam is simple and works well, particularly when rafter space is limited. The spray foam does some air-sealing (though, again, we don’t typically rely on it for that) and provides vapor control. Unvented roofs generally need air-impermeable insulation, either directly above or directly below the roof deck.
On new builds framed with deep I-joists, we often have space for enough dense-pack cellulose to meet our R-value goals in the rafter cavities and still can include a vent space below the sheathing. These roofs need an air barrier and, in our climate, a vapor retarder on the inside.
On this project we used the third type of insulated roof, which is a hybrid of sorts. In addition to the Zip sheathing acting as our air barrier, it is also the only vapor control we need. Because mineral wool is air and vapor permeable, the assembly can dry in both directions. The roof can dry inward and outward. In an ideal scenario, when we insulate a roof like this we prefer to have two-thirds of the total insulation R-value on the exterior. That means the air and vapor control layer is well inside thermal boundary. In colder northern climates, this creates a more durable and healthier roof assembly because the sheathing stays warm through our cold winters. (The same is true of walls.)
10 steps to a tight roof (continued)
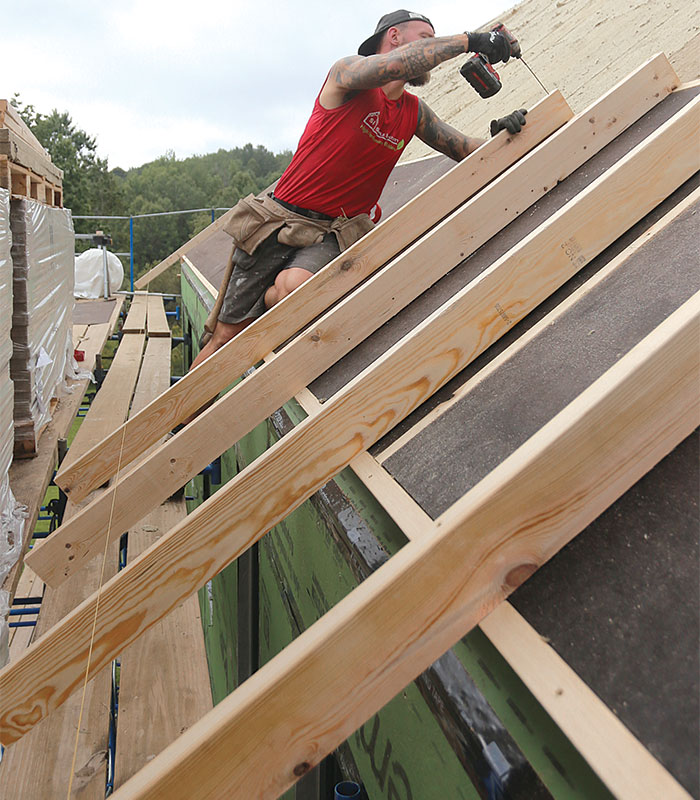
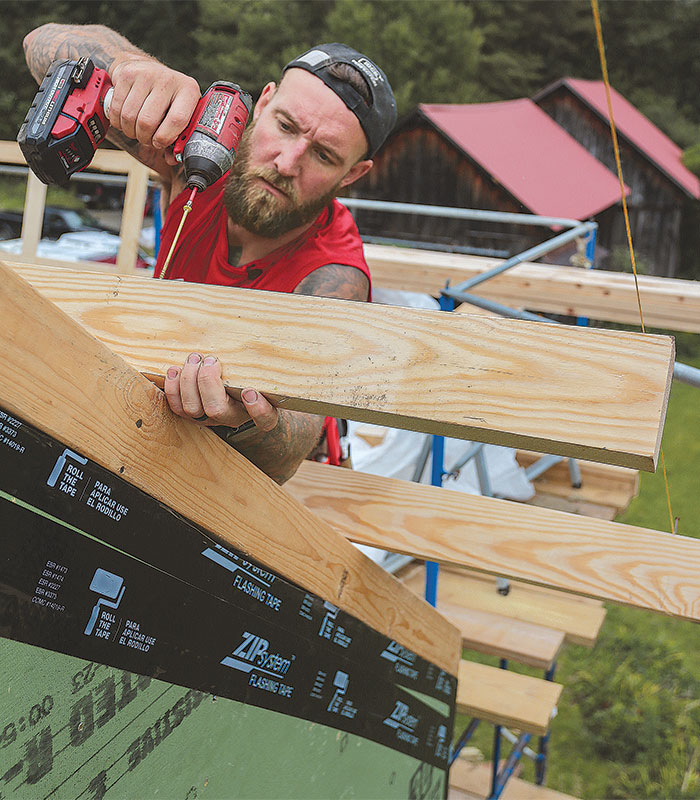
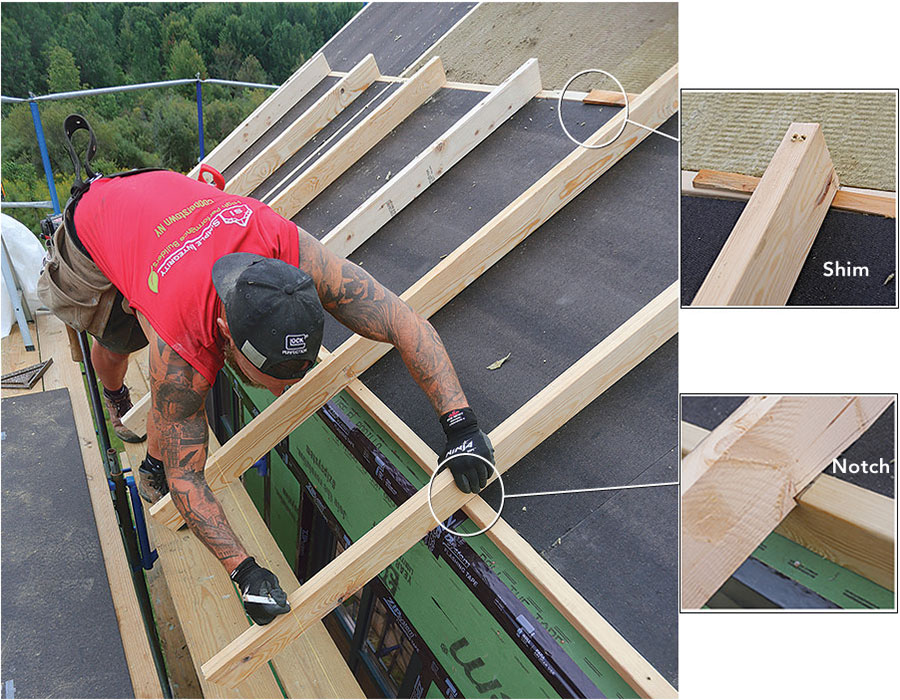
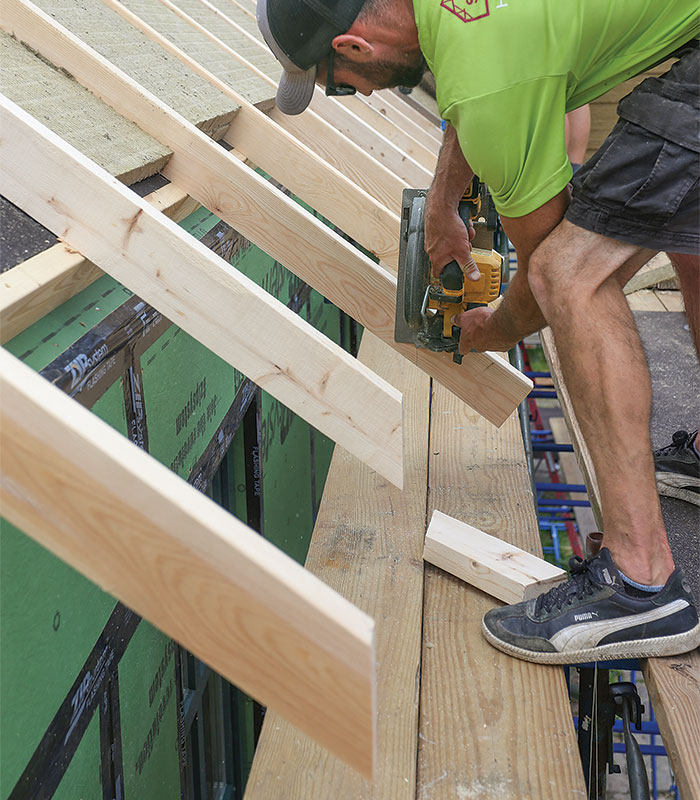
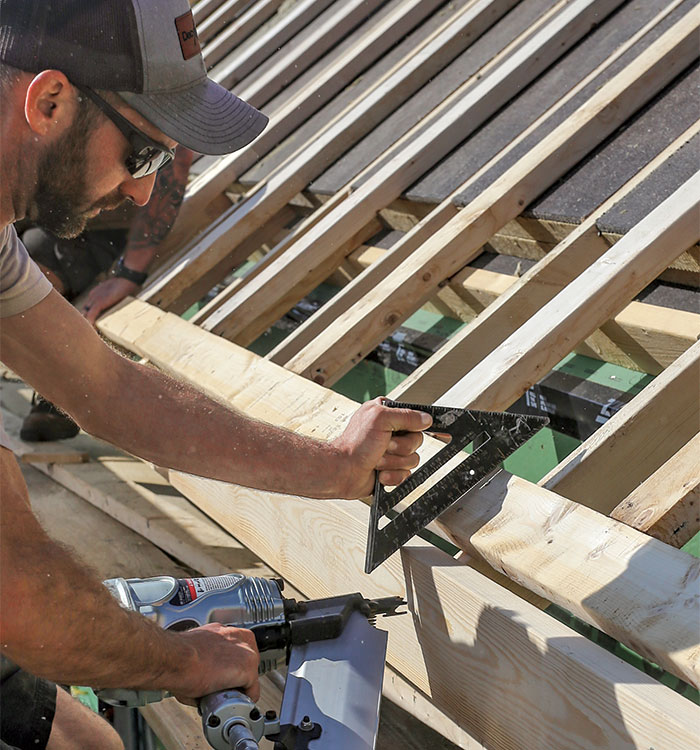
Step 7: Add the overhangs. The rafter overhangs are 4-in.-wide 2x rips that are fastened to the two runs of framing installed around the perimeter. The framing and overhangs are perpendicular, and so they cross each other, which leaves very little thermal bridging on the roof. The crew ran a stringline to set the tops of each overhang in plane and shimmed or notched the rafter tails as necessary. They also set the stringline to mark the plumb cuts they made with a circular saw.
 |
 |
 |
 |
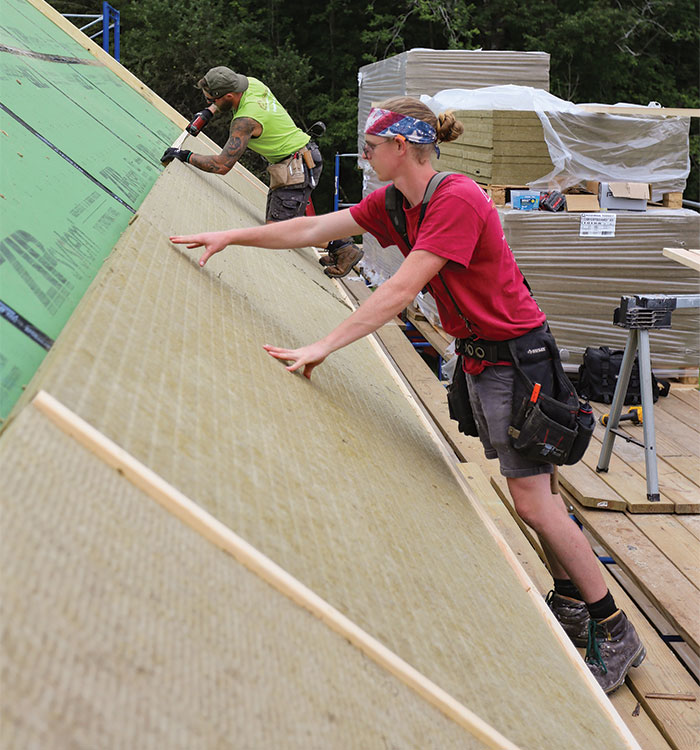
Step 8: Complete the insulation. The rest of the insulation was fitted between the rafter tails and over the remainder of the roof.
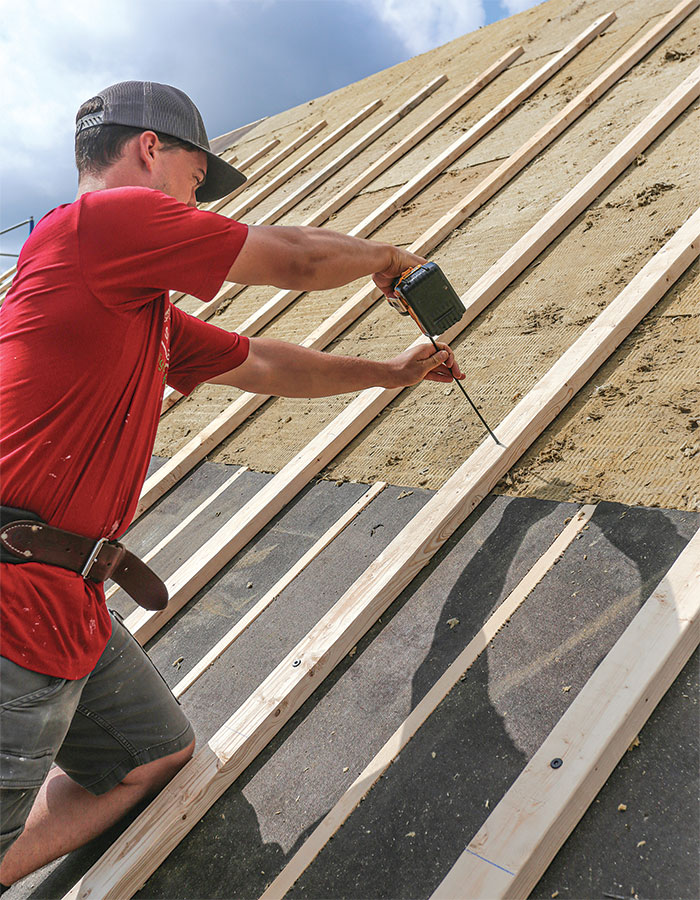
Step 9: Create the vent channel. Once the insulation was complete, the crew installed 2×4 strapping to hold it in place and create a vent channel from the eave to the ridge. The first piece of strapping was installed parallel to the eave, followed by the long boards that run up the roof.
 |
 |
Step 10: Prepare for trim and install sheathing. The final steps, before roof trim and roofing can be installed, are to install the subfascia and a final layer of roof sheathing.
 |
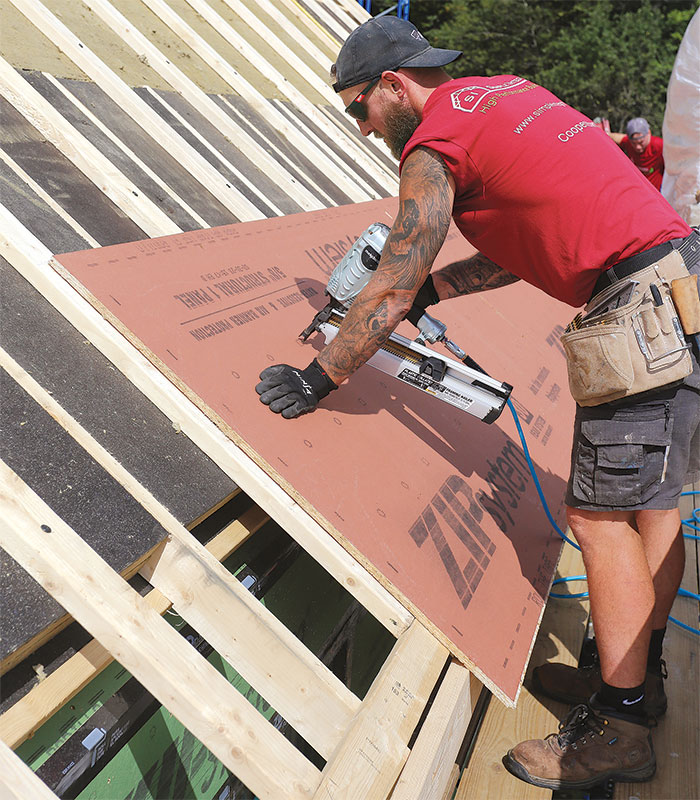 |
We also decided to vent the roof above the mineral wool. We created a vent channel by installing 2x4s on the flat running up the roof. They serve to help strap the insulation down and to create a 1-1 ⁄ 2-in. vent space. On top of the 2x4s we installed 5 ⁄ 8-in. Zip sheathing as our roof deck for shingles.
We have recently had several projects run though hygrothermal modeling as a part of Passive House certification. It was helpful to see how a bunch of different roof assemblies performed over time. This assembly would likely be acceptable without the venting, but it is amazing how much better it will handle moisture over the long haul with venting added. The bottom line seems to be to vent your roofs whenever you can. You won’t be sorry.
I’m sure there are some people reading this who will wonder if all this work was a waste of effort, or materials, or money, or if it is overly complicated. But this is a house that has lasted hundreds of years and now has hundreds more to go. It still has all the charm of an old timber-frame farmhouse inside, but with the comfort, efficiency, and healthy indoor-air quality of a new high-performance home. While this is for sure a deep energy retrofit, that work wasn’t much of the cost or the real focus of the project. It was an opportunity worth taking.
–Josh Edmonds, CPHC, is managing partner at Simple Integrity LLC in Cooperstown, N.Y.
Photos by Brian Pontolilo. Drawings: Christopher Mills.
To see the whole PDF, click on the “View PDF” button below:
From Fine Homebuilding #320
RELATED STORIES
- Air-Sealing Exposed Rafter Tails
- Planning a Reroof Project
- A Practical Look at Deep-Energy Retrofits
Fine Homebuilding Recommended Products
Fine Homebuilding receives a commission for items purchased through links on this site, including Amazon Associates and other affiliate advertising programs.

Respirator Mask

Great Stuff Foam Cleaner

Nitrile Work Gloves



View Comments
We knew that adding new roof sheathing would cover most of the roof air-sealing easily and effectively. But air barriers need to be continuous, and this house had timber rafter tails. Air-sealing around rafter tails is tedious and not very effective, and it makes connecting the air barrier from the walls to the roof difficult. Here is where the chainsaw retrofit gets its name. We used a chainsaw to clip off the rafters so that they would be even with the exterior wall plane. The air barrier now runs up the wall sheathing and, without skipping a beat, continues up the roof plane. We installed Zip sheathing with taped seams over the existing roof boards to create the barrier.9apps apk