Drip-Edge Flashing
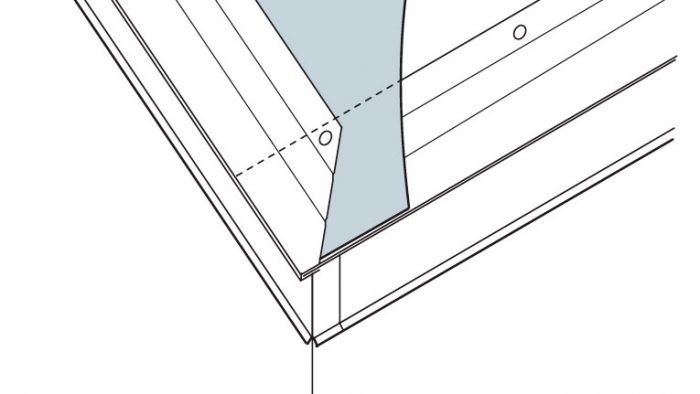
Run drip-edge along the eaves first, install underlayment over the top, and then run drip-edge along the rake edges.
Drip-edge diverts water away from roof edges so it won’t be drawn by capillary action back up under shingles or sheathing. Drip-edge also covers and protects sheathing edges from gutter splashback and ice dams along the eaves and gives rake edges a clean, finished look. The crimped edge of drip-edge flashing also resists bending and supports overhanging shingles.
Lower Roof Corners
Drip-edge is sold in varying widths and comes in an L shape or a lopsided T shape.
Though building codes dictate that you install drip-edge along the eaves first, remodeler Mike Guertin points out that WSU manufacturers recommend that you wrap their products over the edge of the sheathing and onto the fascia to prevent water from ice dams from migrating up the back of the drip edge and into the roof. In order to do the best job possible while also meeting code, he’s come up with a method that he describes in the article Ice-Dam Protection: Over or Under Eave Drip Edge?
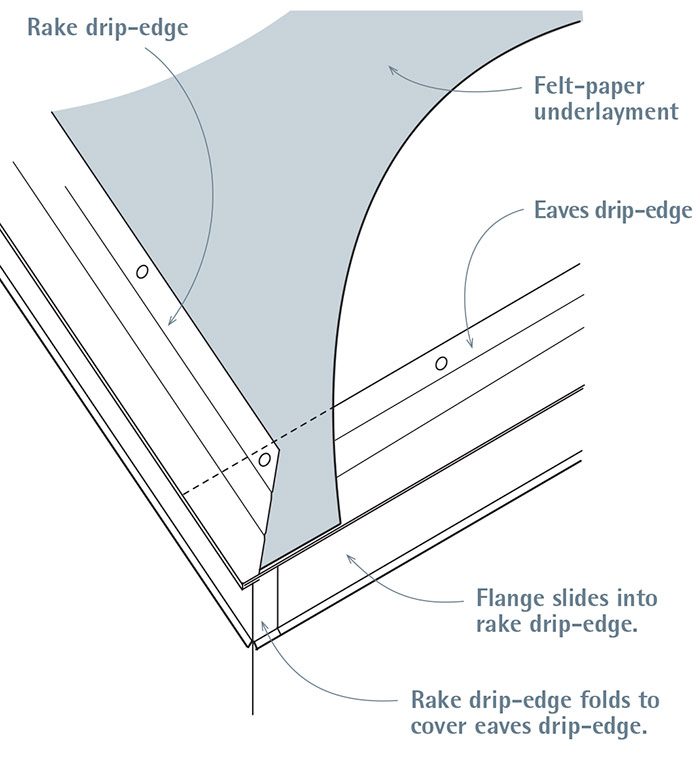
Regardless of how you layer the drip edge and roofing underlayment, drip edge needs to be nailed into sheathing using standard roofing nails. Space nails every 12 in. or so. Underlayment along the eaves will overlap the top of the drip-edge. Along the rake edges of a roof, install underlayment before applying drip-edge. In corners, where rake edges meet eaves, run the rake drip-edge over the eaves drip-edge. Slitting the vertical leg of the rake drip-edge makes it easier for you to bend it over the leg of the eaves drip-edge.
In general, drip-edge flashing 6 in. wide or wider is better than narrower flashing because it enables you to nail well back from the edge of the flashing—always desirable.
Fine Homebuilding Recommended Products
Fine Homebuilding receives a commission for items purchased through links on this site, including Amazon Associates and other affiliate advertising programs.
Ladder Stand Off
Flashing Boot Repair
Shingle Ripper


