Edge Flashing for Roofs
Roofing contractor Dyami Plotke explains the best way to install rake and eave flashing.
Q:
Metal rake-edge roof flashing is treated as a commodity product. It’s sold by every building supplier without labels or instructions. I always wonder, though, if I’m detailing the flashing correctly at the peak of the roof and at the lower edges where it meets the eave flashing. What’s the best practice here in terms of shedding water and looking right?
Dale Thackeray, Wakefield, RI
A:
Roofing contractor Dyami Plotke responds: There are instructions for installing rake and eave flashing, but they typically are found only in industry documents such as The NRCA Roofing Manual from the National Roofing Contractors Association or the GAF Pro Field Guide. For most jobs, we use the same flashing profile for both the rakes and the eaves, which makes transitions simpler. The ridge and rake-to eave intersections are certainly the most involved parts of this job. Don’t, however, overlook the simple overlap between pieces of rake flashing. To avoid a shadow line in the joint between two pieces of rake flashing, many installers lap the lower piece over the upper piece. It may look nice from the ground, but this approach will direct water behind the flashing and rot your fascia.
To flash the ridge
(drawings above)
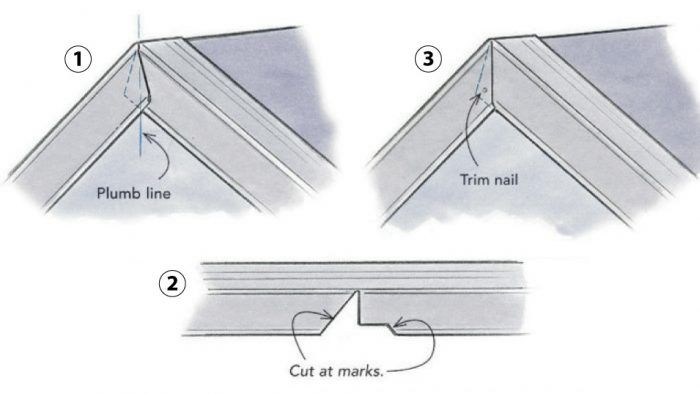
1. Cut the vertical face of the drip edge, bend it over the ridge, and mark a plumb line on the vertical face of the overlapping piece.
2. Take off the drip edge, and cut along the entire line of the outside section and along the kick of the inside section.
3. When the flashing is installed, you may need one small trim nail in the outside piece to close the seam.
Where the rake meets the eave
 |
 |
 |
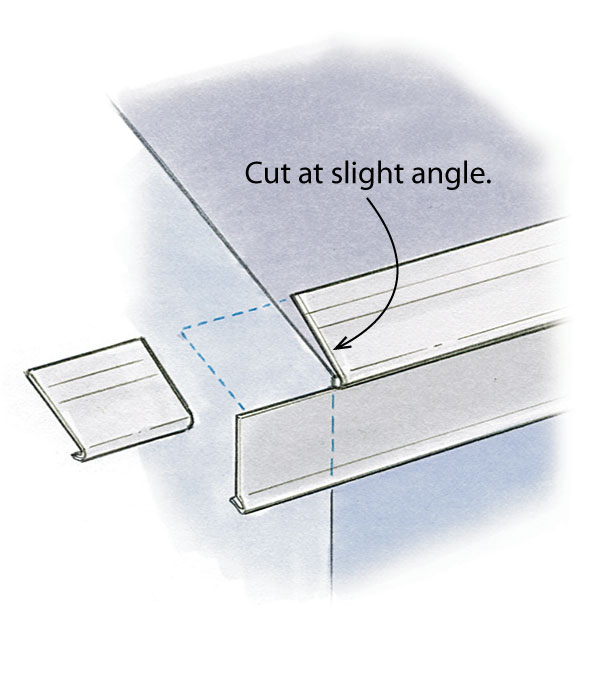
1. Hold the eave flashing in place, running about 1 in. past the outside corner. Cut the top of the flashing at a slight angle to the face of the rake, and bend the vertical leg back against the rake trim.
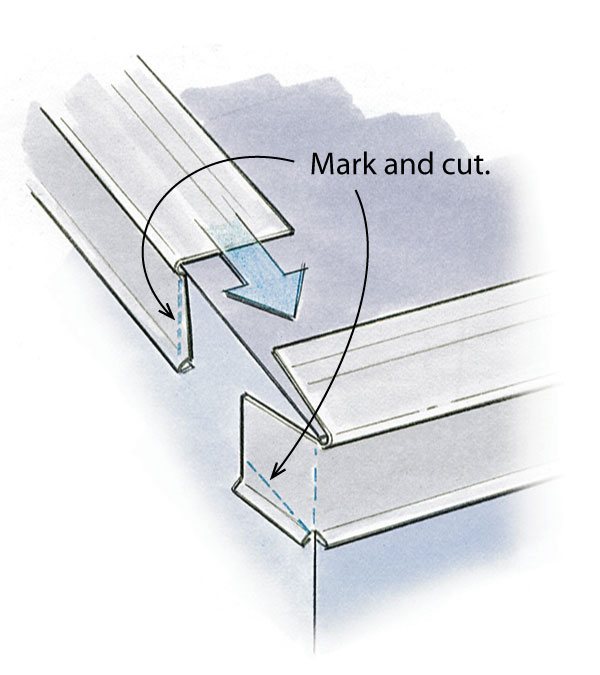
2. Hold a piece of rake flashing in place, and then mark and cut its leading edge plumb to the eave fascia. To hide the folded section of the eave cut, trim its bottom edge.
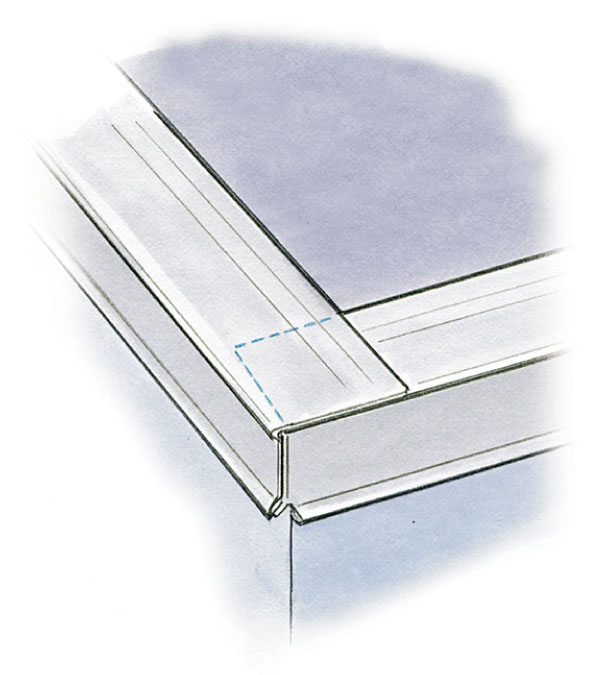
3. Done properly, the rake flashing overlaps the eave flashing with no overhanging edges.
Drawings: Dan Thorton
Fine Homebuilding Recommended Products
Fine Homebuilding receives a commission for items purchased through links on this site, including Amazon Associates and other affiliate advertising programs.
Fall Protection
Ladder Stand Off
Hook Blade Roofing Knife


